Deleted
Deleted Member
Posts: 0
|
'52 M38
Jan 20, 2015 8:04:43 GMT -5
Post by Deleted on Jan 20, 2015 8:04:43 GMT -5
I like a Jeep my way. I'm not a concours type. It just makes sense to make it as good as reasonable, while you have it all the way apart. I hate going back because I screwed up. And----yes, I've had to go back. The professional shop next to me puts epoxy primer sealer on right after blasting/cleaning. They then sand and rough it up where they do the bondo work. Then they put the sandable primer over that. They guide coat it, and sand and reprime two to 3 times. Then wet sand that with 6 or 8 hundred. Paint, clear, and then wet sand to 3000 and polish. When done, the car looks wet when it's dry. They did a black 67 Chevelle. When loaded on the trailer and out in front of the building, all you could see was the building in the reflection. It was so straight, the new glass looked wavy. I kid you not. That said, one of the guys that works there always gives me Hell for my work. He told me one day that my paint jobs look so bad, I 'll need a floor sander to work out the orange peel in my paint! The real check to when you have the clear blocked well, is to look at floresant light bulb reflections in the clear. If they are distorted or wavy, it's not good enough. When the bulb is straight and clear looking, you are there. This is how I want your Jeep done Ryan!!!!!!!!! If not-------fail!  Oil |
|
|
|
'52 M38
Jan 20, 2015 21:08:30 GMT -5
Post by Ryan_M on Jan 20, 2015 21:08:30 GMT -5
Oil - I just took all my fluorescent bulbs out and thew them away. Everything looks much better now - should have done that years ago  Fender repair time! I tried filling these tender spots but they were just too far gone. All I did was chase holes around. I know better than to waste too much time doing that now! 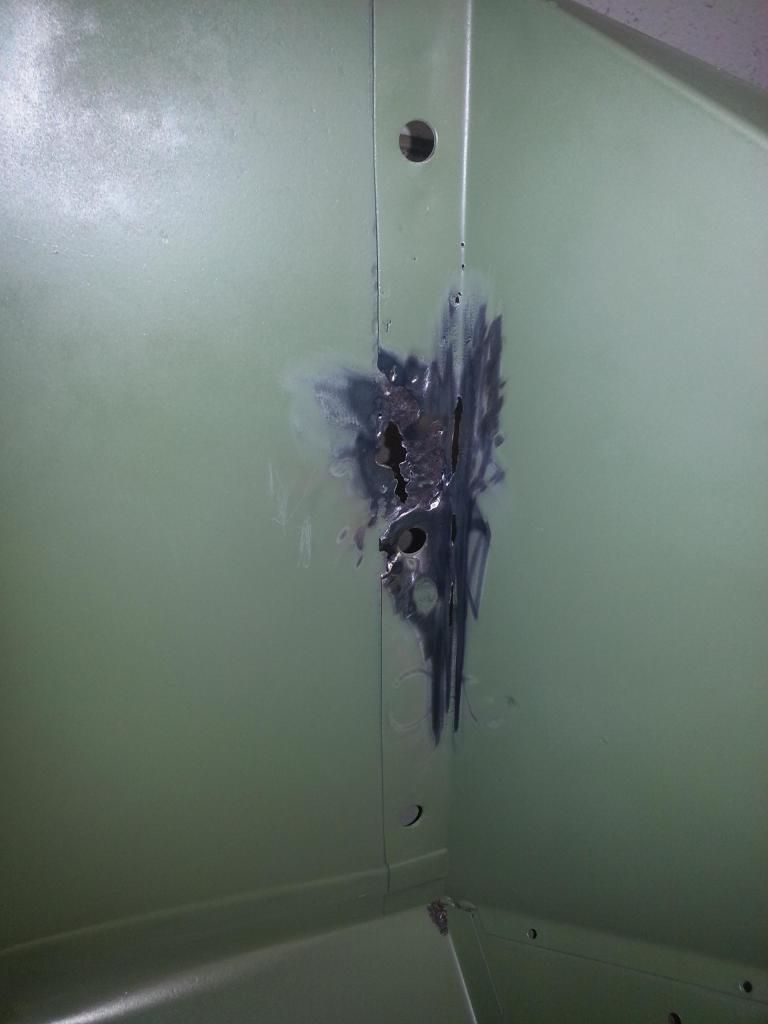  So I cut out the cancer and made a patch. 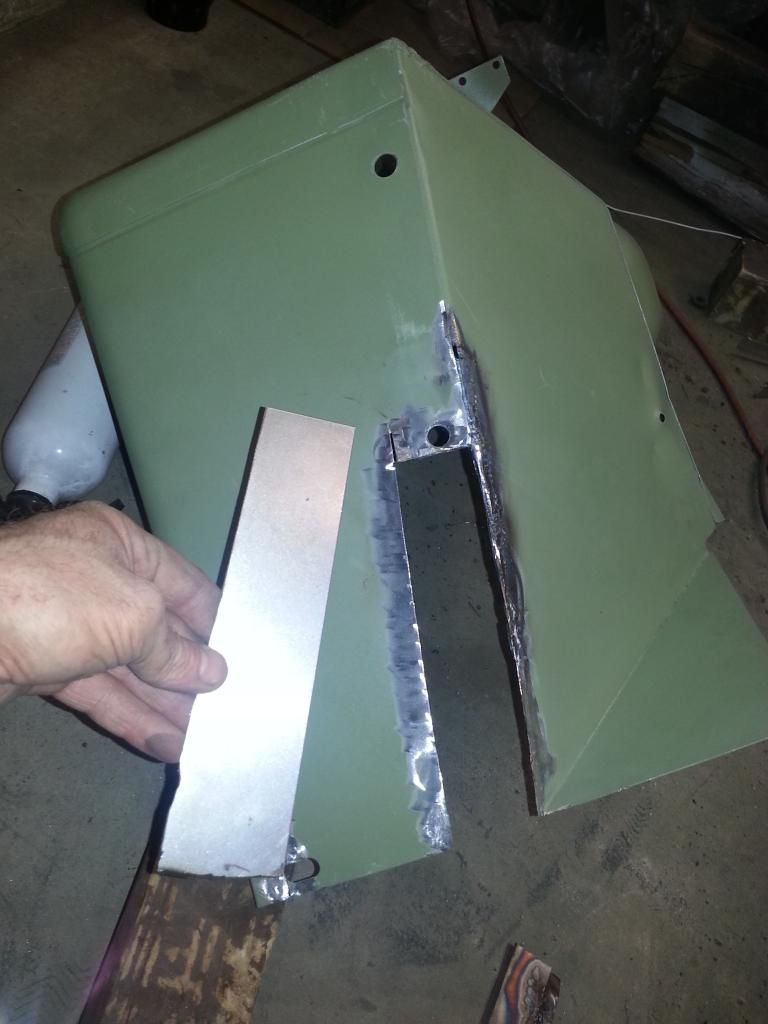 And set it in place. Those little clamps are great.  Then stitch 'er up. 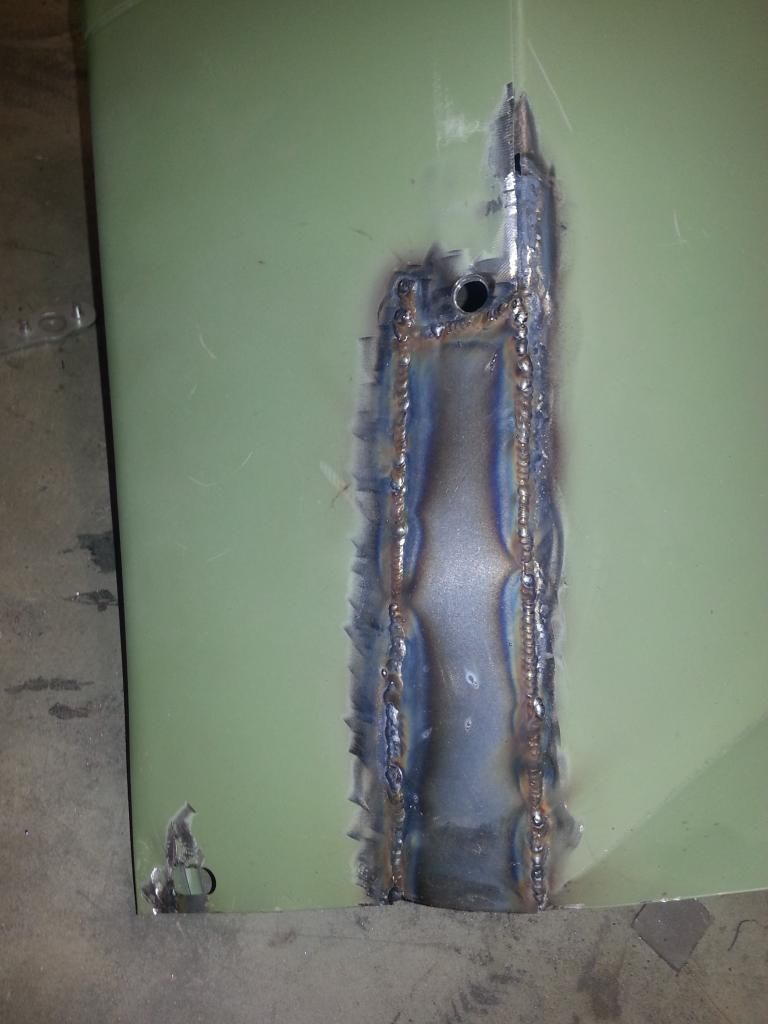 Then grind it smooth.  I should have made the patch just a hair longer and then cut it flush with the existing fender as it comes up a bit short. I still need to add another backing patch on the inside so I can compensate there and then touch it up. |
|
|
|
'52 M38
Jan 20, 2015 22:24:11 GMT -5
Post by Haines Garage on Jan 20, 2015 22:24:11 GMT -5
Ryan, look how far the welding skills have come. You are inspiring me to get back to the tub. Great job, I also need to drag my fenders out of the attic.
|
|
|
|
'52 M38
Jan 21, 2015 0:04:35 GMT -5
Post by zooke581 on Jan 21, 2015 0:04:35 GMT -5
Great work. Never get tired of seeing you work on it. It is going to be one fine looking M38 and used to boot.
|
|
|
|
'52 M38
Jan 27, 2015 19:28:02 GMT -5
Post by Ryan_M on Jan 27, 2015 19:28:02 GMT -5
This is where stuff really gets dicey. Since I feel the tub is too tender for yet another rounding of sand blasting I hit it with some Permatex rust converter. A friend has overhauled several vehicles and raves about the stuff. Online reviews are a little less favorable. We'll find out soon enough. 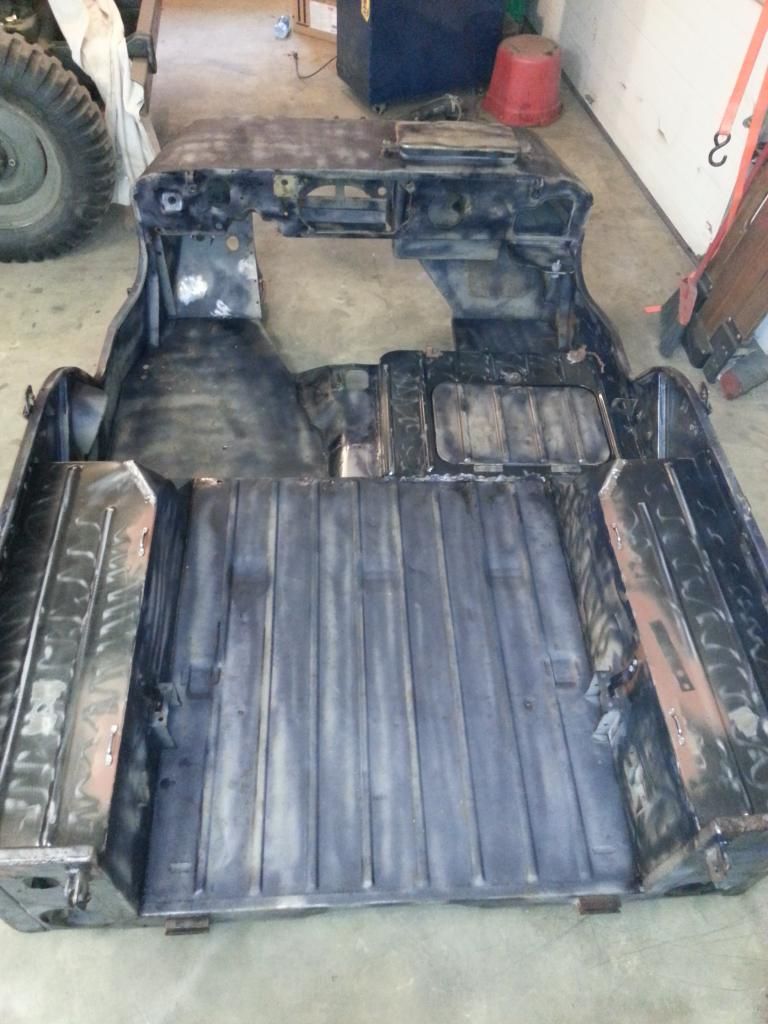 I started filling in all my welding blemishes with Bondo and paste. I didn't get very far before I decided I really didn't like it. I ground most of it off and proceeded with the tub "as-is". The blemishes and imperfections will be on display for all to see. I figure if the paint is going to fall off I"m OK seeing bare metal but not chunks of bondo. This is a thrasher Jeep. I want it highly functional but still rough around the edges. This is before I chased the fresh bondo away with my trusty flapper wheel:  Then I got distracted to go deal with way more snow than I hoped to see today 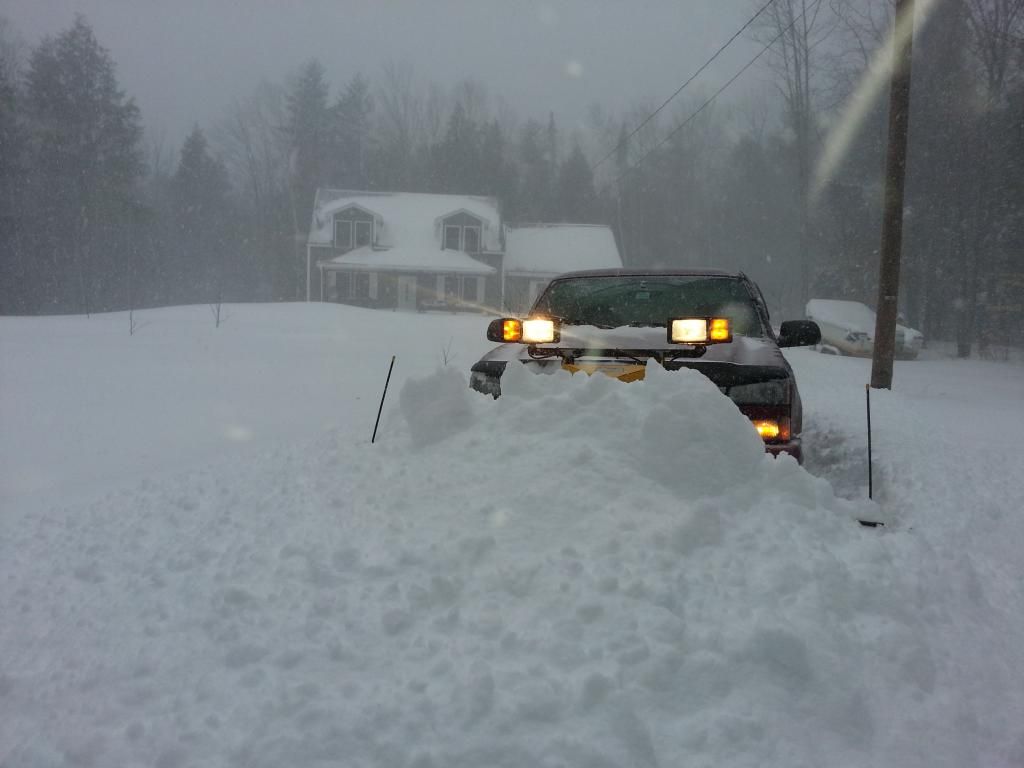 Now for the first round of primer. I ran dry so I'll have to pick up some more tomorrow. If I paint a vehicle "for real" next time I will be sending it out. Trying to pull this off in my cramped garage with my extreme lack of patience is just never going to produce a quality result. Again, I'm OK with that for this project.   |
|
|
|
'52 M38
Jan 27, 2015 20:02:59 GMT -5
Post by zooke581 on Jan 27, 2015 20:02:59 GMT -5
Looks good from all way in Virginia!  |
|
Deleted
Deleted Member
Posts: 0
|
'52 M38
Jan 27, 2015 20:16:55 GMT -5
Post by Deleted on Jan 27, 2015 20:16:55 GMT -5
"Now for the first round of primer. I ran dry so I'll have to pick up some more tomorrow."
if my driveway looked like yours, I wouldn't be going anywhere tomorrow! Snow!
I feel your impatient pain painting, too.
|
|
|
|
'52 M38
Jan 29, 2015 20:00:27 GMT -5
Post by Ryan_M on Jan 29, 2015 20:00:27 GMT -5
I administered a heavy coating of paint to the tub tonight. Throwing the paint store guy's advice completely to the wind I covered everything with multiple coats instead of the prescribed "single coat". On the final pass to use up the last of the paint I got about half way across and realized I was blowing water out of the gun. Not good. My M38 now sports approximately the same finish as a desert lizard. On the fence about whether to try and repair or just forge ahead. 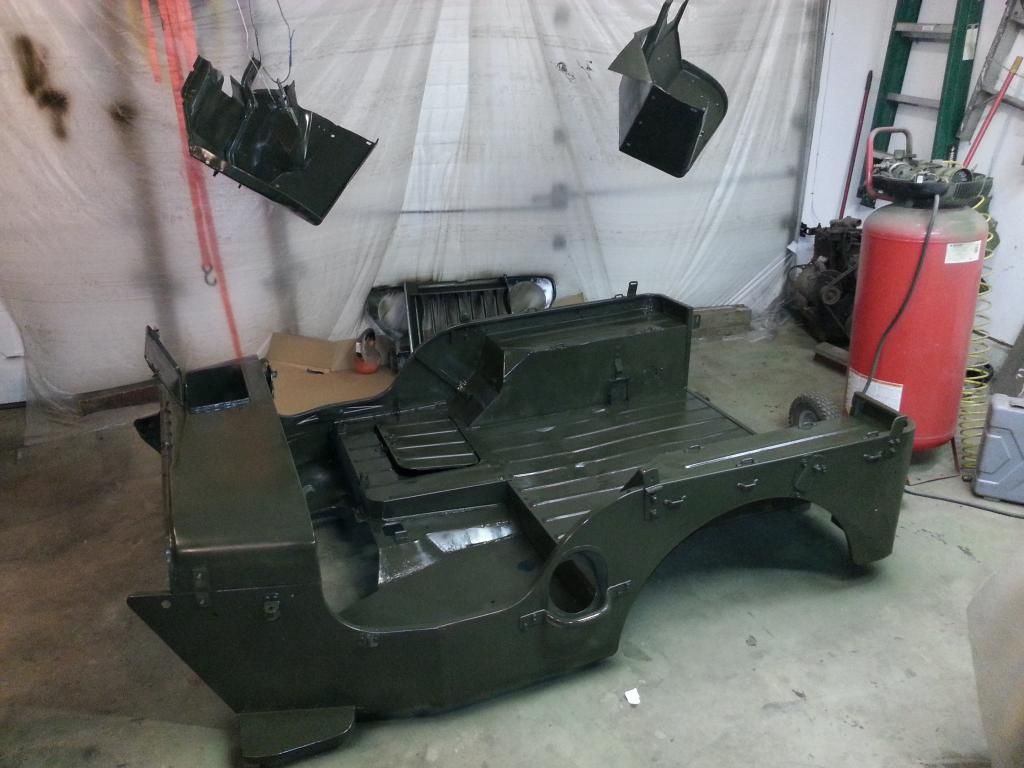  And a close-up of the lizard skin in a particularly bad area. Upon inspection of my compressor's year old $7 moisture trap I noticed for the first time the words "REPLACE WEEKLY". Yup, should have done that. 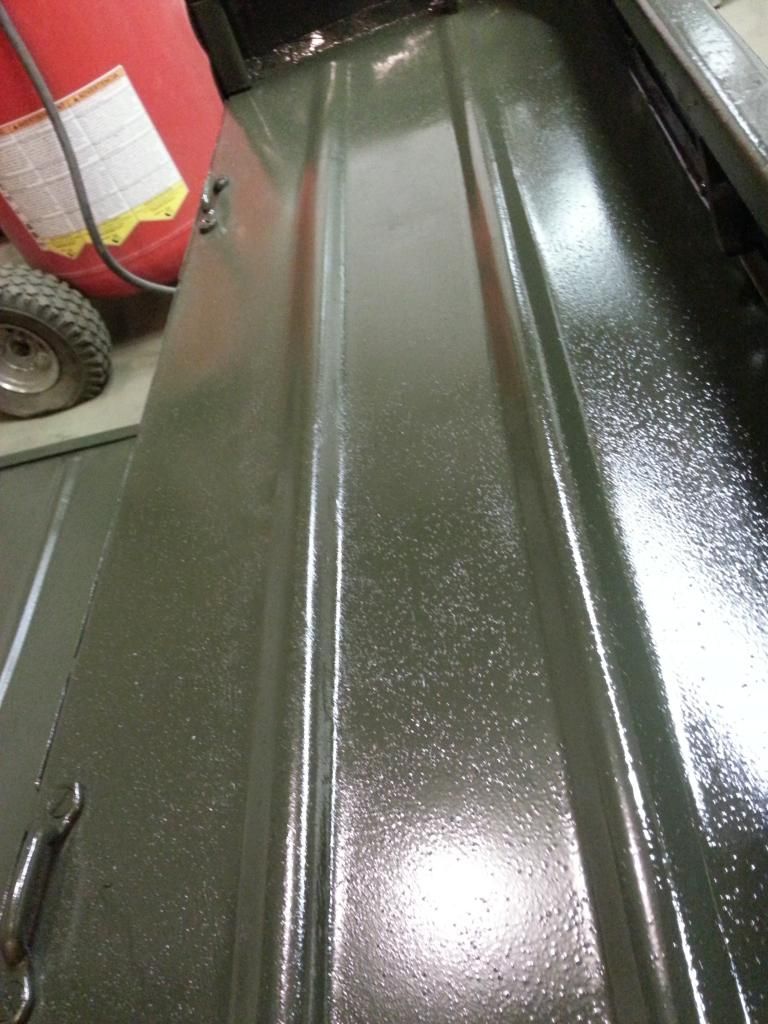 |
|
|
|
'52 M38
Jan 29, 2015 21:26:35 GMT -5
Post by zooke581 on Jan 29, 2015 21:26:35 GMT -5
Do you have a water trap inline on the hose? I have one from Harbor Freight $35 and drain it periodically while painting so to keep the moisture out of the line. It works great.
|
|
|
|
'52 M38
Jan 29, 2015 21:32:10 GMT -5
Post by Haines Garage on Jan 29, 2015 21:32:10 GMT -5
Ryan
What are you going to do?
|
|
Deleted
Deleted Member
Posts: 0
|
'52 M38
Jan 30, 2015 7:33:56 GMT -5
Post by Deleted on Jan 30, 2015 7:33:56 GMT -5
Hey, you have a non skid finish. It helps hide dents, but will not be fun to wash. You might be able to wet sand it with wet or dry fine grit paper and simply re-coat it with the same paint. Your call Jeep guy. I had a similar result when I used year old hardener in Vansickle paint. Made it look like I put sand in it. I wasn't fooling when I told you it hides dents. I now have branch scratches in it and it goes Jeeping. Oil
|
|
|
|
'52 M38
Jan 30, 2015 9:51:41 GMT -5
Post by Ryan_M on Jan 30, 2015 9:51:41 GMT -5
LOL...I was thinking the same thing when I looked at it this morning "Non skid finish!!" I can dance on the wheel houses and not worry about slipping off! I shall follow the advice of one Sir Hawkridge and similar suggestion by Sir Oilleaker. A sanding of the rough with 200 grit paper, a final coat of paint, and then run the motherfarger  |
|
|
|
'52 M38
Jan 31, 2015 12:07:34 GMT -5
Post by Ryan_M on Jan 31, 2015 12:07:34 GMT -5
The M38 was fed a large helping of AWESOMENESS for breakfast today: 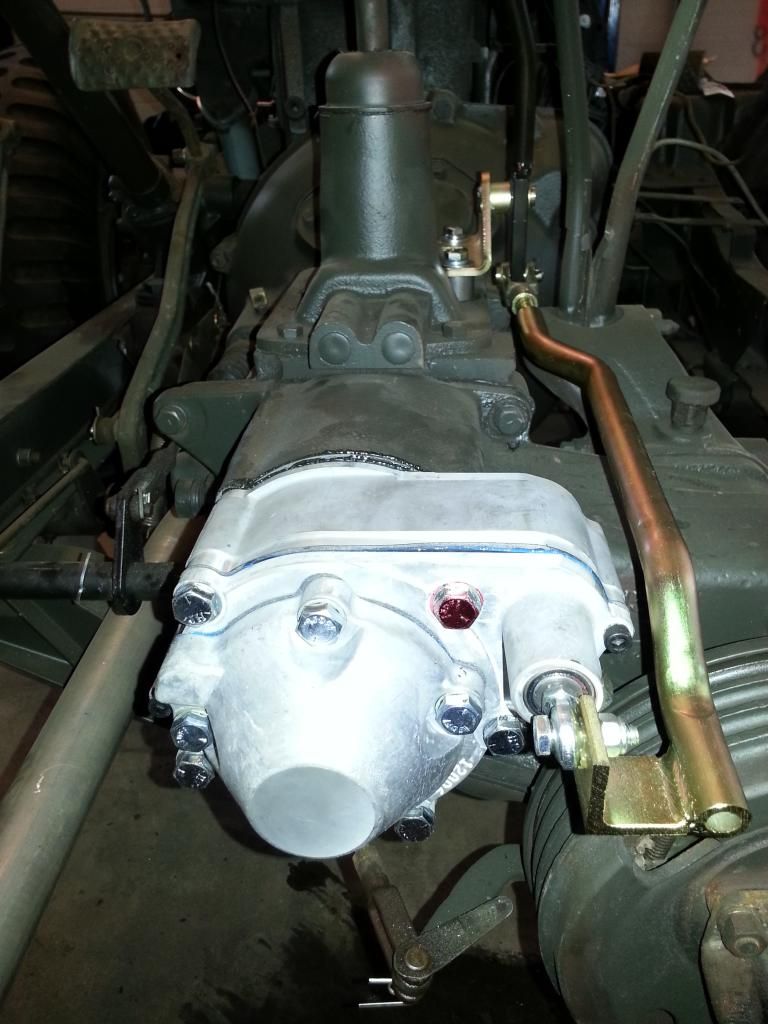 |
|
Deleted
Deleted Member
Posts: 0
|
'52 M38
Jan 31, 2015 15:04:41 GMT -5
Post by Deleted on Jan 31, 2015 15:04:41 GMT -5
You're going to need more horse power now. Kubota or a V6.
|
|
|
|
'52 M38
Feb 8, 2015 16:20:53 GMT -5
Post by Ryan_M on Feb 8, 2015 16:20:53 GMT -5
The tub is installed and reassembly continues. 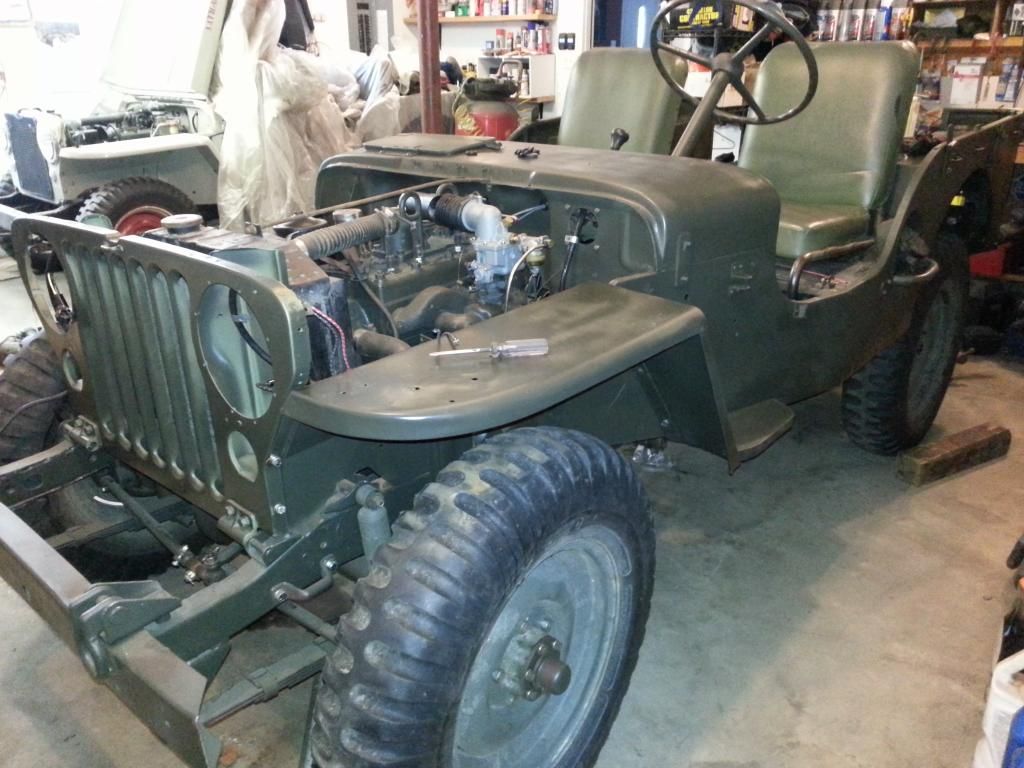 For all you flatlanders out there here's what happens in the Great White North when you realize you are missing a firewall plate on your "new" tub and think there may still be one on your "old" tub - You excavate a path into the woods and scavenge it. 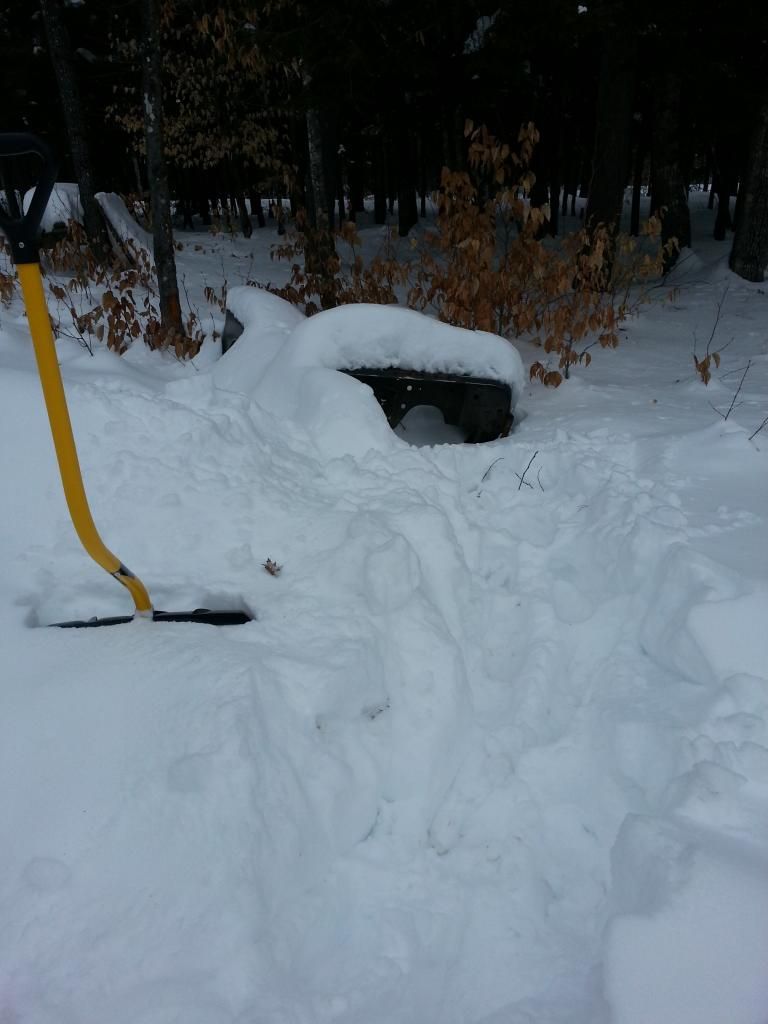 Carb with choke, hand throttle linkage, and crossover tube/intake plumbing rigged up. I bought an NOS ratcheting hand throttle last year (mostly because they are just plain cool) and was disappointed when I found the cable to be about an inch too short to use with a Carter WO. It hooks up nicely to the Carter YS. 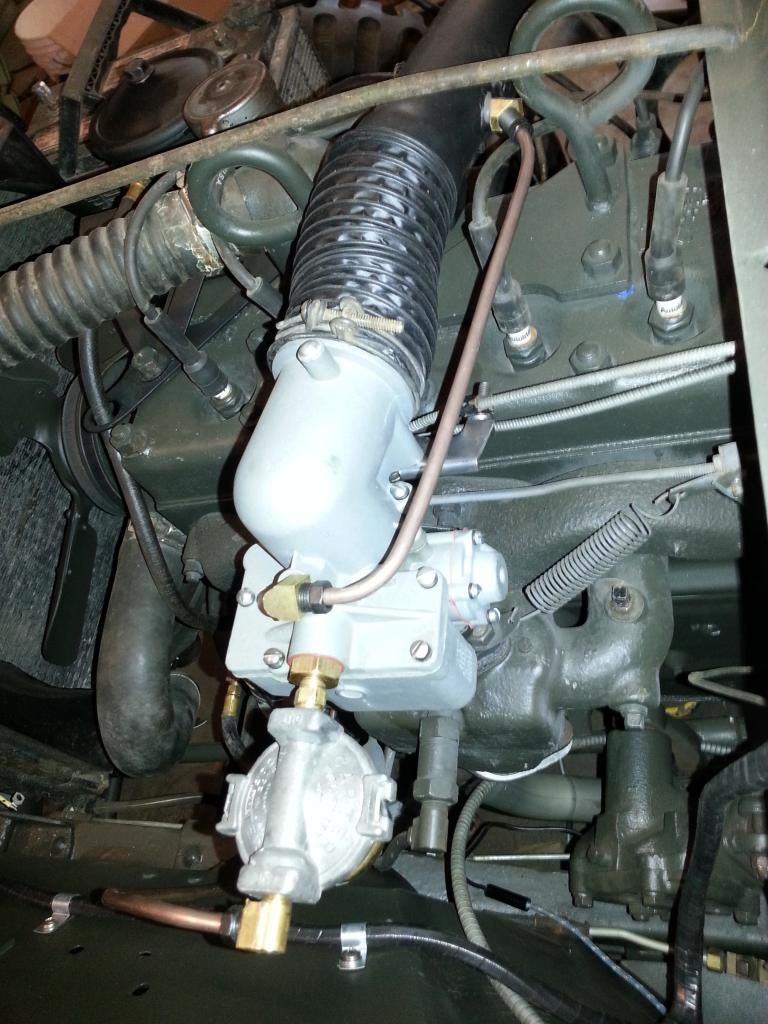 The removable gauge panel alleviates the need to show off your contortionist skills when it comes time to wire everything up. I did not have to slither under the dash once. I am using a new 3A harness from Walcks. Incidentally, it is the exact same harness that Kaiser Willys sells. Even the handwritten sections of the instructions are the same. 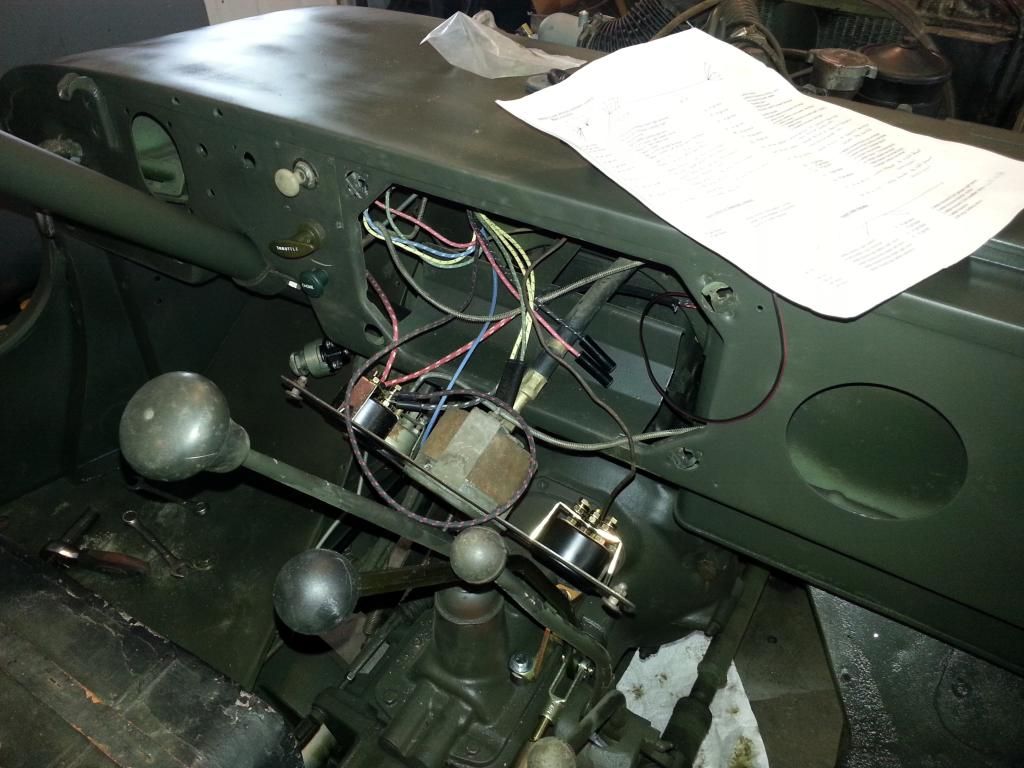 Dirty fuel tank and unwashed unpainted seats plopped right back in place. Everything fits as it should. This is a thrasher Jeep and looks the part but I'm not sure I'll be able to live with that Oil Pressure gauge. I draw the line at orange gauge needles on a Willys. 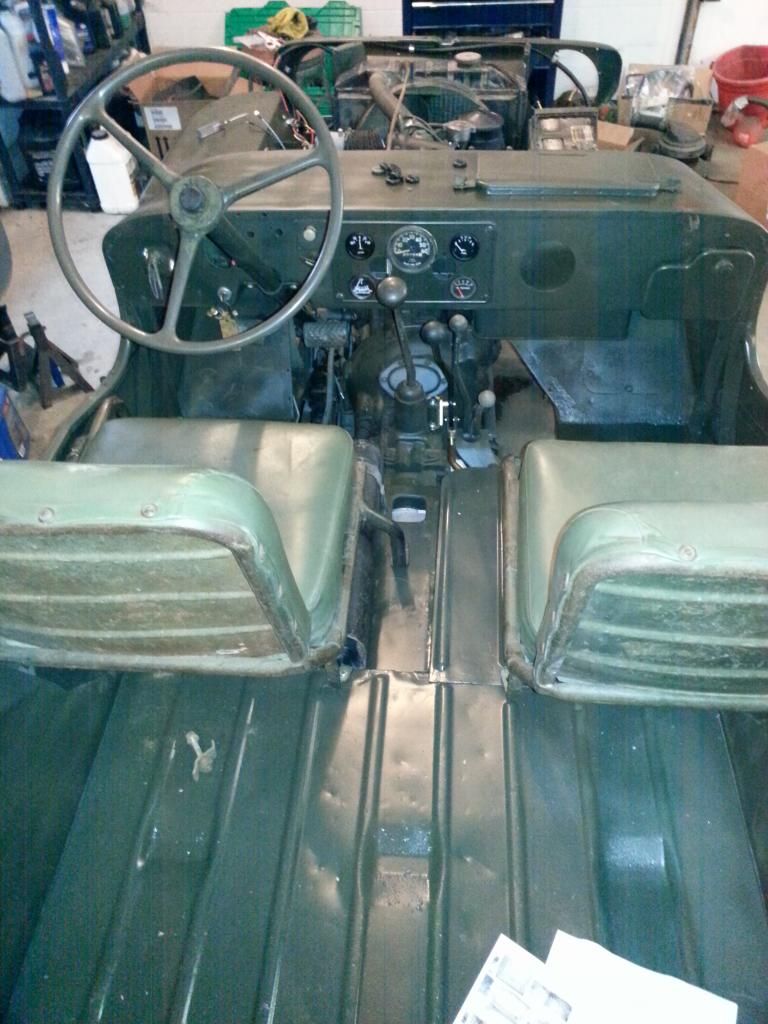 I was able to reclaim this neat little apparatus from my pile of random M38 parts. It's a fuel shut off valve. 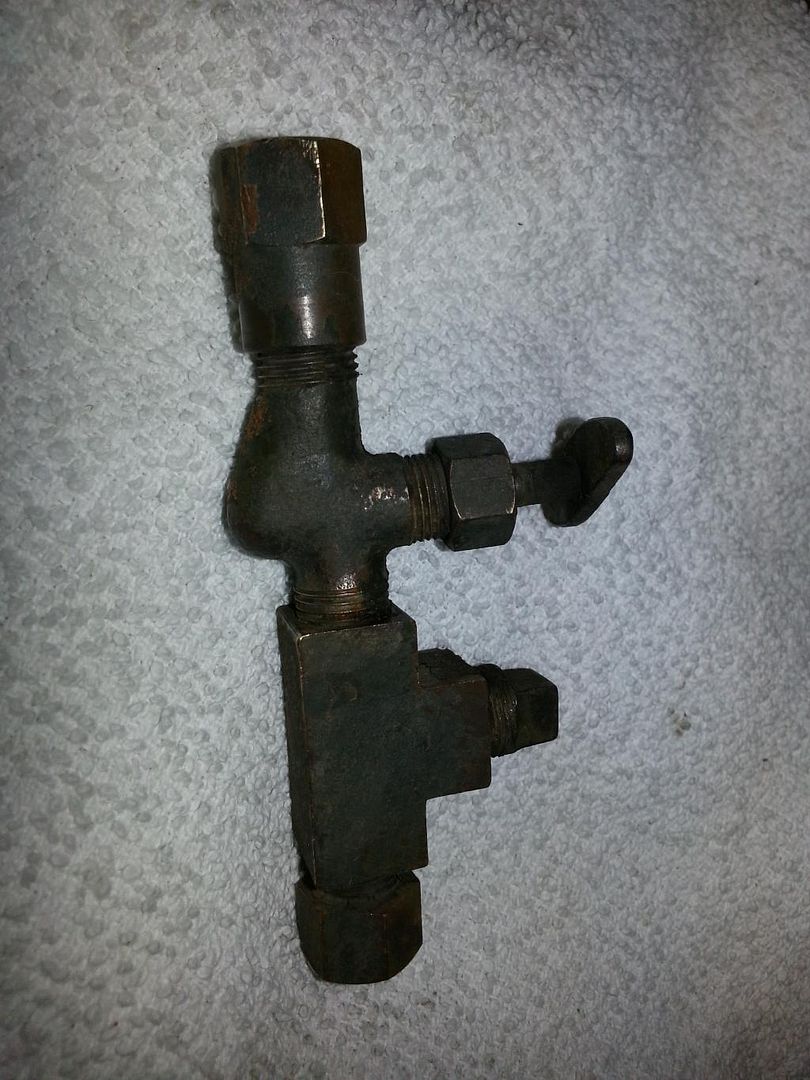 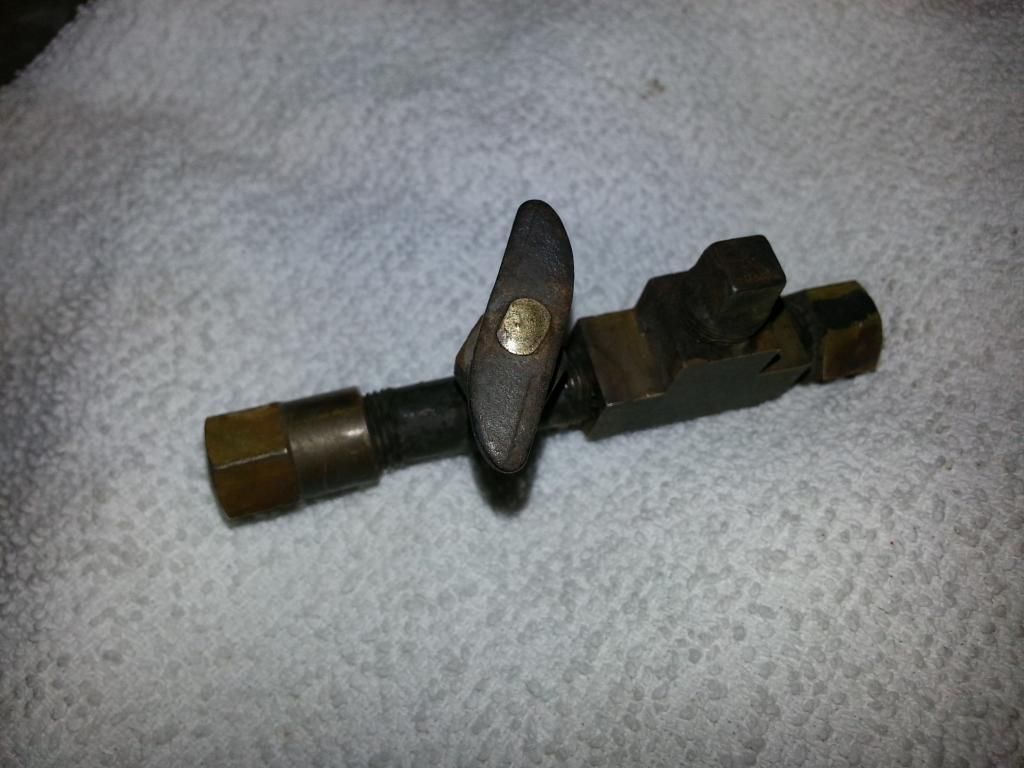 If this was a proper M38 I'd run a line from the plugged "T" fitting to a dash mounted priming pump. I do not have any of the priming stuff so it'll stay plugged. Here it is installed next to the two tone steering box  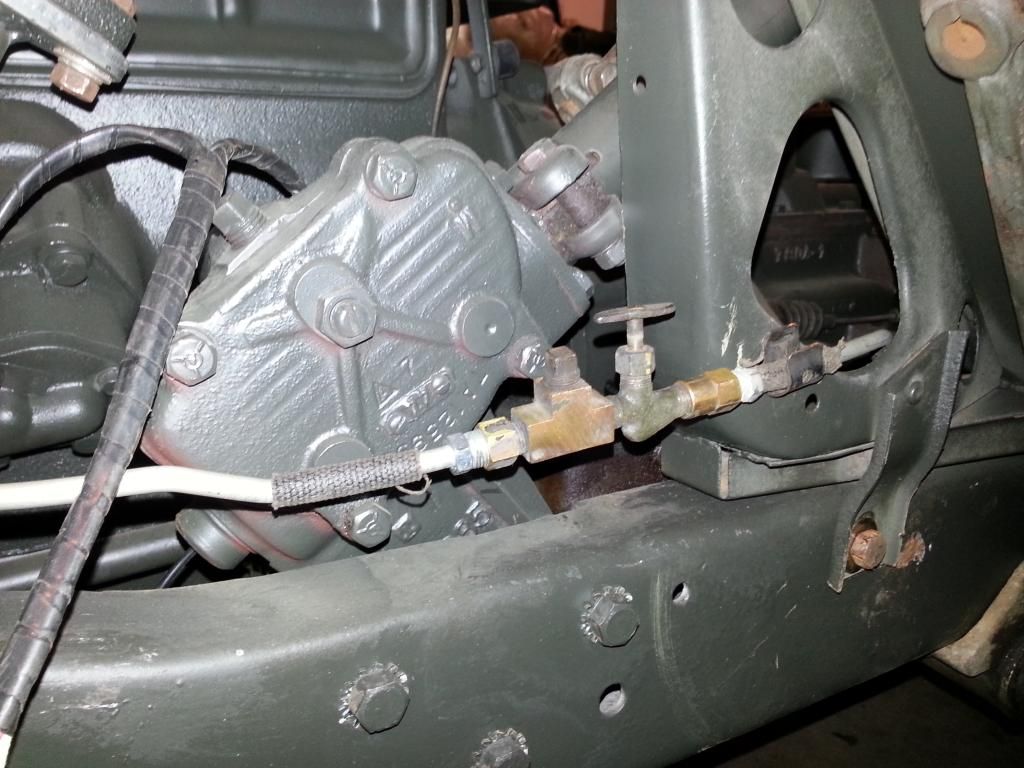 |
|
Deleted
Deleted Member
Posts: 0
|
'52 M38
Feb 8, 2015 16:41:12 GMT -5
Post by Deleted on Feb 8, 2015 16:41:12 GMT -5
That priming pump is cool if you use it all the time and it's new. Otherwise, it leaks, sucks air, and is a pain in the Army. Both mine have it, both are plugged off. 210.00 for a Walcks harness and 800.00 from VWM with butt connectors! Got to go Douglas to be cool. It's just money you could have bought another project with. Right? Oh, almost forgot, when are you buying the 3rd M38 you teased us with? Oil
|
|
|
|
'52 M38
Feb 8, 2015 16:48:15 GMT -5
Post by Ryan_M on Feb 8, 2015 16:48:15 GMT -5
Haha 3rd M38. Good one Oil. Can me and my three Jeeps come live with you when my wife changes the locks on the front door?
Do you have a pic of how the parking brake cable is routed? I can't find a good pics online or in the manuals. I'm especially interested in where that middle twisted "S" shaped clamp goes. Is it supposed to attach to the bellhousing or the left front fender? I know I can't make it work a variety of ways but I'd like to know which is the correct way. Thanks.
|
|
Deleted
Deleted Member
Posts: 0
|
'52 M38
Feb 8, 2015 17:59:04 GMT -5
Post by Deleted on Feb 8, 2015 17:59:04 GMT -5
No picture, but since you are a "Bro", I went and took time out of my busy schedule and looked for you. It leaves the brake handle/cane and goes straight down to the special clip that holds the outer sheath to the bracket under the dash. Then out the corresponding fire wall hole and curves just ahead of the Ross box, back to the bell and the "S" bracket bolts to the motor plate bolt right next to the oil pan skid plate. This "bolt" is also the engine steady cable. It then travels straight back to the cross member mount point that holds the other special sheath end clip. Two holes together there. One for the bolt, the other for the flat on the clip. The outer cable sheath ends here, while the inner travels to the park brake lever that moves the park brake shoes. The inner has a clevis and pin on it. Simple huh? Now, there is a difference on where the engine steady cable goes depending on if you have a later bell housing. The later housing has longer bolt hole castings. I have that on Herm. Ore has the earlier shorter ones. You'll know when your steady cable isn't long enough to work in eary or late holes. Fun stuff huh? So, you want to come stay with Oil when you get kicked out do you? I may be joining you when I get kicked out!!!!!!!! Just give her rides and let her have her own hobby stuff too, and you'll be fine. Make Jeep Peace with her. You are a go getter when I see what you've done. Won't be long now, and you'll be after the other one. It's going to eat at you. Then that mind of yours will figure a way to get it. Green/Jeep Disease is fatal. If you find a Jeep pickup or wagon, that may slow you up a little. You also can hide stuff in the snow until spring. Carry on! Oilly
|
|
|
|
'52 M38
Feb 8, 2015 18:36:42 GMT -5
Post by Ryan_M on Feb 8, 2015 18:36:42 GMT -5
Hmmm...Stay cable bolt..that's probably the last place I would have ended up but I like the sound of it. With the cable routed as I think you are describing it constantly rides on the drag link. If run on the other side of the drag link it would ride against the pitman arm. I can't imagine either of these scenarios are good. I have all the other clips etc that you mentioned. Am I missing something painfully obvious? Could my cable be the wrong length? I bought it last year but forget where. 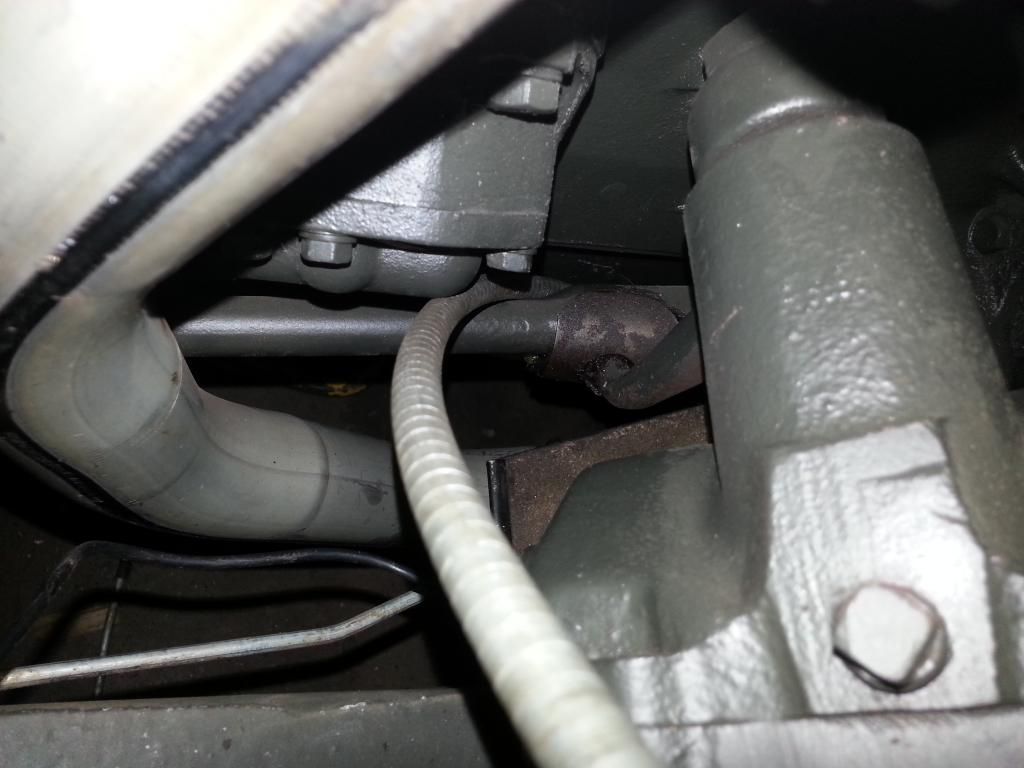 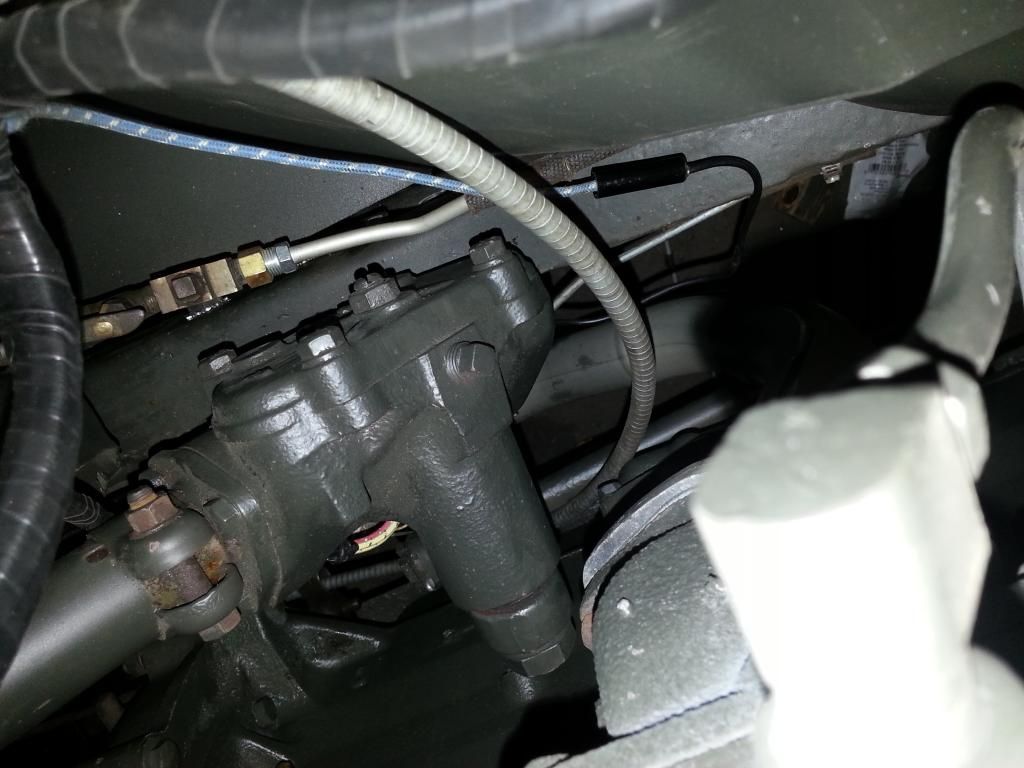 |
|
Deleted
Deleted Member
Posts: 0
|
'52 M38
Feb 8, 2015 19:30:44 GMT -5
Post by Deleted on Feb 8, 2015 19:30:44 GMT -5
Mine goes under the pittman arm on the Ross box and lays against the side of the MC heat shield. The S bracket holds it there and the pittman arm does not contact it. It's definately tight in there. Up above where it exits the firewall, the cable lays on the fender surface as it makes the bend. Oil
|
|
|
|
'52 M38
Feb 15, 2015 10:42:34 GMT -5
Post by Ryan_M on Feb 15, 2015 10:42:34 GMT -5
Oil - It's been a few days but I finally got back to the hand brake cable. I was able to route it as you described so thanks for the help. It does lay on the very edge of the MC heat shield - almost touching the exhaust - but I'm thinking that won't hurt it. I also clipped it to the inside of the fender for added stability. There was already a hole right there in the fender where the cable is anyways. I think some M38's came stock with a fender clip in that location (??).
|
|
|
|
'52 M38
Feb 15, 2015 13:41:15 GMT -5
Post by Ryan_M on Feb 15, 2015 13:41:15 GMT -5
|
|
Deleted
Deleted Member
Posts: 0
|
'52 M38
Feb 15, 2015 13:52:03 GMT -5
Post by Deleted on Feb 15, 2015 13:52:03 GMT -5
Looks great   |
|
Deleted
Deleted Member
Posts: 0
|
'52 M38
Feb 15, 2015 14:18:25 GMT -5
Post by Deleted on Feb 15, 2015 14:18:25 GMT -5
Yeah, looks good. I see you have the pintle hook, but do you have the elusive "LUNETTE"??
|
|
|
|
'52 M38
Feb 15, 2015 15:07:28 GMT -5
Post by Haines Garage on Feb 15, 2015 15:07:28 GMT -5
Looks real nice. I really like the color.
I also am digging the winter setting.
|
|