Deleted
Deleted Member
Posts: 0
|
'52 M38
Jan 10, 2015 18:30:14 GMT -5
Post by Deleted on Jan 10, 2015 18:30:14 GMT -5
Ryan...your last post was, by far, the funniest of the day! McLovin' the sarcasm.
|
|
|
|
'52 M38
Jan 10, 2015 18:35:10 GMT -5
Post by Haines Garage on Jan 10, 2015 18:35:10 GMT -5
No doubt. Looking good in the progress though, Hey pounded Pepsi can is Epic, and a new coined phrase!
|
|
|
|
'52 M38
Jan 11, 2015 8:33:05 GMT -5
Post by Ryan_M on Jan 11, 2015 8:33:05 GMT -5
Ryan...your last post was, by far, the funniest of the day! McLovin' the sarcasm. Haha thanks but the Hitler videos and HG's garage broadcasts take the cake in the humor department. |
|
Deleted
Deleted Member
Posts: 0
|
'52 M38
Jan 11, 2015 9:03:51 GMT -5
Post by Deleted on Jan 11, 2015 9:03:51 GMT -5
The fitting in the crossover for a M38 is 3/16, so that's what it is. John
|
|
|
|
'52 M38
Jan 17, 2015 20:24:05 GMT -5
Post by Ryan_M on Jan 17, 2015 20:24:05 GMT -5
I tip my hat to you guys who have resurrected these truly destroyed tubs. This light duty overhaul I'm doing on mine is tedious enough. Finally, wheel houses and tool box are IN. 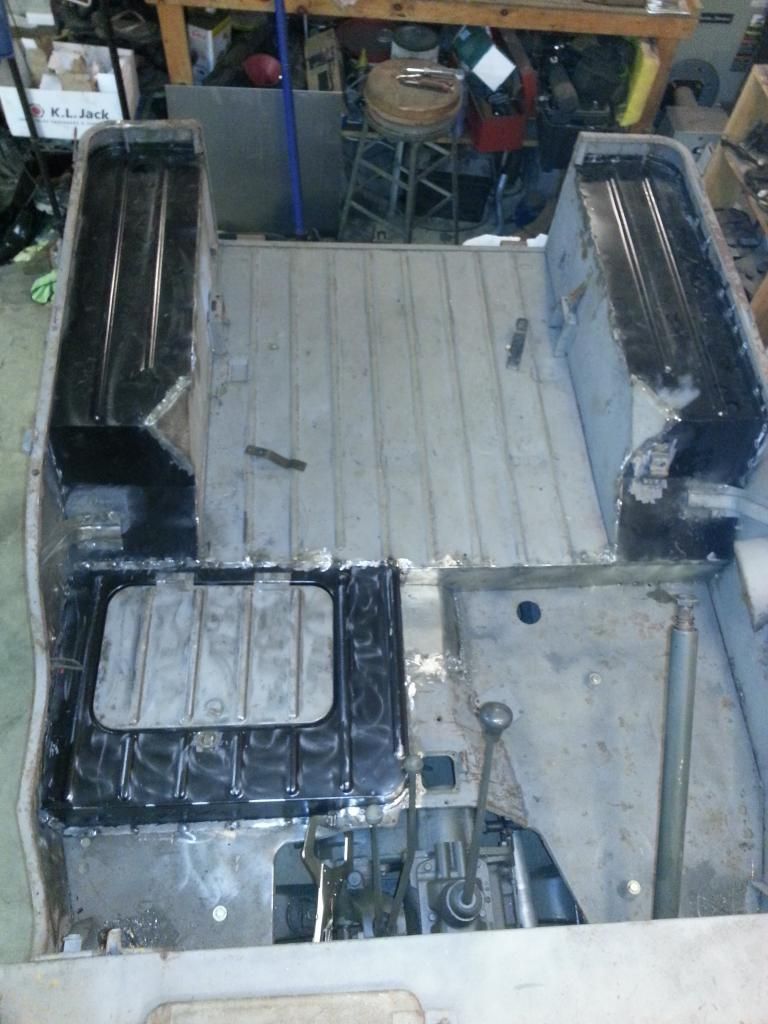 The wheelhouses fit up pretty well but that tool box is bonafide a train wreck. I hammered it into shape but it will still need a little more wrestling once I get the tub off again and can get better access to the underside. I have two driver's seats. Both have issues but the one on the right is the better of the pair. With that said, you can see that Bubba welded a new leg (a bent piece of hardware store pipe) onto it at some point. Apparently Bubba doesn't own a tape measure and left it about an inch too long. A longer leg means the seat doesn't match up anywhere close to where the seat bracket on the wheel house should be. No good.  After carefully measuring I cut the legs off both and transferred the good leg over to the good seat.  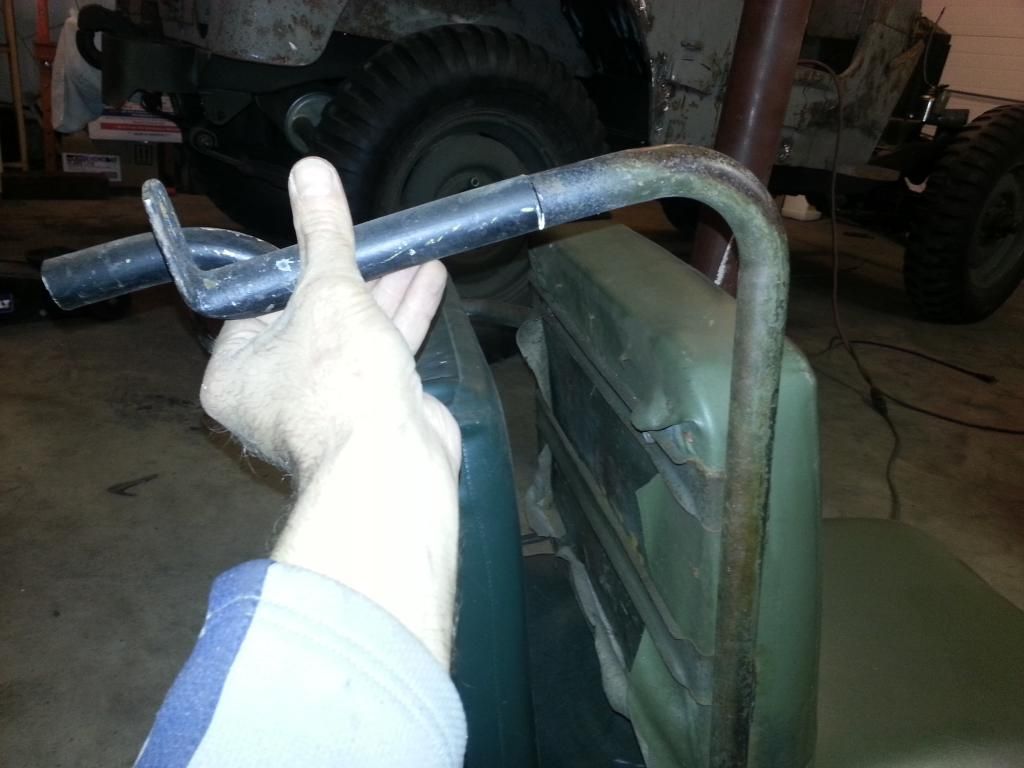 Tacked in place  Next I fit the seat into the tub and lined up the bracket. I held the bracket in place with a couple magnets on the back side of the wheel house. I pulled the seat out and could now mark and then weld the bracket in place. Magnets holding it here: 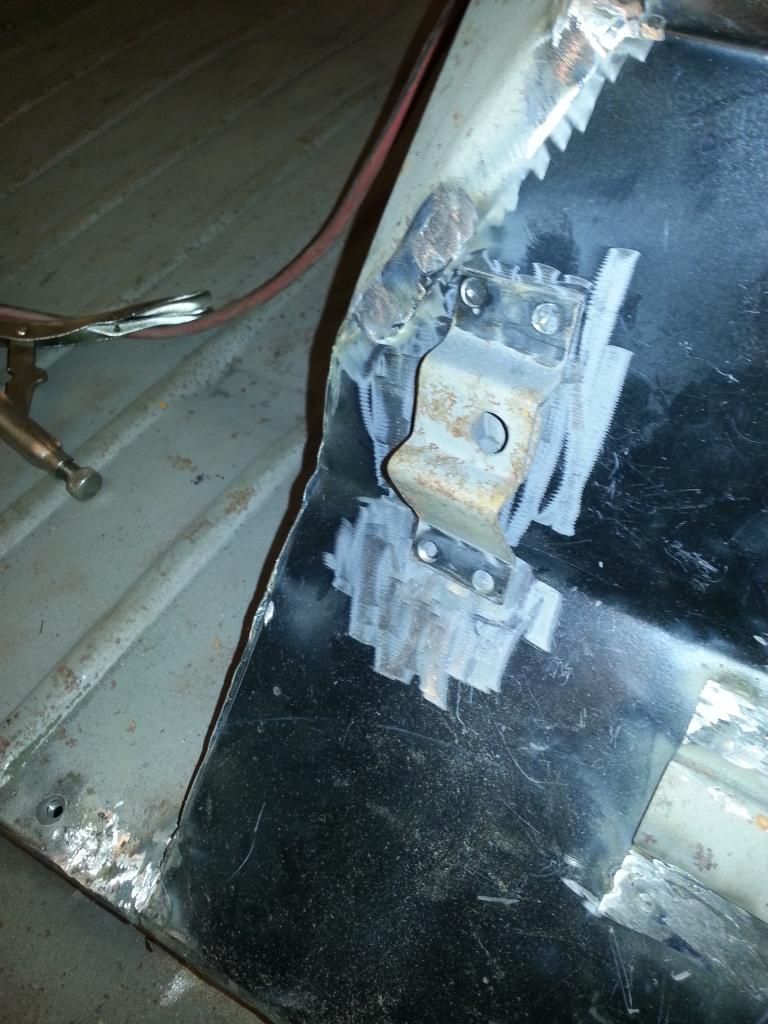 Knowing the seat sits as it should I finished welding the leg. Came out pretty well. 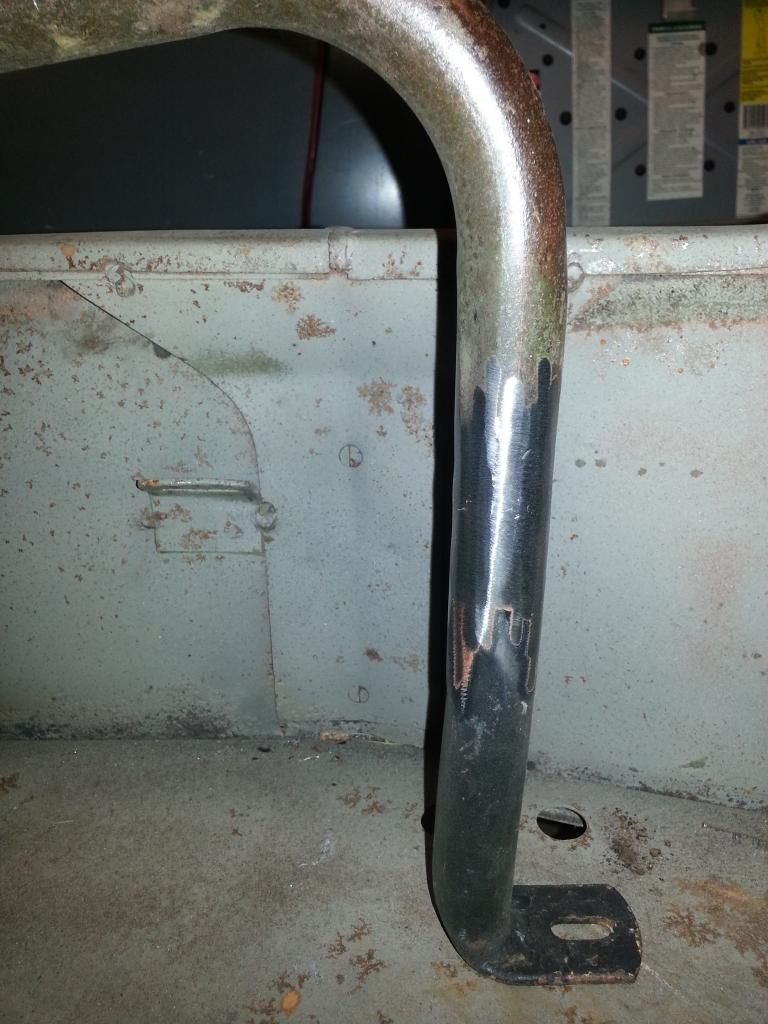  I picked up all the other body parts yesterday too. The have been blasted and primed. The paint shop guys added green to the epoxy primer as they figured it would be easier to top coat with green paint. The fenders will need a little TLC due to a couple weak spots but the other piece are rock solid. 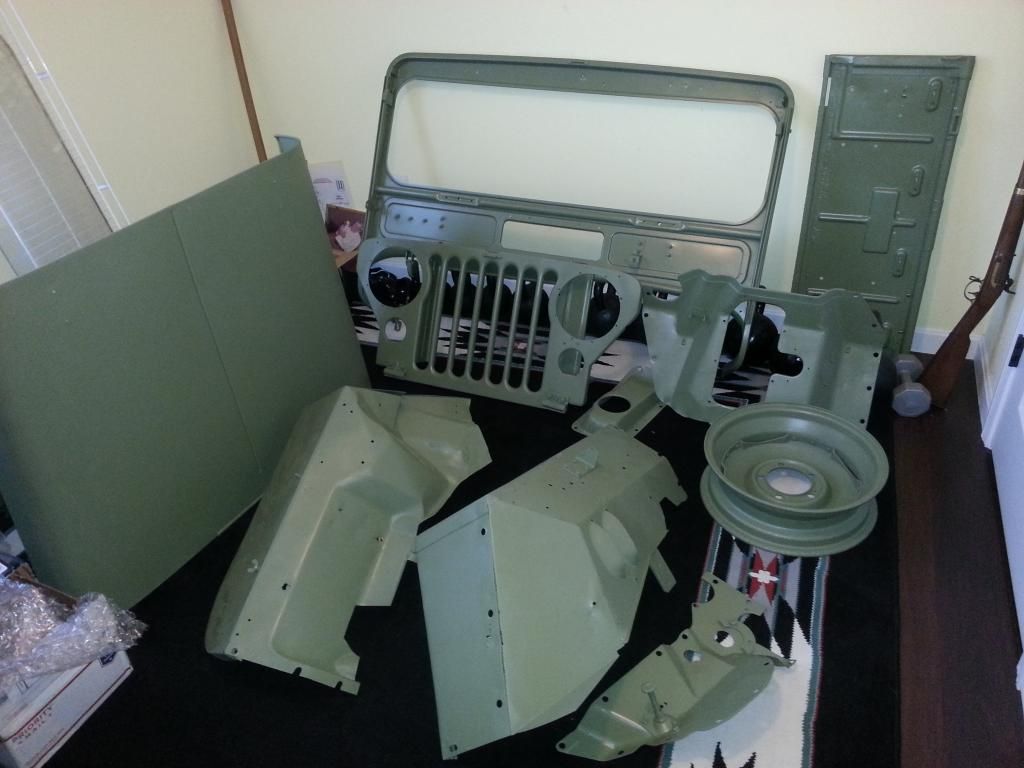 |
|
|
|
'52 M38
Jan 17, 2015 20:40:14 GMT -5
Post by Haines Garage on Jan 17, 2015 20:40:14 GMT -5
Looking Great there Boss. I like how you managed to like the old Midas Commercial Said.
Make it Fit! Your plug welds are looking good as well.
You may have already have said, but what color are you using on the body parts?
|
|
|
|
'52 M38
Jan 17, 2015 21:02:25 GMT -5
Post by Ryan_M on Jan 17, 2015 21:02:25 GMT -5
You may have already have said, but what color are you using on the body parts? Same as the frame which was color matched off my NOS grille. The paint is quite a bit darker than the green primer that is pictured above. |
|
|
|
'52 M38
Jan 17, 2015 21:06:35 GMT -5
Post by Haines Garage on Jan 17, 2015 21:06:35 GMT -5
You may have already have said, but what color are you using on the body parts? Same as the frame which was color matched off my NOS grille. The paint is quite a bit darker than the green primer that is pictured above. I remember now. The Green Primer...? Now you know what I am going to ask next right? |
|
|
|
'52 M38
Jan 17, 2015 21:14:13 GMT -5
Post by Ryan_M on Jan 17, 2015 21:14:13 GMT -5
Not sure....but does this answer it? I don't know what color this primer is in stock form. The paint shop told me they adjusted the color for me. Knowing nothing about paint I can only take their word for it. 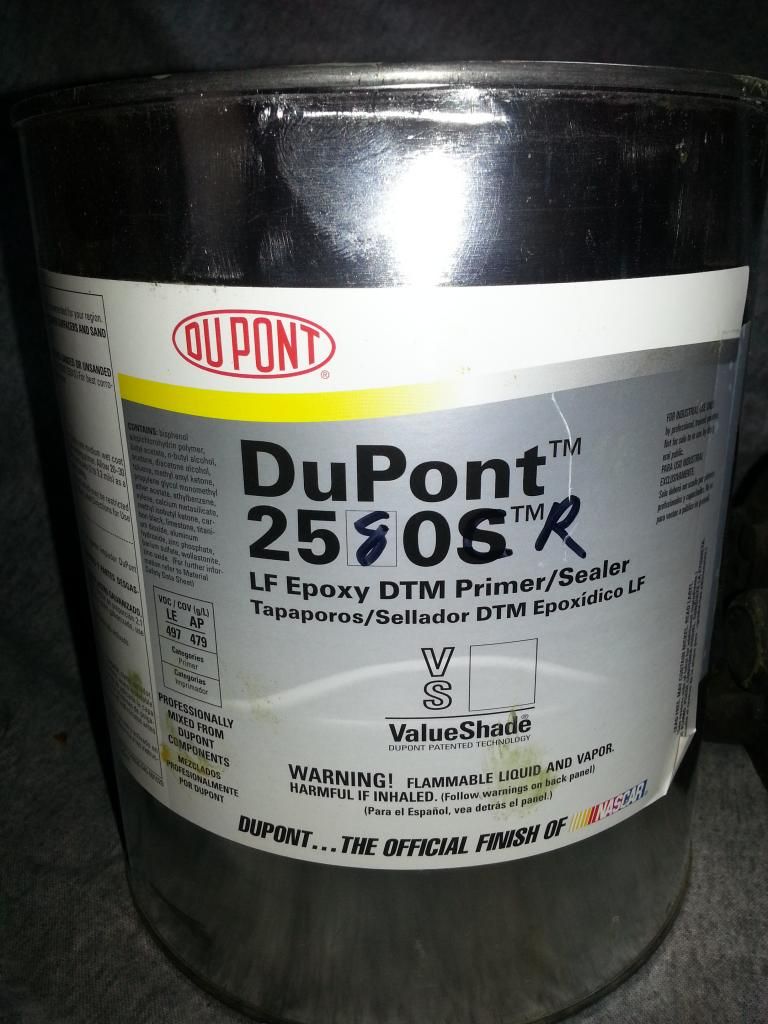 |
|
|
|
'52 M38
Jan 17, 2015 21:17:04 GMT -5
Post by Haines Garage on Jan 17, 2015 21:17:04 GMT -5
So your tinting the primer.
That's just awesome.
Great stuff you got there in that can by the way.
|
|
|
|
'52 M38
Jan 17, 2015 21:18:21 GMT -5
Post by Ryan_M on Jan 17, 2015 21:18:21 GMT -5
It better be. That can was roughly 125% of my entire estimated project budget....
|
|
Deleted
Deleted Member
Posts: 0
|
'52 M38
Jan 17, 2015 21:23:59 GMT -5
Post by Deleted on Jan 17, 2015 21:23:59 GMT -5
You have really come a long ways on your welding . What sucks is you'll be real good at it just as you finish. This means you need to begin looking for another Jeep to build or all that practice will be wasted!  Oil |
|
|
|
'52 M38
Jan 17, 2015 21:32:51 GMT -5
Post by zooke581 on Jan 17, 2015 21:32:51 GMT -5
You have really come a long ways on your welding . What sucks is you'll be real good at it just as you finish. This means you need to begin looking for another Jeep to build or all that practice will be wasted!  Oil What Oiley said. |
|
Deleted
Deleted Member
Posts: 0
|
'52 M38
Jan 17, 2015 22:21:02 GMT -5
Post by Deleted on Jan 17, 2015 22:21:02 GMT -5
Great progress Ryan. I am not familiar with DuPont epoxy as I use PPG, PPg offers epoxy in several colors, one being the green you have, Black, red, Yellow. Now the Jeep police will tell you that if you do not use the red oxide color your topcoat will be off color, as the OD green is semi transparent. That is true to a point, I always use the green your using, when I blasted my M715 the Jeep police told me I had to use red oxide for this reason, but as I blasted it the only place I found red oxide was on the wheels, the Kaiser parts were all black primer and I used the green, no one has ever said anything and it looks good. My point being, the Jeep police can KMA  . Keep up the good work  Lee  |
|
Deleted
Deleted Member
Posts: 0
|
'52 M38
Jan 17, 2015 22:40:50 GMT -5
Post by Deleted on Jan 17, 2015 22:40:50 GMT -5
My '52 M38A1 has much of it's GI paint left. Whenever they touched up areas, it didn't match. It looks awesome. You just can't screw up OD. I paint just like they did, so my work with OD is Concours!  |
|
|
|
'52 M38
Jan 17, 2015 22:56:18 GMT -5
Post by zooke581 on Jan 17, 2015 22:56:18 GMT -5
You should have seen the way we painted our vehicles when I was in. The Jeep police would have a hay day. But it was how we did it. Once it rolled of the assembly line and reported to it's duty station, it was never the same again.
|
|
|
|
'52 M38
Jan 18, 2015 6:09:07 GMT -5
Post by Ryan_M on Jan 18, 2015 6:09:07 GMT -5
The Jeep police will empty their citation book on me long before the they get to the paint. I'm not worried  I wasn't aware that the original paint was "semi transparent". Good info there. |
|
|
|
'52 M38
Jan 18, 2015 6:26:31 GMT -5
Post by Ryan_M on Jan 18, 2015 6:26:31 GMT -5
I'm still waffling badly on just how I will wire the M38 but I've at least committed to a 12V conversion. It had a key start CJ5 starter when I got it but I thought it would be cool to revert back to floor start and keep the stock look. I just happen to have a pile of 24V M38 starters. The last early style one I sold went for about $300. The last late-style one I sold went for less than $7. I know this is sacrilege to some but I figured a $7 late-style starter was expendable under these circumstances. I took one to my trusty old-school starter shop guy where he completely gutted and rebuilt it. Can you tell which one is 24V and which one is 12V? 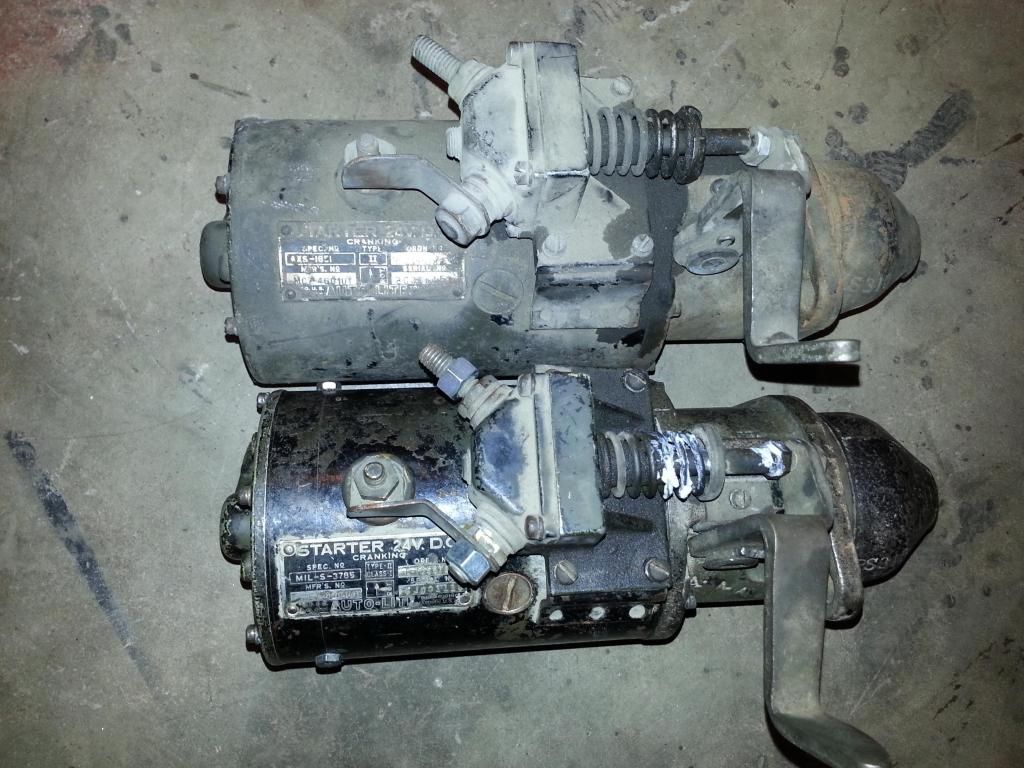 The one with the white grease on the spring is the rebuilt 12V. You can see he had to mill and shorten the case to make everything fit. That means the stock starter bracket won't work anymore so I'll have to fab a new one but that's pretty simple stuff. With a little luck this thing will look and work flawlessly now with a 12V system. After a quick rattle can blast. 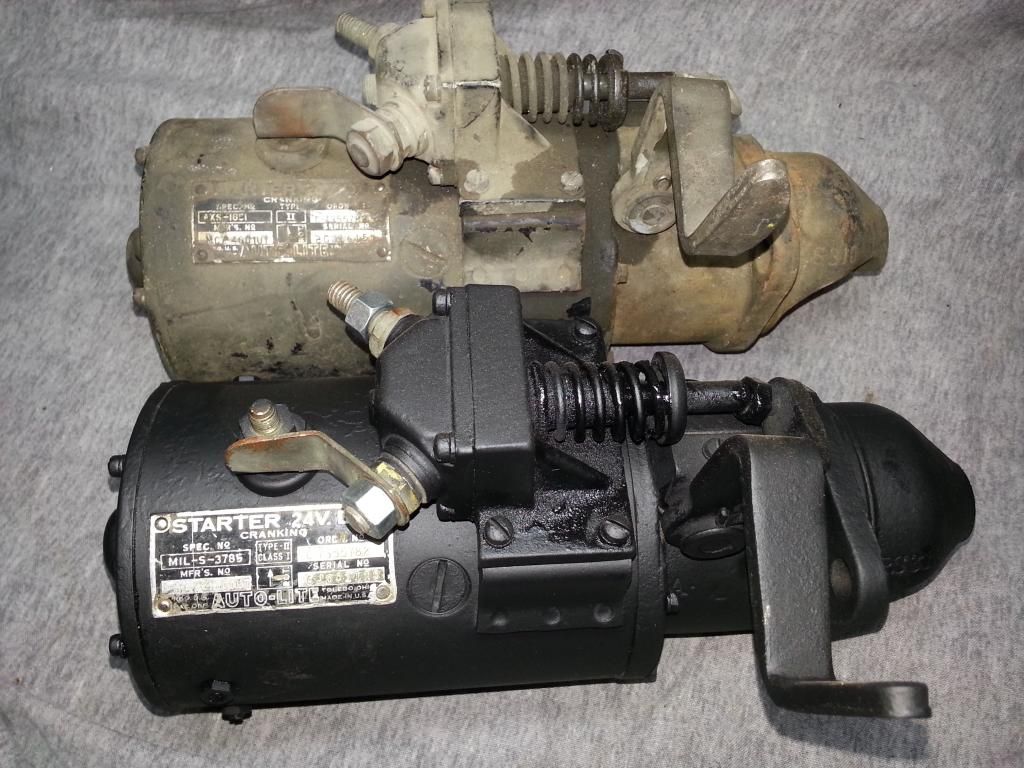 |
|
Deleted
Deleted Member
Posts: 0
|
'52 M38
Jan 18, 2015 8:04:01 GMT -5
Post by Deleted on Jan 18, 2015 8:04:01 GMT -5
That's a class fix. Wondered about that myself. I just stayed 24 volt in mine. You can tap one of the two 12's for appliances anyway. Oil
|
|
|
|
'52 M38
Jan 19, 2015 15:23:37 GMT -5
Post by Ryan_M on Jan 19, 2015 15:23:37 GMT -5
You guys sick of looking at pics of this tub yet? 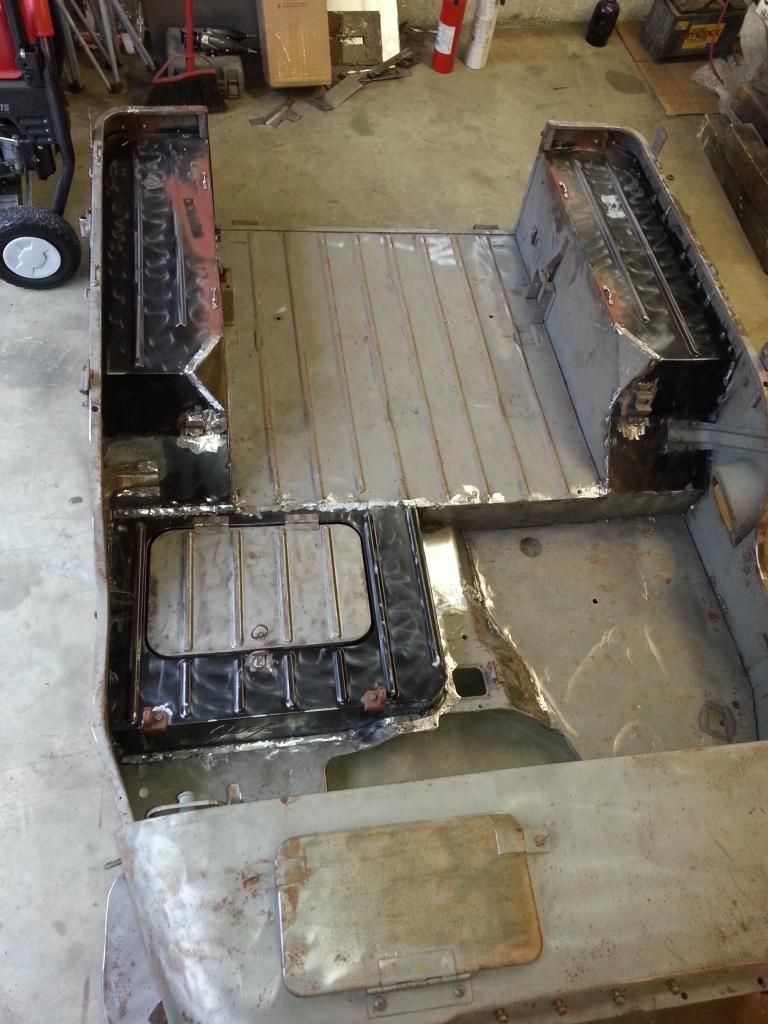 Well, it's almost done. I've spent the past three days crawling all over this thing trying to button up any loose ends. Bracketry, trinketry, and wheelhouse footman loopery - check. 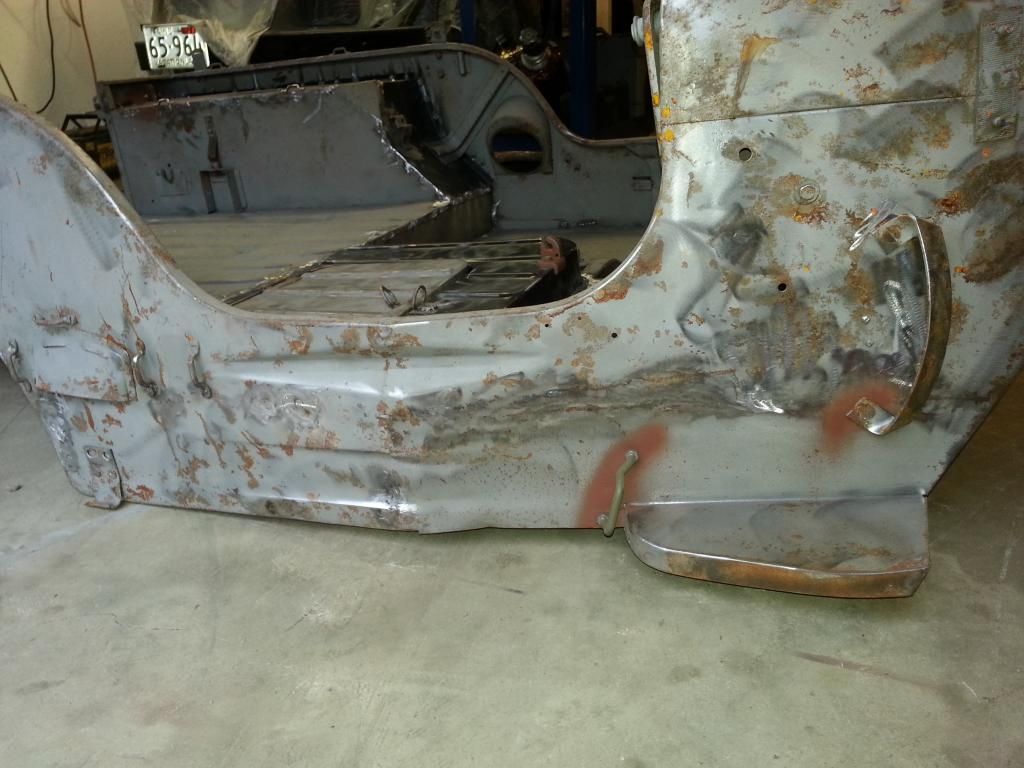 Driver's seat nut - check. 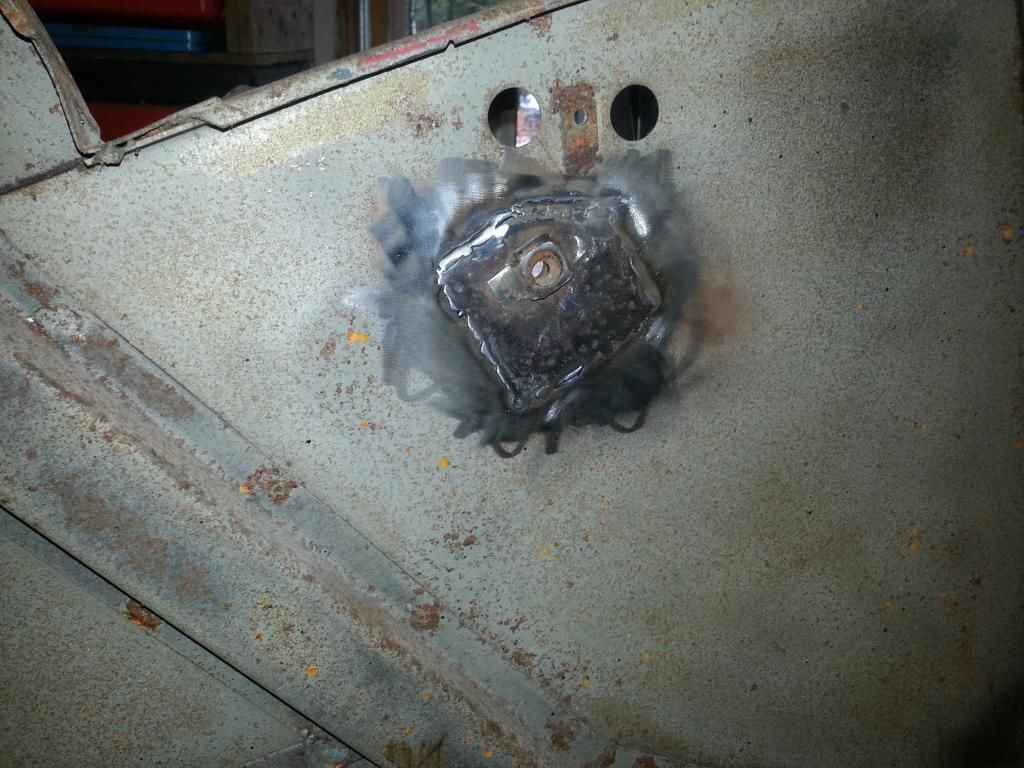 All holes filled and ground. Tender hat channel section cut out and replaced. Rear mount tab cut and reinforced.  I'm pretty much ready for whatever's next. What is next anyways? The plan is to use a rust converter, then apply small doses of body filler where needed, then epoxy primer, then paint. Is that the right order? Before I pulled the tub I fit up the primed parts just to ensure they all still like each other. There's no reason they shouldn't but having never seen them together I figured better safe than sorry. All good. The fenders will need some TLC but everything else is ready to go. 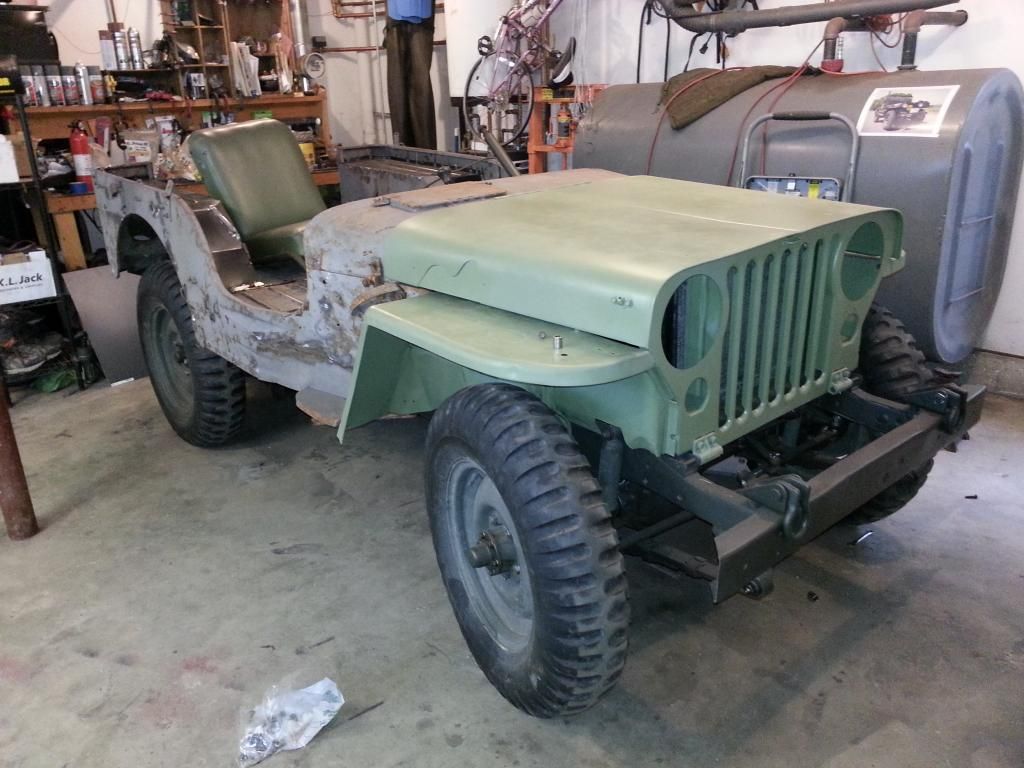 |
|
Deleted
Deleted Member
Posts: 0
|
'52 M38
Jan 19, 2015 15:37:51 GMT -5
Post by Deleted on Jan 19, 2015 15:37:51 GMT -5
My chronological sequence is after you are done with the welding, a quick light sandblast to remove the rust. Then bondo. Block the bondo as best you can. Then sandable catalised primer. 4 coats of it. Guide coat that. Then block with 220, then re-block with 360, and paint olive drab. Just the 4 coats of catalised sandable primer is 650.00! Epoxy'primer sealer is more expensive and has a window that you must prime over with sandable primer or you will have to sand and rough up the epoxy primer before you paint over it. Epoxy primer sealer is indeed awesome stuff, but too expensive for me to put on a Jeep. The sandable catalised primer is very good stuff. I get rid of the sand scratches and edges of the bondo with it. If you use a new type of automotive paint, it's solvents are vicious and you need to seal over the sandable primer or you could get lifting. With xylene thinned OD paint, no lifting ever. Oilleaker out.
|
|
|
|
'52 M38
Jan 19, 2015 16:21:02 GMT -5
Post by Ryan_M on Jan 19, 2015 16:21:02 GMT -5
John - I appreciate the in depth tutorial - excellent info. However, that seems to be serious overkill for what I need to achieve. Sandblasting the tub is not an option which is why I was thinking about a rust converter. And given my way-less-than-ideal paint set-up even thinking about 4 coats of primer makes me want to give up Jeeps and start collecting stamps or coins or something.
I have the epoxy primer already. The bondo will be used just to mask the worst of my welding marks. All other "natural" dents, dings, and imperfections will be left alone. I really just don't want the paint to fall off. Anything aside from that is pretty much OK.
|
|
|
|
'52 M38
Jan 19, 2015 18:31:49 GMT -5
Post by Haines Garage on Jan 19, 2015 18:31:49 GMT -5
Most definitely not sick of looking at that tub. It looks great from here.
I like that you put it together before final paint.
I thought this was your camping trail buggy. That M38 is going to be Sa Weet !
|
|
|
|
'52 M38
Jan 19, 2015 18:50:36 GMT -5
Post by Ryan_M on Jan 19, 2015 18:50:36 GMT -5
Most definitely not sick of looking at that tub. It looks great from here. I like that you put it together before final paint. I thought this was your camping trail buggy. That M38 is going to be Sa Weet ! This is my camping buggy....unless Oil talks me into 47 applications of clear coat by the time it's all said and done  |
|
|
|
'52 M38
Jan 19, 2015 18:58:28 GMT -5
Post by Haines Garage on Jan 19, 2015 18:58:28 GMT -5
Most definitely not sick of looking at that tub. It looks great from here. I like that you put it together before final paint. I thought this was your camping trail buggy. That M38 is going to be Sa Weet ! This is my camping buggy....unless Oil talks me into 47 applications of clear coat by the time it's all said and done       |
|