|
|
'52 M38
Dec 25, 2014 15:05:29 GMT -5
Post by Ryan_M on Dec 25, 2014 15:05:29 GMT -5
I have really been struggling with weld repairs. I'm pretty sure I have a Willys prototype where they tried to reduce weight by building a tub out of tin foil instead of heavy steel. The metal in the wheel houses that I've been working on blows to dust if I get within 10 feet of it with the welding gun. This is my first welding project so my skills leave a lot to be desired too. I needed a change of scenery today so I unceremoniously removed the rotted tool box. 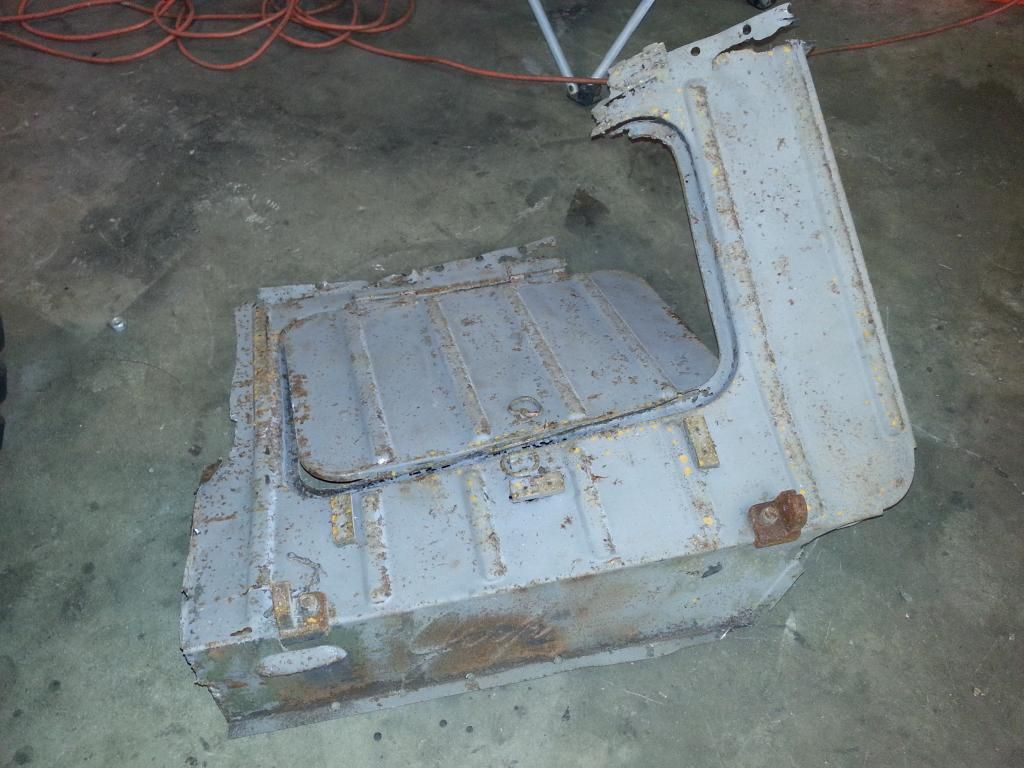  This looks pretty rough  So let's get rid of it 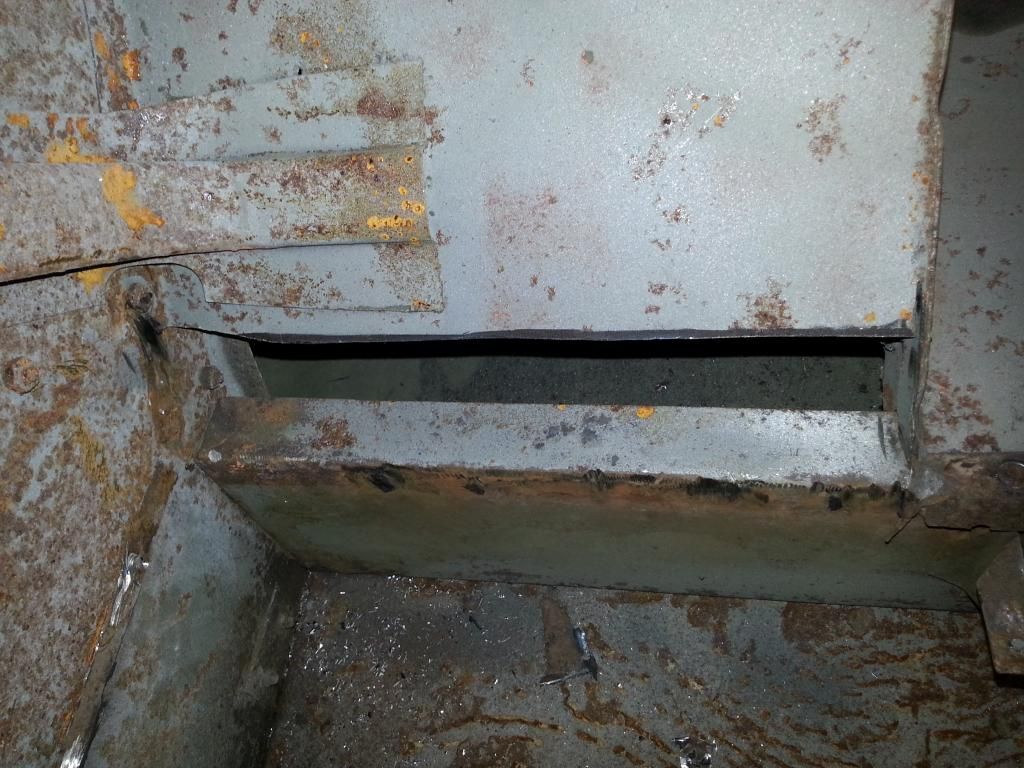 My first ever fabbed repair panel. I'm beaming with pride.... 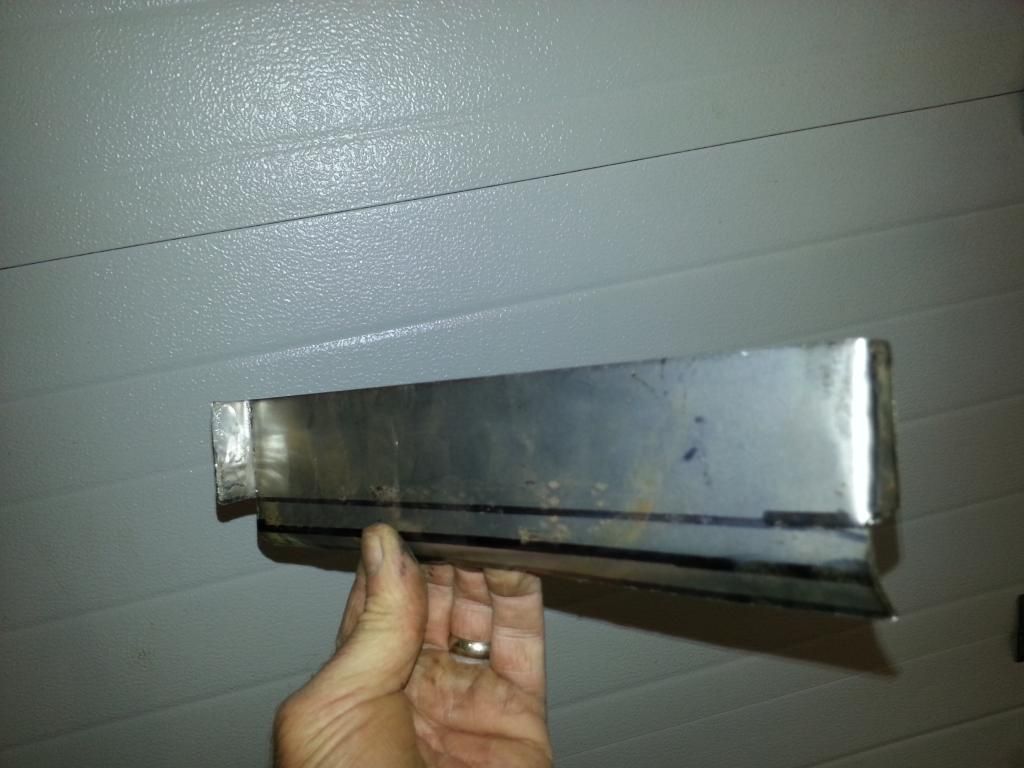 Could be better but could also be a lot worse  Much better luck down here. No blown holes!!  Well, pretty horrid but I'll take it for a first effort. I learned a lot here and this spot will not be that visible anyways. I'll continue to pick away at neatening it up. 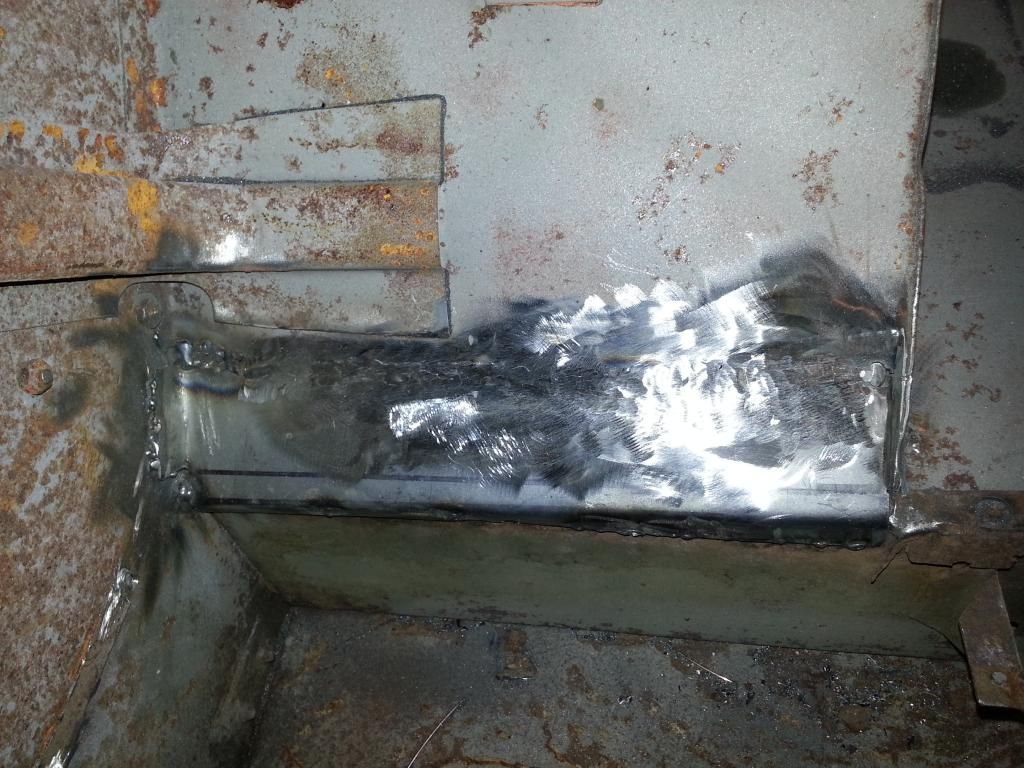 |
|
|
|
'52 M38
Dec 25, 2014 17:51:33 GMT -5
Post by zooke581 on Dec 25, 2014 17:51:33 GMT -5
Nice work on making replacement pieces and your welding is coming along. It will get better with each weld, trust me, I have been there.
|
|
|
|
'52 M38
Dec 28, 2014 11:38:53 GMT -5
Post by Ryan_M on Dec 28, 2014 11:38:53 GMT -5
It's been a productive long weekend in the garage. Radiator, fan, front bumper, front and rear lift shackles, and clutch cross shaft installed. Alternator and distributor painted and secured. I filled up all the fluids and not too many of them leaked back out. I said a prayer to the Jeep Gods and slipped the clutch cable into place without sending the clutch fork rattling into the bottom of the bell housing. That immediately turns a 2-minute task into an extremely awkward afternoon of cruising the neighborhood in search of a 5-yr old with small hands who, "for $5 and some candy", will "help me with something in the garage". I'm thankful I didn't have to go there. The exhaust has been set in place but not properly secured yet. I was the lucky recipient of a holiday prize that may require complete rerouting of said exhaust so I'm leaving it alone for now. More on that next week. 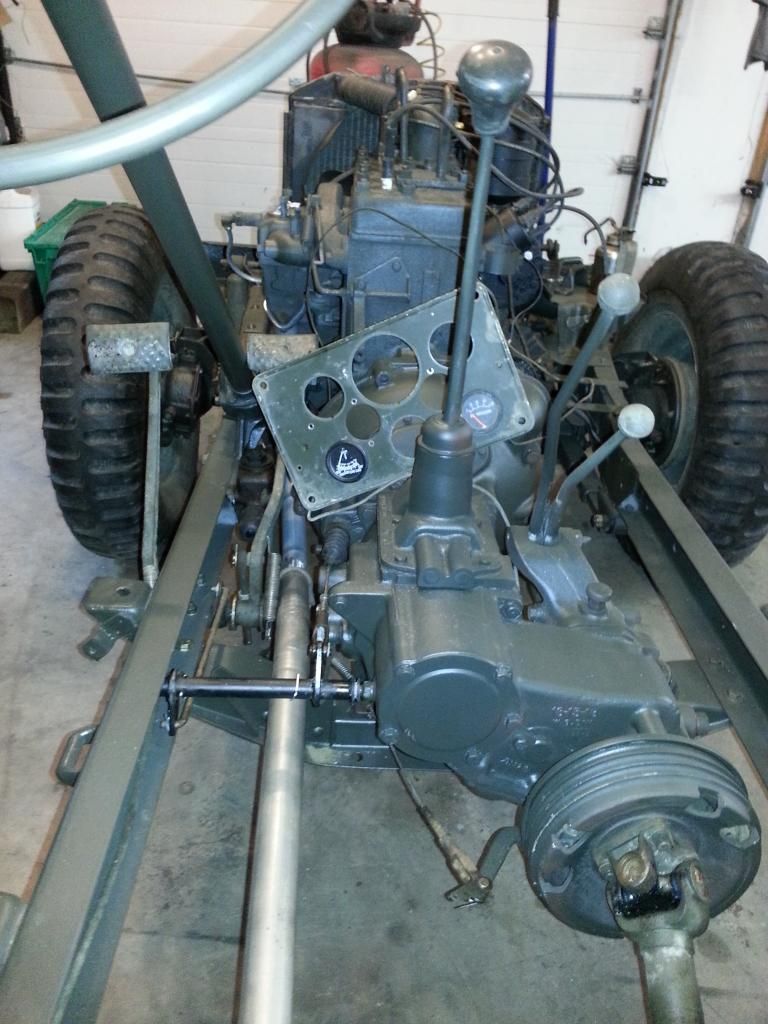 Freshly painted bumper with one original shackle bracket and one new replacement. Note: A single shackle does not make a good tow point when lodged in a 4' high snowbank. It will break. My late grandfather's vintage Craftsman oil can (on the battery tray) saw some action yesterday. It's old and useful and I like it.  I've deemed the wheel houses unfit for further repair and have ordered replacements. This is the first foray into panel replacement. I think it went all right but I'm naturally superior at destruction anyways. The real test will be to see if I can get the new ones in. 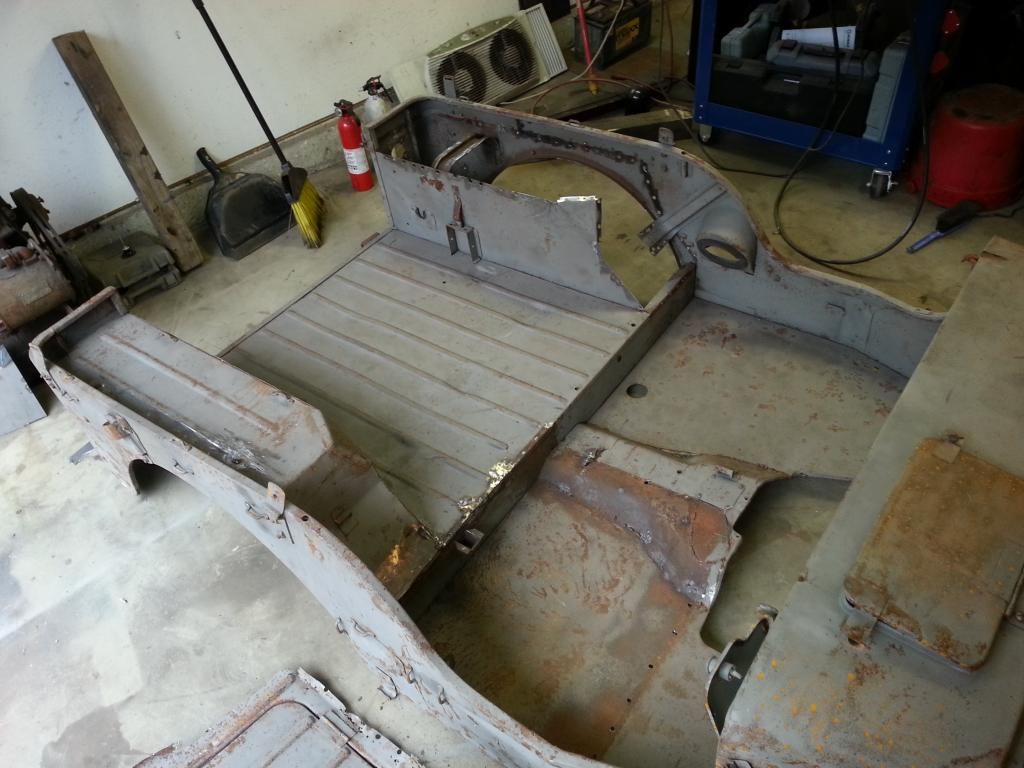 |
|
|
|
'52 M38
Dec 29, 2014 14:52:06 GMT -5
Post by Haines Garage on Dec 29, 2014 14:52:06 GMT -5
Looking great. I like your Grandfathers oil can as well.
Cool having stuff like that for sure.
|
|
|
|
'52 M38
Jan 2, 2015 20:53:51 GMT -5
Post by Ryan_M on Jan 2, 2015 20:53:51 GMT -5
Been delayed waiting on parts. The Walck's floor riser arrived today so it was back to business. The riser looks really good but it is designed for a 2A or 3A so I'll have to poke a new hole in it to accommodate the M38's differently routed fuel line. Hopefully that's the only real difference. For the price it seemed better to buy this entire riser than to try and patch and repair the existing one. (Wait, couldn't that logic be used to simply buy a shiny restored Willys someone else just sold you for $0.50 on their dollar instead of rebuilding these stupid things??). 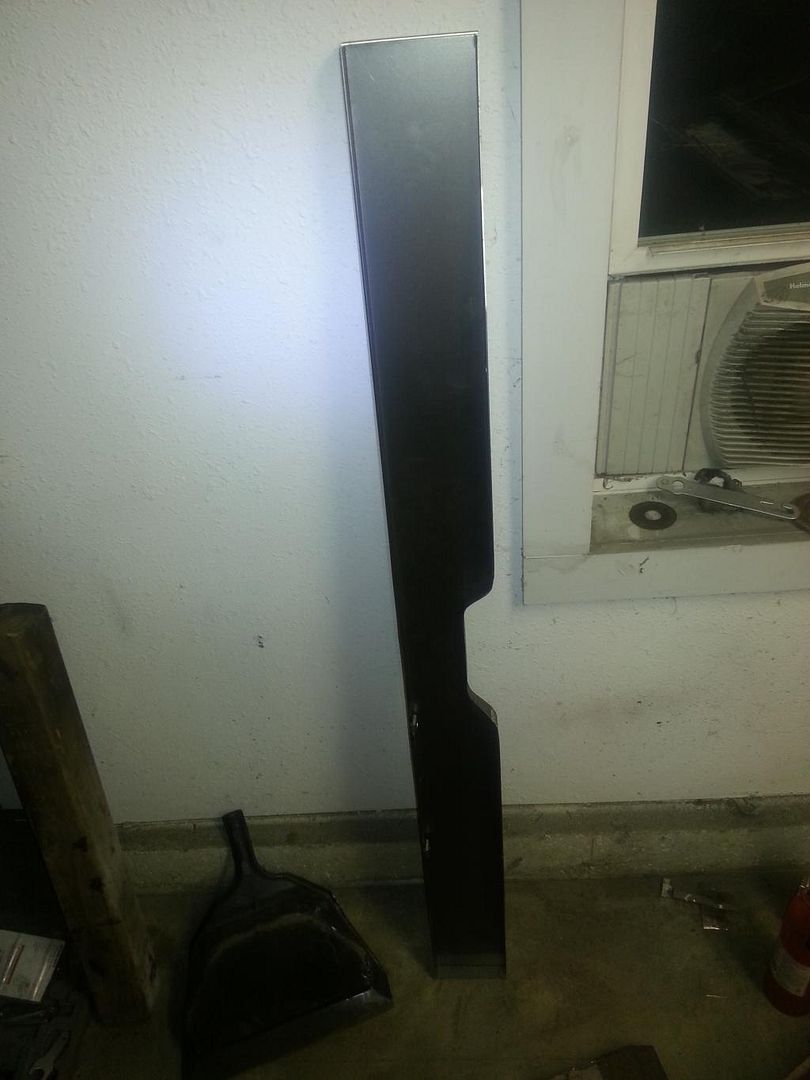 I also cut a rotted section of the transmission tunnel and will need to fab a replacement patch. Didn't Haines just do this? Should have asked him to make two of them  The floor is a little crispy where the passenger side attaches to the riser. I will come up with a patch here too but it will probably not blend in well. I don't care. I'm not replacing that whole floor.... Old riser removed and section of surgically extracted trans tunnel sitting on the rear floor. 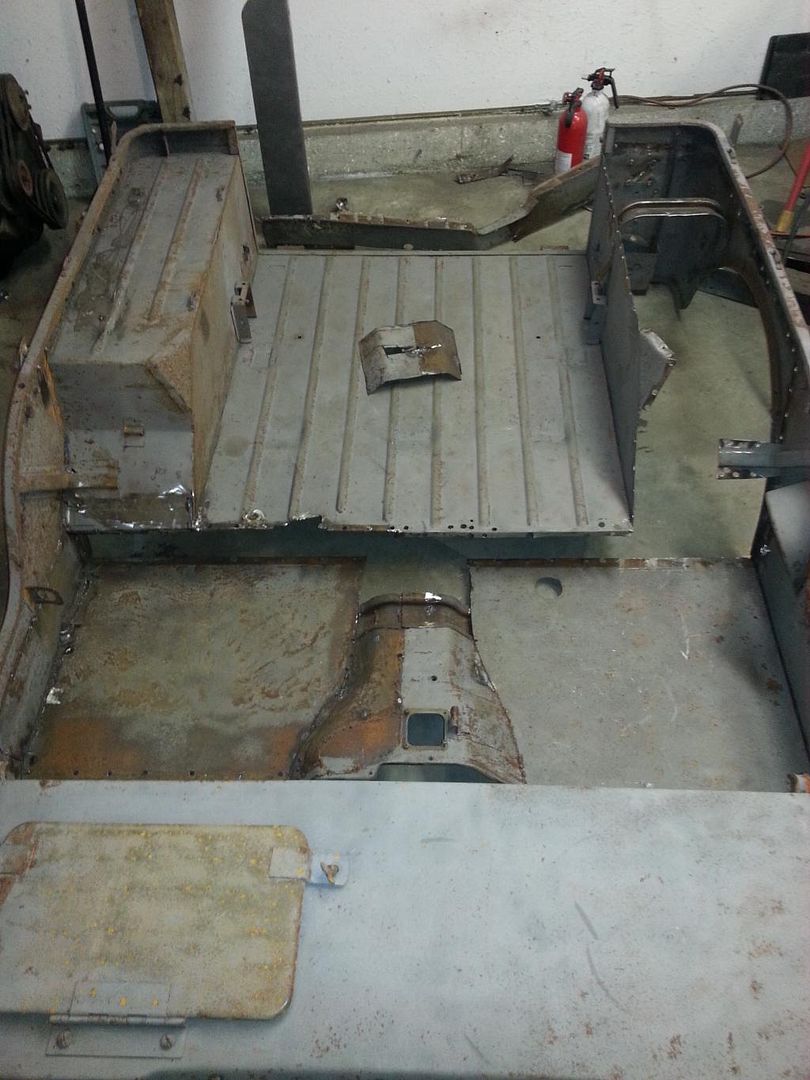 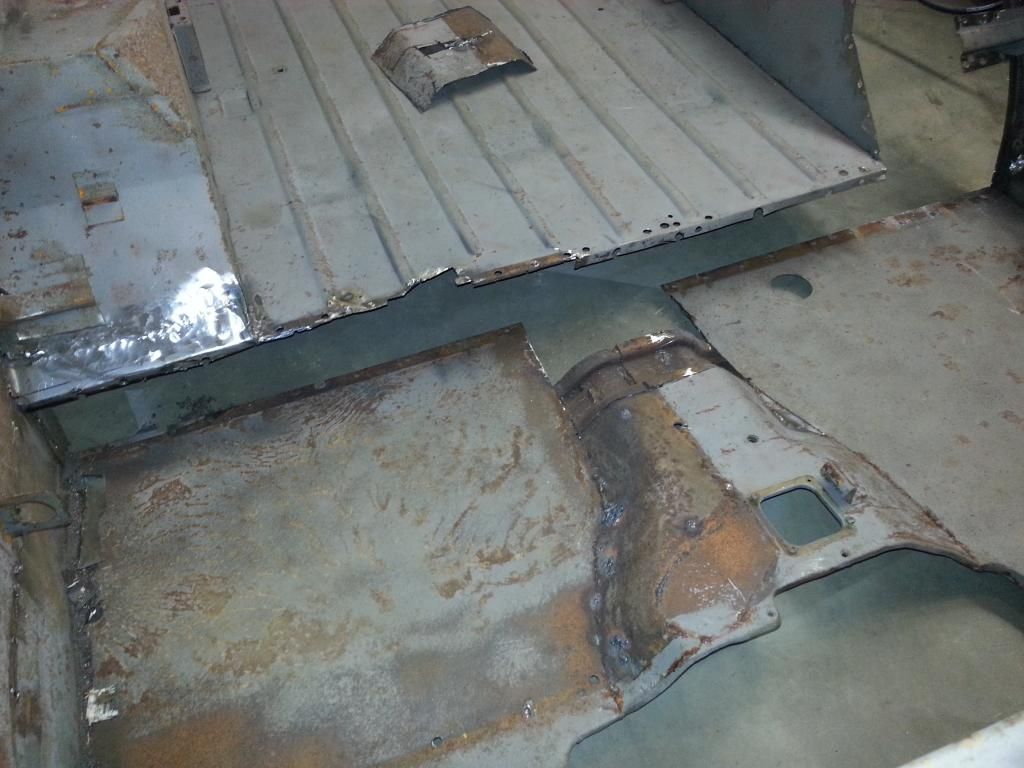  I think I may drag the old stripped frame back inside and mount the tub to it to make sure I get the riser installed in the correct location and to help keep the whole tub squared up. My MD Juan replacement tool box arrived today too. What a trainwreck that thing is. I need to digest what I'm even looking at before I post any more about it. Yikes. |
|
|
|
'52 M38
Jan 2, 2015 21:42:22 GMT -5
Post by zooke581 on Jan 2, 2015 21:42:22 GMT -5
You're really getting at it. Nice work. So...what's with the tool box, assembly required? Inquiring minds want to know.
|
|
|
|
'52 M38
Jan 2, 2015 22:01:36 GMT -5
Post by Ryan_M on Jan 2, 2015 22:01:36 GMT -5
So...what's with the tool box, assembly required? Inquiring minds want to know. Here's a couple pics.  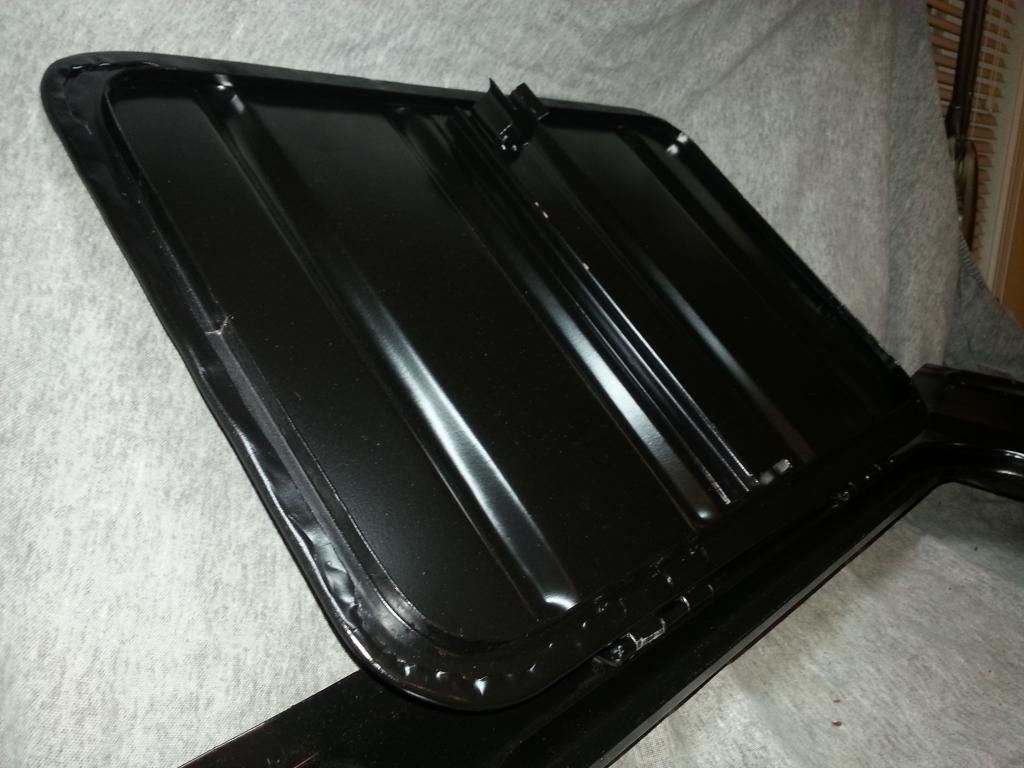 I'm already thinking about trying to scavenge the lid of my old tool box and swap it out for this bizarre looking thing. Aside from that the tool box itself does not look like it will allow itself to be installed without a fight. These things are made from scratch. Why not make them right? Why? Why? Why? |
|
|
|
'52 M38
Jan 2, 2015 22:13:01 GMT -5
Post by zooke581 on Jan 2, 2015 22:13:01 GMT -5
Wow! That looks nothing like the one I cut out and sold. Sorry it is already gone. You sure could have used it. Glad my WWII jeeps don't have one under the seat.
|
|
Deleted
Deleted Member
Posts: 0
|
Post by Deleted on Jan 3, 2015 8:48:18 GMT -5
I hate to tell you this, been down this road, check the fit of the original in the opening first. That too doesn't fit. MD Juan strikes again. I've gone to classic enterprises, Midwest Military, or buy good original take outs. Those fit and work. Why buy a new piece and then cut it all up and it still doesn't look right? The tool box is a tough one to find in good condition. If it is, the whole Jeep tub is usually good and you use that instead. That's what I'm doing on my M38. Oil
|
|
|
|
'52 M38
Jan 3, 2015 14:30:01 GMT -5
Post by Ryan_M on Jan 3, 2015 14:30:01 GMT -5
I had been looking around for a good used one and just couldn't find any. John Bizal replied something along the lines of "I don't have any and the MD Juan's are terrible". I should have listened. I checked Classic Enterprises and didn't see any listed - maybe I should have called them.
Aside from the screwy lid I did set it in place and could immediately see that it's going to take some work to make it fit.....just how much work remains to be seen. We'll get there soon enough.
|
|
|
|
'52 M38
Jan 3, 2015 21:16:33 GMT -5
Post by Ryan_M on Jan 3, 2015 21:16:33 GMT -5
The floor patch came out much better than expected. You'll still be able to tell that it's an obvious repair but I didn't burn through or have to cut out any of the ridges. I'll neaten it up some more once the floor riser is installed. Clamped 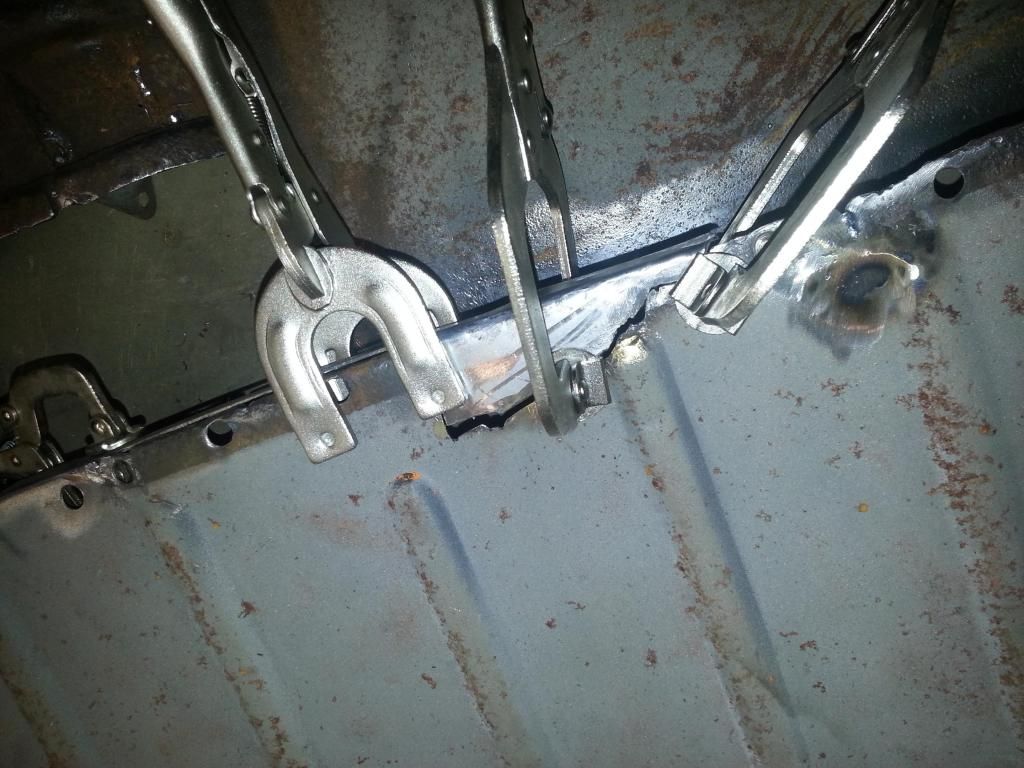 Tacked  Done   |
|
|
|
'52 M38
Jan 3, 2015 21:25:08 GMT -5
Post by Moose on Jan 3, 2015 21:25:08 GMT -5
Impromptu poll: who has NOT taken a selfie like the one above this post? Lol
|
|
Deleted
Deleted Member
Posts: 0
|
Post by Deleted on Jan 4, 2015 6:11:23 GMT -5
No.
|
|
|
|
Post by Haines Garage on Jan 4, 2015 8:34:04 GMT -5
That is some funny stuff. Floor looks great Ryan.
|
|
|
|
'52 M38
Jan 8, 2015 18:24:36 GMT -5
Post by Ryan_M on Jan 8, 2015 18:24:36 GMT -5
|
|
Deleted
Deleted Member
Posts: 0
|
'52 M38
Jan 8, 2015 18:53:12 GMT -5
Post by Deleted on Jan 8, 2015 18:53:12 GMT -5
You can't fool me, it's a brand new one! Nice job. The red gaskets are what kind of rubber? I've seen black and gray, but not red. Oil
|
|
|
|
'52 M38
Jan 8, 2015 19:06:52 GMT -5
Post by Ryan_M on Jan 8, 2015 19:06:52 GMT -5
No idea what the red gaskets are. The rebuild kit came from "Army Jeep Parts" in PA and Scout gave it his blessing prior to the overhaul. That was good enough for me.
Oil you have made me a little nervous with your comment on OldJeepCarbs about how finicky these things can be. I always just assumed they were the same innards as a WO but apparently not. I should have know that with the water proofing gear of the M38. I'll guess I'll find out first hand soon enough.
|
|
Deleted
Deleted Member
Posts: 0
|
'52 M38
Jan 8, 2015 20:07:24 GMT -5
Post by Deleted on Jan 8, 2015 20:07:24 GMT -5
I'm running 3 of the YS's and I find they need full choke and much more cranking to get the engine started. They are extremely finicky about any blockages in the primary (idle) fuel circuit. Other than that, they run fine. I think part of the cranking thing is that the fuel in a military M38 has to be sucked up and out the top of the tank. No gravity in it's favor. It also has a internal tank military filter to go through. I like the larger capacity tank though. Watch for leaks on those two covers. It drips directly down on the intake/exhaust on the L 134, not the F head. Oil
|
|
|
|
'52 M38
Jan 8, 2015 20:09:25 GMT -5
Post by Haines Garage on Jan 8, 2015 20:09:25 GMT -5
That looks Fantastic! Nice Job Scout! You did the flip side of mine, very cool!
I am excited for Rick, the Scout Pilot. He has his own website up, and running. Does great work, and us a man of his word.
Awesome!!
|
|
Deleted
Deleted Member
Posts: 0
|
'52 M38
Jan 8, 2015 20:27:52 GMT -5
Post by Deleted on Jan 8, 2015 20:27:52 GMT -5
Awesome!
|
|
|
|
'52 M38
Jan 10, 2015 15:59:53 GMT -5
Post by Ryan_M on Jan 10, 2015 15:59:53 GMT -5
It's only once you start welding body panels do you seriously determine the number of vice grips in your possession. Never before have mine all been assembled in one place at one time. Turns out I have 13. I was surprised at that number. I would have guessed half that many. Regardless, I'll likely be purchasing some more. The floor riser and transmission hump panel are in.... 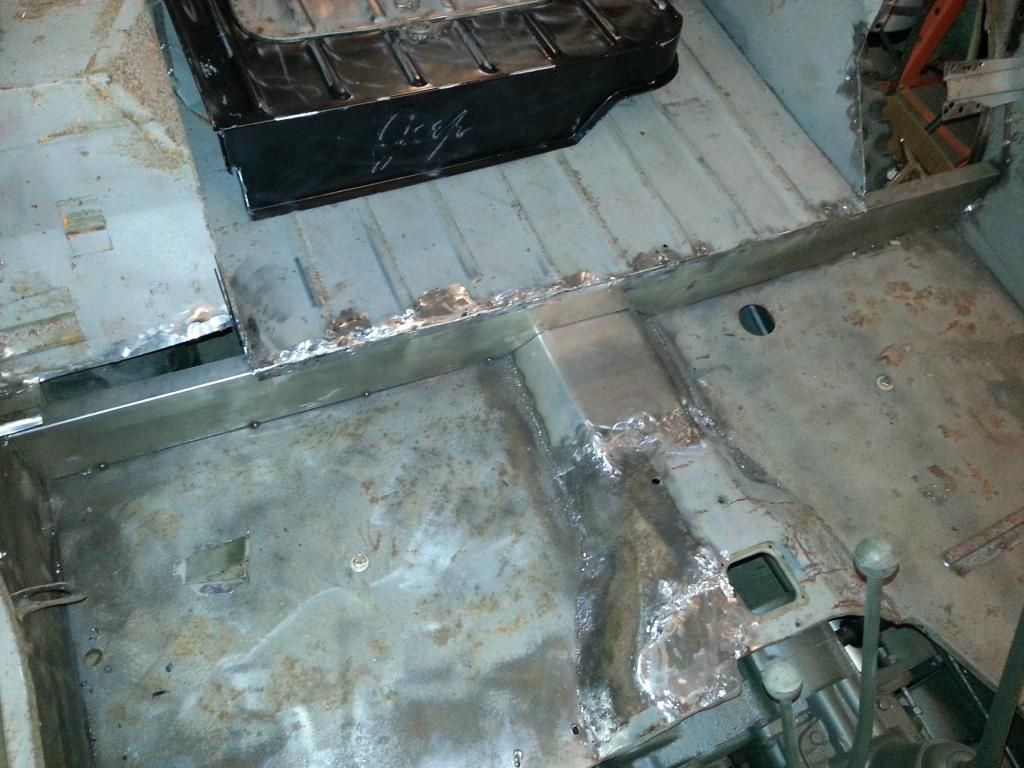 ...so the CRAPCO toolbox was the order of the day. I'm pretty sure this lid is just a flattened Pepsi can painted black.  So off it comes...  ...and is replaced with the lid from the original M38 tool box. 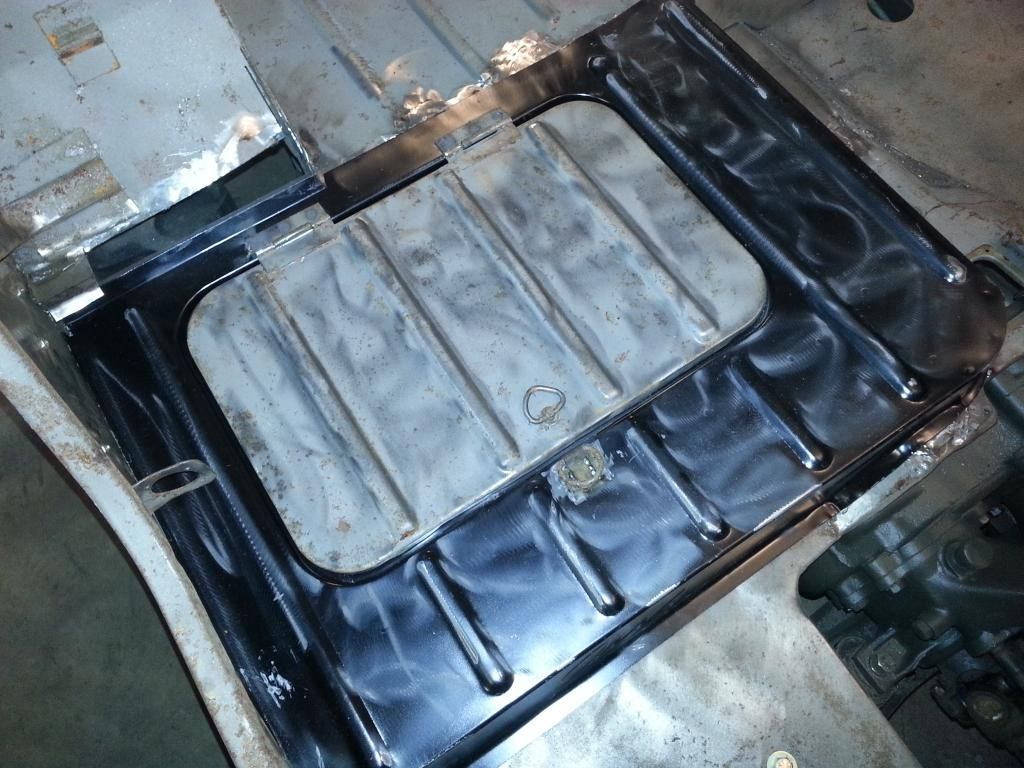 MD Juan must also assume that everyone has an extra latch loop so they don't bother putting one on their tool box either. No problem, I had one of those too. 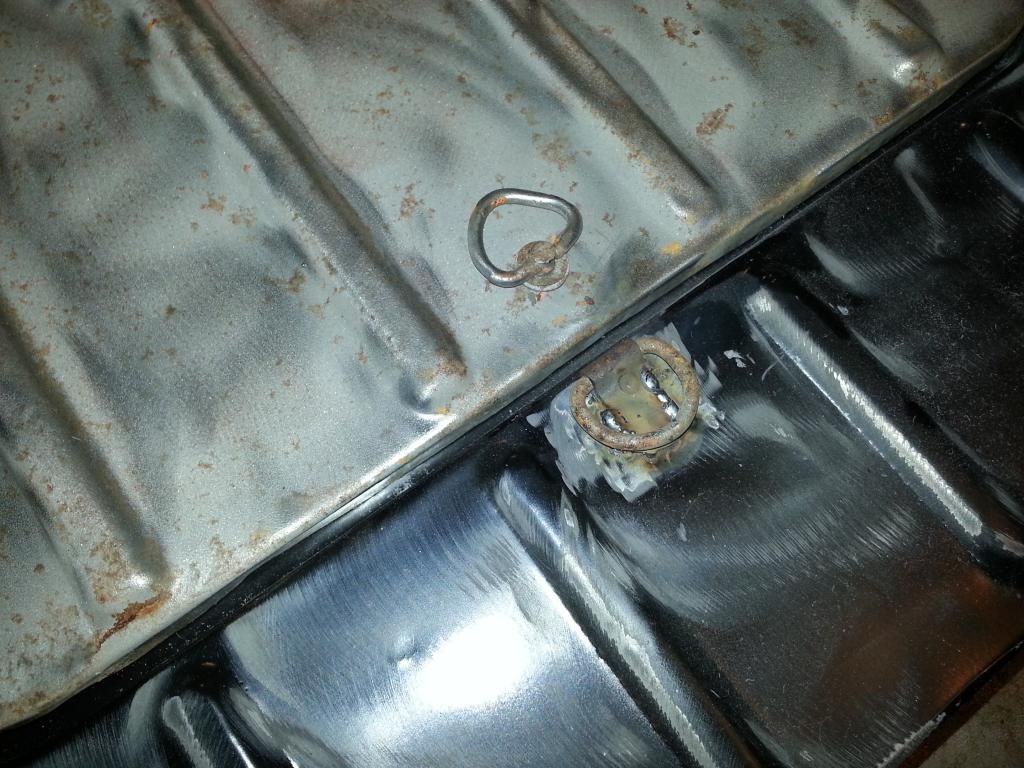 Aside from this I had to snip, grind, and bend quite a few edges and oddly positioned bracing channels that were seemingly installed for no other reason than to get in the way. I'm waiting until the wheel houses to arrive before I actually attach the tool box to the tub but I think it's in pretty good shape now. Oh yeah, better save this rain gutter because the tool box doesn't have one of those either. 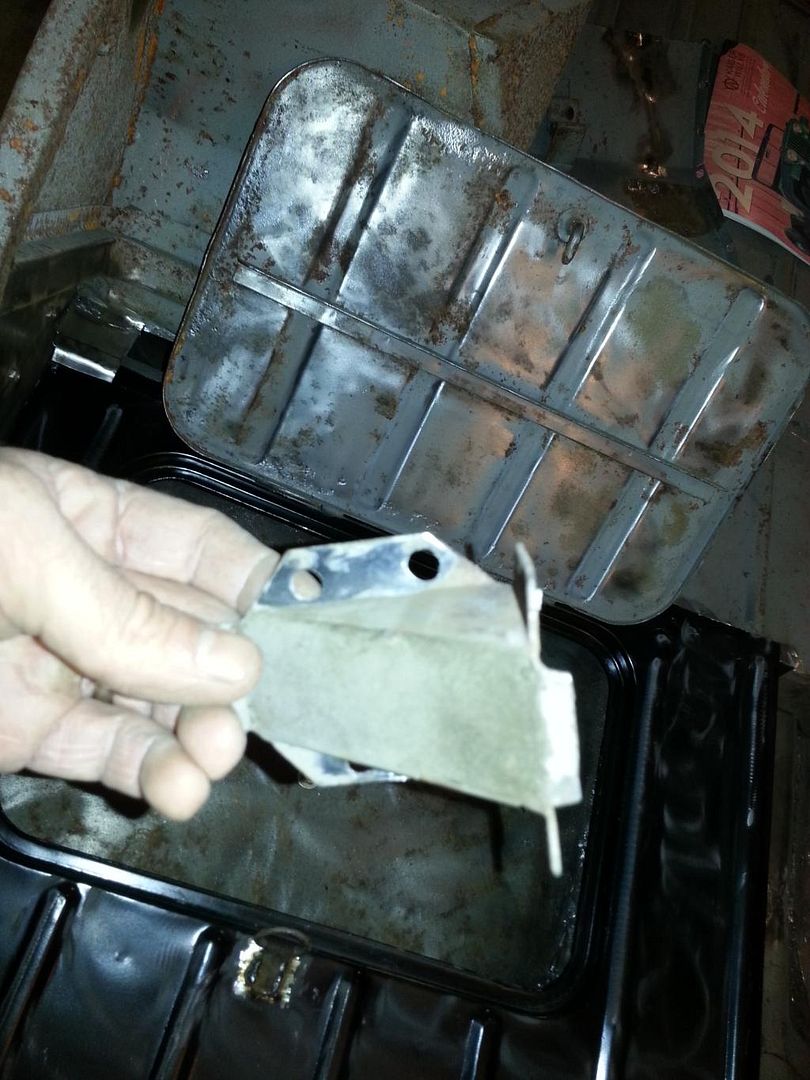 I guess I should be appreciative that MD Juan is making these toolboxes as apparently they are the only ones doing it. If someone else out there wants to dive into the Willys tool box manufacturing arena you won't have to work that hard to decimate a monopoly. |
|
Deleted
Deleted Member
Posts: 0
|
'52 M38
Jan 10, 2015 16:35:48 GMT -5
Post by Deleted on Jan 10, 2015 16:35:48 GMT -5
No idea what the red gaskets are. The rebuild kit came from "Army Jeep Parts" in PA and Scout gave it his blessing prior to the overhaul. That was good enough for me. Oil you have made me a little nervous with your comment on OldJeepCarbs about how finicky these things can be. I always just assumed they were the same innards as a WO but apparently not. I should have know that with the water proofing gear of the M38. I'll guess I'll find out first hand soon enough.
While the YS does have a metering rod, it is not in the conventional sense. It is not actuated mechanically alone. Vacuum pressure activates the mechanism when more fuel is called for with the accelerator pump. The two "bumps" on the sides are the housings for the accelerator pump and the metering rod. It is unlike the YF, in that this setup allows for water-proof (obviously up to a point, or down to a certain depth, if you will.) operation in conjunction with the fording/breathing system. |
|
Deleted
Deleted Member
Posts: 0
|
'52 M38
Jan 10, 2015 16:39:35 GMT -5
Post by Deleted on Jan 10, 2015 16:39:35 GMT -5
I'm running 3 of the YS's and I find they need full choke and much more cranking to get the engine started. They are extremely finicky about any blockages in the primary (idle) fuel circuit. Other than that, they run fine. I think part of the cranking thing is that the fuel in a military M38 has to be sucked up and out the top of the tank. No gravity in it's favor. It also has a internal tank military filter to go through. I like the larger capacity tank though. Watch for leaks on those two covers. It drips directly down on the intake/exhaust on the L 134, not the F head. Oil
|
|
Deleted
Deleted Member
Posts: 0
|
'52 M38
Jan 10, 2015 17:06:10 GMT -5
Post by Deleted on Jan 10, 2015 17:06:10 GMT -5
Do you mean the float chamber vent over to the crossover? Mine are piped in Waterproof style. Oil
|
|
Deleted
Deleted Member
Posts: 0
|
'52 M38
Jan 10, 2015 18:21:22 GMT -5
Post by Deleted on Jan 10, 2015 18:21:22 GMT -5
Correct size, no kinks, no blockages?
|
|