|
|
'52 M38
Jan 18, 2014 23:21:08 GMT -5
Post by Ryan_M on Jan 18, 2014 23:21:08 GMT -5
Transmission, transfer case, bellhousing have been reunited and set atop a new crossmember. Rubber mounts are also new as are the throwout bearing, bearing carrier, and spring. 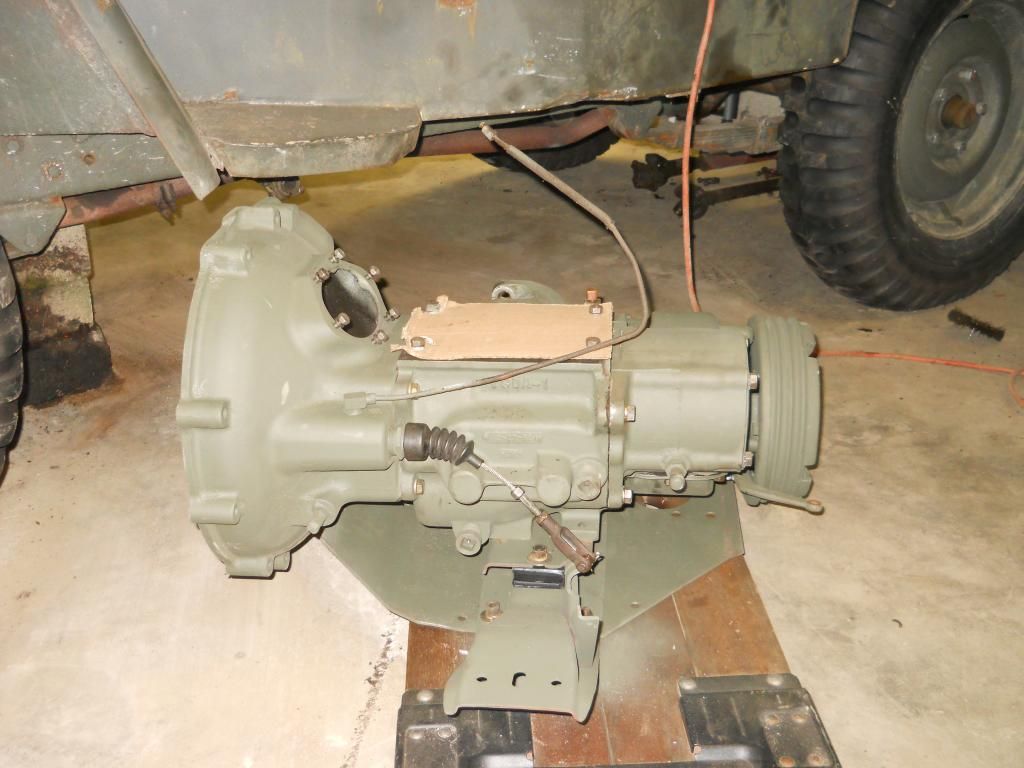 I'm not sure what this completed assembly weighs but it is all I can do to pick it up and carry it across the garage. I don't have a transmission jack nor am I too excited to buy one. Since I have the luxury of an M38 removable floor I could have rigged up some type of overhead crane but I didn't feel like I had the right equipment for that today either. What I do have is a fair amount of scrap wood. I decided to build a crib system. Prying up one side, slipping in a piece of wood, and then repeating on the other side, I slowly but steadily raised the whole unit to the exact level of the motor and slid it forward into place. The entire ordeal probably took a couple hours so it certainly wasn't real efficient but not too terrible either. I consider the fact that it worked at all a success. With that said, if I have to do this again anytime soon I'll pick-up a heavy duty come-a-long and try the overhead method. I used a prybar under the skid plate to get the first couple blocks inserted.  After that I was able to use a 2x4 as a lever. 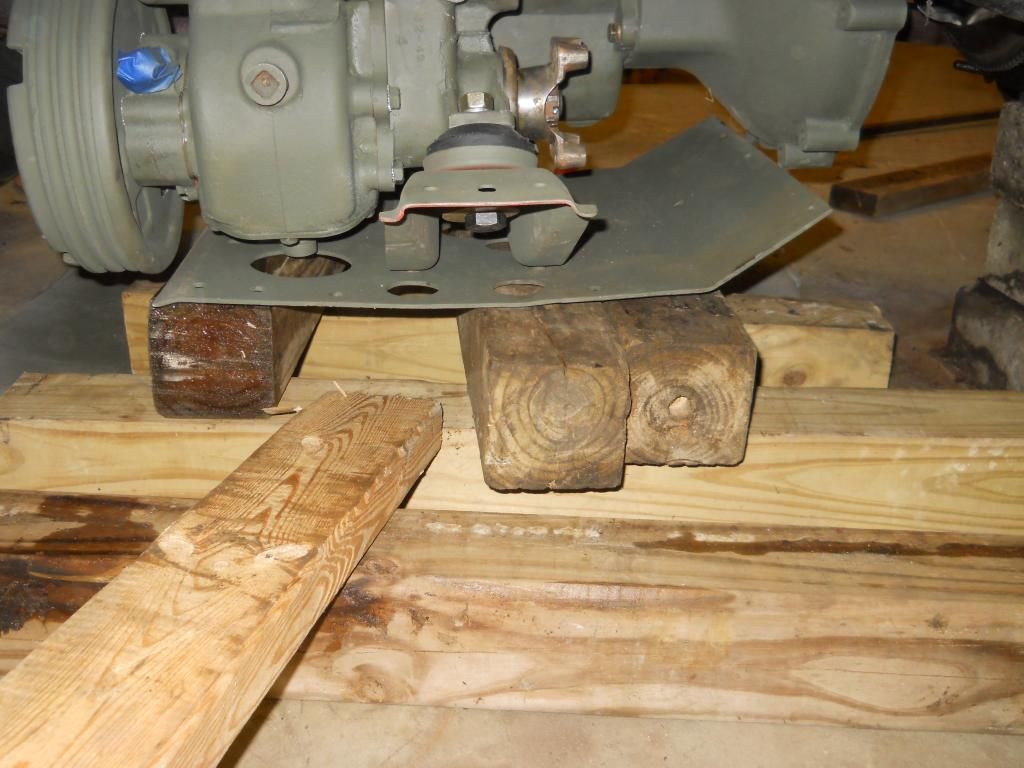 Eventually it was high enough that I could use the floor jack under the ends of the crossmember to raise it up for the last couple crib blocks. 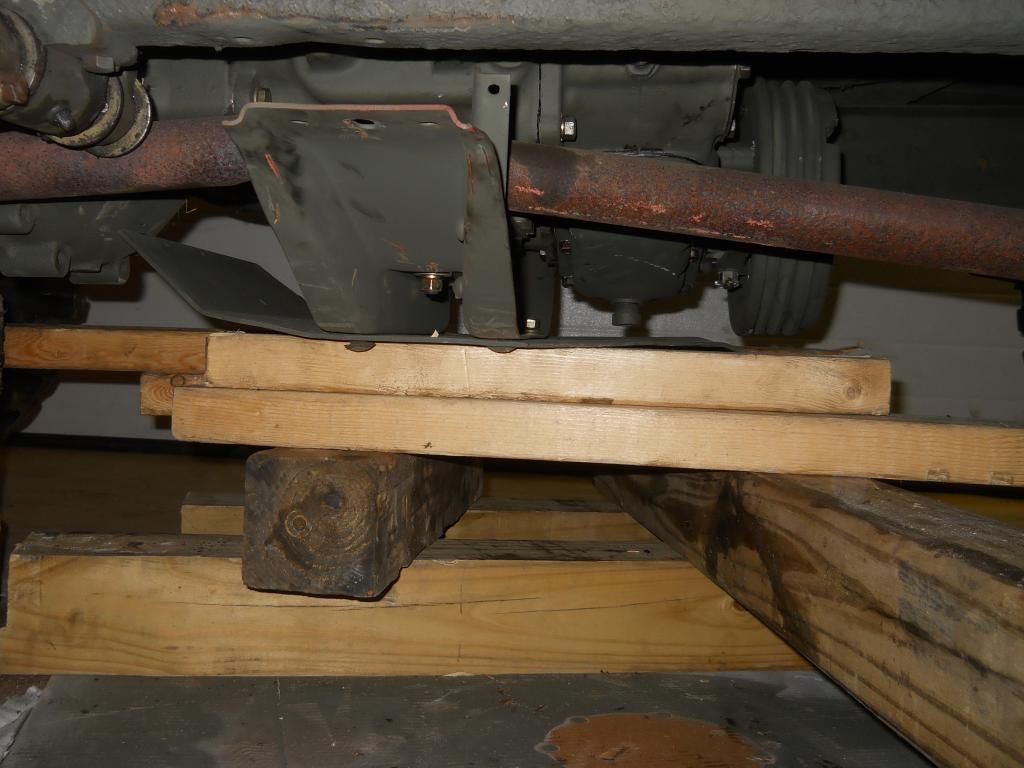 Once the crossmember ends were high enough to bolt loosely to the frame I removed all the cribbing. I had been supporting the engine with cinder blocks and was able to remove those too. Tightening a little here and a little there along with some persuasive leveling with the use of the floor jack under the engine skid plate I finally pulled it all tight. Here's everything back in place. I'm leaving the inspection cover off for now until the clutch pedal and all the linkage is back in place.  Motor mounts are shot so time permitting tomorrow that's the next mini-project. It's easy to work up there since the radiator is still out for repair. Once that's done it'll be onto the driveshafts and u-joints. |
|
Deleted
Deleted Member
Posts: 0
|
'52 M38
Jan 19, 2014 7:28:46 GMT -5
Post by Deleted on Jan 19, 2014 7:28:46 GMT -5
How did I miss this thread??!
Oh, well...I think I'm caught up to speed now. What a fun ride!
The wY you raised your transmission back into the jeep was the same method I used on my WC when I removed it. I think it was ingenious AND clever!
Bo!
PS...the humor in your writing is cracking me up! Your internal thoughts are priceless.
|
|
Deleted
Deleted Member
Posts: 0
|
'52 M38
Jan 19, 2014 8:06:54 GMT -5
Post by Deleted on Jan 19, 2014 8:06:54 GMT -5
Where there is a will, there is a way. Well done! I've read threads where guys doing the removal/install take the round swivel plate off their floor jack and make a bolt on adaptor that sits in the jack location of the round plate. They then have made a floor jack, transmission jack, that rolls. I'm spoiled, I go across the street from my shop and borrow the transmission shops professional jack and do it on my car hoist. It has a two way adjustable plate. Very nice. John
|
|
|
|
'52 M38
Jan 19, 2014 20:57:45 GMT -5
Post by Ryan_M on Jan 19, 2014 20:57:45 GMT -5
Hey Bo! Glad you found the thread. You'll be pleased to know that this M38 is the new home of your listed-as-the-driver-side-but-actually-goes-on-the-passenger-side steering knuckle I bought from you on ebay. I removed the 4 pounds of complimentary vintage grease that it arrived with though. Good thinking to cake it up like that. Should the shipping box have been left out in the rain or fallen to the bottom of the sea that knuckle never would have rusted. Aside from that, it's just as you sent it. Works perfect and at a great price. Slick as... well, grease! And John, I thought about trying to retrofit some type of bracketry on the floor-jack but that had its own hurdles I didn't want to deal with. Maybe next time. So today I started with a quick motor mount swap. I said I wasn't going to splurge on too many upgrades for this project so I may have pulled the trigger early in replacing these guys. Probably could have gone another half-century or so...or maybe not: 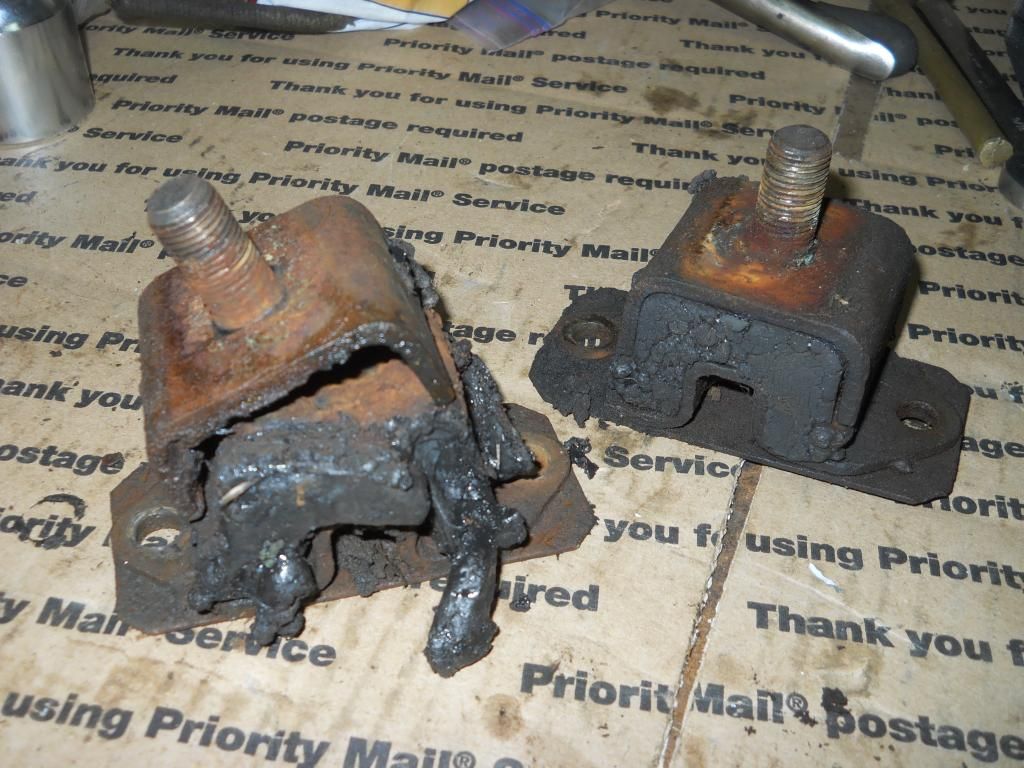 With the motor mounted and after some more fiddling with the reinstalled trans/TC, Project Driveshaft was the main mission of the day. Like everything else on this rotbox, they were pretty disgusting: 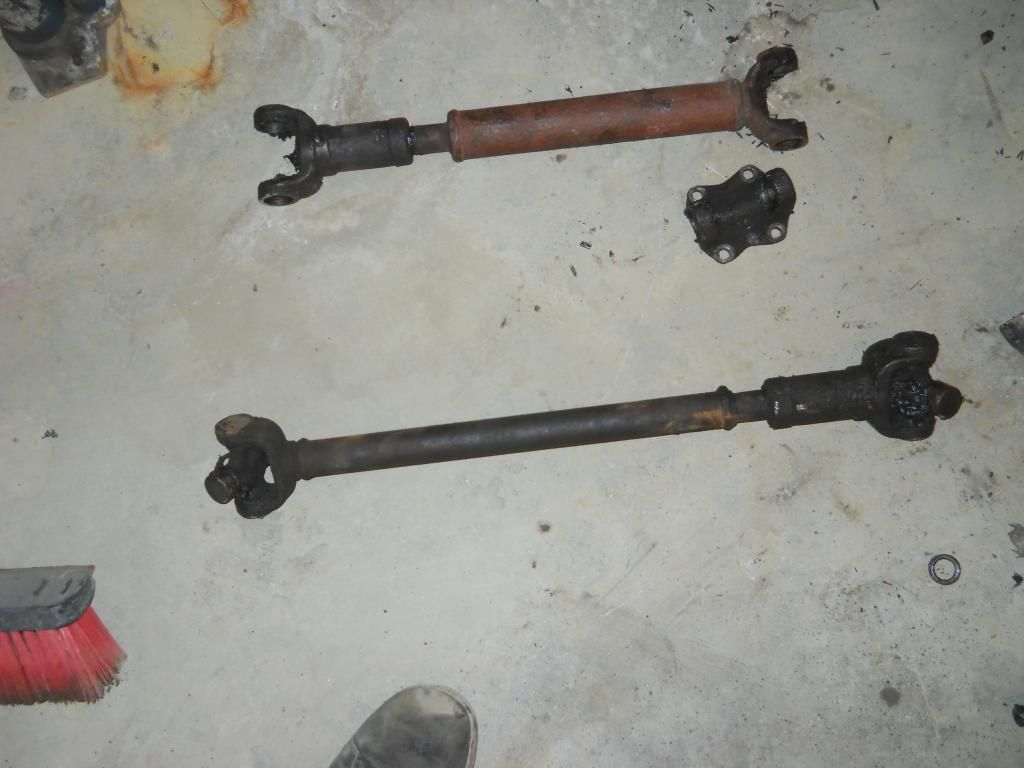 But I got them cleaned up:  While installing new Spicer u-joints I managed to screw one up and actually had to cut the thing in half with the grinder. I must have flipped one of the needle bearings down causing the end cap to wedge badly in the driveshaft ear while trying to hammer it home. Numerous thundering blows with my trusty BFH and then a few more with a B'rFH proved futile. Nothing like taking a shiny new component off the shelf and within 30 minutes of it being out of the box you're unceremoniously butchering though it in a shower of grinder sparks. So for now the rear driveshaft is installed on the Jeep but the front one will have to wait until another u-joint can be had. I got a good look at the starter too. I would have gotten a better look at it on the ground at the Dairy Queen parking lot this summer had I not dealt with it here. It was held in place only by the single decrepit bolt through the bell housing. All traces of the rear bracket were gone. Probably rotted off sometime during the Carter administration. I have some questions about this starter but that's a topic for a different thread. 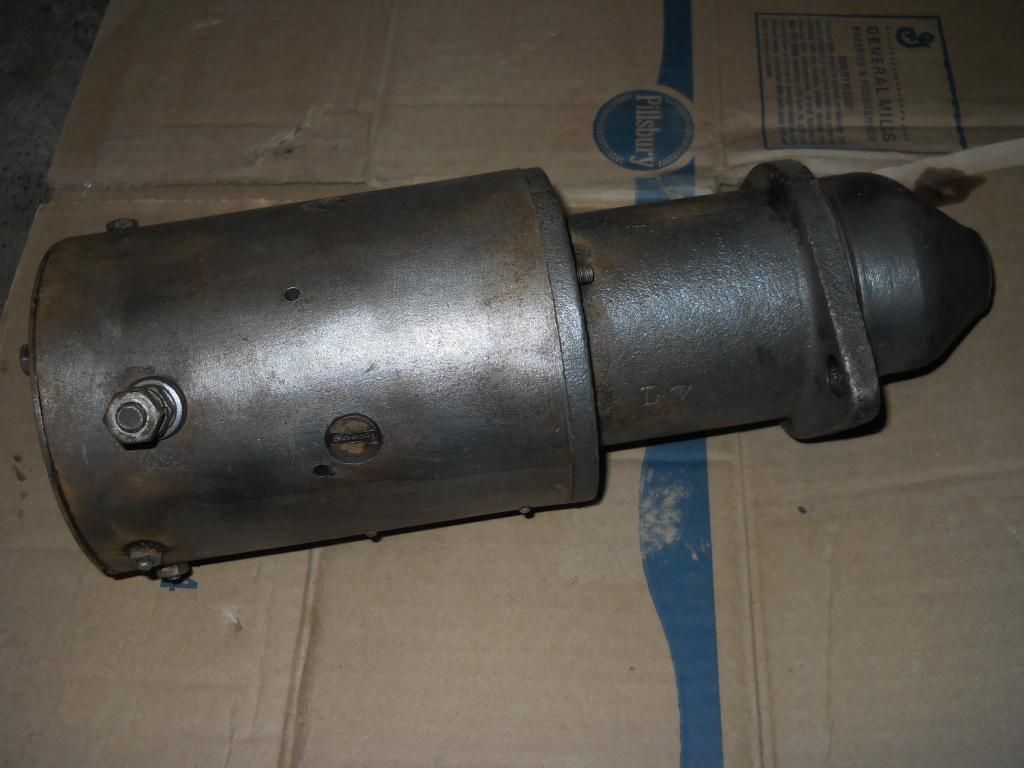 |
|
|
|
'52 M38
Jan 19, 2014 21:58:47 GMT -5
Post by Haines Garage on Jan 19, 2014 21:58:47 GMT -5
Ryan,
That is looking Very Nice.
I enjoy watching your work in Progress.
The Install trick was COOL as well.
I also like the cardboard cover you made for the top of the Transmission. That should go under Tips and Tricks. GREAT IDEA!
|
|
|
|
'52 M38
Jan 25, 2014 21:20:44 GMT -5
Post by Ryan_M on Jan 25, 2014 21:20:44 GMT -5
The recently mutilated radiator is back from the shop and back in the Willys - held snugly in place with its new support rod this time. 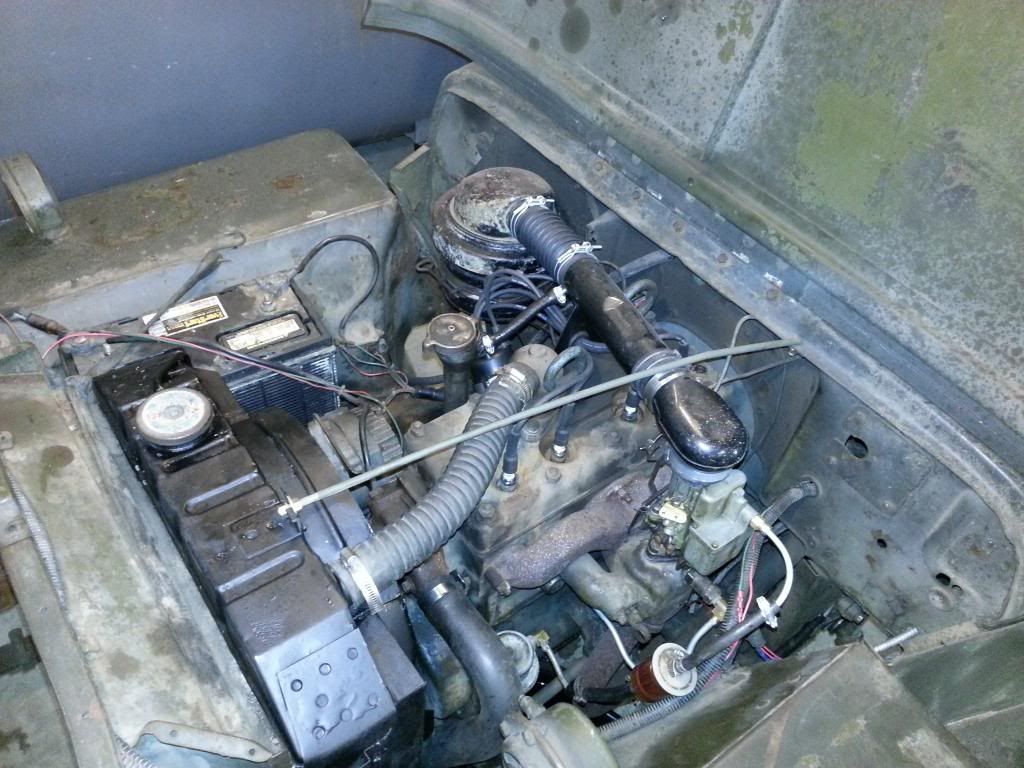 I also removed the hardware store plumbing elbow and replaced it with a functioning PCV valve that I scavenged from a buddy's spare parts bin. The heat riser is seized in place but I have no desire to go chasing after that until some other more compelling reason drives me to pull the manifolds off. I get nervous just looking at those rusted manifold studs. Initial test drive with the rebuilt trans and TC passed with flying colors. Shifts are crisp and tight which is a huge relief - with a little luck they stay that way. Hopefully I'll get some more laps around the yard in tomorrow. It's dark and snowing hard tonight. 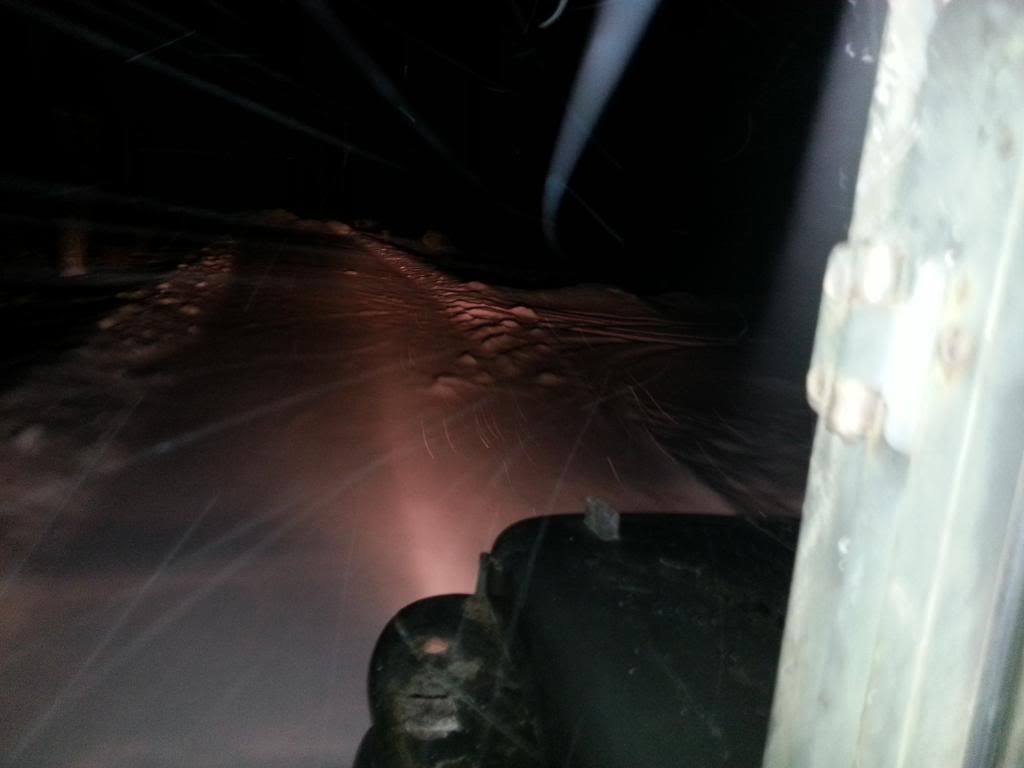 |
|
|
|
'52 M38
Jan 25, 2014 22:14:55 GMT -5
Post by Haines Garage on Jan 25, 2014 22:14:55 GMT -5
Looking Good! Tearin' it up in the snow..Even Better!
|
|
|
|
'52 M38
Nov 13, 2014 14:14:32 GMT -5
Post by Ryan_M on Nov 13, 2014 14:14:32 GMT -5
I haven't updated in awhile but I've put over 1350 miles on the M38 this summer (in addition to 3500+ on my 3A). It runs and drives superbly and has really been a blast. I even survived a direct hit from a tree that fell on me WHILE DRIVING! 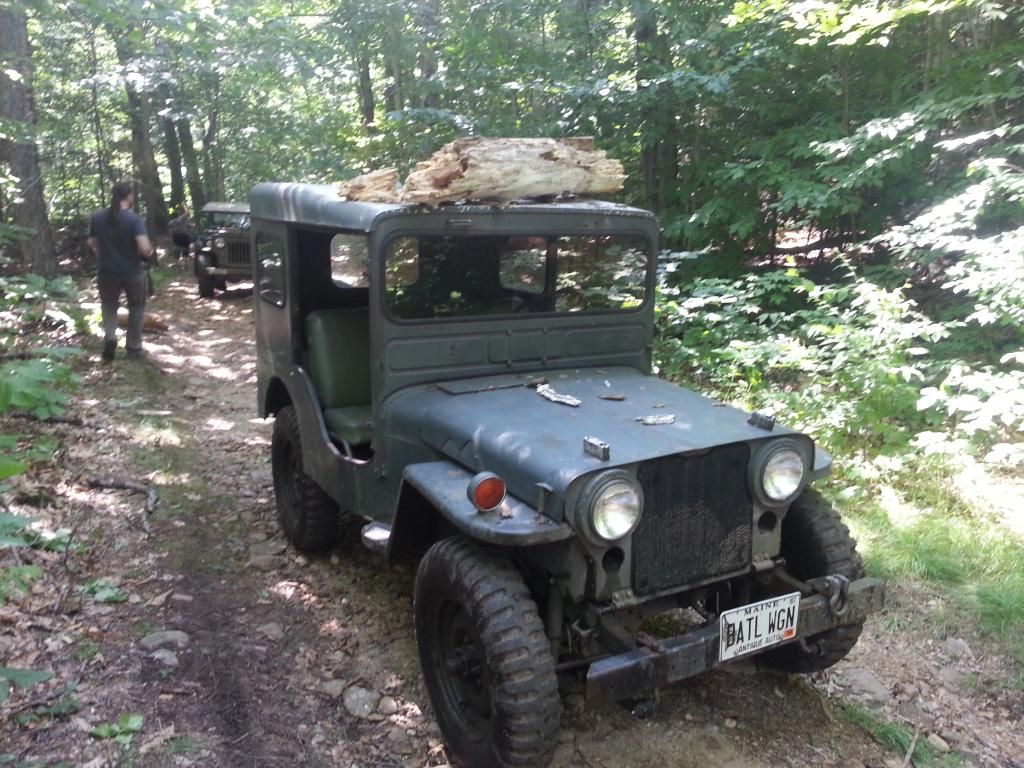 Although it runs well, the frame is marginal at best and the body is completely shot. It's loads of bondo over patch panels that were welded right over the rusty originals. The patch panels are now rotting through. The fenders are welded to the tub and everything is just a mess up there. A couple weeks ago, I dragged this home after it popped up on Craigslist. It's a very solid frame and very clean donor tub. It has replacement floor panels, hat channels, and a few other fixes but they appear to be well done. It still needs help in a couple of small tender areas, especially around the tool box. The rest of the body parts were included too and all are in great shape, which is rare up here in the land of the road salt. 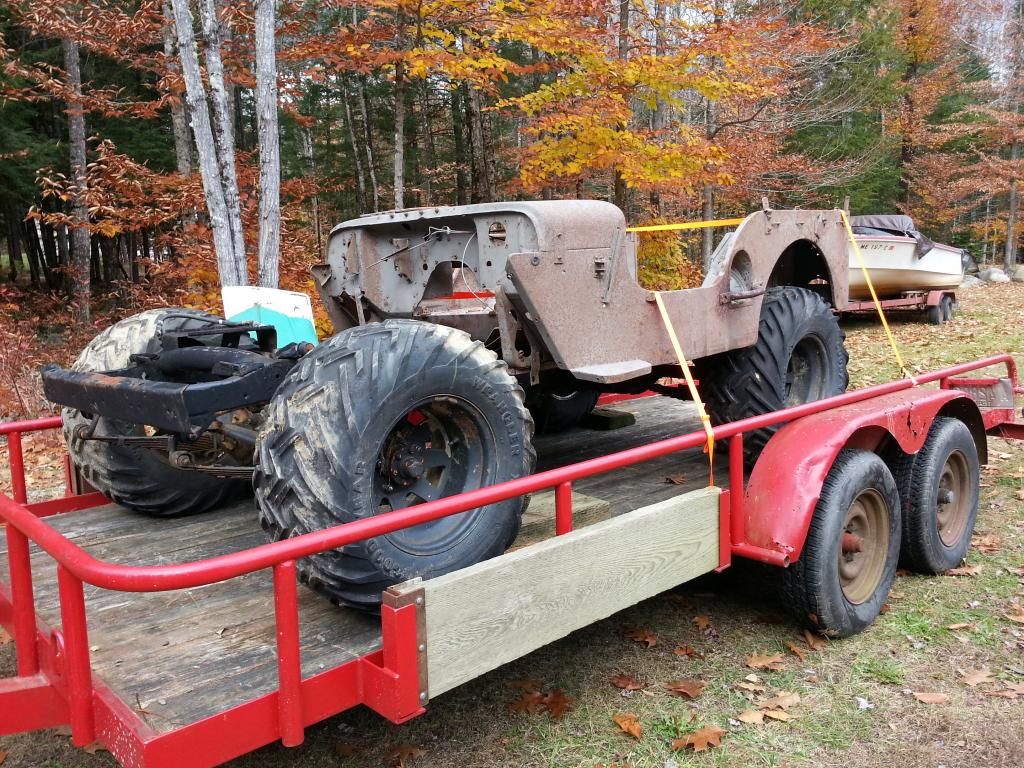 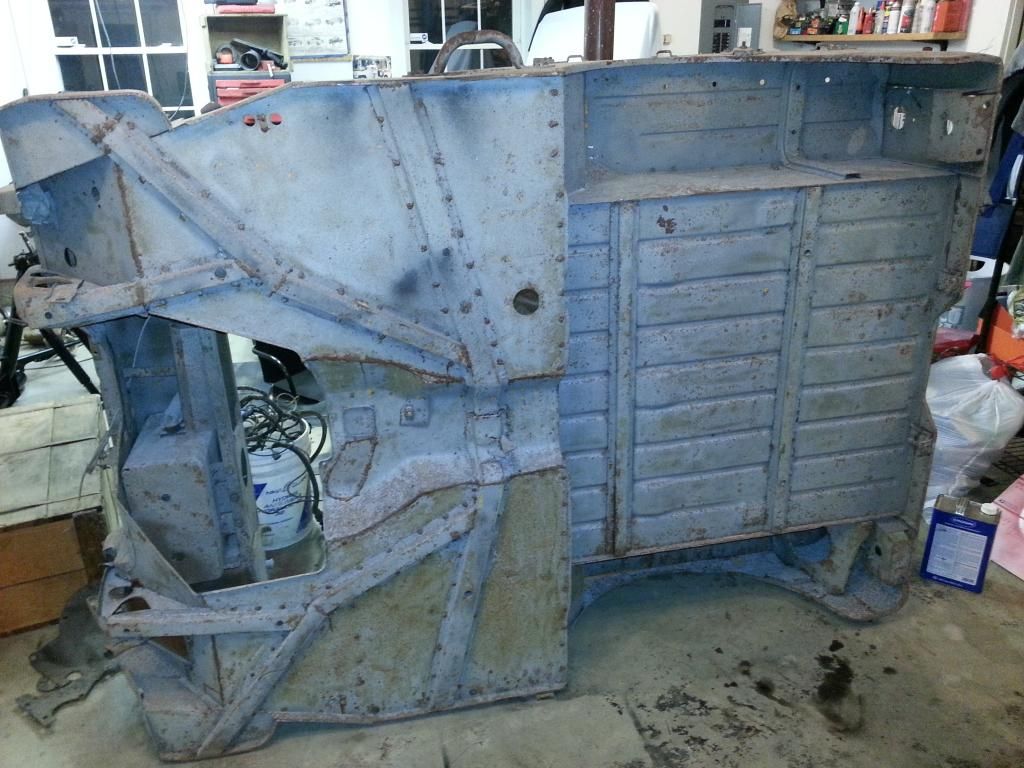 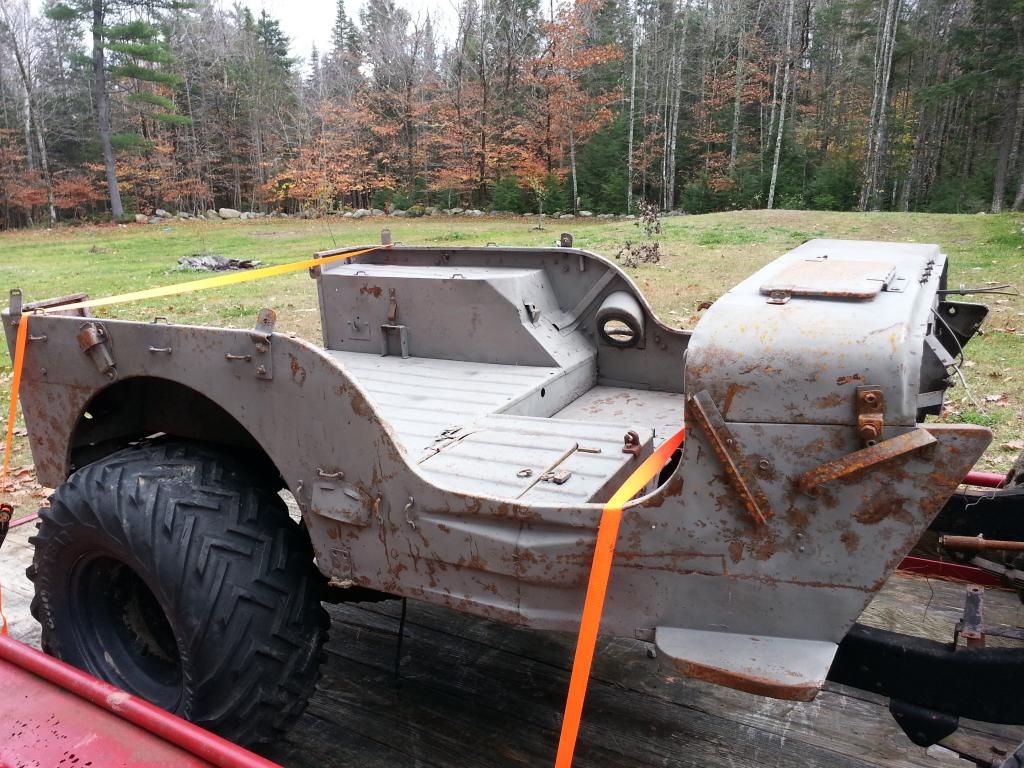 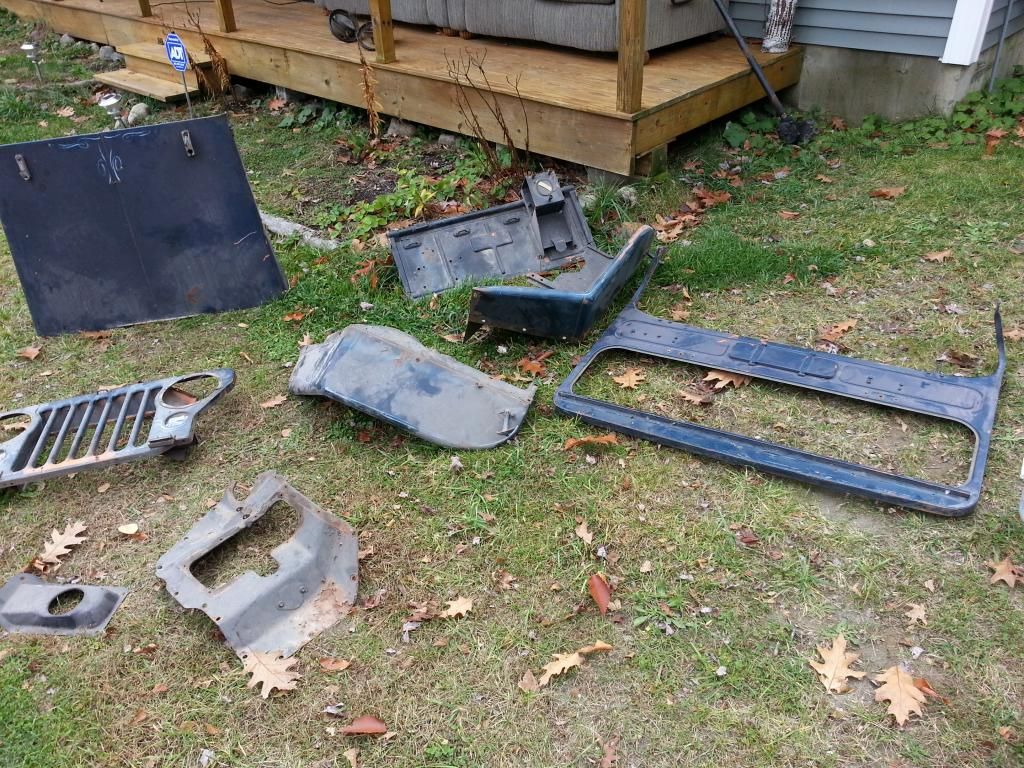 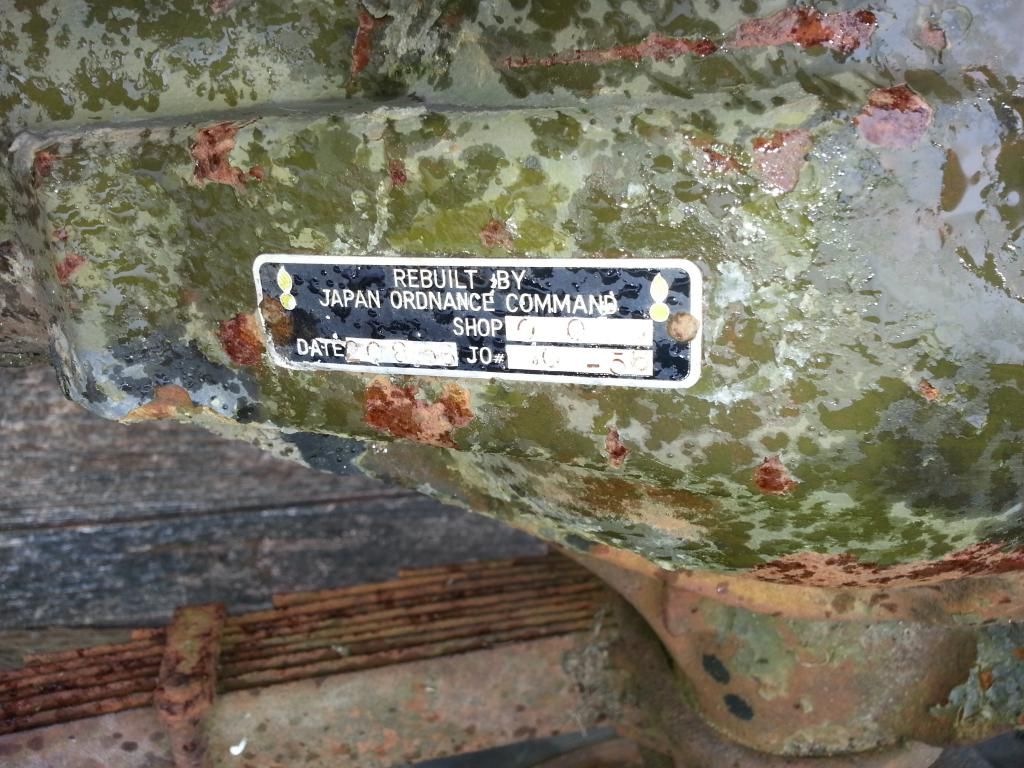 The plan is to migrate all the running gear from the current rig onto this nicer frame and then drop the donor body in place. I'm only going for a driver quality vehicle but at least I won't have to worry about falling through the floor. Looking forward to getting started on it. |
|
|
|
'52 M38
Nov 13, 2014 14:59:56 GMT -5
Post by surveypunk on Nov 13, 2014 14:59:56 GMT -5
Regarding lifting with a come along, folks do it all the time... 'till they get hurt! Much better tool is a chain hoist. They can be had for under a hundred smackers at most farm supply type places.
Otherwise great work! Those tires are something!
Best,
JB
|
|
Deleted
Deleted Member
Posts: 0
|
'52 M38
Nov 13, 2014 17:37:15 GMT -5
Post by Deleted on Nov 13, 2014 17:37:15 GMT -5
Wow!! Gotta love those terra tires! Haven't seen a set of those for about 30 years. There used to be 8 or 10 sets of those around Calgary back then. There was a lot of guy's running a set on the rear, and some on all 4. Real good on a hill climb!!
chuck
|
|
Deleted
Deleted Member
Posts: 0
|
'52 M38
Nov 13, 2014 18:03:37 GMT -5
Post by Deleted on Nov 13, 2014 18:03:37 GMT -5
There's just something about a old rotting Jeep that crys out "save me" that rings in my being. Thanks for the picture reminder! Oil
|
|
|
|
'52 M38
Nov 13, 2014 18:16:17 GMT -5
Post by Ryan_M on Nov 13, 2014 18:16:17 GMT -5
There's just something about a old rotting Jeep that crys out "save me" that rings in my being. Thanks for the picture reminder! Oil There's a lot more to the story here. They guy was selling the entire "project" but all I needed was the frame and body parts, which after much haggling, we made a deal on. A week or so of sleepless nights later I felt guilty enough to go back and buy the "other half" of the Jeep. Here's the haul from Round 2: 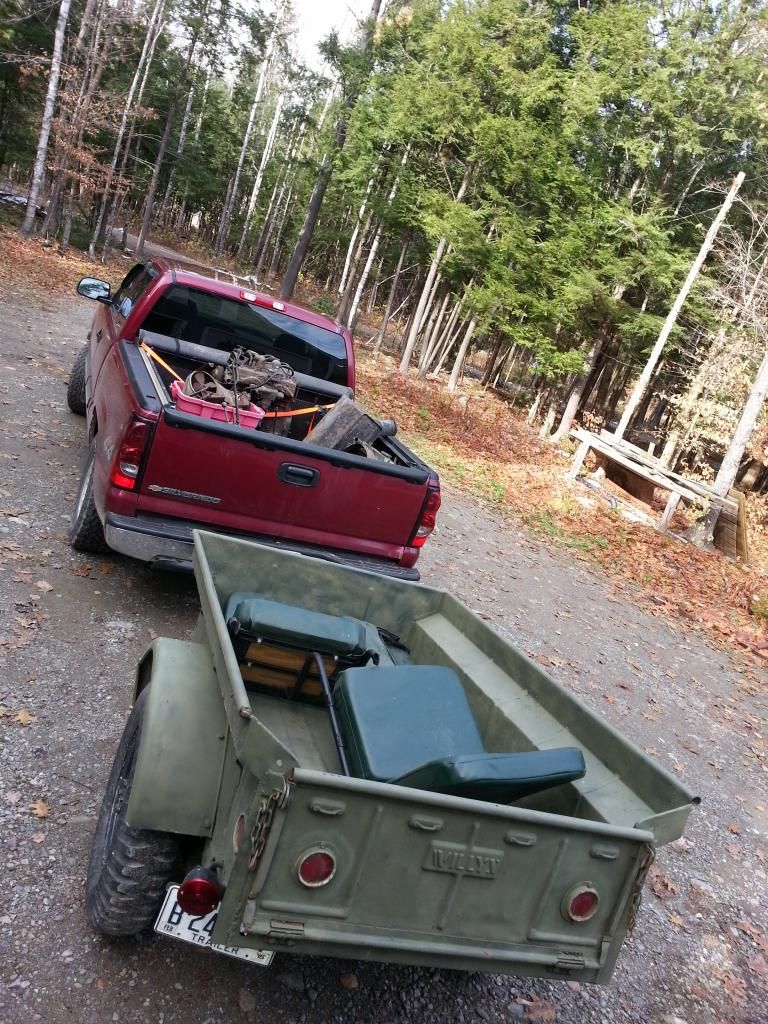  |
|
Deleted
Deleted Member
Posts: 0
|
'52 M38
Nov 13, 2014 18:40:42 GMT -5
Post by Deleted on Nov 13, 2014 18:40:42 GMT -5
Frankly, even finding a M38 gas tank is something now a days. By the way, I fixed my floor section in my M38 by using extra tool box lids with the ribbed pattern. Worked well. Oil
|
|
|
|
'52 M38
Nov 13, 2014 18:50:03 GMT -5
Post by Ryan_M on Nov 13, 2014 18:50:03 GMT -5
The gas tank is indeed a nice one. Very solid...and already sold. It's shipping out tomorrow. The one I have in my other M38 is not as pretty but has already been patched and sealed - I know for certain it's good so I'll be using it.
Great idea using the toolbox ribs for the floor repair. My donor tub is good except for the lip around the toolbox lid. I'm trying to figure out the best way to replace that section. For someone who just bought their first real welder yesterday my skills are pretty limited. You mentioned rogue methods in another thread here recently....you ain't seen nothing yet. Stay tuned.
|
|
|
|
'52 M38
Nov 15, 2014 16:05:24 GMT -5
Post by Ryan_M on Nov 15, 2014 16:05:24 GMT -5
Decided to dive into the "new" frame clean up effort last night. First, the running M38 pushing its soon-to-be new frame into the garage. Admittedly, it is now bittersweet driving the "old" M38 knowing it will soon be reduced to a pile of random parts on the garage floor. Yes, it will rise from the ashes, but still.... 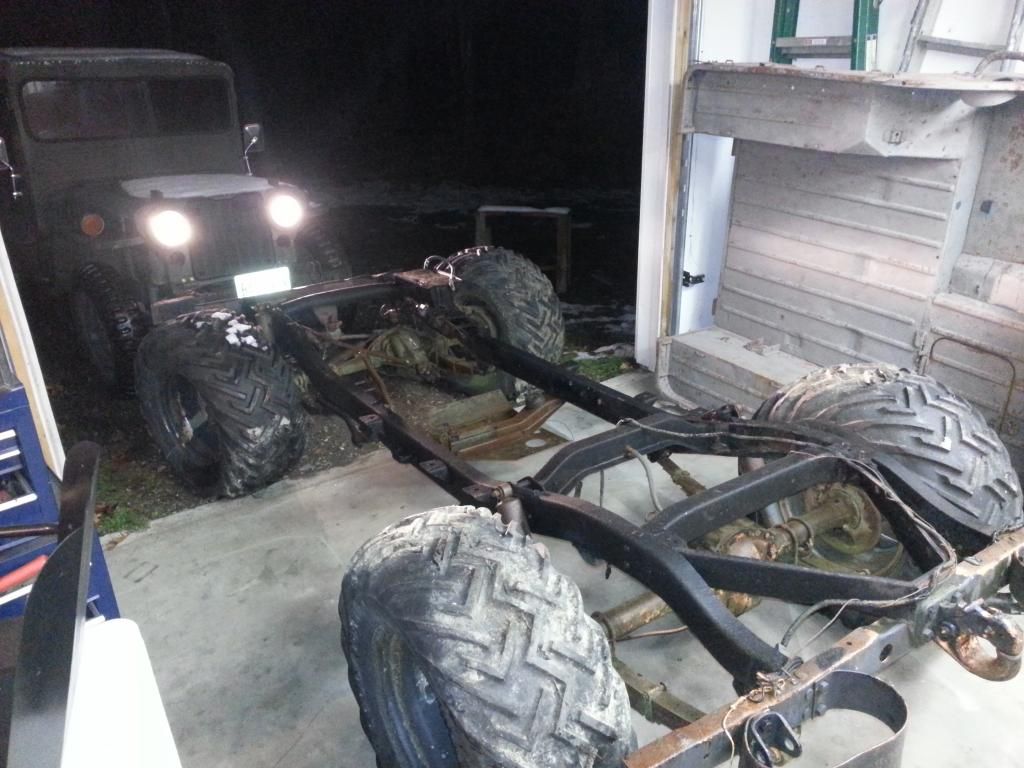 It's amazing how much quicker it gets each time I dismantle a jeep (or some part of one). I'm hoping I can say the same when it comes time for re-assembly. 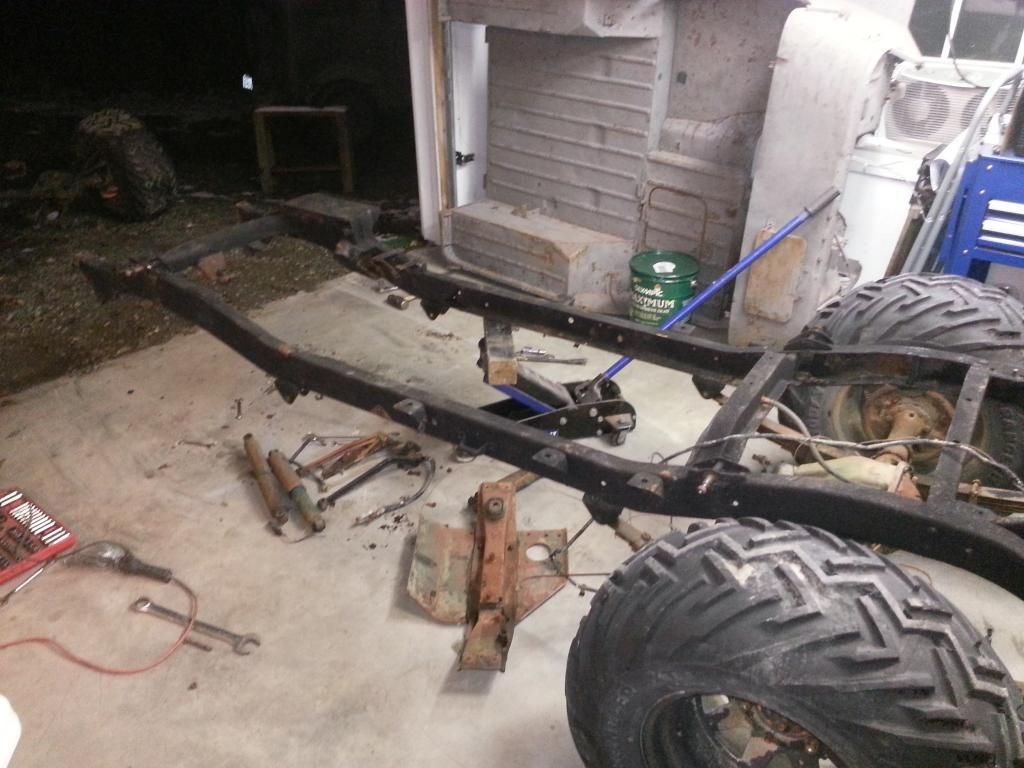 Bare frame back out in the driveway. I can carry it myself now. Spent about 6 hours and just as many wire wheels getting it cleaned up. Lots of interesting colors to be seen as the layers are ground away.  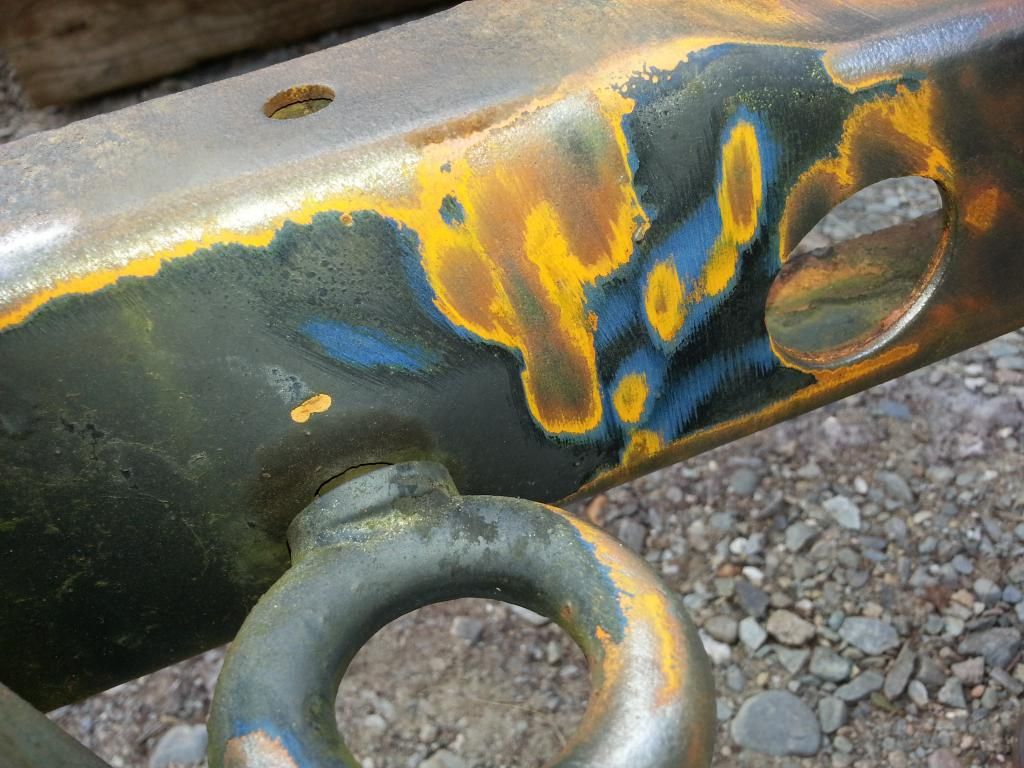 I'm torn here about throwing down the money for sandblasting and really doing this right or trying to keep to a smaller budget but with less impressive results. Since I don't want to spend the cash and I want to be driving this thing by spring, you will see the art of cutting corners as this thread continues. And besides, I do want a solid driver but don't want to lose that "down and dirty feel". Frame washed and degreased and back in the garage.  I finally bit the bullet and lugged home a Lincoln 140 mig welder. I'm going to try and fire it up tonight for a few small repairs to the rear bumper. An idiot with a welder. Stand back.... |
|
|
|
'52 M38
Nov 18, 2014 20:49:32 GMT -5
Post by Ryan_M on Nov 18, 2014 20:49:32 GMT -5
Frame cleaned and minor repairs made. I straightened a few of the significant dents in the bumpers and welded a couple cracks. The small dents and bent safety chain eyelets were left alone....they add character. POR-15 time!  I used Chassis Saver on my 3A and people either seem to love or hate POR so I wanted to try it myself. I did not prep the frame with the recommended POR cleaner so if it falls off next week I still can't necessarily blame it on the product. I brushed it on this time instead of spraying it like I did on the 3A. Brushing sure is a lot cleaner but it's tougher (if not impossible) to get all the little cracks and crevices. After a quick shot of el-cheapo primer (let the howling begin!) over the tacky POR, I let it sit for a few days. It took me nearly that long to hang all this freakin' plastic. The paintery:  And the painter:  And the paint:  This color was derived from a paint shop scan of an NOS M-38 grille. It looks way off but I think I like it anyways. I'll be able to compare it better once the frame dries. Meanwhile, the desecration of the other M38 continues. This is the first time I've seen her topless. She was a little shy at first but quickly overcame her inhibitions.  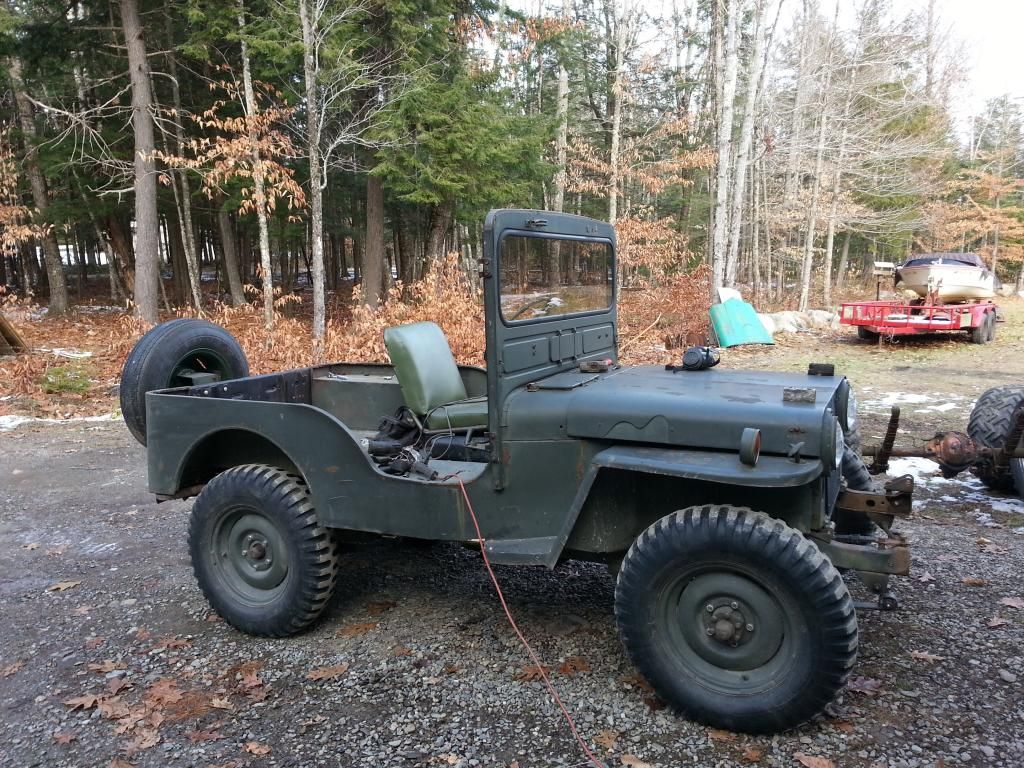 |
|
|
|
'52 M38
Nov 18, 2014 20:53:32 GMT -5
via mobile
Post by Haines Garage on Nov 18, 2014 20:53:32 GMT -5
Sir Ryan!!
That selfie of you in the paint garb!!! LMFAO !!
Haines Garage Style you have!!
I have had good luck with the Por15.
Brushing it is the ticket!!!
Looks good .
|
|
|
|
'52 M38
Nov 18, 2014 20:59:48 GMT -5
Post by Ryan_M on Nov 18, 2014 20:59:48 GMT -5
This hobby would be way more fun if there was no painting involved...
|
|
|
|
'52 M38
Nov 23, 2014 14:53:23 GMT -5
Post by Ryan_M on Nov 23, 2014 14:53:23 GMT -5
After a couple very frustrating days destroying sheet metal with my new welder I needed to tinker with some other part of the project. Here's the engine, trans, and TC as plucked as a single unit. With an M38 you were originally able to pull the radiator as part of this ensemble but mine is missing the clips that secure the radiator to the motor so it came out separately. Note the benefit of the removable shift lever that allows this extraction without having to remove the entire shift tower. I was a little apprehensive hanging the whole shooting match by a single 60yr old lift hook but it didn't seem to mind a bit. 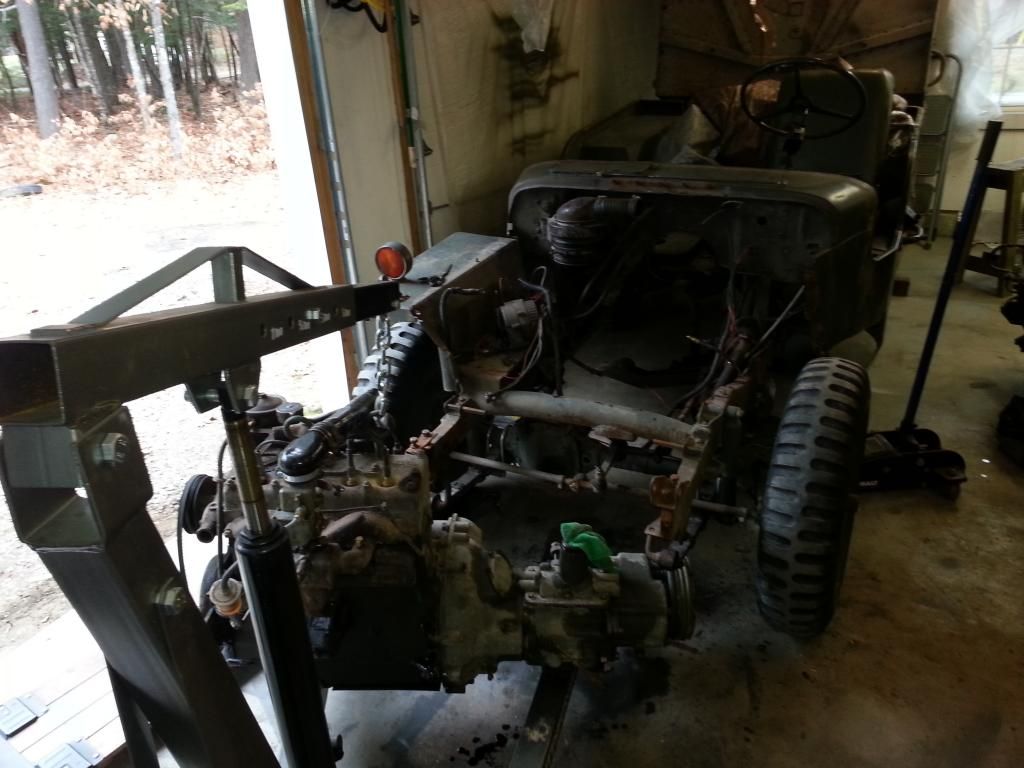 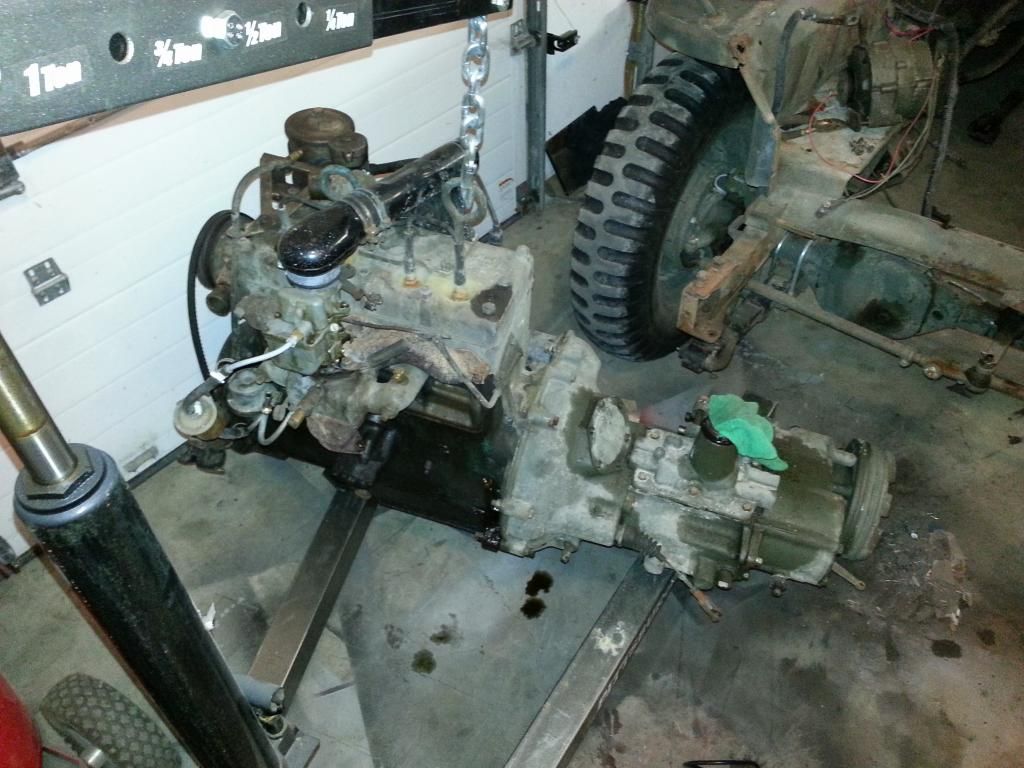 |
|
|
|
'52 M38
Nov 23, 2014 15:13:22 GMT -5
via mobile
Post by Haines Garage on Nov 23, 2014 15:13:22 GMT -5
Very nice.
The grab hook is way cool.
Rebuilding these?
|
|
|
|
'52 M38
Nov 23, 2014 16:48:04 GMT -5
Post by Ryan_M on Nov 23, 2014 16:48:04 GMT -5
The trans and TC were completely overhauled last year (and earlier in this thread) so they are good to go. The engine runs superbly so I will probably leave it alone. It's an M38 motor but it has an MB head. I have no idea how or why it got that way but I'm going to resist the temptation of pulling the head and replacing it with a correct M38 one (It aint' broke so I ain't fixing it). I think I will convert from 12V back to 24V so I'll need to swap out the generator, distributor, and voltage regulator. It also has a later model starter so I hope to install an actual M38 one. I have all of these components kicking around I'm just not sure any of them work. We'll soon find out.
The lift bracket is very cool. You can see there are two eyelets on it. If you are pulling everything like I did today you use the rear hook. If pulling just the motor you use the front one. Using the correct hook ensures the motor stays level and balanced while hanging from the engine lift.
|
|
Deleted
Deleted Member
Posts: 0
|
'52 M38
Nov 23, 2014 18:09:54 GMT -5
Post by Deleted on Nov 23, 2014 18:09:54 GMT -5
This hobby would be way more fun if there was no painting involved... I agree! I don't mind cleaning and repairing. I hate prepping to paint and painting. As for the lift hook...that'd make me nervous, too! I recall my dad using the engine studs and a chain to pull my gpw block many years ago. Totally freaked me out. |
|
|
|
'52 M38
Nov 27, 2014 21:38:26 GMT -5
Post by Ryan_M on Nov 27, 2014 21:38:26 GMT -5
The disassembly of M38 #1 is officially complete. The bare frame is now actually sitting on top of the old tub outside in the snow. Here's a parting shot of the tub headed out the door. 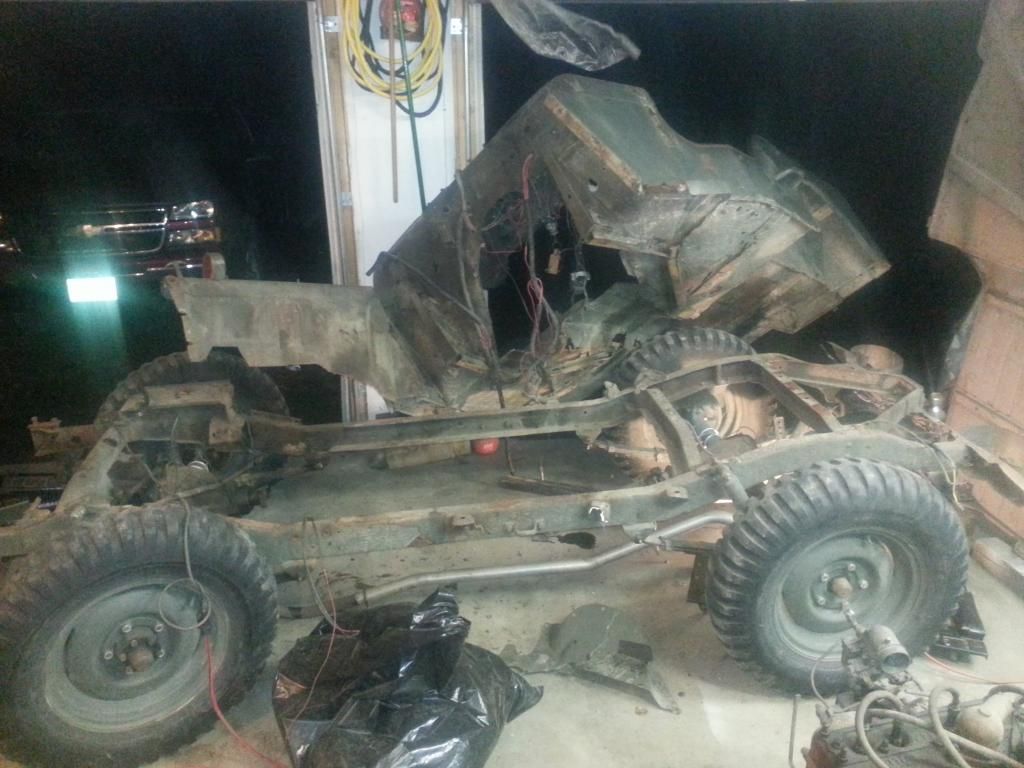 When I envisioned this project the initial plan was to simply drop the drive shafts, unbolt the springs from the old frame, and roll the wheels, axles, and springs as a unit over to the new frame and bolt everything back up. Simple stuff....I estimated the time required to roughly that of consuming a cup of coffee. I didn't take long before the curse of "well, you are already THIS far...." took hold. Might as well go through all the axles and harvest the best parts from each one 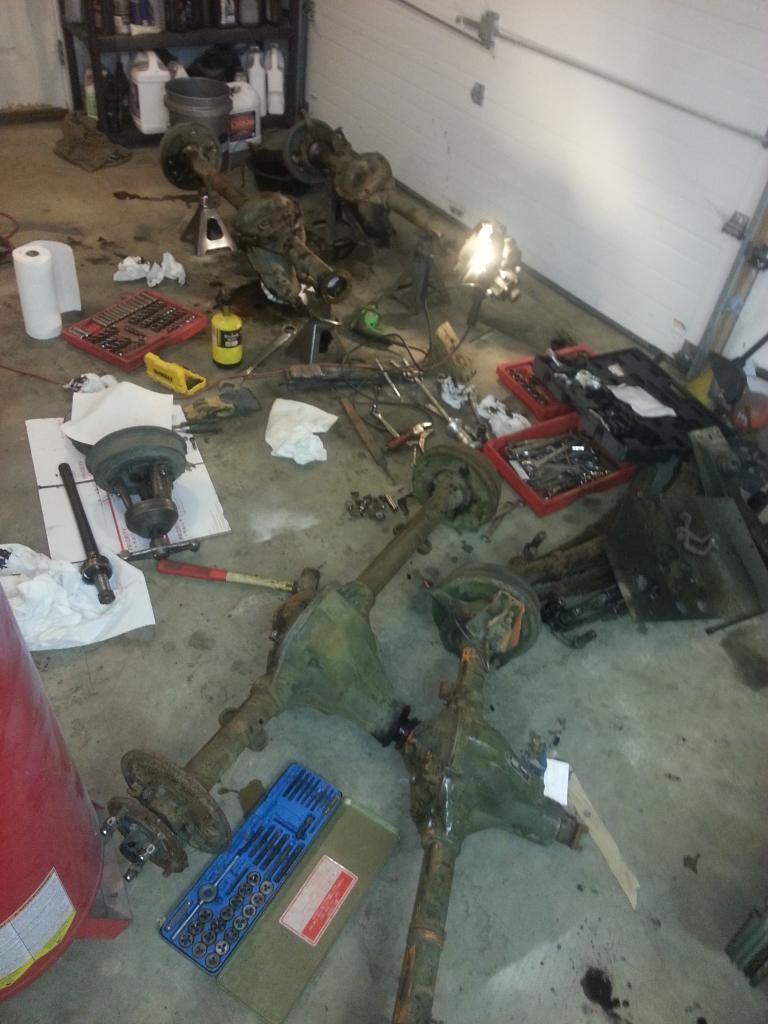 Both axles from M38 #2 contained more water than gear oil. Yuck. The rear axle from M38 #1 has proven itself over the summer as a good axle but upon close inspection I noticed a couple things. One of the ring gear bolts was completely gone (and nowhere to be found inside the housing) and the lock-strap was twisted and hanging freely. Many of the other carrier bolts were loose enough I could turn them by hand. Not good. I tightened them all and secured them with the lock-strap tabs. 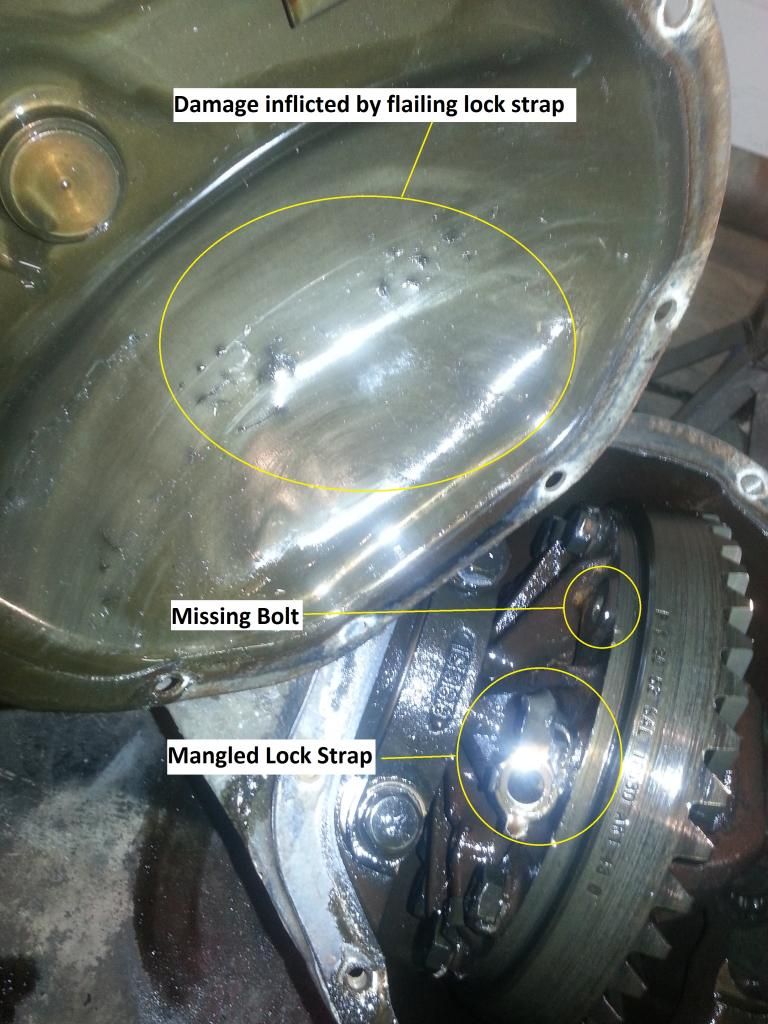 Next, I pulled the axles and found the tubes full of dirt. Gritty chunky dirt. Only one way to really clean those tubes - gotta remove the differential.  With the diff out I found that the bearings looked good but the races had a couple bad spots. At the very least I'll replace the races although I know I should get new bearings while I'm at it. The pinion seal was junk too so I have a good shopping list prepared for Black Friday... I found these critters tonight while consolidating axles. They are little spring loaded check valves for the bearing grease to escape from but by design they do not let water in. M38 #1 had them but they were so rusted they were unidentifiable. M38 #2 had a nice working set that were migrated over. 3A's just have a small open hole in that spot where grease can get out but anything else can seep in. Neat little gadgets. 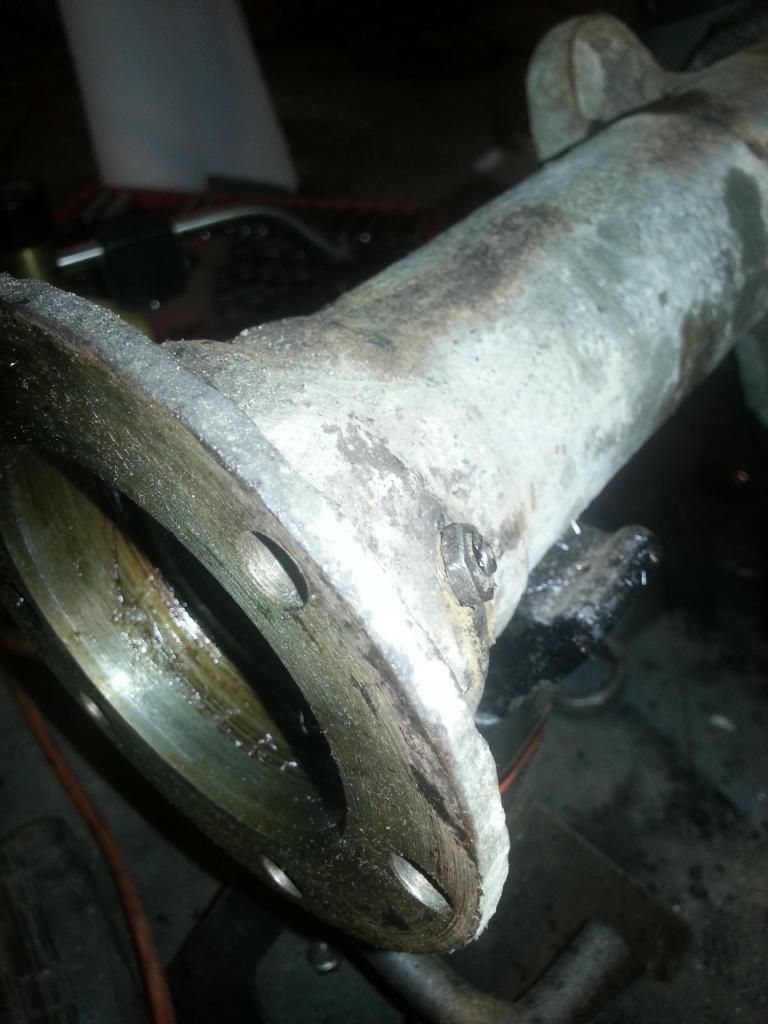 I'm pushing the spring loaded plunger up here with pliers 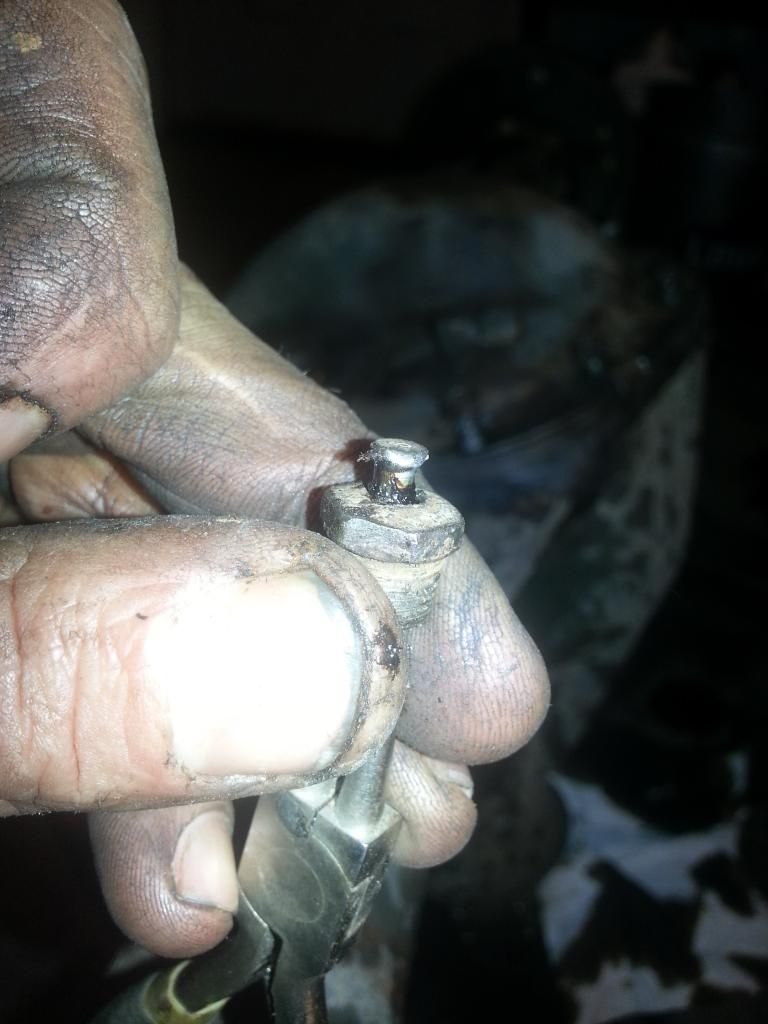 |
|
|
|
'52 M38
Nov 30, 2014 14:57:58 GMT -5
Post by Ryan_M on Nov 30, 2014 14:57:58 GMT -5
I spent the entire day yesterday and much of this morning grinding and cleaning parts. Disgustingly dirty work. Differentials are buttoned back up and now it's paint day. I just replaced the king pin bearings and knuckle seals last year so I opted not to take them off again. A little bit lazy on my part but it really didn't seem worth the effort. Most of the brake backing plates on M38 #2 were better than the ones on M38 #1 so I am swapping them out. Every other Jeep project I've done has pretty much consisted of rattle can paint jobs which are easy as you can do as small of a job as you want. Now that I'm using "real" paint I'm trying to prep as much as I can all at once. The air sprayer sure is nice to use but it's a pain to clean up and I don't want to do it any more than I have to. The wife was a little annoyed when she found these parts hanging in the living room coat closet right after I washed them this morning. She was even more annoyed when she realized the "parts hangers" are former clothes hangers that I robbed from her closet. 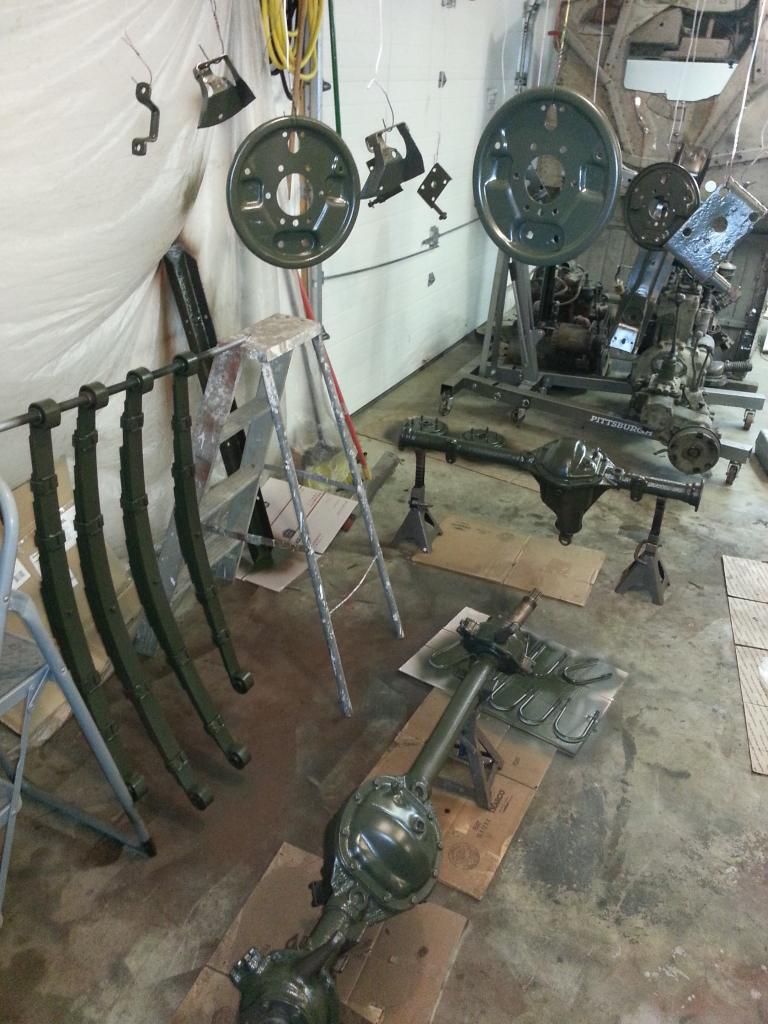 |
|
Deleted
Deleted Member
Posts: 0
|
'52 M38
Nov 30, 2014 18:18:38 GMT -5
Post by Deleted on Nov 30, 2014 18:18:38 GMT -5
|
|


