Deleted
Deleted Member
Posts: 0
|
Post by Deleted on Dec 13, 2015 18:36:37 GMT -5
Chewy is for sale too! Bring a big truck to pick it up though. I do have a fond attachment to him. A sweet running truck. If we get the storm of the century, I'll most likely make the front page of the paper: "Local Saves State Highway Dept. with Chewy"  |
|
|
|
Post by Ryan_M on Dec 27, 2015 14:58:04 GMT -5
So it was barely enough to justify but to keep it from icing over I hit the road with the plow...and it works. I wonder if Walck's offers quantity discounts on clutches? I have a feeling I'll be changing them as frequently as the engine oil.
|
|
|
|
Post by Haines Garage on Dec 27, 2015 15:20:47 GMT -5
That is Awesome my friend......Awesome!!!!
|
|
Deleted
Deleted Member
Posts: 0
|
Post by Deleted on Dec 28, 2015 7:55:45 GMT -5
You guys just keep getting better and better with your videos. Excellent. oilly
|
|
|
|
Post by rudycon on Dec 28, 2015 11:41:29 GMT -5
My favorite part is the mounted high on the windshield angle. I'll try to use that next time I'm out for a spin with a camera.
|
|
|
|
Post by Ryan_M on Dec 29, 2015 17:31:44 GMT -5
I found an old guy in an old shop with some old tools to custom make some NEW tire chains for the red Jeep. We are currently getting walloped with fresh snow so the timing is good. The chains are pretty beefy: 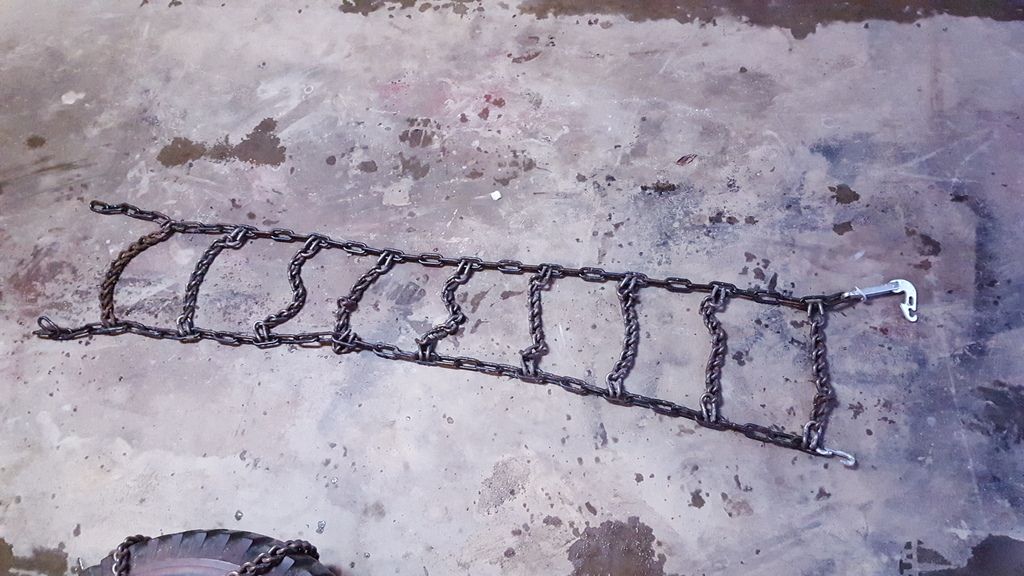 Here's one installed on the spare tire from the gray Jeep I brought in to the shop as a test fit guinea pig.  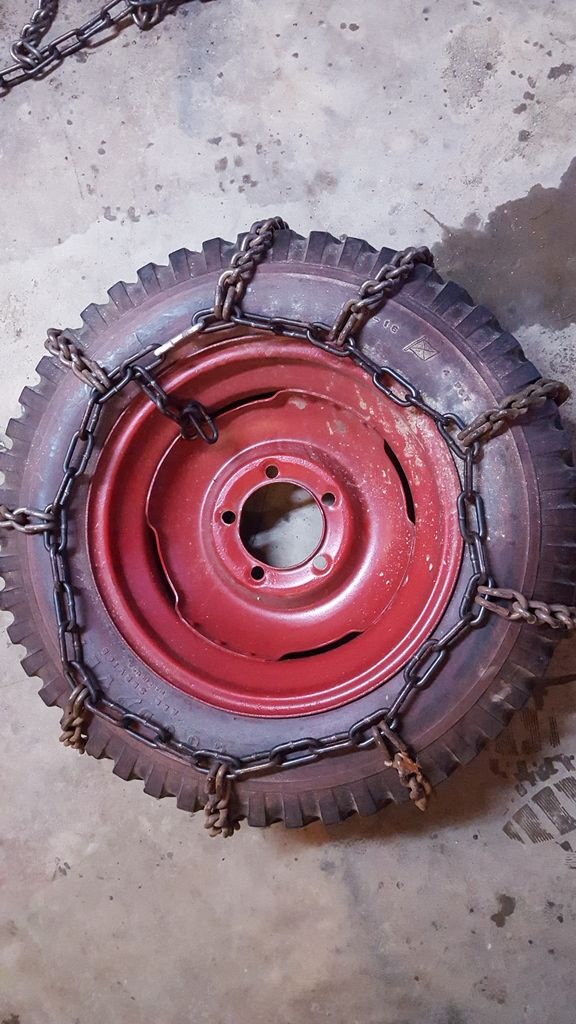 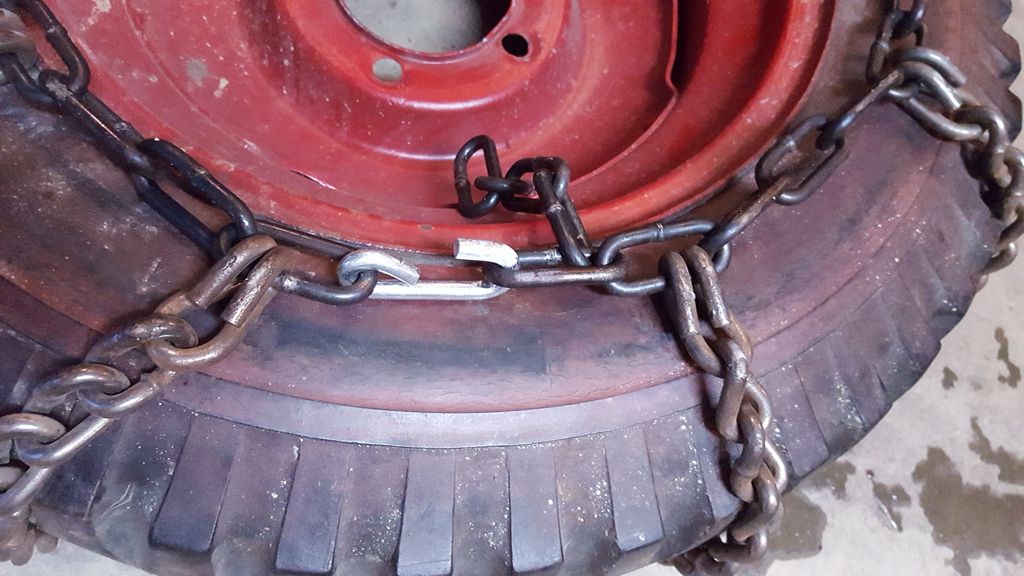 And installed on the red Jeep. 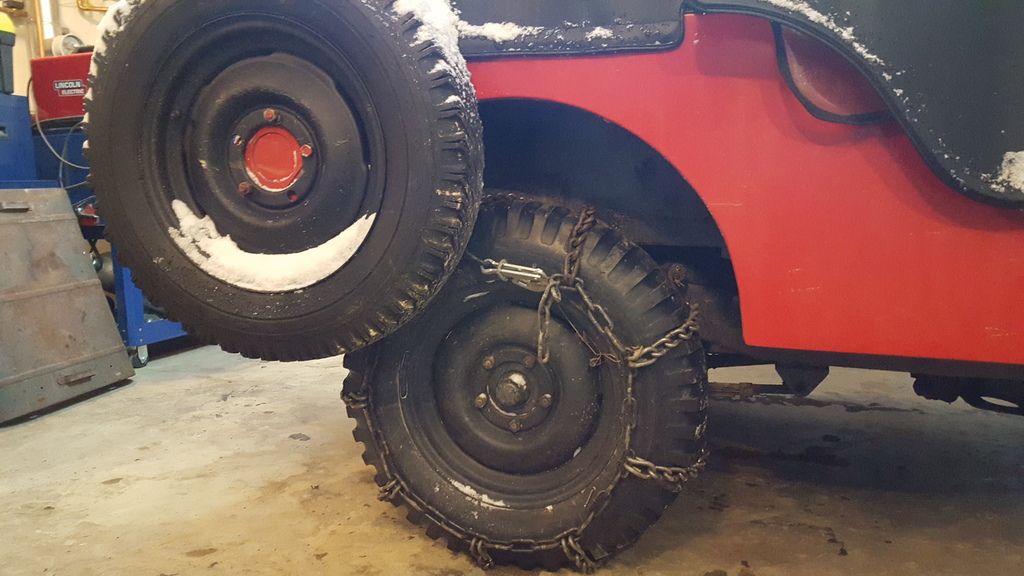 I barreled through 8" of snow just now with surprising efficiency. So far it's way better than I expected. I'm ecstatic. I did get stuck once (semi-intentionally.....you have to push the limits to find them, right?) but since the Jeep is so light I was able to pluck it out of the ditch with my Tundra without it even breaking a sweat, another plus. It's still snowing hard so I'll get another round in tomorrow morning. 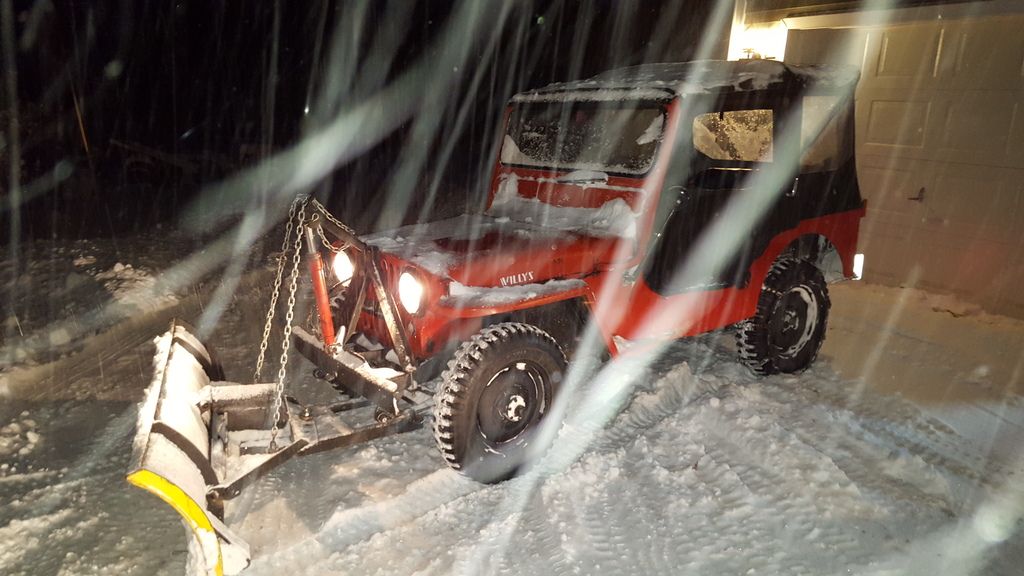 [/URL] |
|
|
|
Post by Haines Garage on Dec 29, 2015 22:41:12 GMT -5
Sir Ryan...
Those pictures you are posting and vids are bringing back such great memories for me. Thank You Sincerely. The Jeep Snow plow... That's where it all began for me . Funny what a man recollects .
|
|
|
|
Post by Ryan_M on Dec 30, 2015 6:50:06 GMT -5
Sir Ryan... Those pictures you are posting and vids are bringing back such great memories for me. Thank You Sincerely. The Jeep Snow plow... That's where it all began for me . Funny what a man recollects . Glad to hear it. Just don't let me catch you curled up sleeping in the back some morning    |
|
Deleted
Deleted Member
Posts: 0
|
Post by Deleted on Dec 30, 2015 7:37:47 GMT -5
Ryan your wipers look kinda stuck on the 3A. How long do you hold your breath while plowing so you don't fog up the windows and can't see what you are doing?  |
|
|
|
Post by Ryan_M on Dec 30, 2015 8:40:11 GMT -5
Ryan your wipers look kinda stuck on the 3A. How long do you hold your breath while plowing so you don't fog up the windows and can't see what you are doing?  Good eyes. That wiper is utterly useless. I keep both door windows unzipped and still have to wipe the inside windshield every 4-1/2 seconds to maintain any visibility. I will need to rig up some sort of defroster unit to the Harrison Heater if this is going to be a long term plow rig. |
|
Deleted
Deleted Member
Posts: 0
|
Post by Deleted on Dec 30, 2015 18:33:06 GMT -5
All those old harrisons did was melt the snow on your boots, it evaporated and collected on the windshield. Similar to a mouse breathing on your foot. So. catch a mouse and have him breath up at the windshield.
|
|
|
|
Post by Ryan_M on Jan 2, 2016 21:45:04 GMT -5
Enough fires already. Old wiring out!  New Walck's harness in! 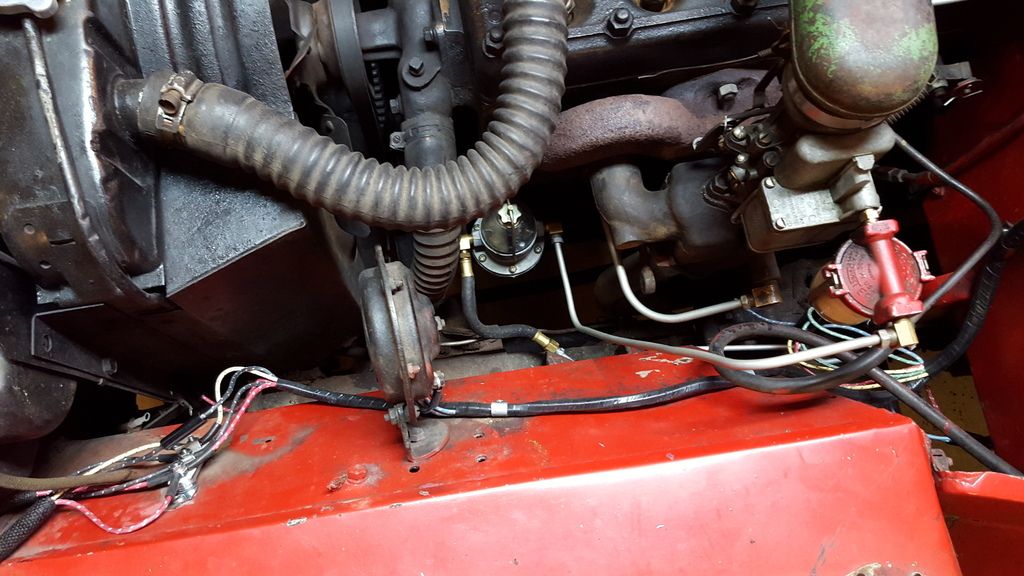 This is the third one of these I've installed and it is still much easier to have a completed visual aid parked 6' away for continual quick reference.  [/URL] |
|
|
|
Post by Haines Garage on Jan 3, 2016 0:00:25 GMT -5
Sir Ryan. Seeing you are doing the harness at this time, please take as detailed photos as you can of the process. This is something that I hope we can all do here on the HG site.
Put a quality thread, video , on how to install these harnesses correctly. Let's do something special. I have a ton of pics, I would love others input . A step by step as I ranted about a few weeks ago.
|
|
|
|
Post by Ryan_M on Jan 3, 2016 6:56:29 GMT -5
Sir Ryan. Seeing you are doing the harness at this time, please take as detailed photos as you can of the process. This is something that I hope we can all do here on the HG site. Put a quality thread, video , on how to install these harnesses correctly. Let's do something special. I have a ton of pics, I would love others input . A step by step as I ranted about a few weeks ago. I started out with exactly that intent...and soon found myself contorted up under the dash with my camera sitting across the garage on the workbench. It unraveled from there. The seats are still out of the Jeep so I may be able to slither back in for a few more pics. |
|
|
|
Post by Ryan_M on Jan 14, 2016 20:22:51 GMT -5
I'm slowly picking away at prepping the MB motor for transplant. I dropped the oil pan tonight to have a look. A little bit of sludge but not too bad.  The pick-up was squeaky clean. A pleasant change from the last one of these I saw....  Chain drive of course 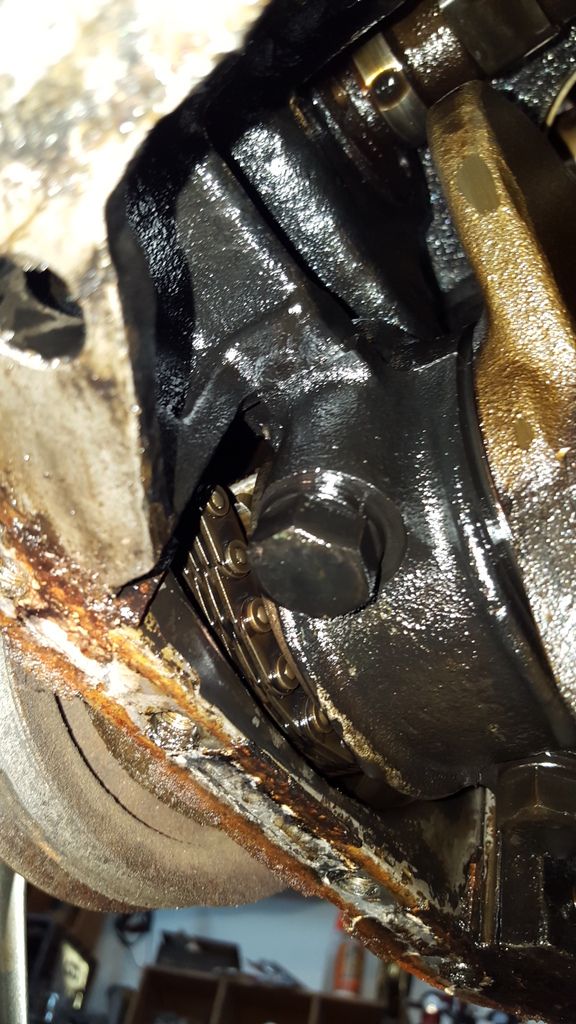 I couldn't see very well but the cylinders looked smooth and clean 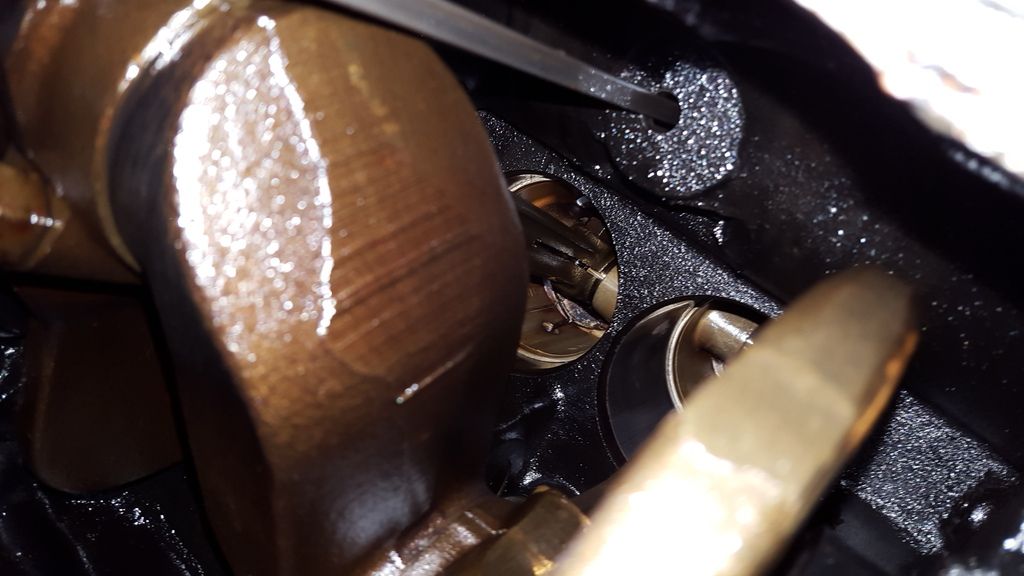 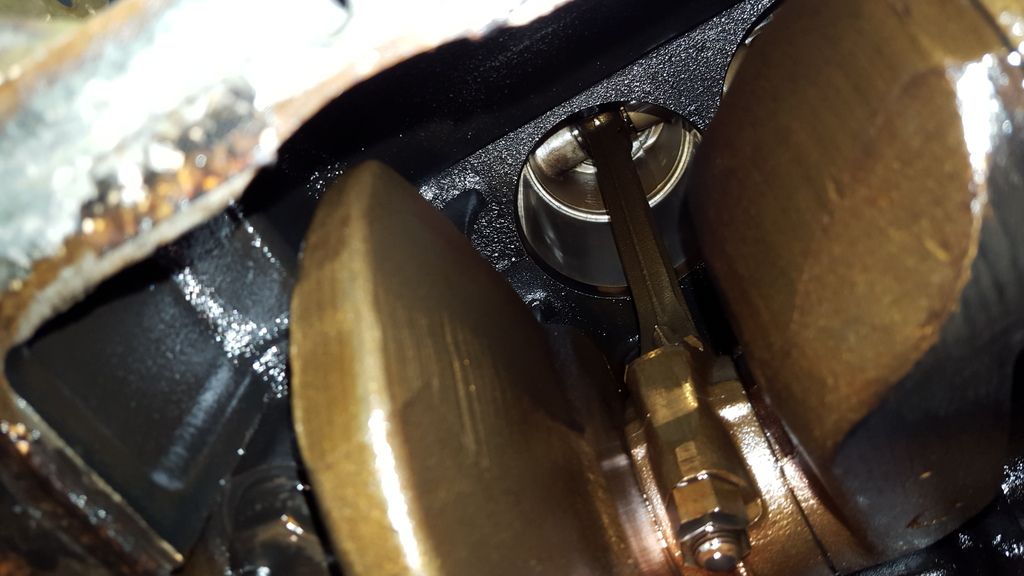 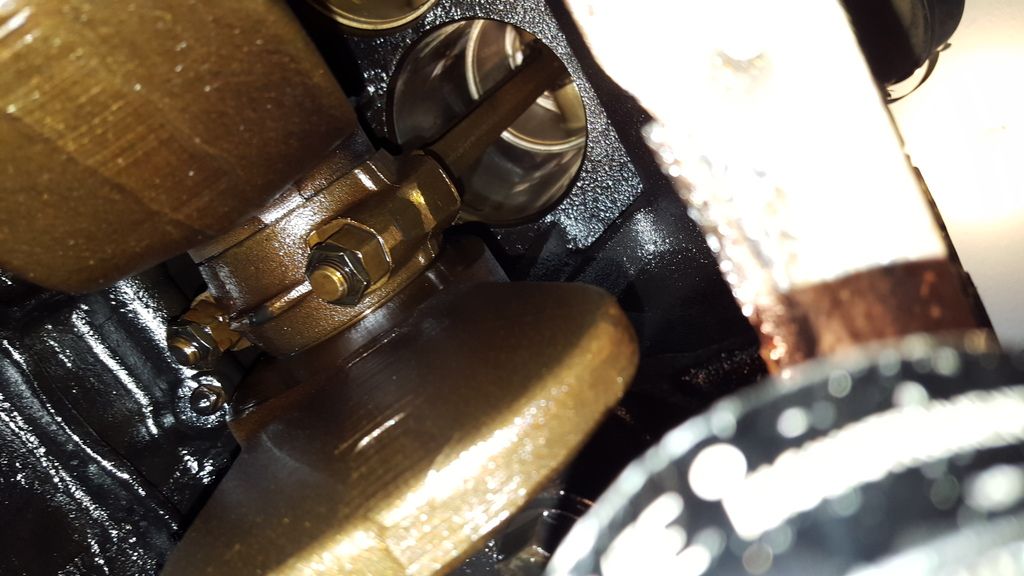 "W.O.CO" stamped pistons 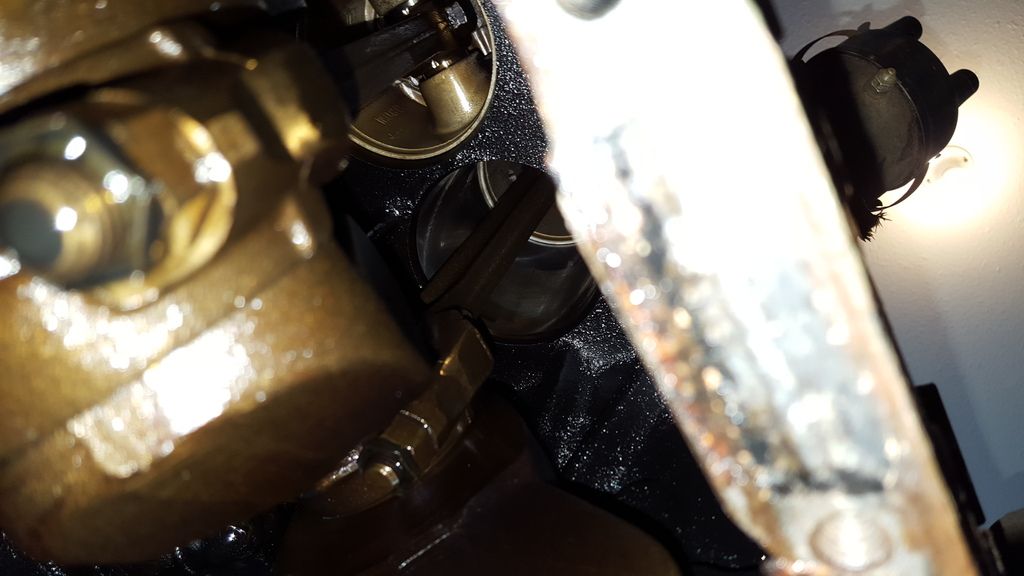 #4 Connecting rod [ 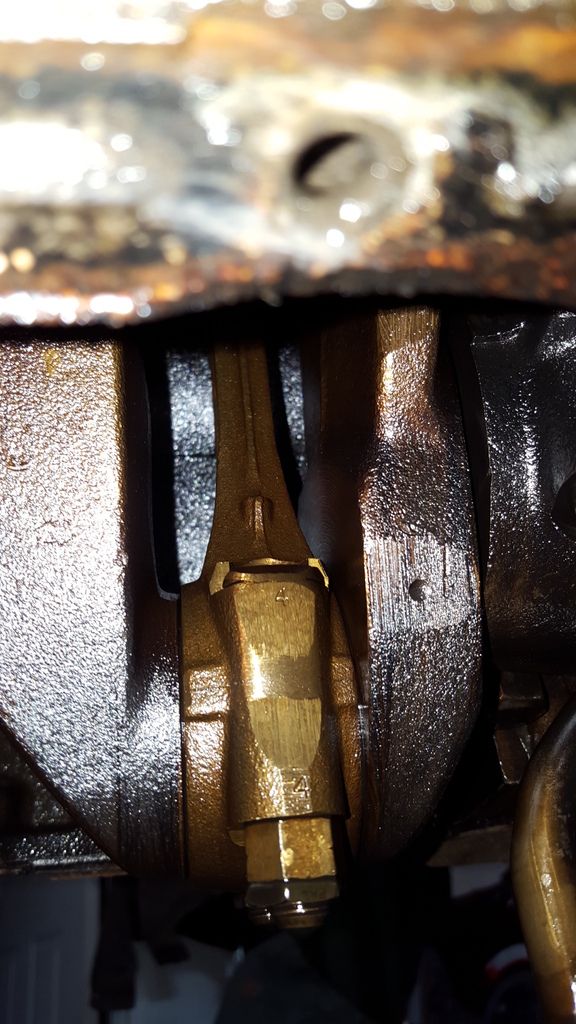 Crank 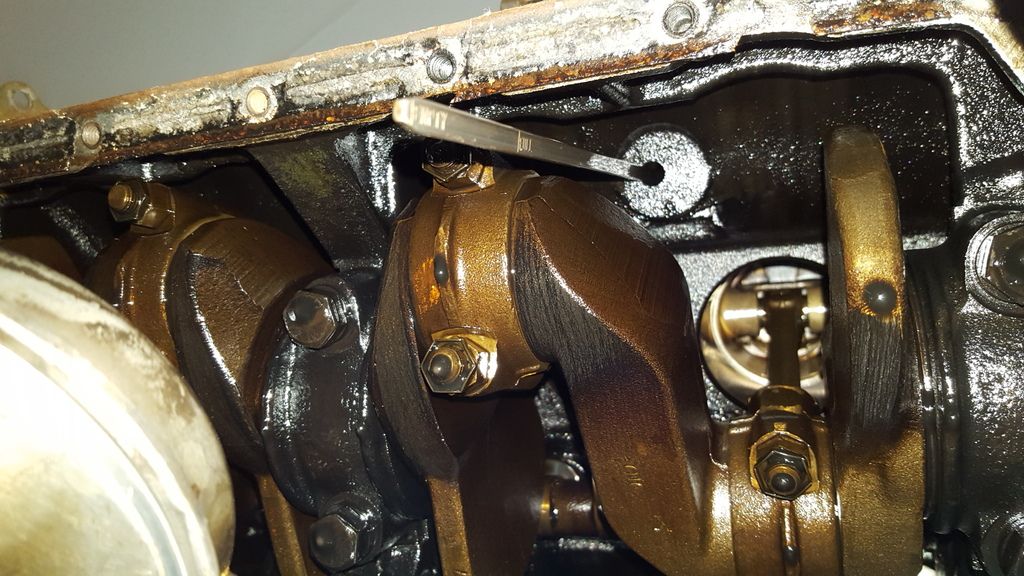 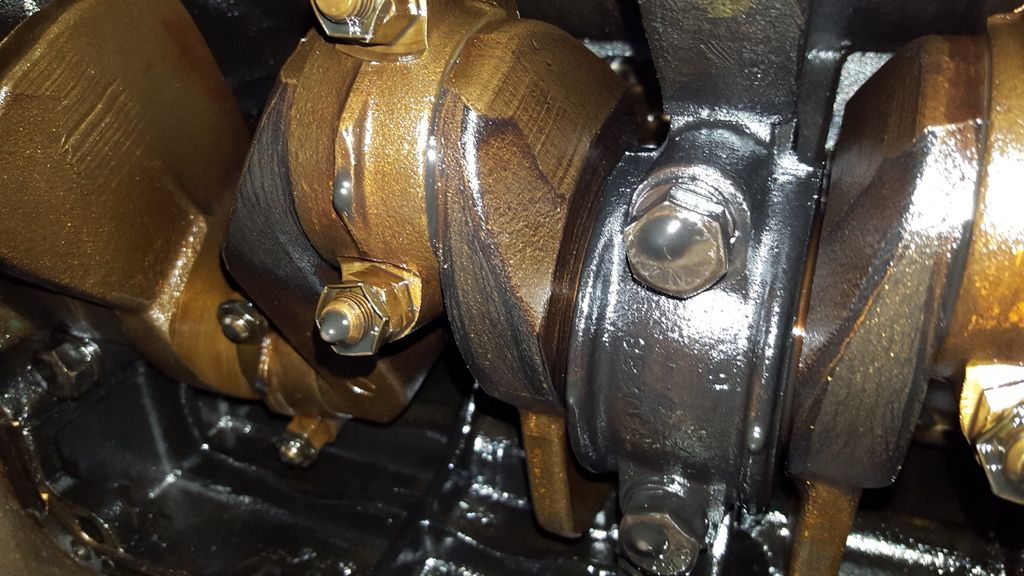 I didn't see anything that really jumped out at me as "bad" but I don't exactly have a trained eye for inside a motor. Anything specific I should be looking for while it's on the engine stand? |
|
|
|
Post by zooke581 on Jan 14, 2016 21:27:23 GMT -5
That motor looks pretty schweet to me. You outta see my GPW block.
|
|
Deleted
Deleted Member
Posts: 0
|
Post by Deleted on Jan 14, 2016 23:24:00 GMT -5
I say.... RUN IT!!!!!
|
|
Deleted
Deleted Member
Posts: 0
|
Post by Deleted on Jan 15, 2016 7:24:15 GMT -5
Don't sell it. Keep it. Running it and tuning it is good. But-----------I'm thinking that you must find a G503 for it. Moosey and I want it. LOL, Oilly
|
|
|
|
Post by Ryan_M on Jan 15, 2016 7:38:30 GMT -5
Don't sell it. Keep it. Running it and tuning it is good. But-----------I'm thinking that you must find a G503 for it. Moosey and I want it. LOL, Oilly I am going to run it. At this point the plan is to drop it in the red 3A. I'll take that 3A motor and rebuild it. From there the 3A motor will either go back into the red 3A or maybe into the gray one instead. Plans tend to change drastically, however, every time I drag something else out of the woods... |
|
|
|
Post by Ryan_M on Jan 21, 2016 21:13:59 GMT -5
I've kicked myself for not hanging onto that little Trico vacuum fan that I had awhile back as I think it might have helped combat the foggy windshield problem when plowing. Yesterday I found this "Little Wonder" 6V fan in an antique shop. I try to avoid buying things in antique shops because it gives me that horrible feeling of "paying full retail". I'd much rather buy something out of an old dusty barn than from the guy who bought it out of an old dusty barn. So, against my own better judgement, I plunked down the sticker price (plus sales tax...) and the fan came home with me. The severely rotted cord was quickly replaced with one slightly less rotted. I think this originally had multiple speeds but right now only one of them is working which should be fine anyways. Not sure if it'll waft enough of the warm air from the meager output of the tired Harrison Heater below it but based on the forecast it will likely see it's first real test this weekend. Neat little accessory either way though.  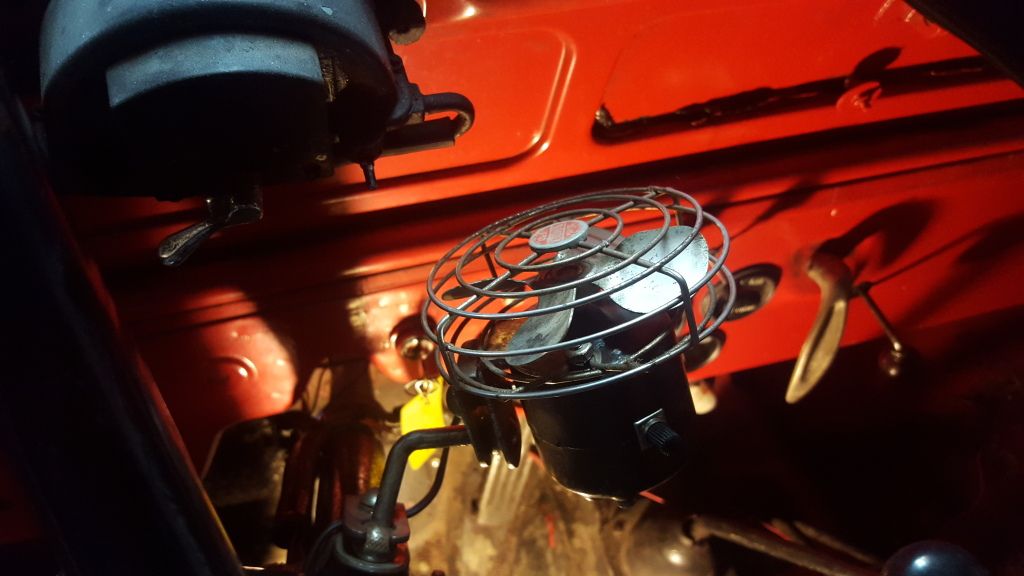 |
|
|
|
Post by zooke581 on Jan 21, 2016 23:28:21 GMT -5
Quit breathing so hard and it'll fog less.  Nice score though. |
|
|
|
Post by Haines Garage on Jan 21, 2016 23:32:25 GMT -5
Quit breathing so hard and it'll fog less.  Nice score though. Hahahahaha! That there is funny! |
|
Deleted
Deleted Member
Posts: 0
|
Post by Deleted on Jan 22, 2016 6:44:25 GMT -5
You could always get another mouse to breath on the windshield from the other side. Dual defrosters that way. Oilly
|
|
|
|
Post by Ryan_M on Jan 22, 2016 6:48:34 GMT -5
Quit breathing so hard and it'll fog less.  Nice score though. I guess that means I should plow first and do the shoveling afterwards. Manual labor is hard work you know! |
|
|
|
Post by Ryan_M on Feb 14, 2016 20:44:24 GMT -5
I decided to conquer another new frontier today - A carburetor rebuild. Nobody is going to mistake me for Scoutpilot any time soon but I managed to start with this....  ...and turn it into this 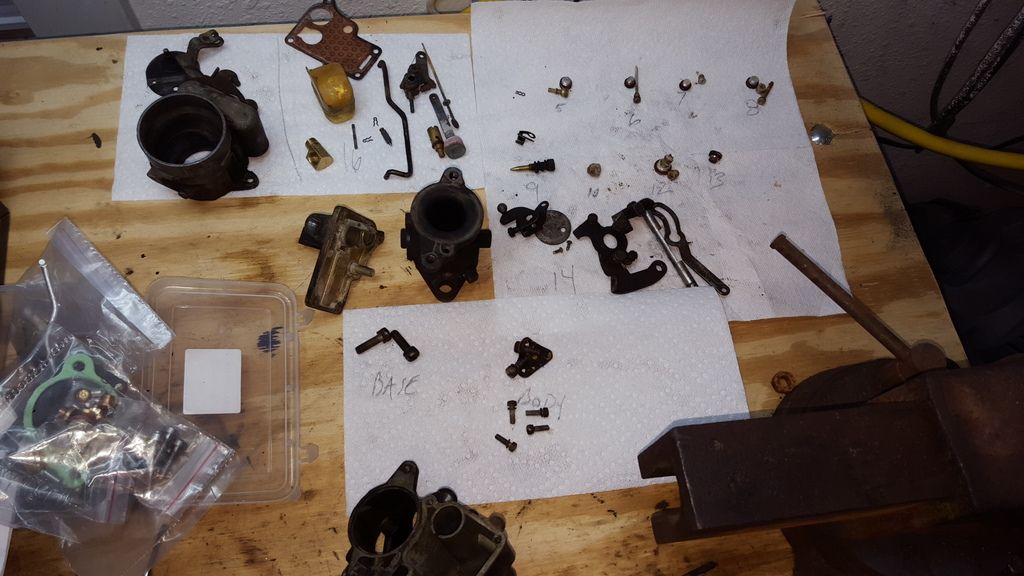 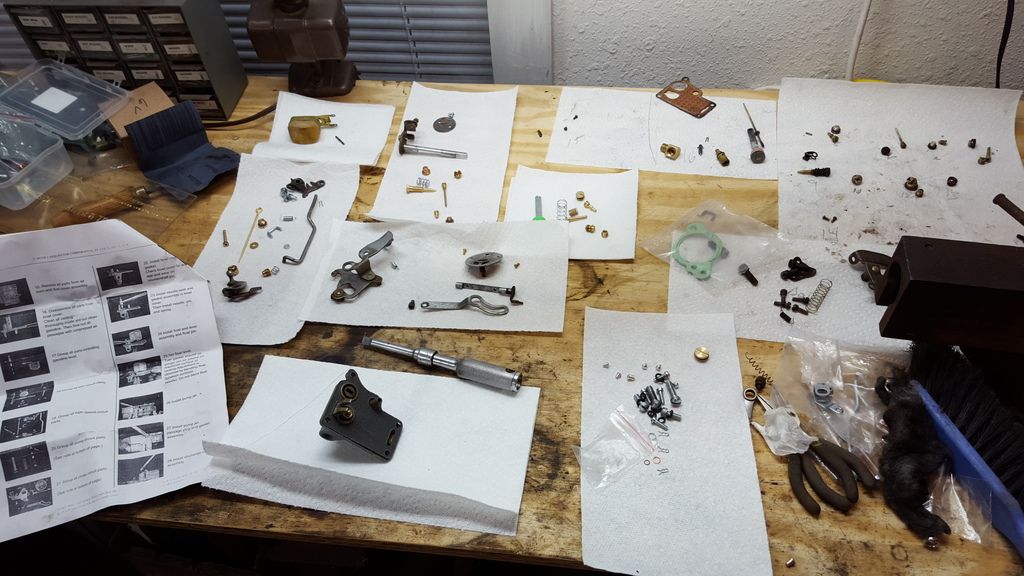 ...and get it back to this  I soaked the carb body in gasoline and scrubbed throughly followed by blasts of compressed air. It's going back on the ratty red 3A so I don't want it too shiny. The key for me was laying out each group of original pieces after disassembly and labeling them with the step number from the instruction booklet in the new kit. During reassembly, I matched up the new pieces with the old pieces to ensure I had the right parts in the right places. I also did my usual "take pictures of absolutely everything during disassembly for refernece during reassembly". I only had a short while tonight to test it. I backed mixture screw out two turns, bolted it onto the Jeep, started it up, and drove away. At this point I have done absolutely no tuning of any sort. Seems to run great and no gasoline spewing out of anywhere it isn't supposed to. Hopefully tomorrow I'll dial things in a bit but judging by the way it ran around the yard tonight it won't need much. I am pleased. I also discovered after checking a few of the usual hiding spots for original paint that the red 3A started it's life as a Potomac Gray 3A. Go figure.  |
|