|
|
Post by Haines Garage on Mar 4, 2015 22:37:00 GMT -5
I need to wire the horn on my 46 CJ2A start to finish. I have no idea where to begin. I have the worm gear open on my build. Walk me through, start to finish. I will post pictures as I go.
|
|
Deleted
Deleted Member
Posts: 0
|
Post by Deleted on Mar 5, 2015 7:20:34 GMT -5
A question first: How did it drive before you tore it apart? Lots of play in the wheel? The sector is the side to side part with the two angles posts that ride in the worm gear. If both are worn, you will always have play, and not be happy. If worn just a little, a tightsteer will fix that part. If the sector shifts front to back in the steering box, the bushings and sector shaft are worn. Any play in all the steering parts will end up resulting in steering wheel movement before it starts to turn the wheels. You have to think of the entire system. The bellcrank must be tight with no movement other than turning on the bearings/bushings inside. The balls on the end of the bellcrank and pittman arm must not be worn flat. The tie rod ends must not be loose. The knuckle bearings must be smooth and adjusted for preload. If all is well, then you can worry about horn wiring. The wire in your setup is the horn brush type. Down at the bottom is your horn brush assembly. Previous owners that put a zirc in the filler and greased it with a grease gun, will pump grease up the shaft and into the horn brush area. Has to be clean. I usually grease mine upon assembly ( the box area) and then add some gear oil and mix it up so it's thick. It leaks if you use only 90 weight. OK, there is a brass round bushing that has a plastic inner for insulation. The horn brush rides on the brass, and the horn wire from above gets soldered to the brass after it exits the tube through the little square hole. It's a bitch to get it to solder without a large bronze soldering iron. Flux , heat, and 50/50 solder needed. Installing, fitting, soldering of this unit is critical. The brush can not run into the wire/solder. You need to carefully fit the brass ring. I had to clean the shaft of any imperfections, and hone the plastic inner with a brake cylinder hone , in order to get the brass ring to slide down the inner shaft from the top to it's postion and fit snug enough to stay there. I used a wire to fish the horn wire down and through the square hole. You may want to leave extra wire, and put a connector in the wire so you can remove the upper contact assembly for pulling the steering wheel. You can't use a puller without ruining the upper spring loaded contact assembly. You'll soon know why they quit using this system. You'll also know why many Jeeps have a horn button installed on the dash or side of the column. Set up a device in your garage to take out all your frustrations on, and not the Jeep!!!!!! A hammer and a old Jeep part that you are throwing out will suffice. Always beat the crap out of this, and not the Jeep!  You should antiseise the steering wheel splines. I usually can pop off the wheel by hand later if needed. Oil |
|
Deleted
Deleted Member
Posts: 0
|
Post by Deleted on Mar 5, 2015 7:45:30 GMT -5
The CJ horn wiring is different than the MB/GPW, version...right, Oily?
|
|
Deleted
Deleted Member
Posts: 0
|
Post by Deleted on Mar 5, 2015 8:22:20 GMT -5
No, early CJ2A's and MB/GPW are the same. Oil
|
|
Deleted
Deleted Member
Posts: 0
|
Post by Deleted on Mar 5, 2015 8:48:33 GMT -5
Does my Mentor HG in Mt. Pleasant have the early steering column? Can the wire be soldered with the column mounted to the frame or will he have to do all this on the bench? I ask because I need to solder my wire to the brass ring. My solder skills are hideous. I couldn't ever get it to stick...so I used purist electrical tape and now I can only honk my horn when I make right hand turns!  |
|
Deleted
Deleted Member
Posts: 0
|
Post by Deleted on Mar 5, 2015 9:53:49 GMT -5
It's difficult to do the job in the frame . You obviously need the outer column tube off. You also need to test fit it all before you solder since the horn brush assembly moves with the outer column. You need heat to get the thing to solder. A flame may melt the plastic inner of the bushing. Best is to use a bronze soldering iron that you heat with a torch before using. It has the heat to do the job, and won't be there long enough to melt the inner. You also need a good flux like tinning fluid. I don't like resin core solder. 50/50 solid core works best for me. Using gravity in your favor or in other words, out of the Jeep is best, but if you remove the LF fender and outer column, you could do it in a pinch. Wonder if you had a good zip lock plastic tie, if you could hold the bare wire on with that? They are a pain. The wire out through the center of the box was a huge improvement. I'll be interested in how you all fair with this. Oil
|
|
Deleted
Deleted Member
Posts: 0
|
Post by Deleted on Mar 5, 2015 10:22:22 GMT -5
I haven't thought about a solder iron...the zip tie is pretty clever, too. that would even hold it in place while attempting to solder.
I knock on my solder skills. They really aren't that bad. I have had decent success when using a flame. Zero success when using the guns. I know with flame I could secure it very easily, but like you warned about the rubber insulator, I knew it would melt and fail the connection. I'm going to put this in the back of my mind and think about it for a little while before taking action. I'm pretty sure that detard's steering column will need this same procedure done.
I really admire guys like HG who know how to do all this kind of thing. He is my Hero. I am glad he allows me to be on this awesome forum.
|
|
|
|
Post by Haines Garage on Mar 5, 2015 15:25:31 GMT -5
Wow Bo Bo.... Thanks for the compliments...right back at you Pal! Now down to serious Bidness ! Here are the parts I have in a bag marked steering/horn. 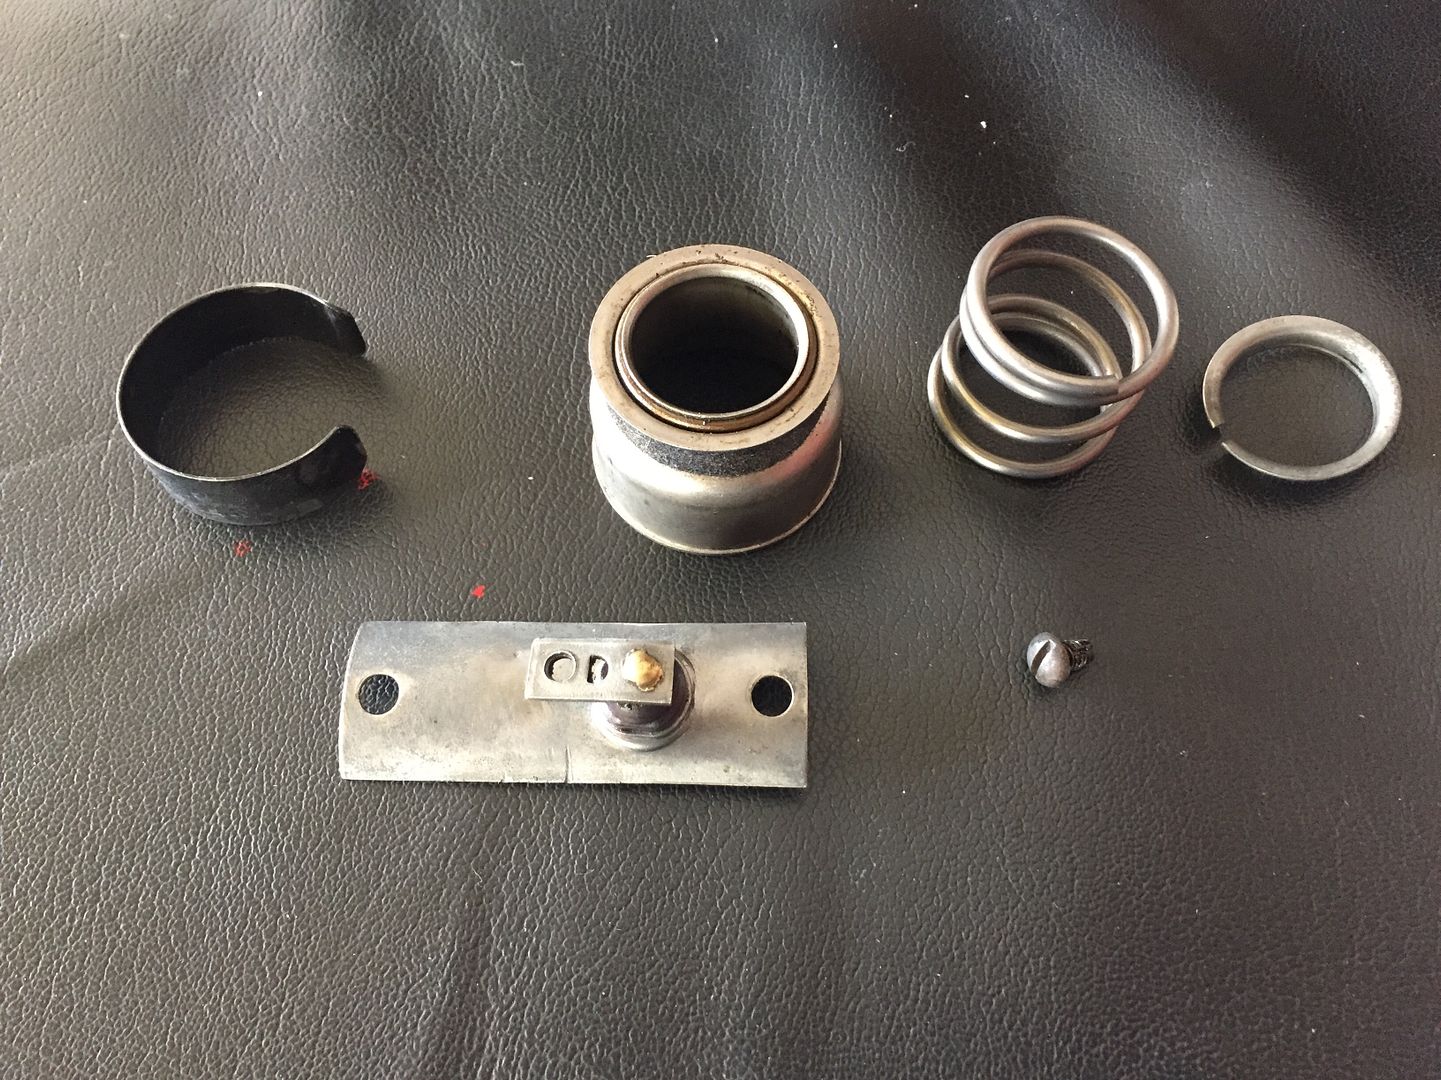 Here is a picture of my shaft, notice the slot . 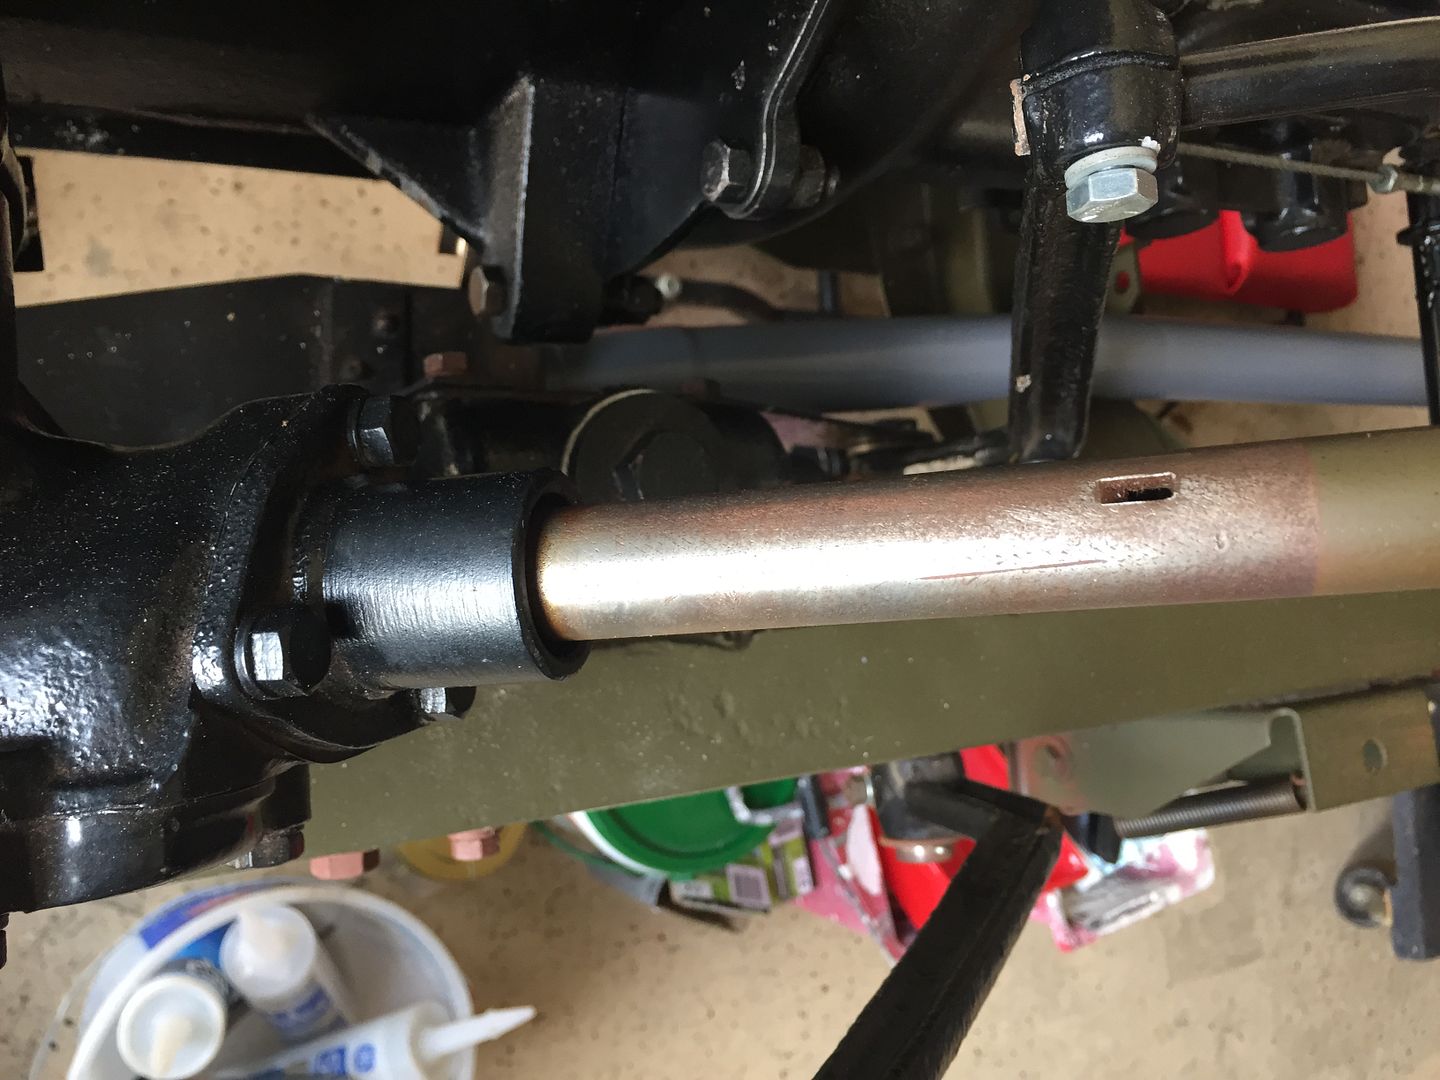 Here is a picture of my re pop brass ring 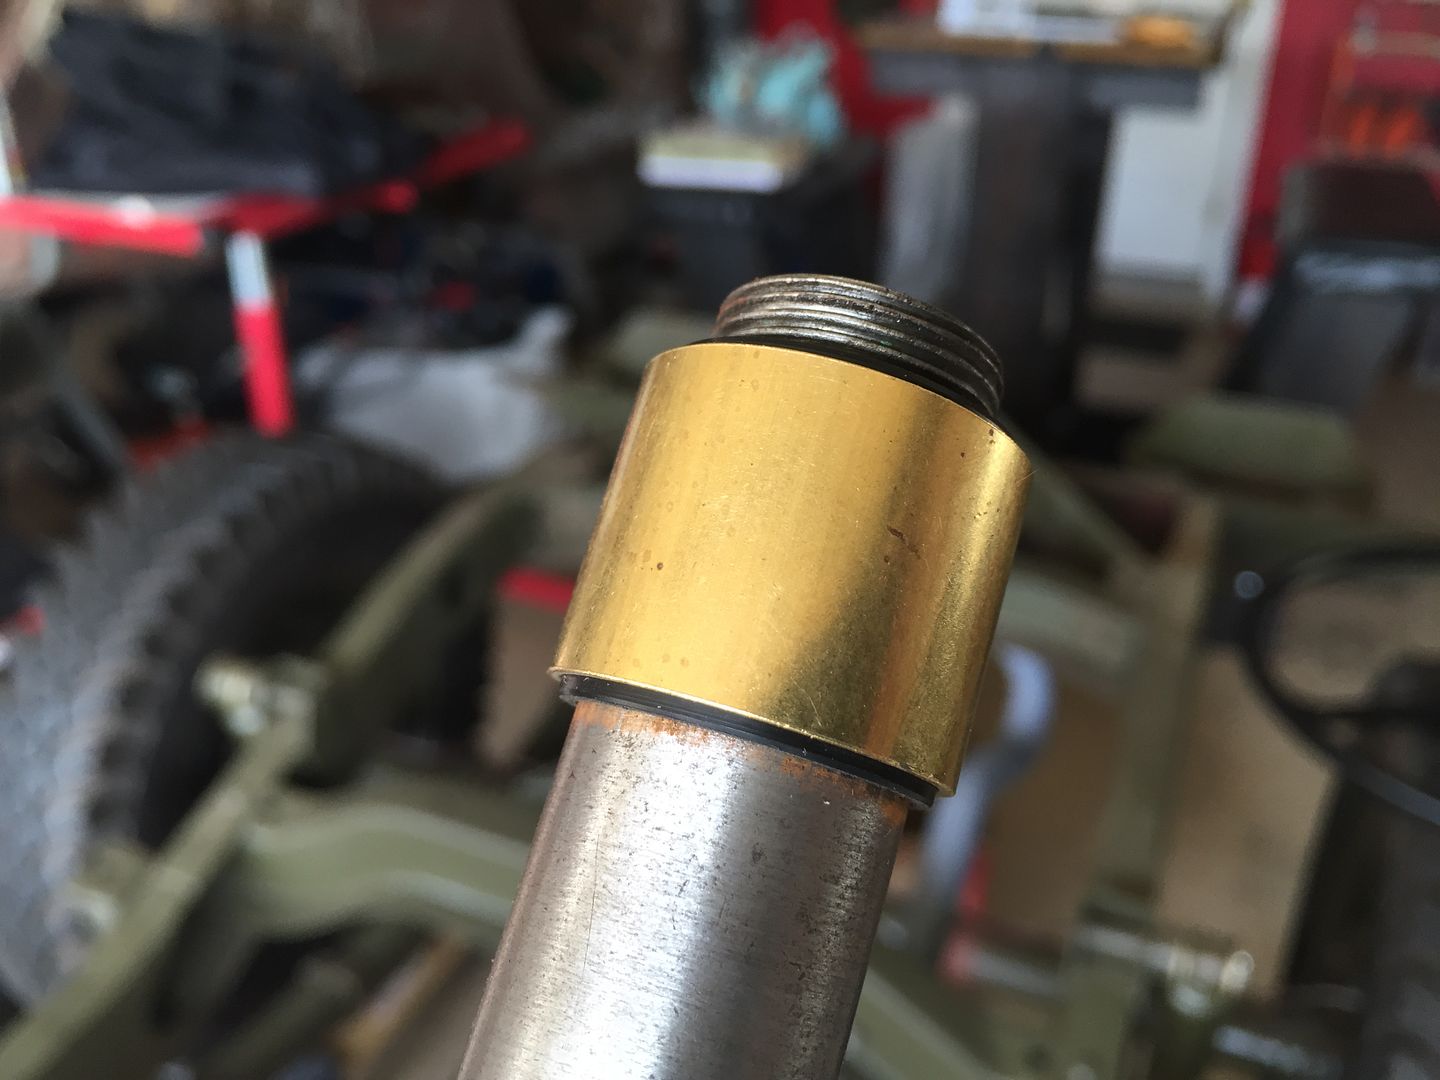 As usual, my shaft is too thick. That is as far as the ring goes. What next? |
|
Deleted
Deleted Member
Posts: 0
|
Post by Deleted on Mar 5, 2015 17:08:45 GMT -5
Brake cylinder hone with cleaning solvent as a honing lubricant. A little at a time and test. It has to friction fit, but be able to be tapped or pushed down the tube. Fun, Fun. Oil
|
|
Deleted
Deleted Member
Posts: 0
|
Post by Deleted on Mar 5, 2015 18:19:16 GMT -5
Does my Mentor HG in Mt. Pleasant have the early steering column? Can the wire be soldered with the column mounted to the frame or will he have to do all this on the bench? I ask because I need to solder my wire to the brass ring. My solder skills are hideous. I couldn't ever get it to stick...so I used purist electrical tape and now I can only honk my horn when I make right hand turns!  I never said mentor. The word was doofus! Can't trust anything on here anymore. |
|
|
|
Post by Haines Garage on Mar 5, 2015 18:42:51 GMT -5
Brake cylinder hone with cleaning solvent as a honing lubricant. A little at a time and test. It has to friction fit, but be able to be tapped or pushed down the tube. Fun, Fun. Oil So you are saying first step is to make the brass ring fit? How far down does it need to go? What about the other parts I showed? Here is the thing, I googled the crap out if this topic...no dice. Let's do it here! |
|
|
|
Post by Haines Garage on Mar 5, 2015 18:45:42 GMT -5
Does my Mentor HG in Mt. Pleasant have the early steering column? Can the wire be soldered with the column mounted to the frame or will he have to do all this on the bench? I ask because I need to solder my wire to the brass ring. My solder skills are hideous. I couldn't ever get it to stick...so I used purist electrical tape and now I can only honk my horn when I make right hand turns!  I never said mentor. The word was doofus! Can't trust anything on here anymore. What do you mean? I was really touched by those words, and thought we perhaps had a break through in our friendship. Your the dude watching Dr. Phil!!! You want to keep it the same? Fine Your just let your Alligator mouth out talk your Canary Ass!!! |
|
Deleted
Deleted Member
Posts: 0
|
Post by Deleted on Mar 5, 2015 19:44:23 GMT -5
The items in the picture are: a circular clip that snaps on the bottom of the column when completely assembled and covers the slit that is exposed where the outer column fits on to the steering box. The bearing assembly fits in the top of the outer column tube. The small cup washer goes on top of that, the spring goes on top of that, the steering wheel covers all. I don't think all the brush holder is there. There should be a spring loaded carbon brush attached to the underside of the plate with the spade connector. That brush makes contact with the brass horn ring when installed on the inner shaft. You have to slide that brass horn ring below the square cutout on the inner steering shaft. Yep-------a long fargin way. That's why you need to make sure all the burrs are cleaned up on that shaft before you slide it down. You will need to hone the ring and test fit over and over until it will move with some drag, down the shaft. Now----------get the brush assembly fixed so it's complete. Then install the outer tube on the steering box. The "window" in the outer tube is where the brush holder attaches. The brush protrudes through the window and makes spring loaded contact with the horn ring. You need to understand all this in order to stop sliding the horn ring when it's in the correct position. Remember the wire has to come through the square hole and solder to the ring. This means you must ID where the brush makes contact and runs. Otherwise it hits the wire and solder. PS-----Do you have the outer tube clamp that holds it to the nipple on the steering box? The "clip" installs just above it. Look at some parts diagrams. That little cup washer applies even spring pressure to the upper bearing because the spring end is not flat and even all the way around. The steering wheel pushes down on the spring when installed. Do not forget that the column outer top fits up into a plastic sheller wheel. That means you need to test fit it all so the outer tube fits the wheel before you locate the horn ring in the brush window. Got it Skippy? I told you this was not for wimps! Only Jeep Guys know this stuff. You must spend time with your little friend and get to know him. Oilly
|
|
|
|
Post by Haines Garage on Mar 5, 2015 20:20:56 GMT -5
That is a great description . With your help, going to put it into pictures. Just took these. 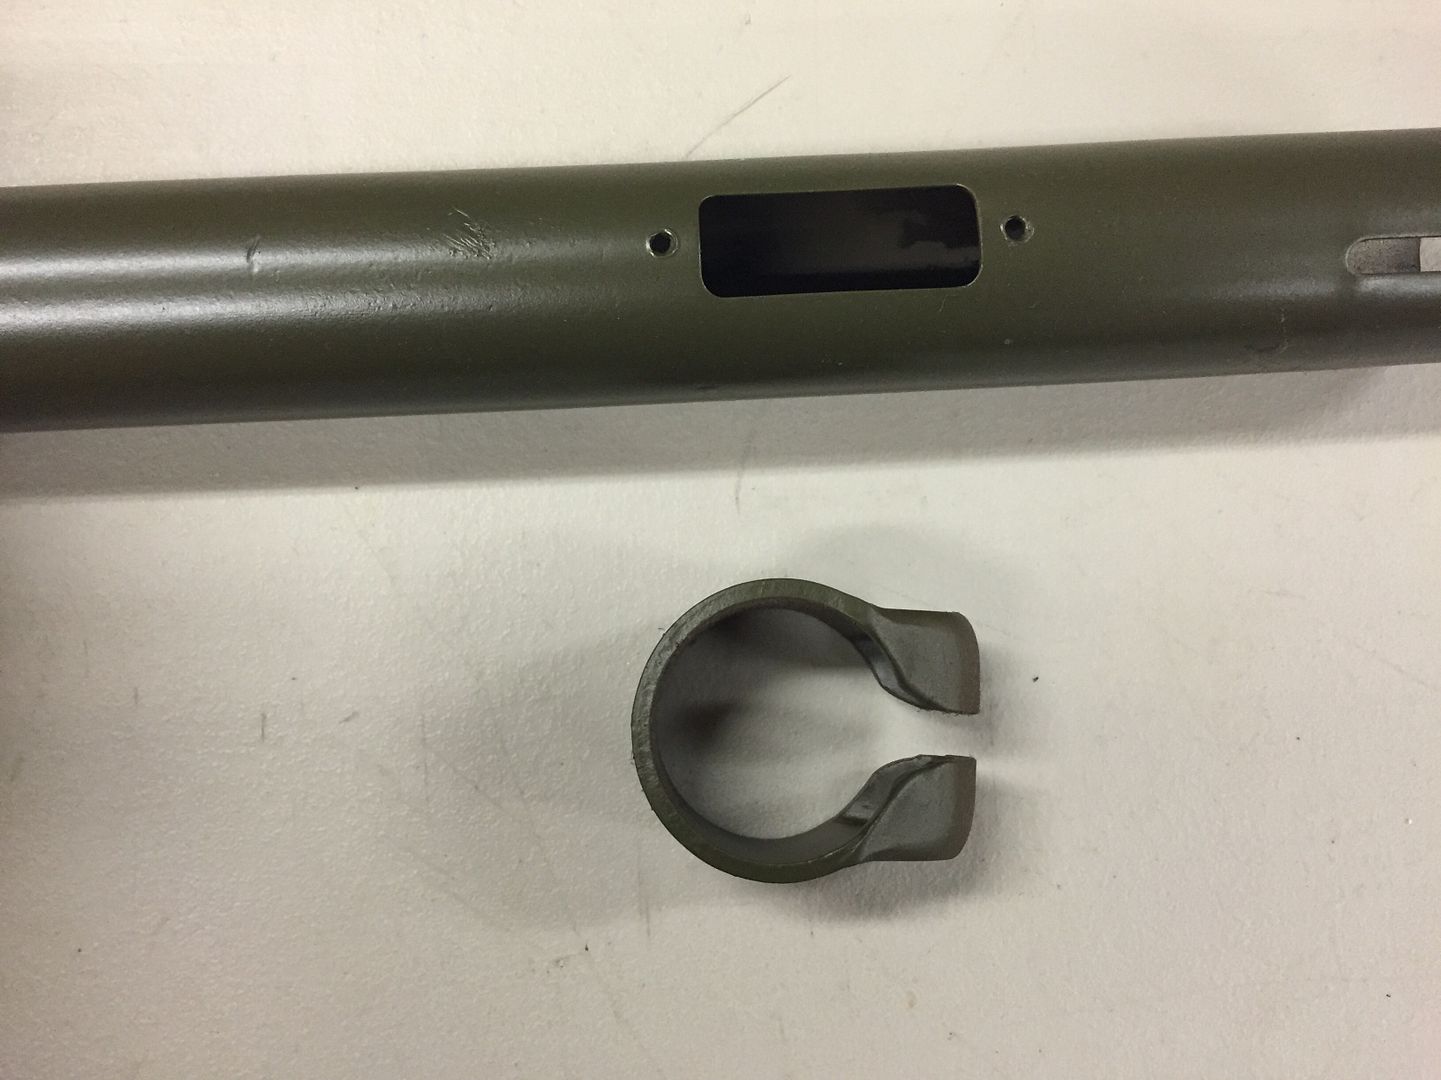 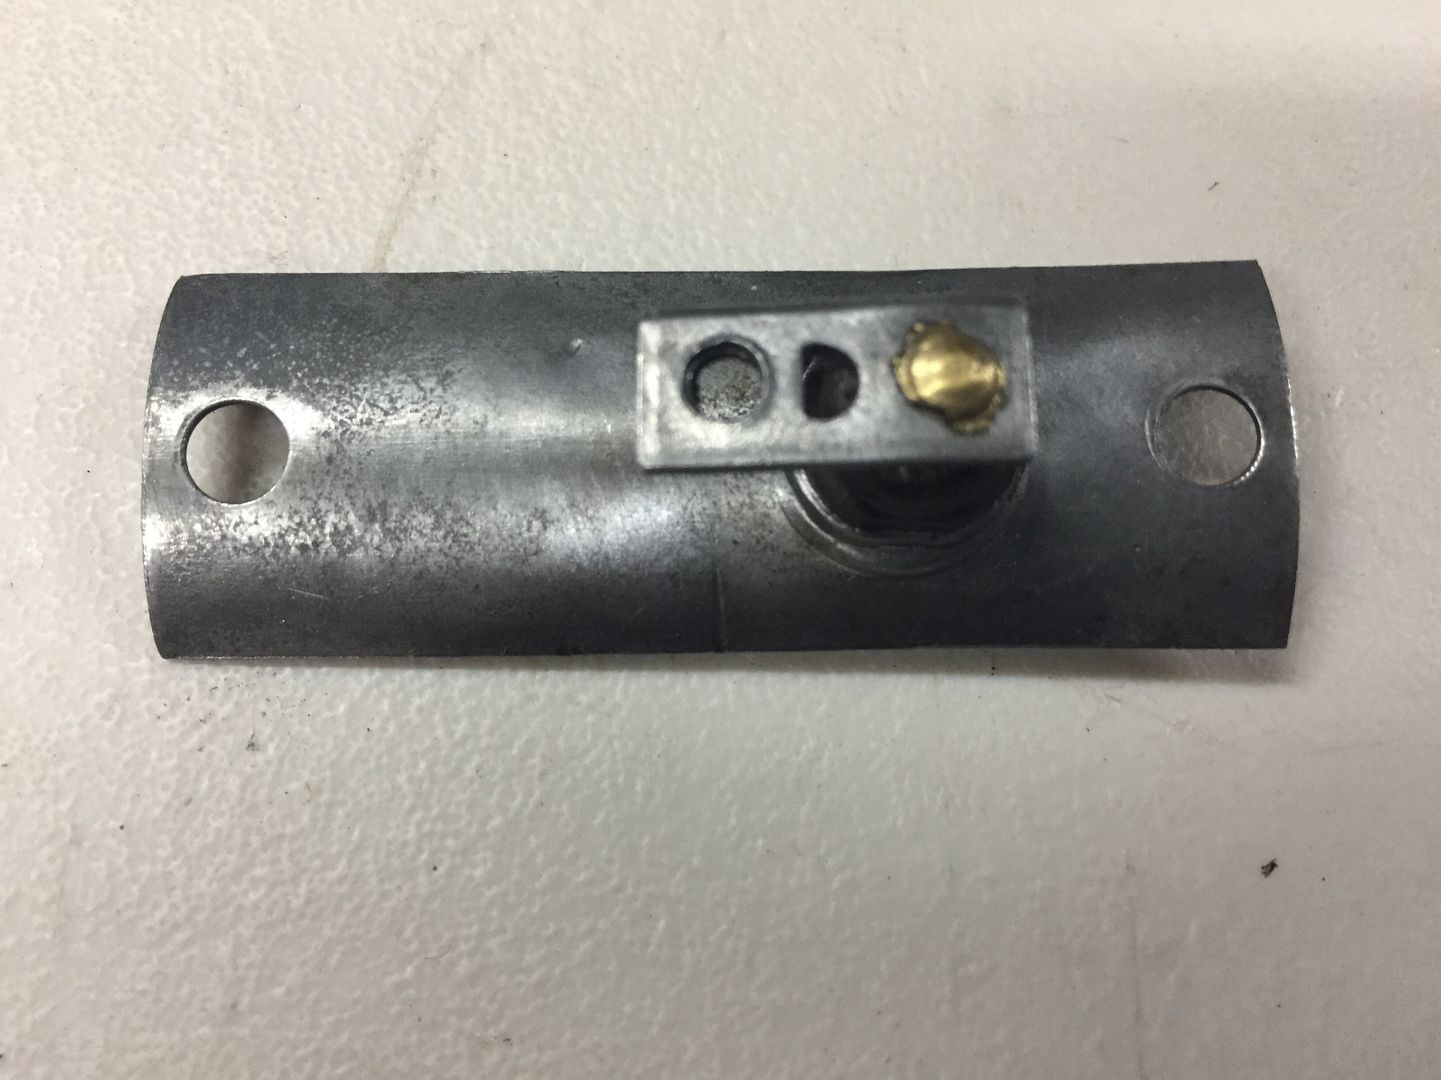 What brushes I am missing? Where do I get them? I find no parts drawings......anyplace! |
|
Deleted
Deleted Member
Posts: 0
|
Post by Deleted on Mar 5, 2015 21:26:56 GMT -5
Maybe you should look in the army manuals if it is the same set up.
Somehow I was able to determine the correct set up, Doofus Mentor.
|
|
|
|
Post by Haines Garage on Mar 5, 2015 21:30:10 GMT -5
Maybe you should look in the army manuals if it is the same set up. Somehow I was able to determine the correct set up, Doofus Mentor. Maybe you should confront some of those anger issues, and inferiority complex problems, and post a picture. |
|
|
|
Post by Haines Garage on Mar 5, 2015 21:56:04 GMT -5
Following the Generals orders, I start to hone the re pop brass rings plastic insulator . Out of the box, not even close . My shaft measures at the rings resting point .8920 The insulator , after honing for 30 minutes measures .8690 The outside edge of the insulator measures .9865 Thing is going to be paper thin to fit. Is this OK? Why is replacement part not correct? Bought from my favorite vendor!  |
|
Deleted
Deleted Member
Posts: 0
|
Post by Deleted on Mar 5, 2015 22:09:48 GMT -5
I bet you put too many coats of paint on your shaft.
|
|
|
|
Post by Haines Garage on Mar 5, 2015 22:12:16 GMT -5
I bet you put too many coats of paint on your shaft. Nine...that means no. Measurement takin on bare metal . |
|
|
|
Post by Haines Garage on Mar 5, 2015 22:28:55 GMT -5
The button and new wire purchased. 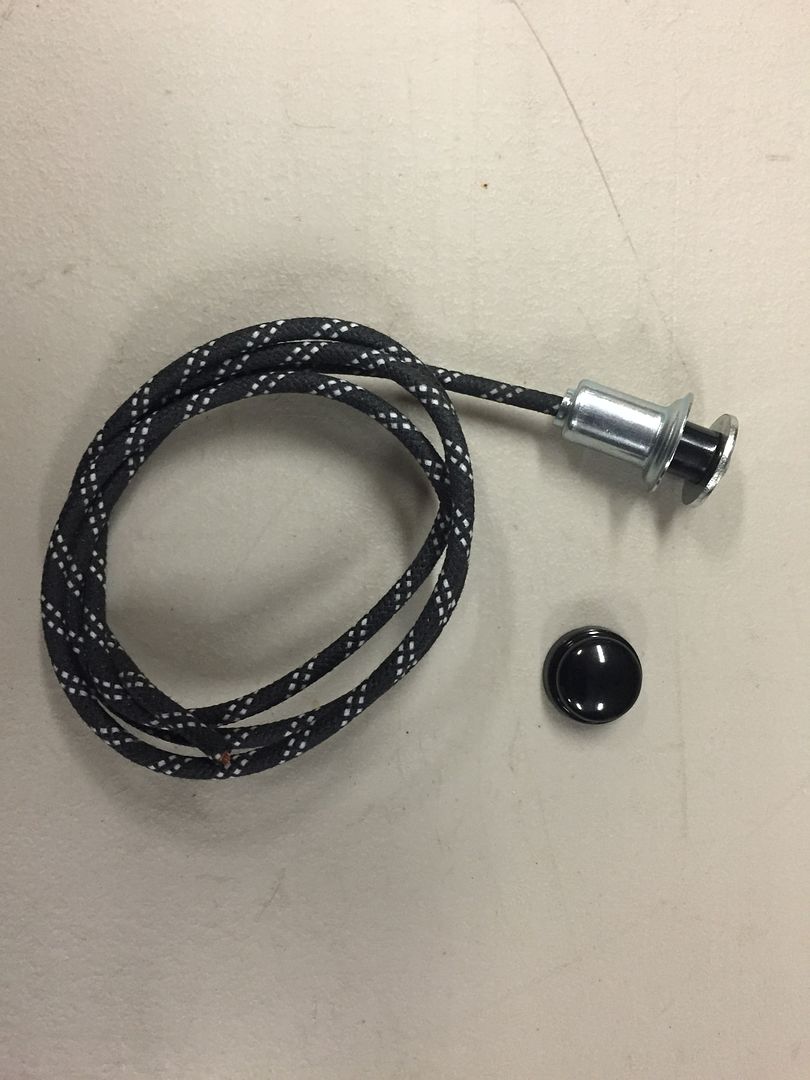 |
|
Deleted
Deleted Member
Posts: 0
|
Post by Deleted on Mar 6, 2015 6:36:34 GMT -5
Following the Generals orders, I start to hone the re pop brass rings plastic insulator . Out of the box, not even close . My shaft measures at the rings resting point .8920 The insulator , after honing for 30 minutes measures .8690 The outside edge of the insulator measures .9865 Thing is going to be paper thin to fit. Is this OK? Why is replacement part not correct? Bought from my favorite vendor! View AttachmentI still can't see the bottom or brush side of the brush holder. Not sure what all you have of it. As far as being too thin, as long as the plastic is there and the brass is not contacting the inner shaft, you are good. I was not happy with my "new " bushing either. I see you do have the correct outer tube and clamp. That's good. Making that window would be difficult. The later 2A's and 3A's have a tube that extends through the worm shaft up into the inner shaft. High enough to be above the grease/oil in the box. The horn wire simply goes through it out the bottom. No more BS brush stuff. You got to be original and correct , especially since you have it. If the hone goes through and the plastic fails, maybe you can find a suitable non conductive material that just fits the shaft and bushing. Like thin butter dish lid plastic. As long as it's tight enough not to move, it would work fine. Oil |
|
|
|
Post by athawk11 on Mar 6, 2015 14:02:43 GMT -5
Thank God we are talking "Real" Willys stuff here. Weather issues have kept my from doing any real Willys work, so I turn to you guys to get my fix. That's when I tune in to...Peddle Cars...Poles...and Pot Shots.  Tim |
|
|
|
Post by Haines Garage on Mar 6, 2015 15:39:19 GMT -5
After honing the insulator out of the new brass ring...That only took hours.  I got it so it would just fit onto the shaft. I used silicone spray as a lube. I sprayed the shaft and inside of the brass ring. Oddly enough, the tool used to remove the locking ring on my grinder made a perfect tapping tool. 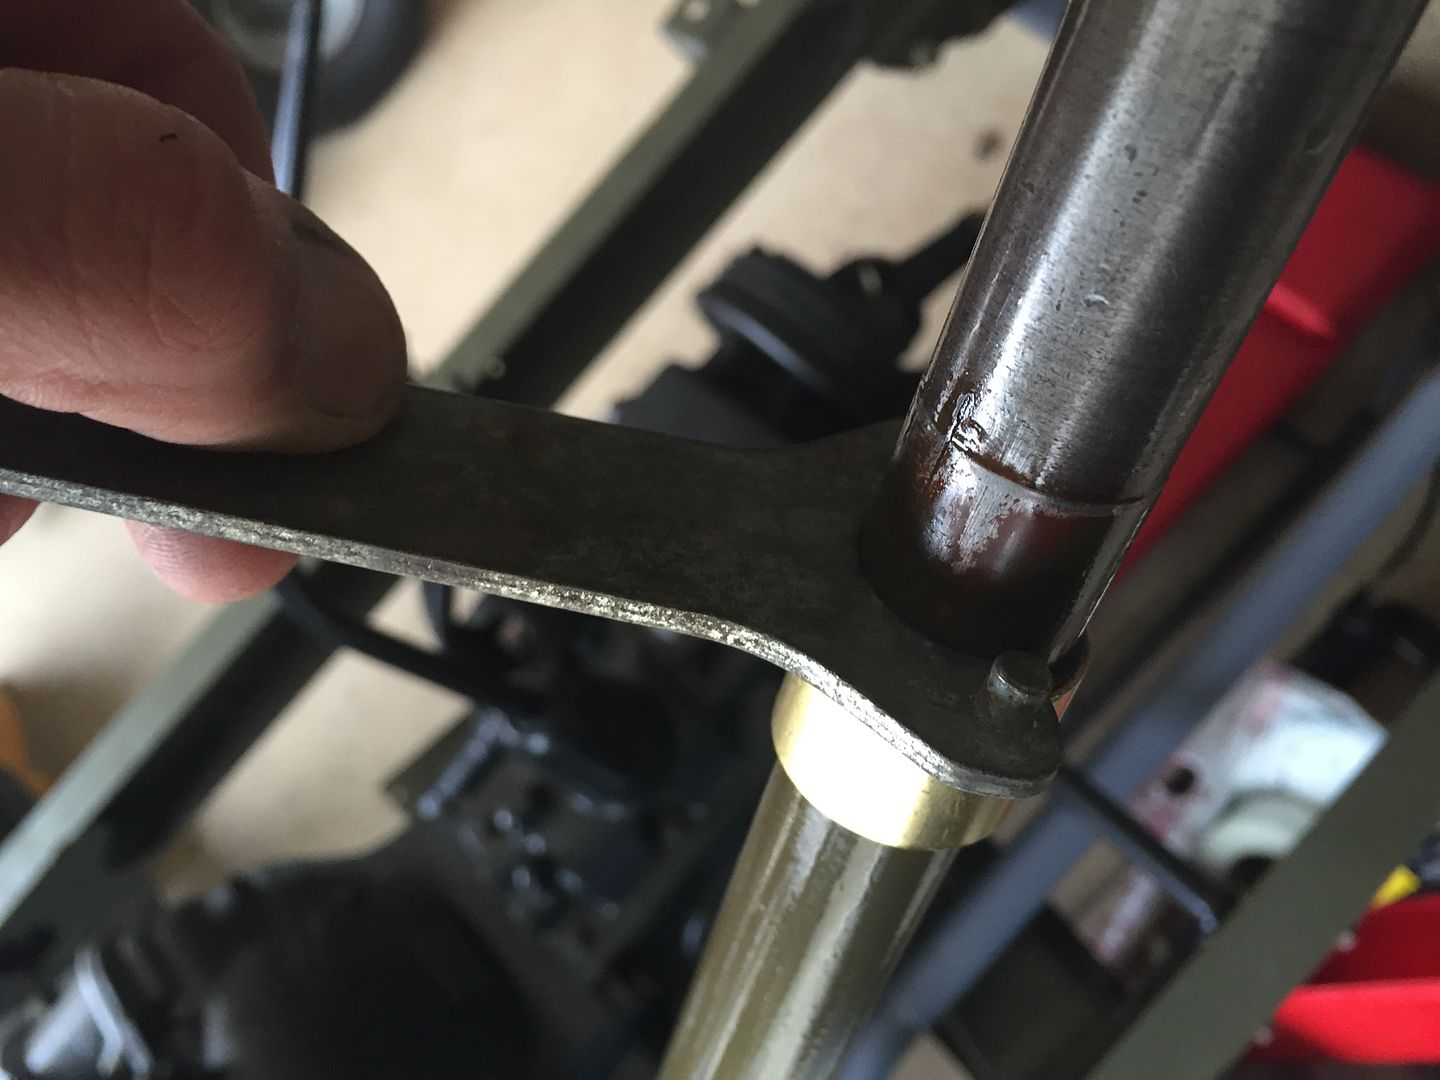 I used a small ball peen hammer to tap it down the shaft carefully. It was a little time consuming, but not that bad. According to the marks on my shaft, I placed it where the old one was. 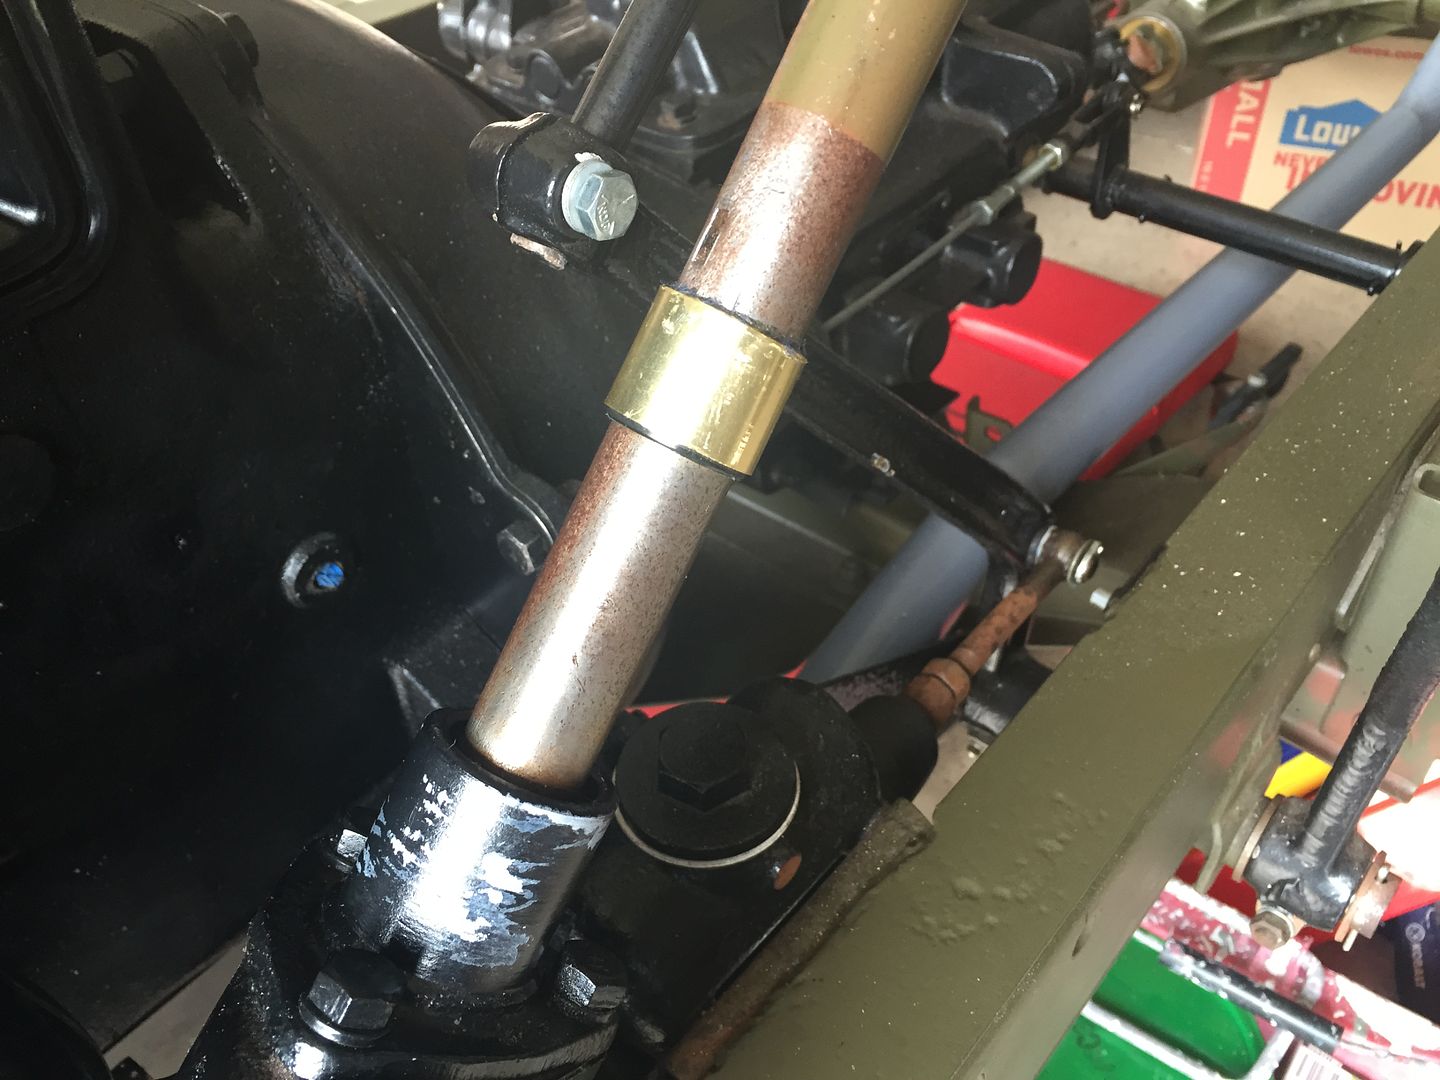 Then check its location with the window on the tube. 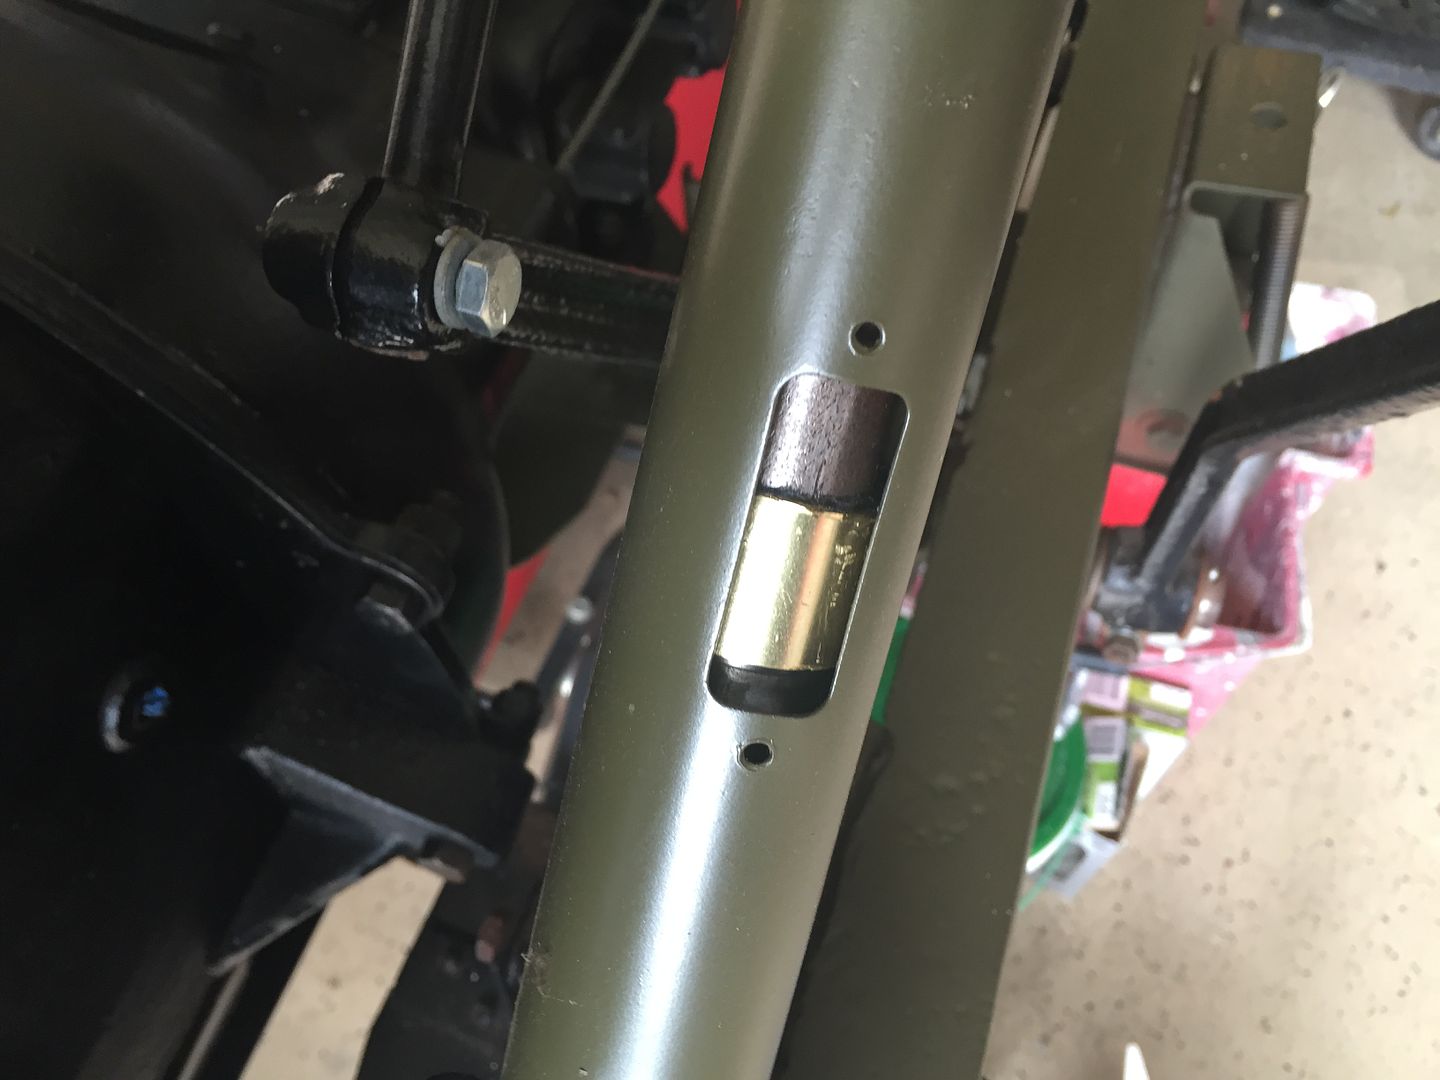 |
|
|
|
Post by Haines Garage on Mar 6, 2015 16:43:41 GMT -5
Feed a 4 foot long piece of MIG wire through the bottom slot on the shaft. 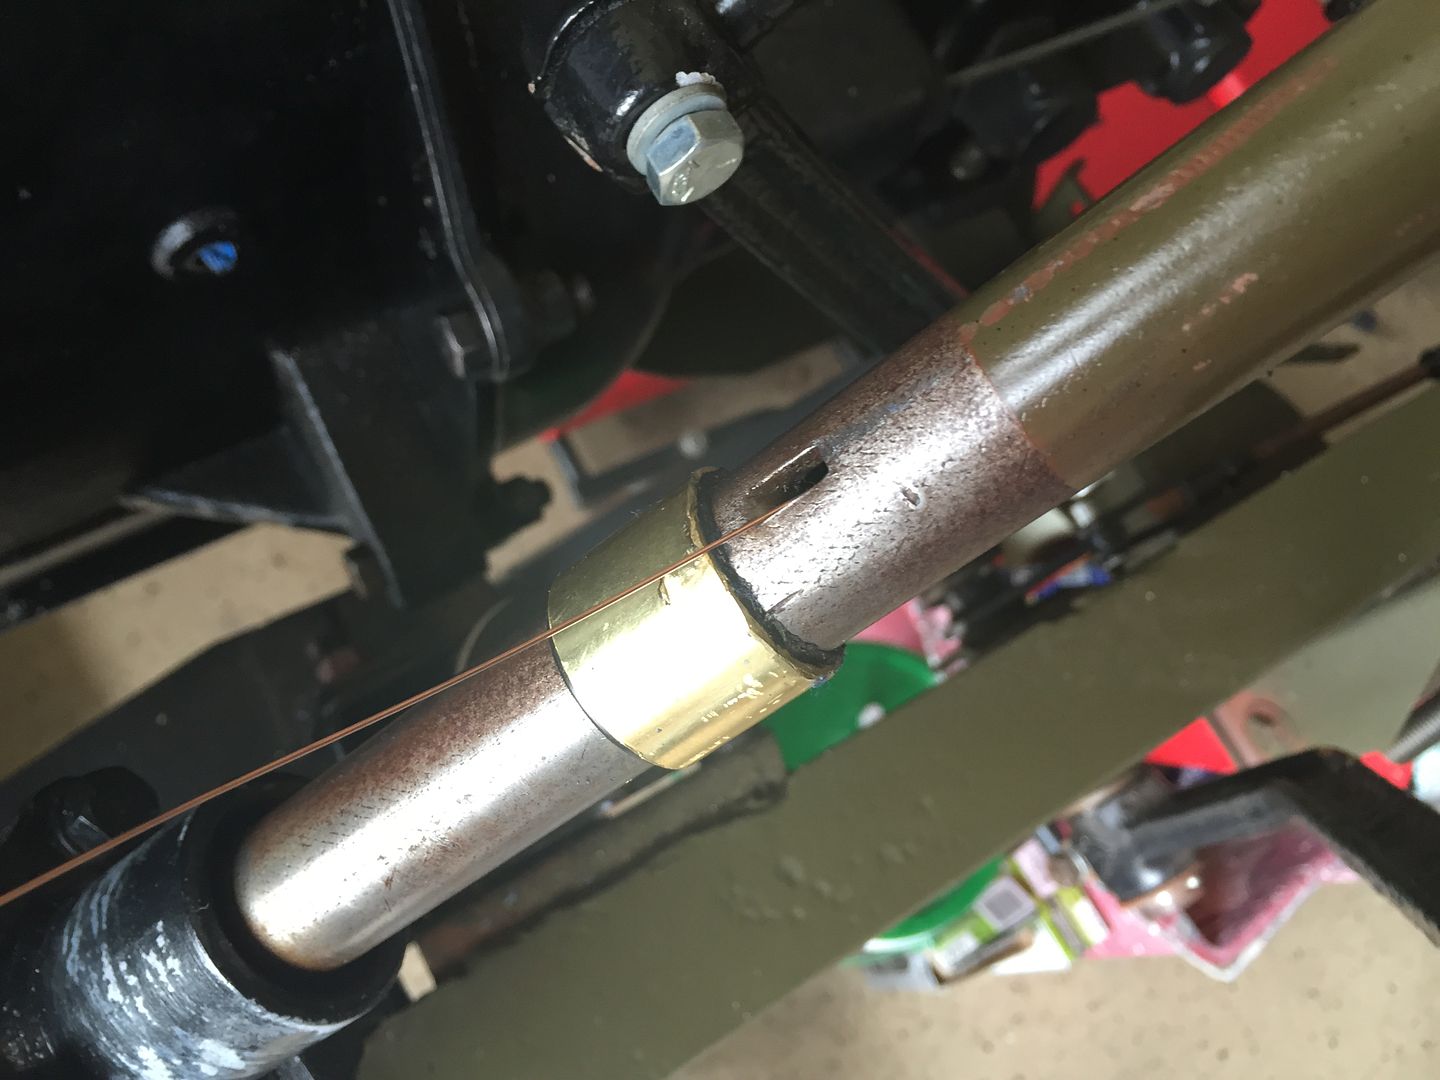 Put an small bend in the wire to act as a hook, and wrap tight with electric tape. 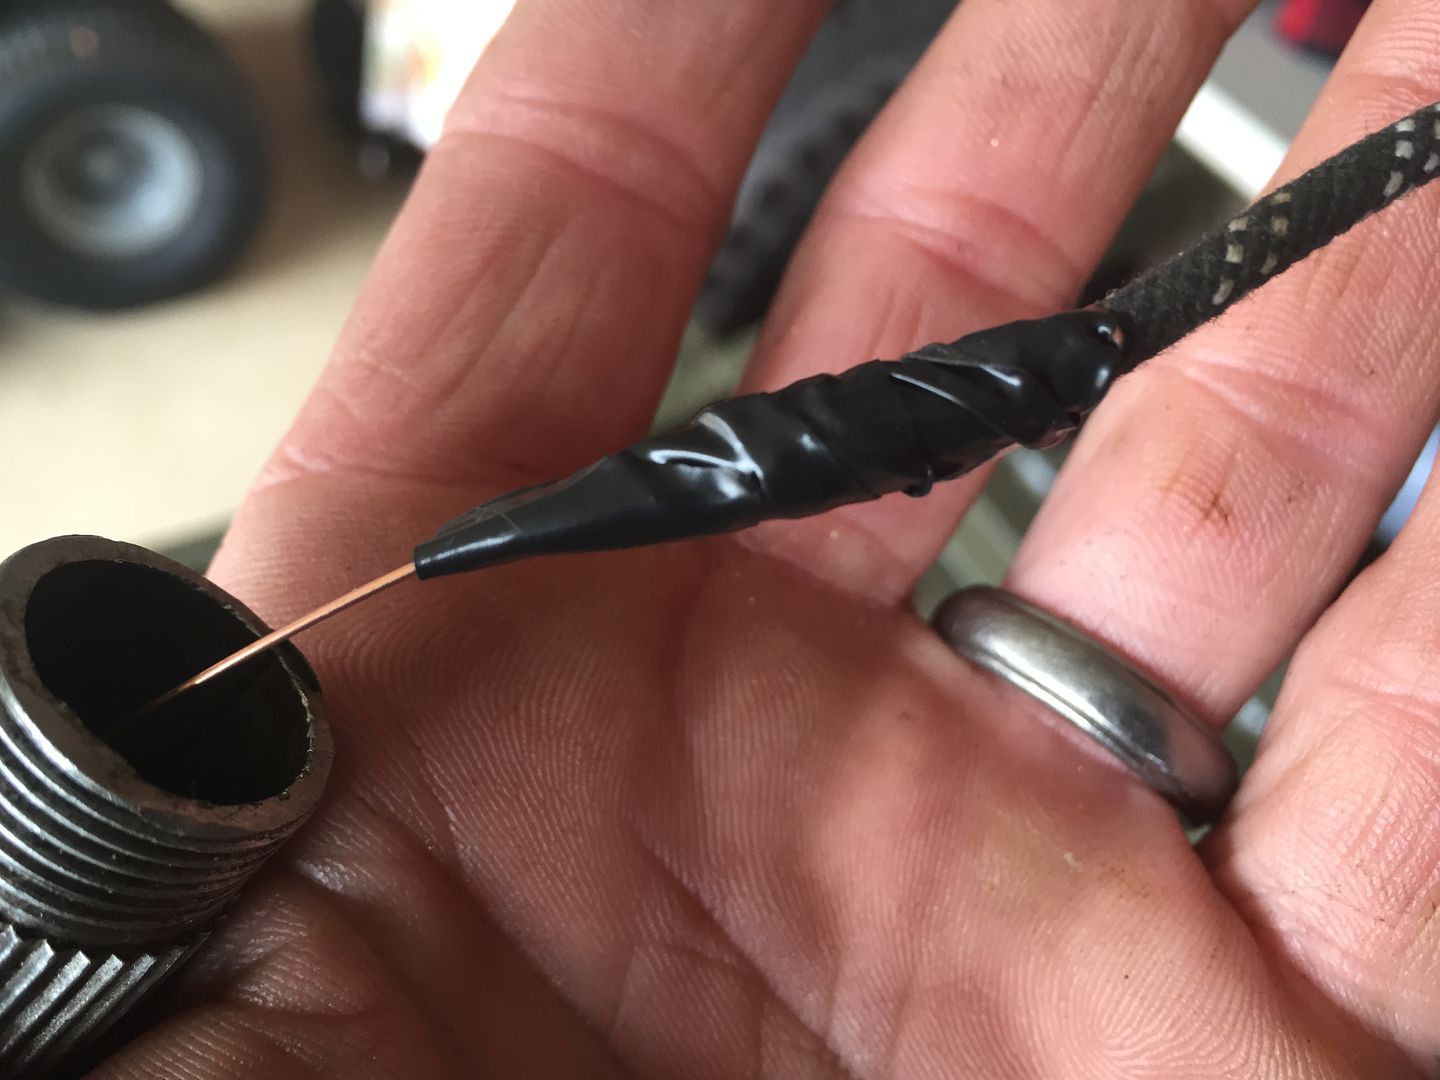 Pull from the lower end SLOWLY until the head of the horn wire comes through the slot. 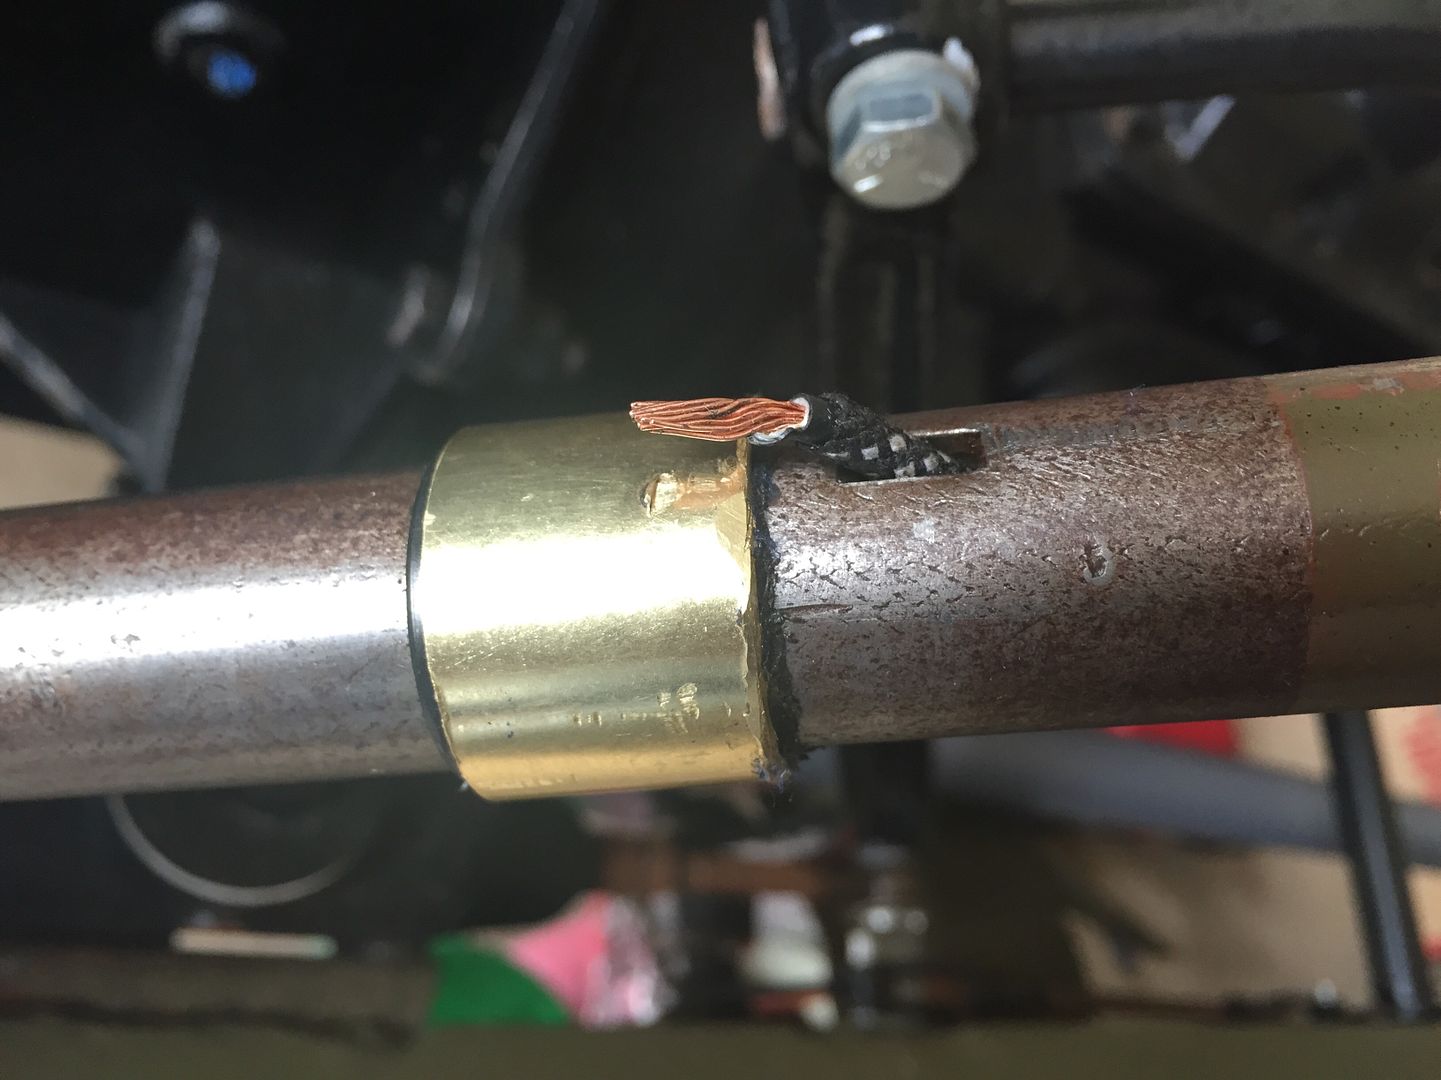 I then slightly fan the wire strands and soldier them to the top edge of the brass ring. I used 50/50 ACID core soldier. you can use lead free with flux as well. 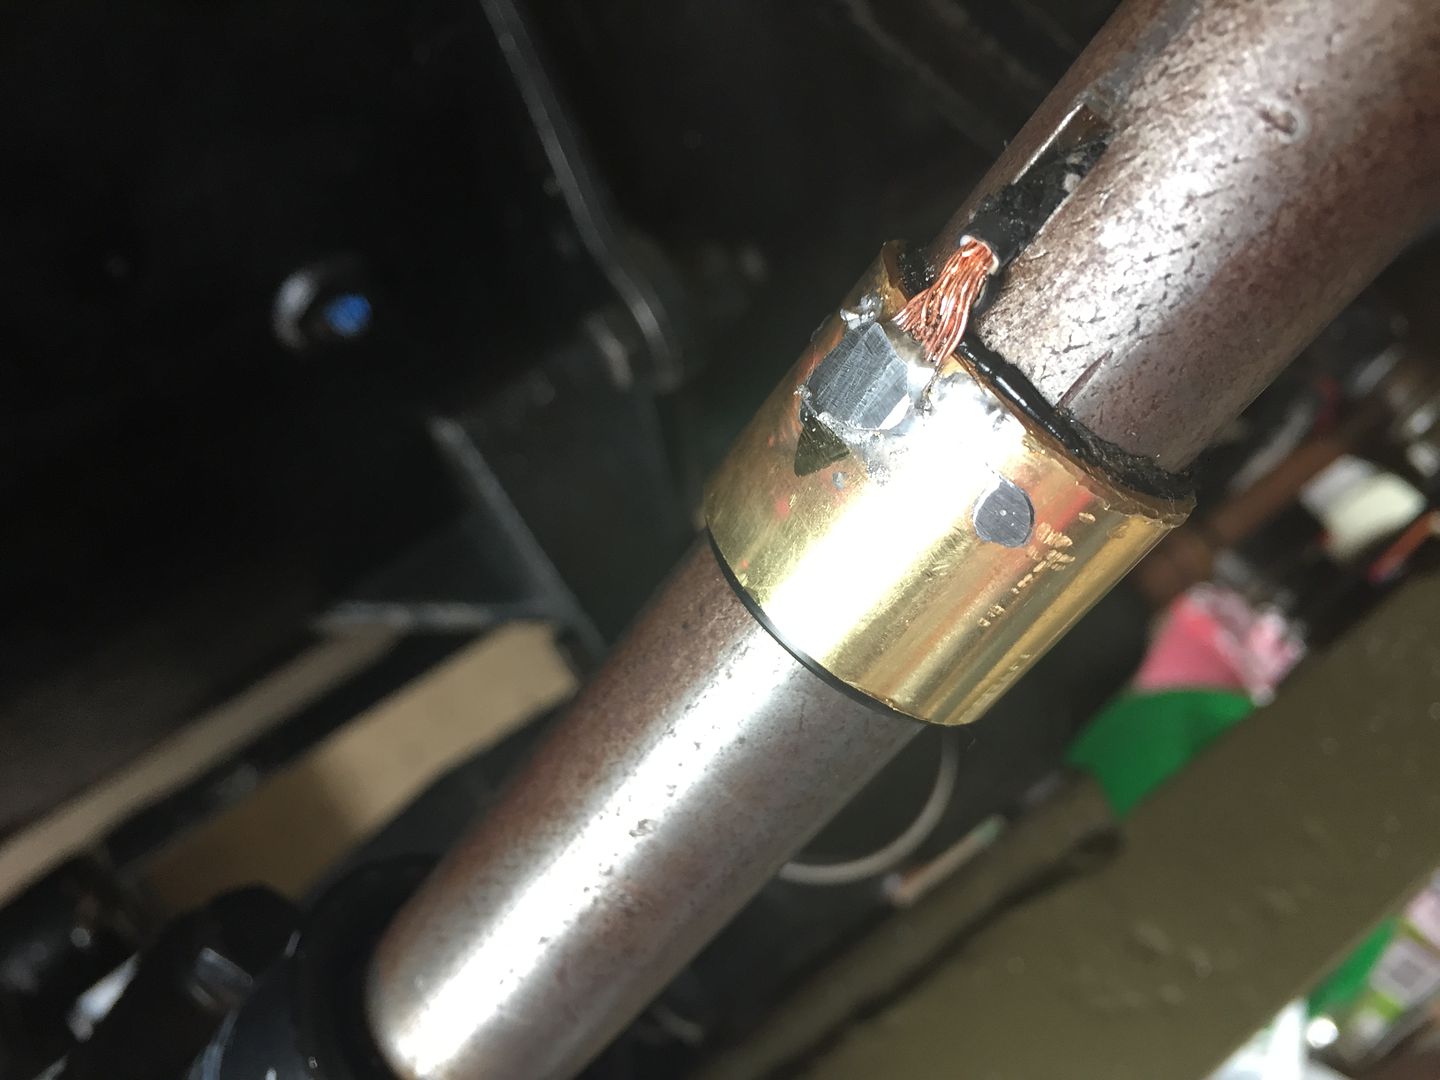 |
|
|
|
Post by Haines Garage on Mar 6, 2015 19:08:44 GMT -5
Here is a contact picture. Where and what are "Brushes" 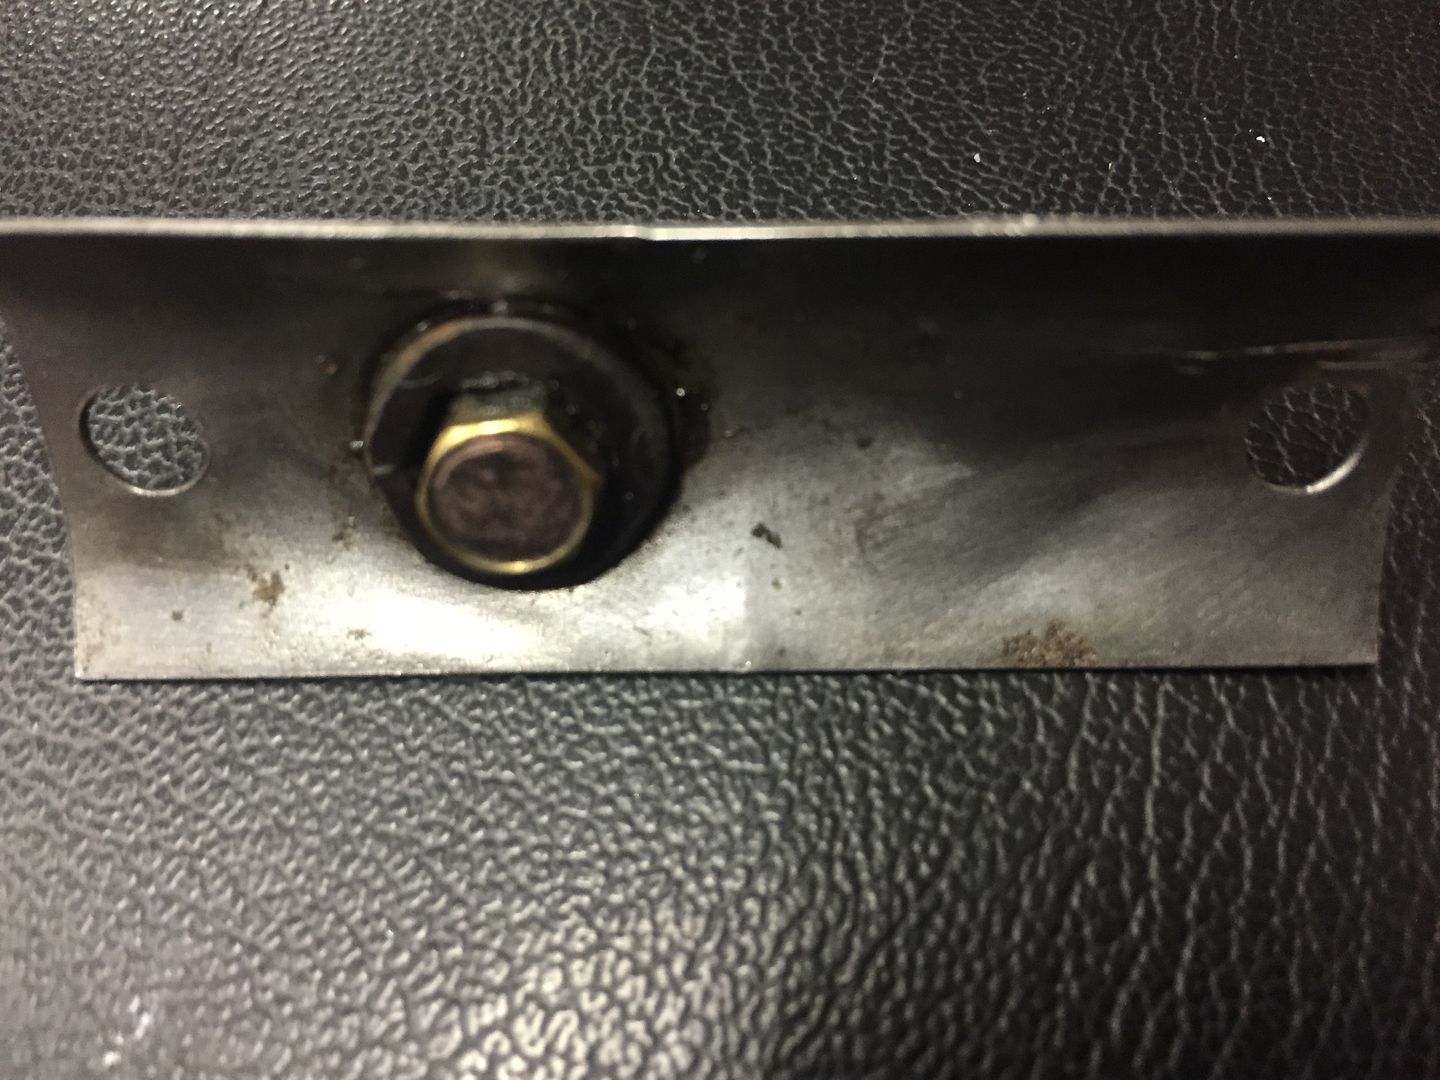 |
|