|
|
Post by zooke581 on May 15, 2014 6:53:15 GMT -5
Very nice. A practice pinstripe job before the actual?
|
|
Deleted
Deleted Member
Posts: 0
|
Post by Deleted on May 15, 2014 7:11:24 GMT -5
Good Job ! Super Traxions? (Edit: Found the post where you already answered that, I'll learn to read next time!!)
X2 on the baby powder! Plus it doesn't dry out, so if you to have to patch a tube while out and about somewhere, it will still do it's job!
|
|
|
|
Post by Haines Garage on May 15, 2014 17:58:35 GMT -5
Too cool! The rubber is awesome..
My skill set indeed...lmfoa
Cool pics! I remember that driveway at the Hawkridge Ranch.
When can you and Rachel come visit me?
|
|
|
|
Post by athawk11 on May 16, 2014 18:41:42 GMT -5
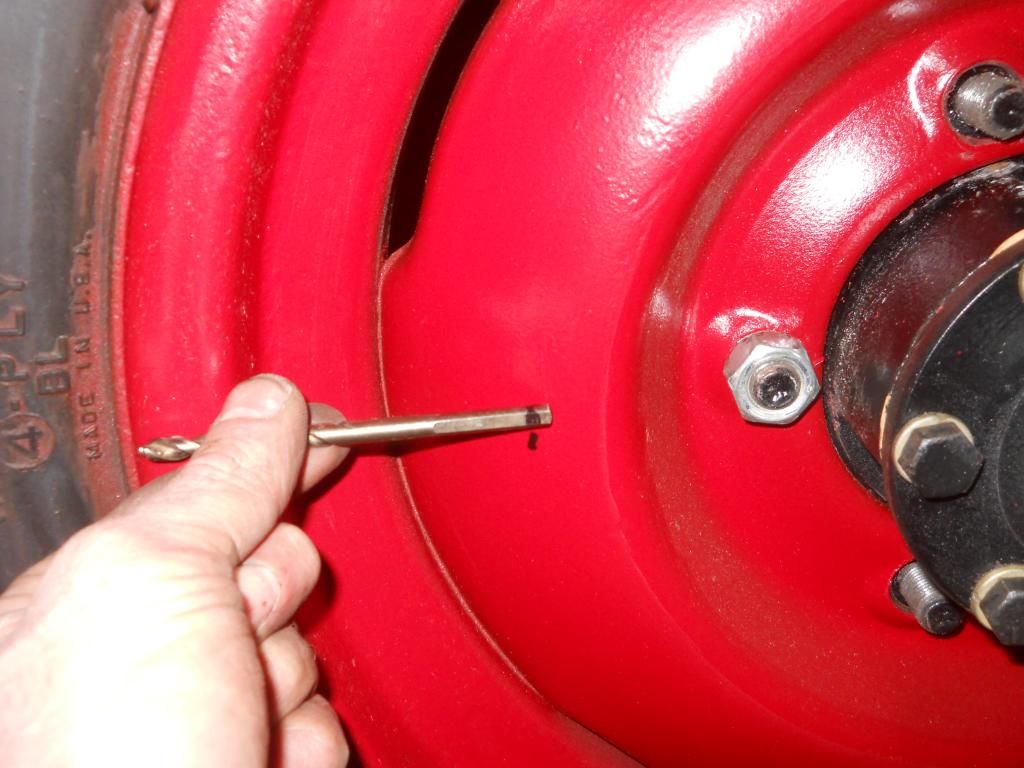
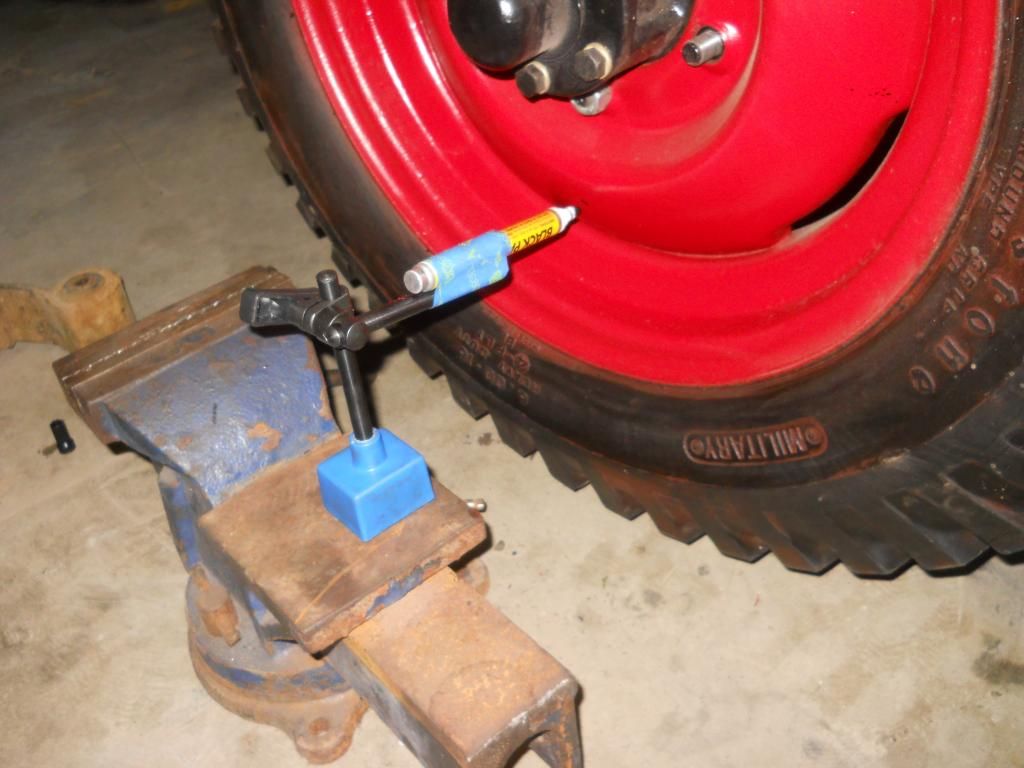
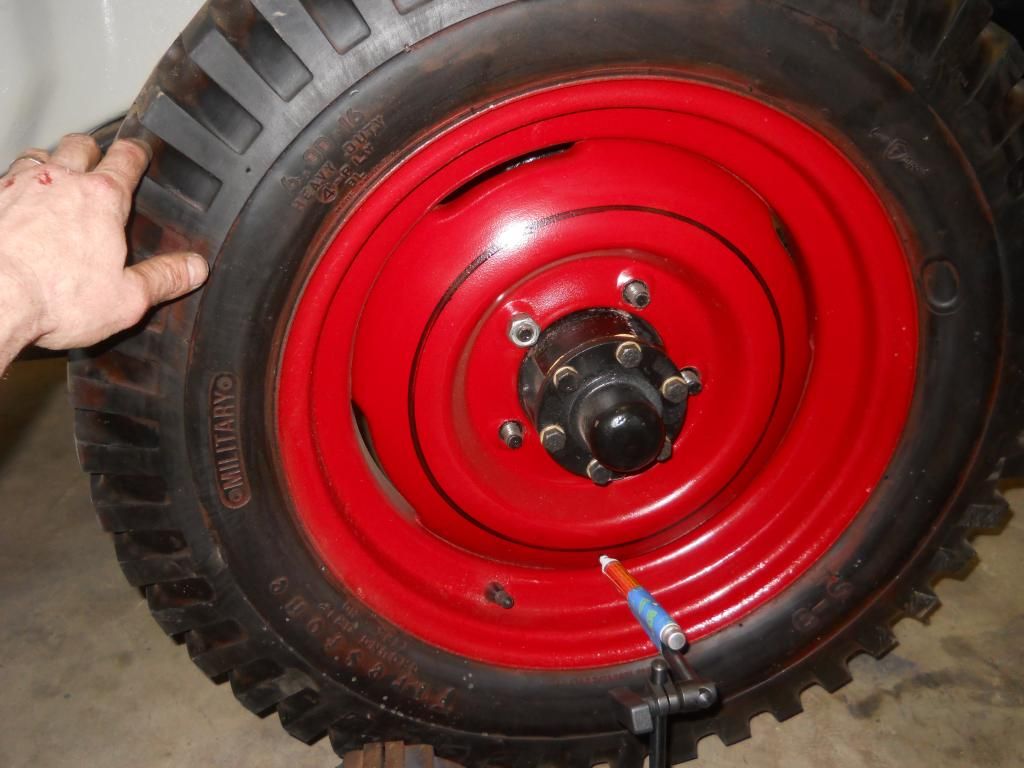
Moose...After the fits this Willys gave me while trying to develop oil pressure, it owed me an easy, gratifying day!!  Zooke...I had to practice. I don't have any of the wheel paint left. If I botched it up, I would have had to pony up another $35.00 for a half pint of paint. Leaker...Gary...I'll do the baby powder on the next set I do. I appreciate the idea. Leaker...That Kubota ranks right at the top of the best purchases I've ever made. It was tough handing over that much cash, but at this point, I can't imagine my life without it. I cherish it. I'm running low on garage space, but it will never be left out in the elements. HG...I will be at your door at some point in the future. I promise. Time to add pin striping to the wheels. This is my rig…  This is the oil paint pen…  To stripe the wheels, I mounted each to the rear right side of the Willys. I set my rig into position, then slowly spun the wheel. They turned out nice. They do have that ‘hand painted’ look. The rig took me about 30 minutes to build. For set up and painting, each wheel took about 5 minutes.   Mounted the wheels to the Willys. We have a rolling chassis…  |
|
|
|
Post by Haines Garage on May 16, 2014 19:09:43 GMT -5
|
|
Deleted
Deleted Member
Posts: 0
|
Post by Deleted on May 17, 2014 6:17:38 GMT -5
Tim, that paint stick idea is fantastic. Knowing how sharpies run out if not held with the tip down, I was thinking a magnet device on the body? Did it try and quit feeding? Who has those sharpies in oil base, and what colors other than black? If they had it in Luzon Red I'd jump! Also, your base and wood block, did you do each rim mounted in the same location each time, or did you move the block around? Getting the same starting point would be difficult. I feel a test drive is approaching. John
|
|
|
|
Post by athawk11 on May 17, 2014 11:39:20 GMT -5
Leaker, Thanks! I can't take credit for this approach. I stole the paint marker idea from Ryan M. I found this marker at Hobby Lobby. I'm not sure they'll have Luzon Red,  though I did notice a number of other colors, tip sizes, and manufacturers. I mounted all wheels to the rear passenger side. For consistency, I set the rig 1/4" from the rubber and centered on the hub. The pen tip is spring loaded. Before each wheel, I took the pen and pressed it on a piece of plastic. This 'reloaded' the paint into the tip, and it was more than enough paint to spin the wheel a couple rotations. I put my knee on the plywood base, held the pen steady with my left hand, then spun the wheel with my right hand. |
|
|
|
Post by Ryan_M on May 17, 2014 12:42:36 GMT -5
..... Also, your base and wood block, did you do each rim mounted in the same location each time, or did you move the block around? Getting the same starting point would be difficult. I feel a test drive is approaching. John John - When I did mine I started by moving my paint rig around to each wheel but found it was much easier to pick one spot (in my case it was the front right side) and move each wheel through that location. My rig was not as "fixed" as Tim's so I had to measure off and re-set it every time. Even with that, it was still pretty easy. Tim - Sorry for posting pics of MY project in YOUR thread but it seemed like a good place to further discuss the pinstripes.    Ok, now back to Tim's Jeep. Get that thing on the road. We want a test video!! |
|
Deleted
Deleted Member
Posts: 0
|
Post by Deleted on May 17, 2014 15:46:01 GMT -5
Thanks to both of you! I've been on the fence about doing this and now have much more faith in it. Brushes, pin strip rollers, tape, all had me not anxious to mess with a nicely painted wheel. You guys have made it quite simple. Now to see what they have at hobby lobby for colors. John
|
|
Deleted
Deleted Member
Posts: 0
|
Post by Deleted on May 17, 2014 16:09:17 GMT -5
The creativity here is top shelf  (by the way I do like the new thumbs up deal). The paint marker would work excellent in my tire machine as well. I am caught up on a few things at home for once so I am going to call Mr. Hawkridge and chew his ass a little   , so TIM, when you see 612 area code on your phone it is not the IRS, it's not the Department of Homeland security, it's me and that's worse!  , LOL Lee   |
|
|
|
Post by Haines Garage on May 17, 2014 16:45:20 GMT -5
Ugh ohhh
What the heck could have Sir Hawk have done???
|
|
|
|
Post by Golfing Moose on May 17, 2014 19:41:32 GMT -5
Hey guys...go back to page one and review. The first post for the rebuild was made about 375 days ago!!
That is a tremendous amount of progress! I wonder how many posts HG has made in 375 days?!
-Bo
(Yes, this guest post was a throw back to the good old days before oilleaker knew the difference between letters and numbers! =-)
|
|
Deleted
Deleted Member
Posts: 0
|
Post by Deleted on May 17, 2014 19:44:24 GMT -5
Yes Moose, I finally graduated to 2nd grade.  John |
|
Deleted
Deleted Member
Posts: 0
|
Post by Deleted on May 17, 2014 21:36:46 GMT -5
(Yes, this guest post was a throw back to the good old days before oilleaker knew the difference between letters and numbers! =-) OUCH!, Moose55 is a little frisky tonite  , LOL    Lee  |
|
Deleted
Deleted Member
Posts: 0
|
Post by Deleted on May 18, 2014 7:41:26 GMT -5
I forgot to add that Moose passed the test proving he was a human being! Now, the test to being a true mulligan golfer-----------I think he dresses the part. Your turn to strike and smite! Oil
|
|
|
|
Post by athawk11 on May 18, 2014 9:04:52 GMT -5
Just a quick post, then off to breakfast with my family. A couple glamour shots…   And, took whitey for a spin… |
|
|
|
Post by Haines Garage on May 18, 2014 15:28:20 GMT -5
Sir Hawkridge, That is by far The most Awesome post !!!! Fantastic!! Outstanding!! Superb!! You get the gold star award for sure!      Now I inquire .. How does one drive a chassis! |
|
Deleted
Deleted Member
Posts: 0
|
Post by Deleted on May 18, 2014 17:38:36 GMT -5
Holy cow, they are much quicker without a body. Awesome! Now it's off to the Jeep races. I think you have a fast one there. John
|
|
|
|
Post by Moooooooose on May 18, 2014 18:11:38 GMT -5
That was fun to watch! My 8 year old asked if it was some kind of go kart. He was perplexed that it was a jeep. Guess he's forgotten that I used to have him push my chassis around. I started mine up in that configuration, but never drove it. Wish I had just to say I did! That was fun to watch!
|
|
|
|
Post by athawk11 on May 18, 2014 19:20:44 GMT -5
Thought I'd give you guys a show. This thing hauls A$$, and handles like a Ferrari!  Moose, I didn't do this for the first one. This seems to be trending on some of the other sites. The theory is you run it this way, and catch bugs that would be more difficult to repair on an assembled Willys. HG had some interest on how I set up a rolling chassis. I used plywood for a floor and to hold the clutch and brake pedal arm in position. I secured this by bolting it to the frame/tub mounts. I added a few chunks of plywood to mount the gas pedal. I strapped a gas can to the front and tied down the battery. I used an old lawn chair and some scrap lumber for the seat. Key-switch, oil and temp gauge hooked up. That's it.    |
|
Deleted
Deleted Member
Posts: 0
|
Post by Deleted on May 18, 2014 19:40:43 GMT -5
No steering wheel nut?    ? you got guts buddy! John |
|
|
|
Post by zooke581 on May 18, 2014 21:18:06 GMT -5
Loved the vid. It sure is fast. I did the same with my chassis but sat on the tank and just pushed on the gas lever on the engine. Bud did have clutch and brake pedal.
Very, very nice!
|
|
|
|
Post by Haines Garage on May 18, 2014 21:30:41 GMT -5
No steering wheel nut?    ? you got guts buddy! John Except for when he was afraid to fire the engine  go figure! I have never popped Sir Hawkridge...It kind of felt good!  |
|
|
|
Post by rudycon on May 19, 2014 9:00:49 GMT -5
Wow! Fantastic! That is the fastest lawn furniture in the country! Sounds great and yeah, that is QUICK! Must be the flames on the bellhousing.
Bravo!
Missing steering wheel nut? Optional. I was riding with a friend in his classic mustang on the highway one day. He hands me the steering wheel and says, "What do I do with this?" I yelled at him to put it back on before we run into a bridge abutment!
|
|
|
|
Post by athawk11 on Jun 18, 2014 10:45:54 GMT -5
Thanks for looking in fellas. For my additional test runs, I've installed the steering wheel nut.  I am currently putting the rolling chassis through an extensive test phase. I drive it often and hard. Well, not hard enough to break stuff, but hard enough to expose a weakness. In the mean time, I'm back to working sheet metal. Many of you remember how bad the tub was on this Willys. Unfortunately, the rest of the sheet metal was just as abused as the tub. The fenders are probably in the best condition, so I'm saving them for last. The grille is straight, but I will need to replace some metal below the headlight area. The hood and windshield frame were brutalized. I don't know if I'll end up using them, but I figured it was worth a try to fix them. The windshield frame has the typical 80 to 100 holes to fill. Additionally, there was a horrible repair sometime in its past. I've cut it out and will replace with fresh steel...   The hood is warped and had a hole cut into it. I'm not sure why. Maybe the PO slipped a Hurricane in at some point. I've started the process of patching, hammer/dolly, and shrinking. Hoods are tough, but I figure if I can make this one look good, then there is nothing I can't do! Tim    |
|