|
|
Post by Ryan_M on Jan 26, 2014 17:17:18 GMT -5
I've recently started a few mini projects on my '51 3A and since I completed the inital overhaul long before the advent of this fine board, I figured better late than never to embark on a project thread. Please allow me to bring you up to speed. This Willys was purchased brand new in '51 by my great-grandfather. He used it on his farm up until he sold the farm in the '70s and the Willys went with it. The farm was eventually turned into a subdivision but the Willys was kept around to drag the reel mower across the golf course. In 2011 it was decided the Willys was to be replaced by a shiny new Kubota. The Willys was put up for sale and I blindly bought it. This is how it looked when I brought it home in Oct '11. 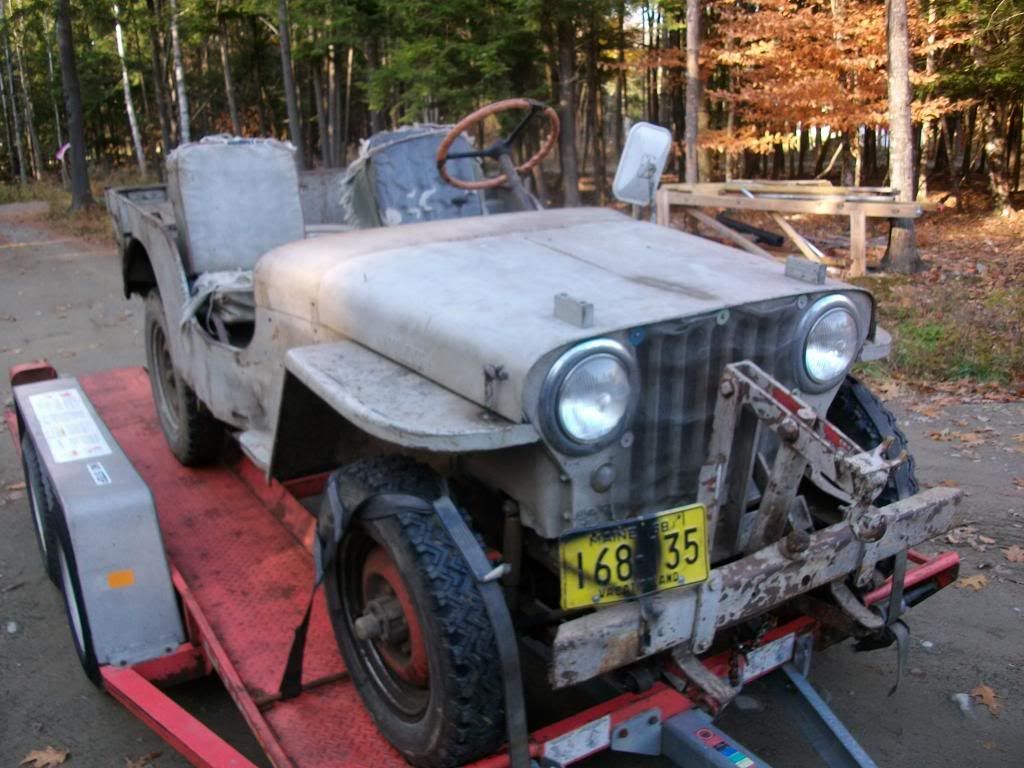 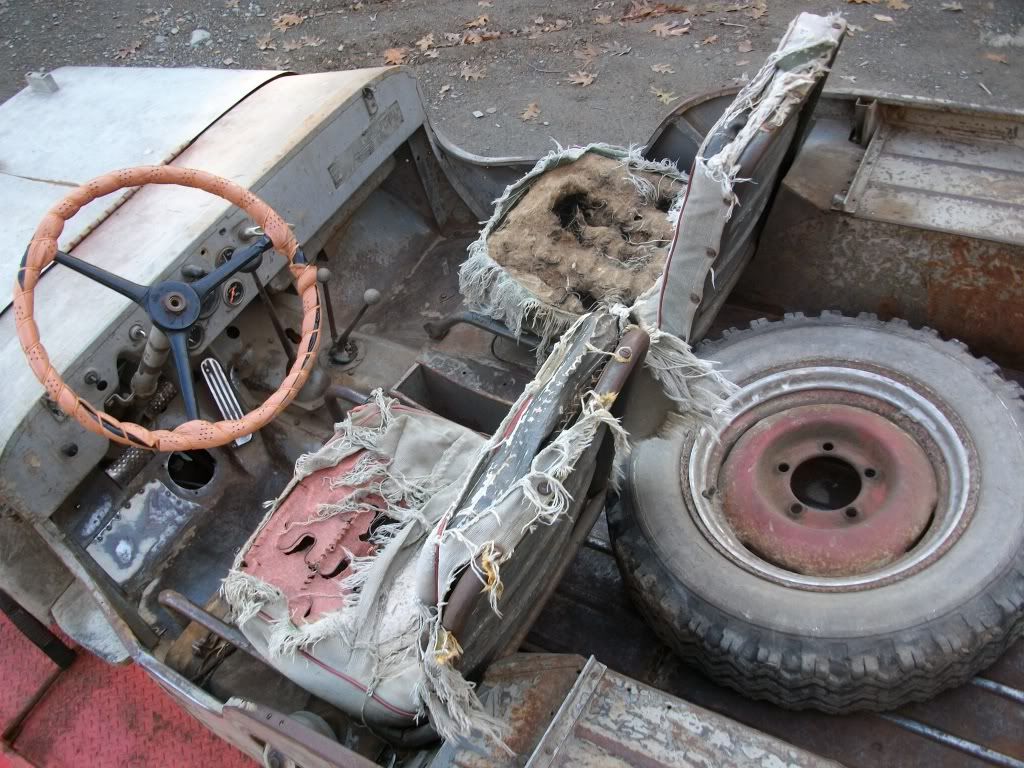  Within a couple days, and with virtually no mechanical knowledge, I went looking for the source of the failed brakes and this happened:  Through the power of the internet and one small triumph at a time, somehow it managed to end up like this: 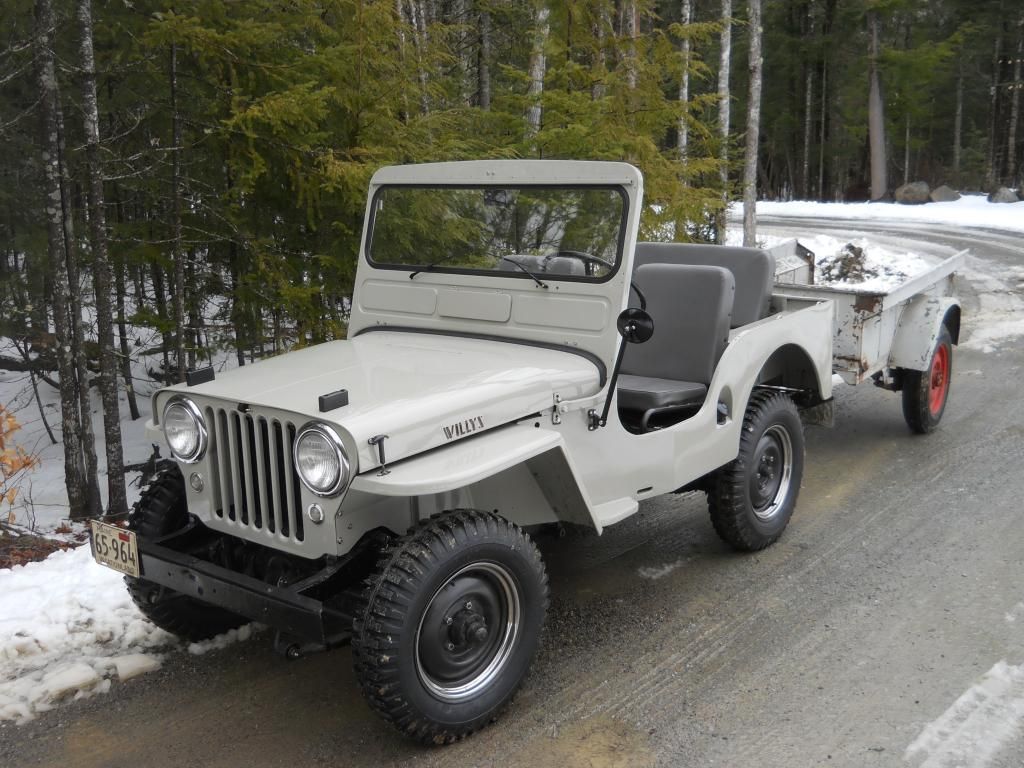  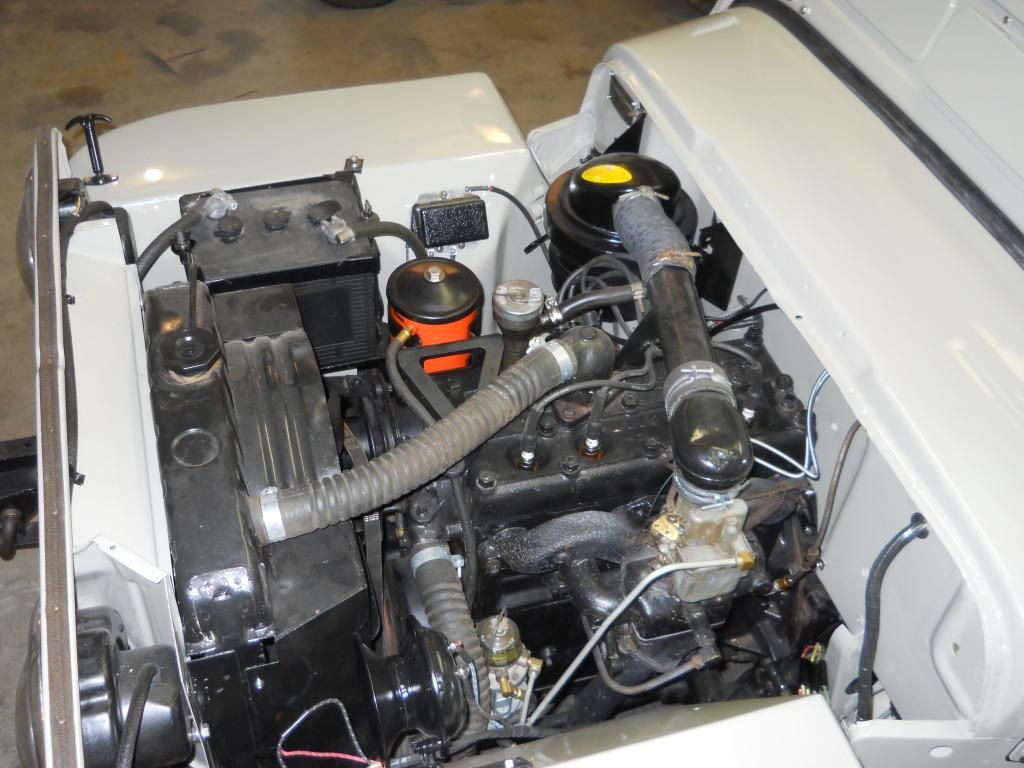 Here's a pic from this past summer when I trailered the Willys back what was my family's farm and where it had spent the first 60 years of its life. The barn is now the rec room for the HOA but a couple of the residents there have 30+ years experience driving it. Some of my other family members stopped by too, a couple of whom learned to drive on this rig. It was a pretty fun day 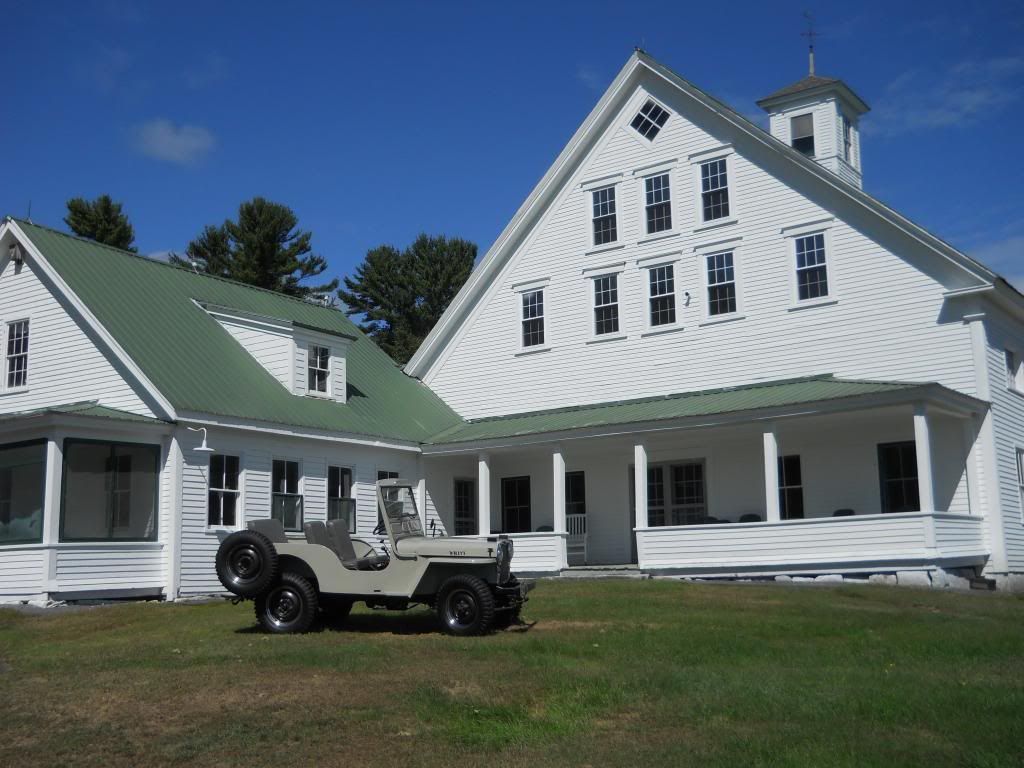 So I did a lot of repairs but there were some things that I skipped over or just plain did a terrible job at. For a rookie effort, I expected as much. I'm now going back and either touching up some of those issues or servicing things that simply need a little maintenance. |
|
|
|
Post by Ryan_M on Jan 26, 2014 17:45:50 GMT -5
I have been battling a small leak around the new water pump that persistently and quite annoyingly results in coolant blowing all over the passenger side of the engine every time I drive it. 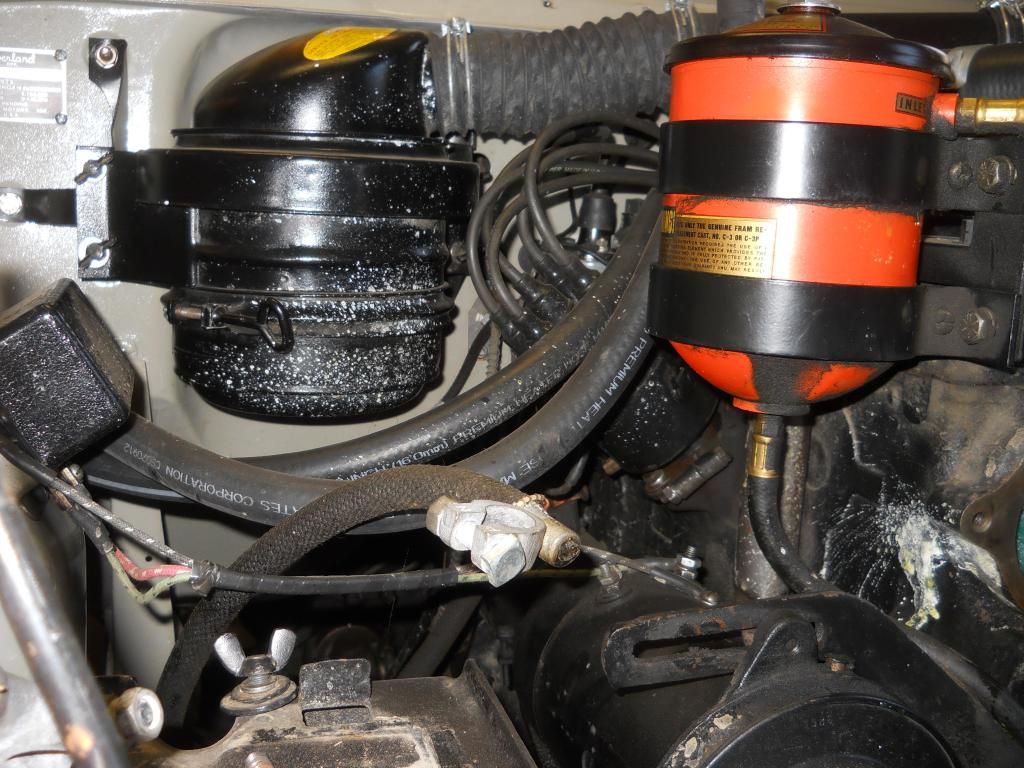 Grill, radiator, and water pump removed. Water pump mating surfaces cleaned, threaded holes in block cleaned up. New water pump gasket, sealant, and bolts torqued to spec. I wish there was a good way to test for leaks besides putting everything back together and driving it. With the radiator out it's a good chance to clean up some of those places that are impossible to reach otherwise. 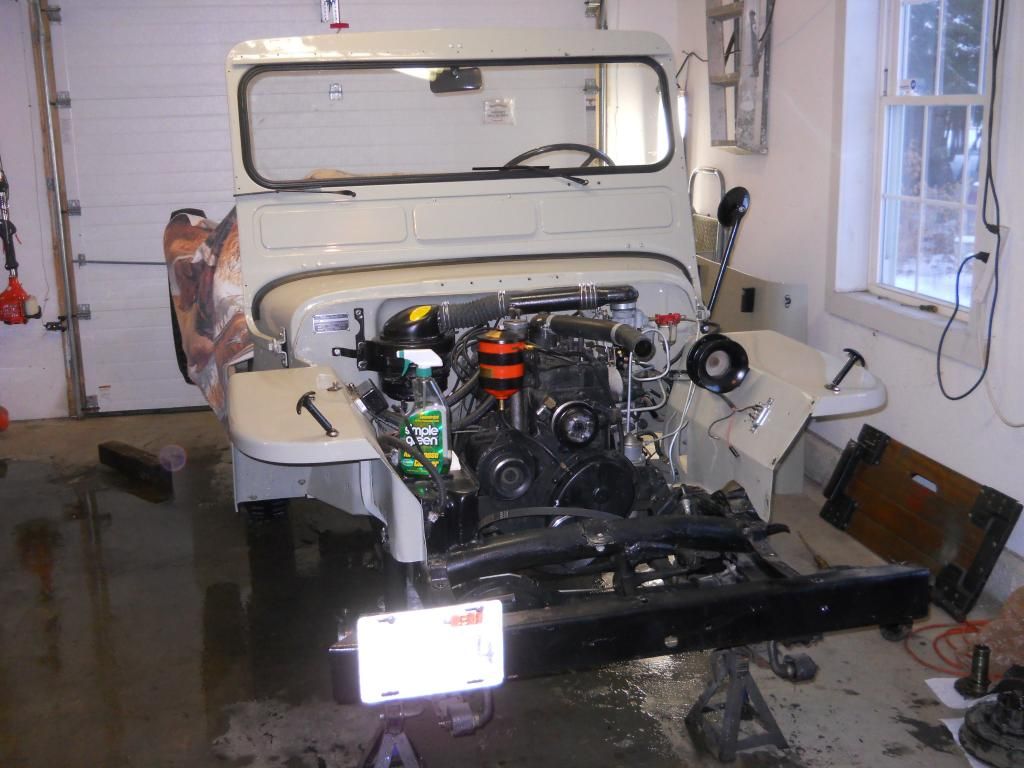 I drove over 3500 miles last summer which was its first full season on the road. After about 3000 miles I started experiencing an occasional death wobble. The steering was rebuilt almost entirely during the initial rebuild - new steering box innards, bell crank kit, tie rod ends, connecting rod kit, etc. Pretty much everything but the king pin bearings. Time to take care of those. It's amazing how crummy brand new brake hardware can look after only a year. I'll do a better job painting everything before it is reinstalled. 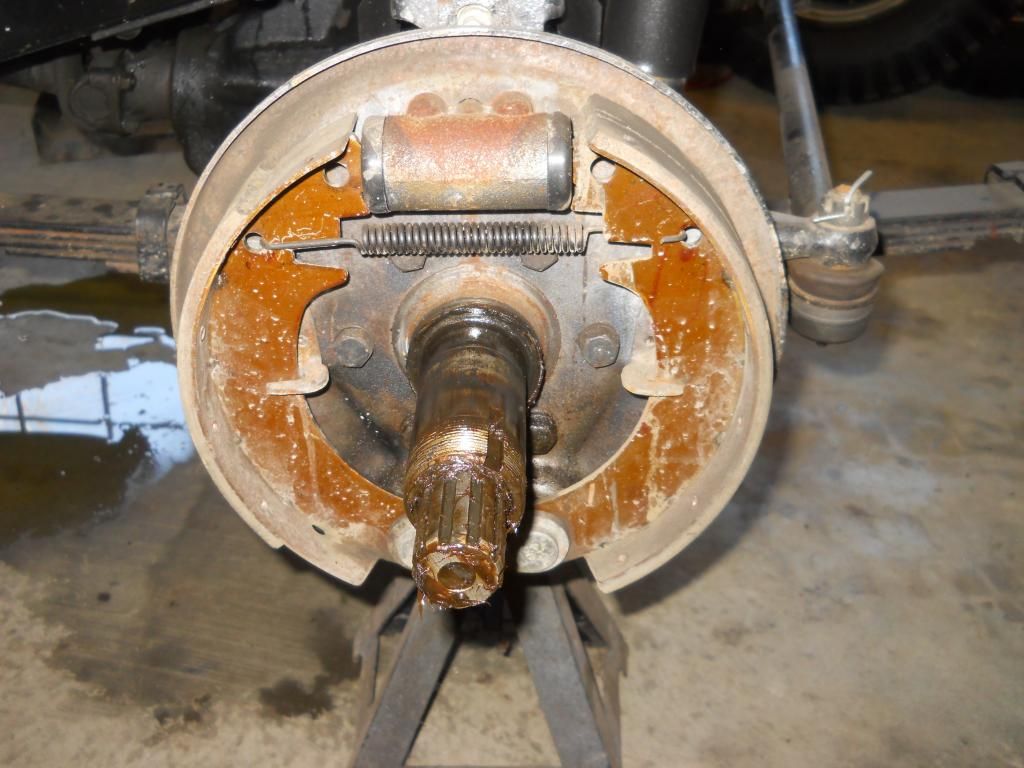 Knuckles on their way out. 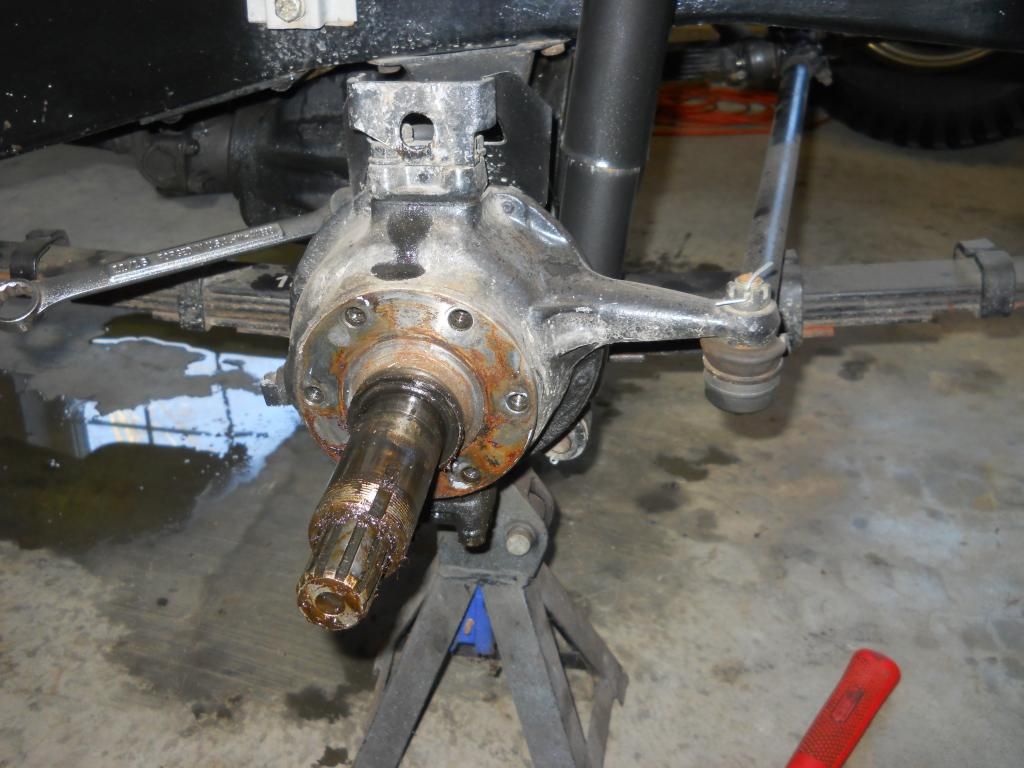 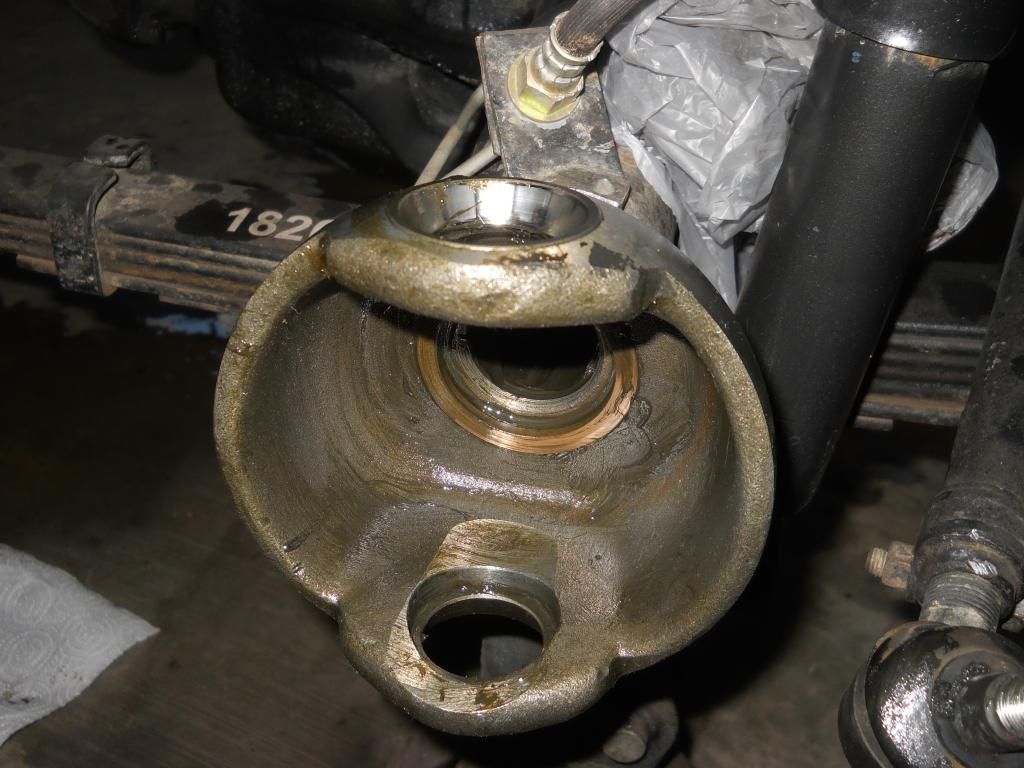 You can see 3 out of 4 races are pretty badly worn. That makes the effort worthwhile. It'd be a little discouraging if I found no wear! 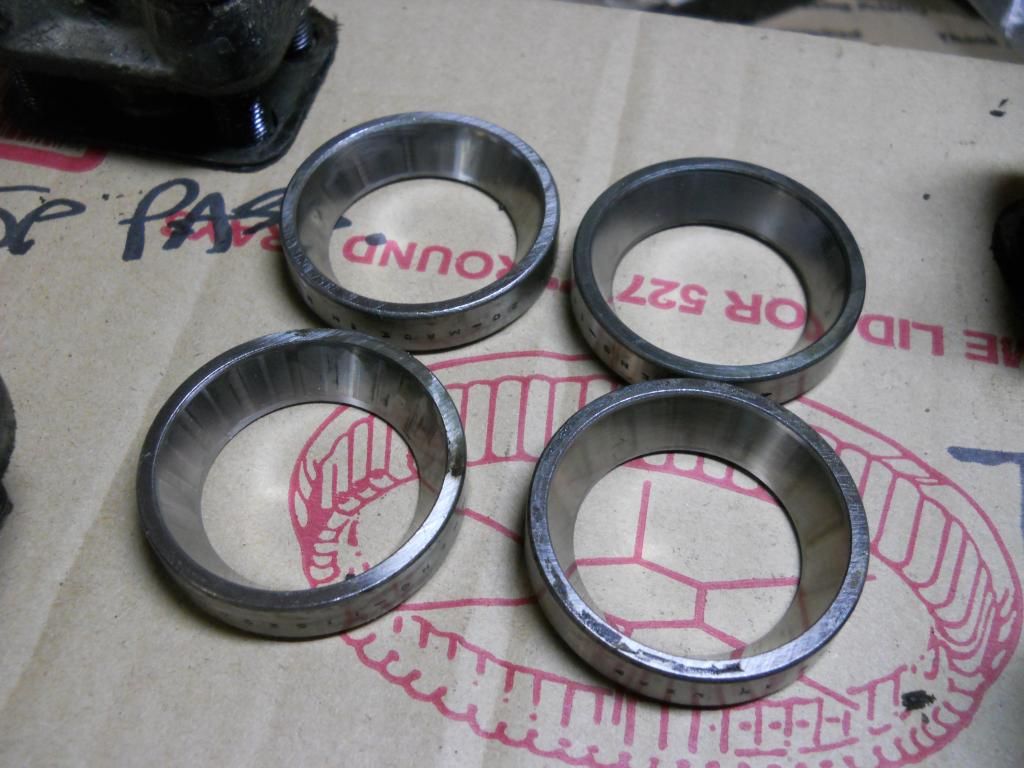 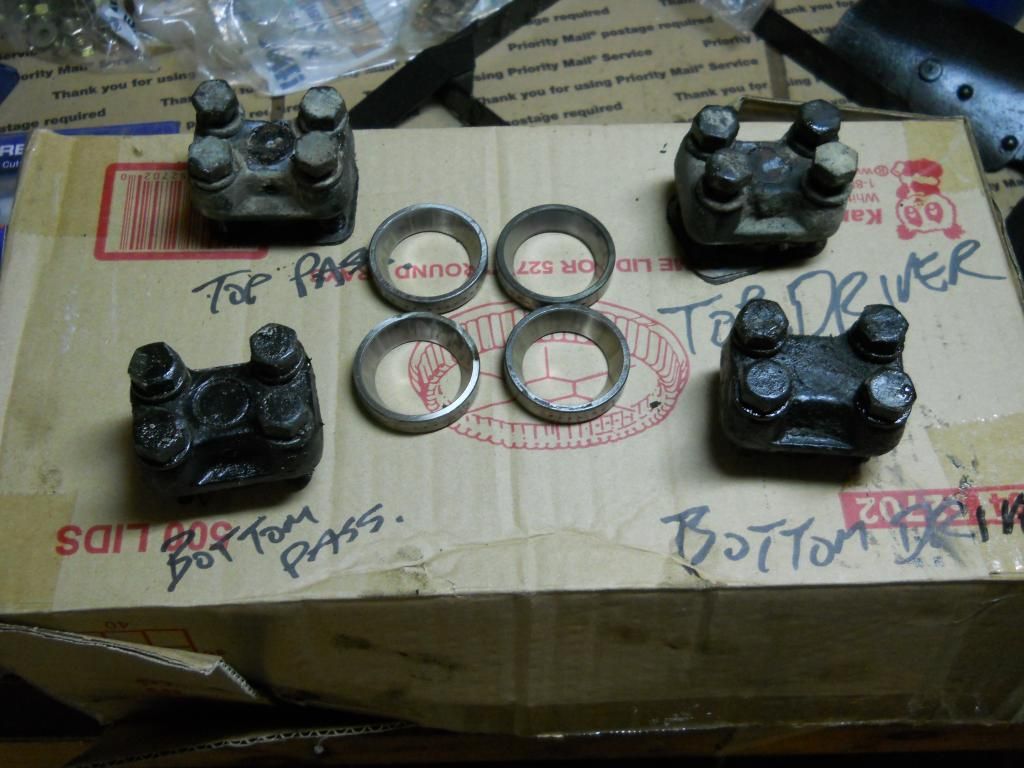 Axle in a bag. 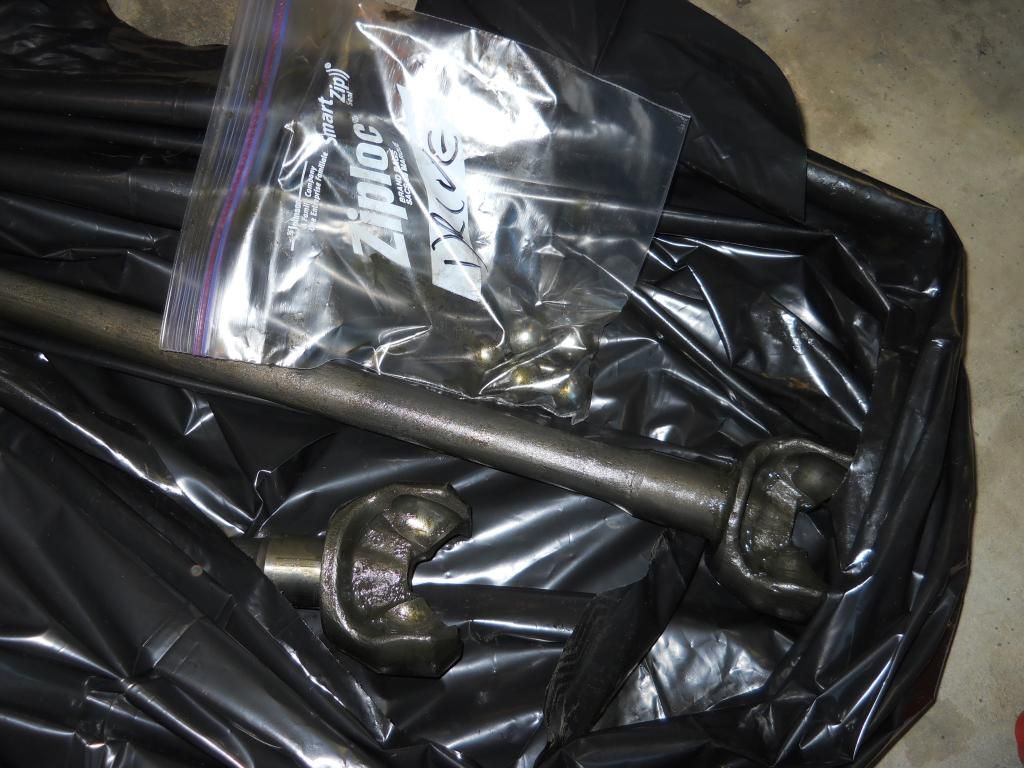 This is a slippery slope. I'm not wanting to open up the differential and attack it too but that all-too-familiar saying "Well, you've gone this far..." is creeping back into my head. We'll see whether or not I listen to it.  |
|
Deleted
Deleted Member
Posts: 0
|
Post by Deleted on Jan 26, 2014 20:57:34 GMT -5
You have a very nice Jeep, the detail work never seems to end. I have never had king pin bearings out that looked good, the lower ones anyway, wise choice to repair. Lee  |
|
|
|
Post by Haines Garage on Jan 26, 2014 21:05:20 GMT -5
Ryan ..thanks for posting...Your Project is AWESOME! I have laid many a night in the fluids and grime..  Forgive me for asking so boldly...WHY? There is a thread here to tell your story, I should love to hear your how and why... What is your reason for loving these 'Ole Jeeps like you do..? Your Work is FANTASTIC! |
|
|
|
Post by Ryan_M on Jan 28, 2014 15:31:58 GMT -5
Ryan ..thanks for posting...Your Project is AWESOME! I have laid many a night in the fluids and grime..  Forgive me for asking so boldly...WHY? There is a thread here to tell your story, I should love to hear your how and why... What is your reason for loving these 'Ole Jeeps like you do..? Your Work is FANTASTIC! Why? Good question. Not sure I have a definitive answer but here we go. I've always been a fan of jeeps. Ever since my buddy got an old CJ-7 back in high school and we cruised all over SW Florida - both on road and off - any chance we got. We used to whoop it up regularly but I'd almost always volunteer to be the designated driver anywhere we went just so I could drive the Jeep. I had a couple CJ-7's of my own over the years but never really did any of my own work. Fast forward to 2011 when I dragged home my 3A (I had to do some internet research to even figure out what it was - I had no idea how to tell the difference or even what the correct model designations were - 2A, 3A, MB, etc). I dove into that project head-first but with no intention of getting the thing any more than roadworthy. I had no clue what I was doing. It wasn't until I got further and further along with it that I got more diligent in my effort to keep it "correct" and make it something nice. It's certainly no trailer queen and I kick myself for skimping on some of the earlier repairs but I think it's a good balance between something I can drive and something I can enter in a show and still have a chance of bringing home an award. Both are fun. So I'm a relative newcomer to the flatfender world (less than 3 years) but have gained a borderline unhealthy obsession with the little buggies since that day I towed mine home. I check in to all the forums way-to-regularly, spend almost any free time getting grease on my hands, and often neglect other critical components of my existence to do so (just ask my extremely patient wife  ). If it wasn't for the forums (2A/3A/WillysM pages and now this one) there's no way I could have gotten as much done as I have. I have the ratty ol' M38 that I'm tinkering with now and I'm sure there will be more in the days ahead. I can recite all of the local CL Willys ads from memory and it seems I can't drive anywhere without scanning the fields or open barns with the hope of seeing a neglected flatfender just waiting to be rescued. It's almost as if this isn't a hobby, it's a disease...and it appears to be incurable, which is fine with me. |
|
|
|
Post by Haines Garage on Jan 29, 2014 19:05:54 GMT -5
That is a GREAT "WHY"... To me that has always been most important... You do some Fantastic work, and is is very easy to see that you CARE! I am glad that you choose to share here.. PS Patient wives are a GREAT THING!!  And Grandfathers memories..Well..  |
|
|
|
Post by Ryan_M on Feb 4, 2014 20:43:55 GMT -5
King pin bearings are in and all components that came off have been cleaned up and repainted. Amazing how dirty this stuff gets after only a year on the road. 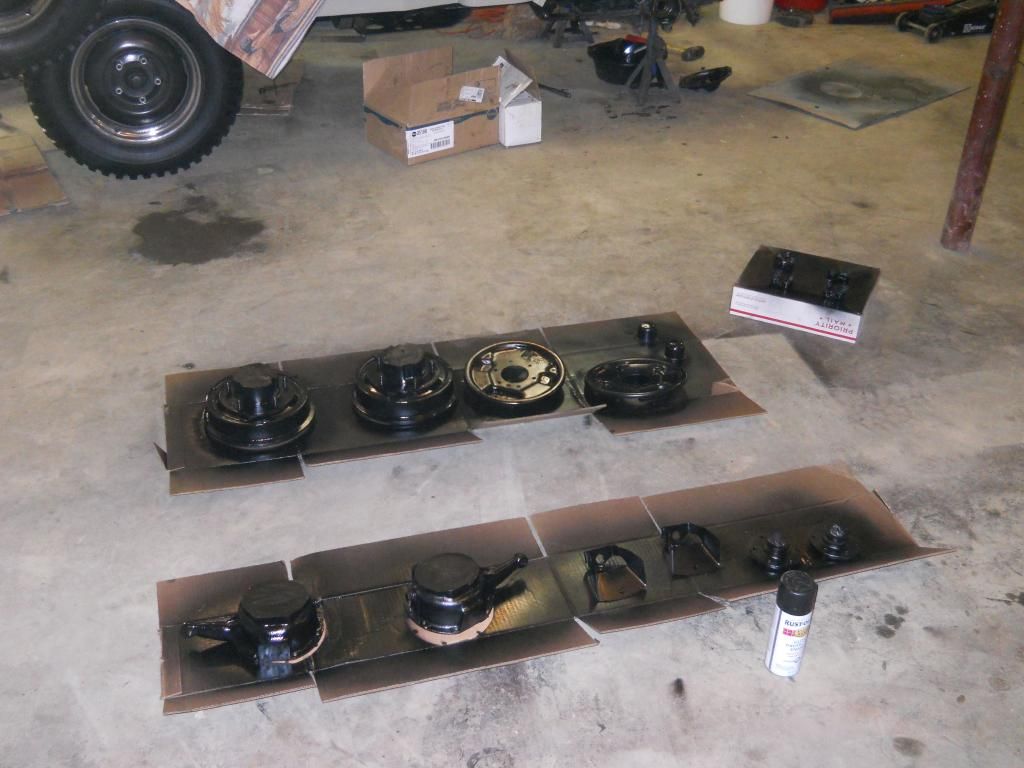 I threw in the towel and replaced all the brake adjusting hardware. Adjusting brakes is a pain on a good day, doing it with crusty old hardware is even worse. Out with the old, in with the new. New knuckle seals and felt installed. I did clean up those old bolts and coupled with new washers was able to reuse them all. That part looks good but now the rest of the axle looks like crap in comparison. Here goes that slippery slope thing again....  Thought I'd get a little crazy with the brake cylinders. Athawk hasn't been the only one splashing around in red paint this week. Do red cylinders give it more horsepower? I think so. Can I say I'm driving a "sleeper" now?  The brake cylinder paint was only just to test what the color looked like. The real reason I bought it was for the wheels. I only have three out of the five painted and clear coated but I had to do a test fit tonight. How's she look in red??  Now to engineer some way to apply the black pinstripe. I've come up with a few ideas and I don't like any of them. |
|
Deleted
Deleted Member
Posts: 0
|
Post by Deleted on Feb 4, 2014 21:22:13 GMT -5
ryan a few things, 1 is that the original tub, 2 for the pinstripe there is a 2a tips add where someone used a small paintbrush with a holder to put the stripe on by rotatine the wheel slowly with an electric drill ( wire wheel in drill and turned slowly). 3. you can check if your water pump will seal but you need a pressure testing kit we used them on inboard boats a bunch at work.
|
|
|
|
Post by Ryan_M on Feb 4, 2014 21:49:40 GMT -5
It is the original tub. It needed work when I got it but I made the mistake of bringing it to a maniac with a torch and a drug problem. I took it from him to another guy who wasn't much better. Not knowing really what I was doing myself, I didn't watch the work as closely as I should have. The metal is all good but it was smoothed out with WAY too much filler and it drives me crazy. I want to blast the whole tub myself and do it over.
I saw that 2A tip thing and I'll probably go that route. As for the water pump, I'm just gonna keep my fingers crossed and rig it back up.
|
|
Deleted
Deleted Member
Posts: 0
|
Post by Deleted on Feb 4, 2014 22:12:43 GMT -5
ryan I have to do a water pump for my truck rebuild in a few years ( or my current truck as the pump is going like no other might be a summer switch). when you rebuilt your engine did you change out the water pump? if so with what brand i want a good one that will last seeing as if i pull my own i will just use a nut splitter as i don't need anymore broken bolts in my block.
|
|
|
|
Post by Ryan_M on Feb 5, 2014 6:48:13 GMT -5
|
|
|
|
Post by Haines Garage on Feb 5, 2014 23:28:54 GMT -5
I love seeing this, and also love knowing that there is member here whom has really done it...
Time for another vote...
I nominate Ryan into the Knights Of The Jeep Round Table! (Very Exclusive Band By The Way)
What Say you Sirs...You know the voting drill..
|
|
|
|
Post by Ryan_M on Feb 9, 2014 15:51:52 GMT -5
It's time to give the rear axle a good follow-up vist and address anything I skipped (pretty much everything except the brakes) during the initial overhaul. Drums are off with this handy-dandy puller. If you're using anything other than one of the pullers to remove rear drums you are wasting your time. 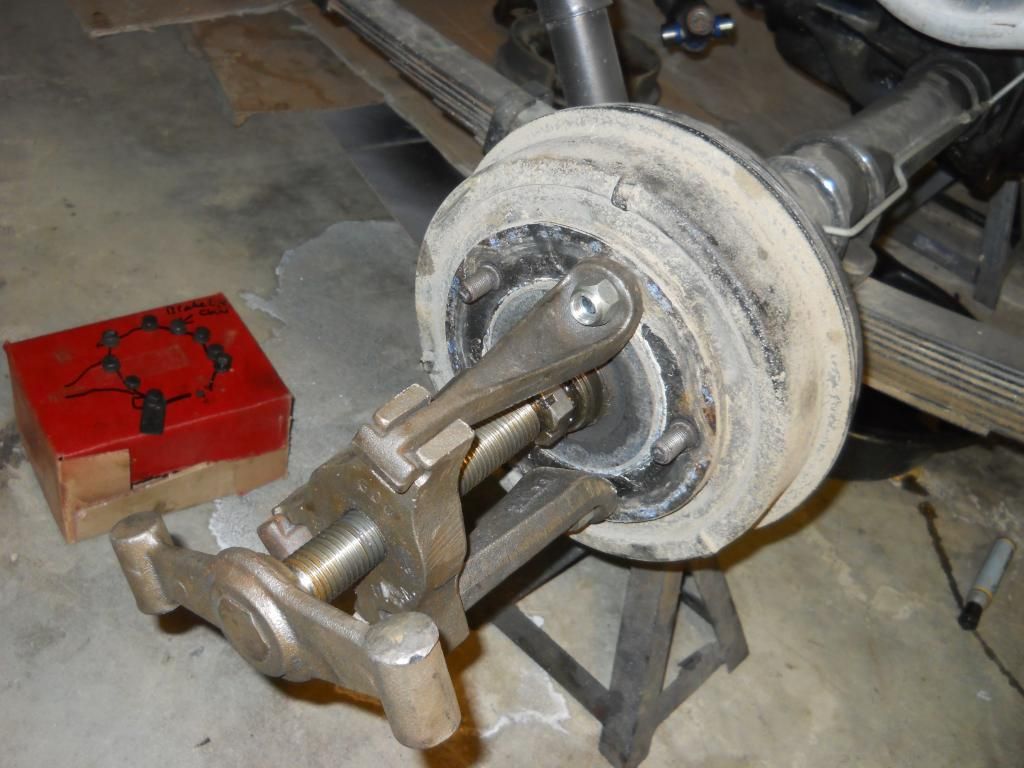 I removed the rear differential cover for a quick peek and noticed some significant play in the small spider gears.  From a couple other threads and some additional online research it is clear that I definitely have a problem. I've been skirting the idea of a differential rebuild out of sheer intimidation but I'm tired of dreading it. Time to conquer the demon. Let's get to it. 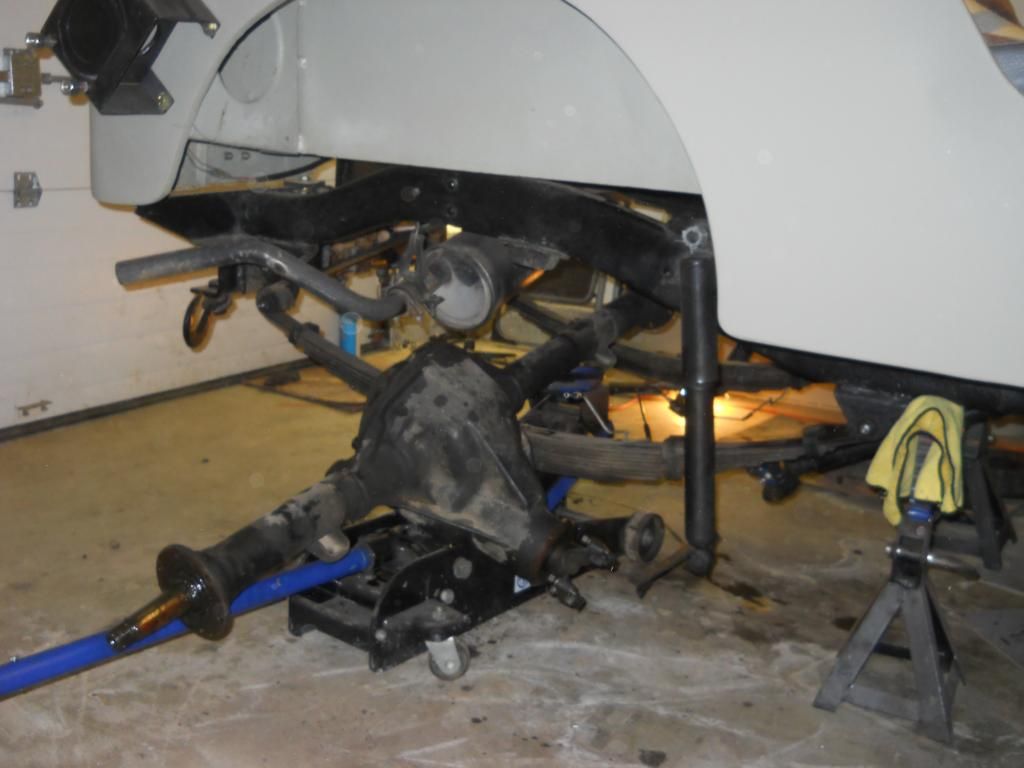 I don't have a slide hammer but I found that by attaching the drums to the axle shaft I could use a block of wood behind the drums and with a few solid whacks from a BFH the axles popped right out. Bearing caps removed and labeled. Don't mix these up!! 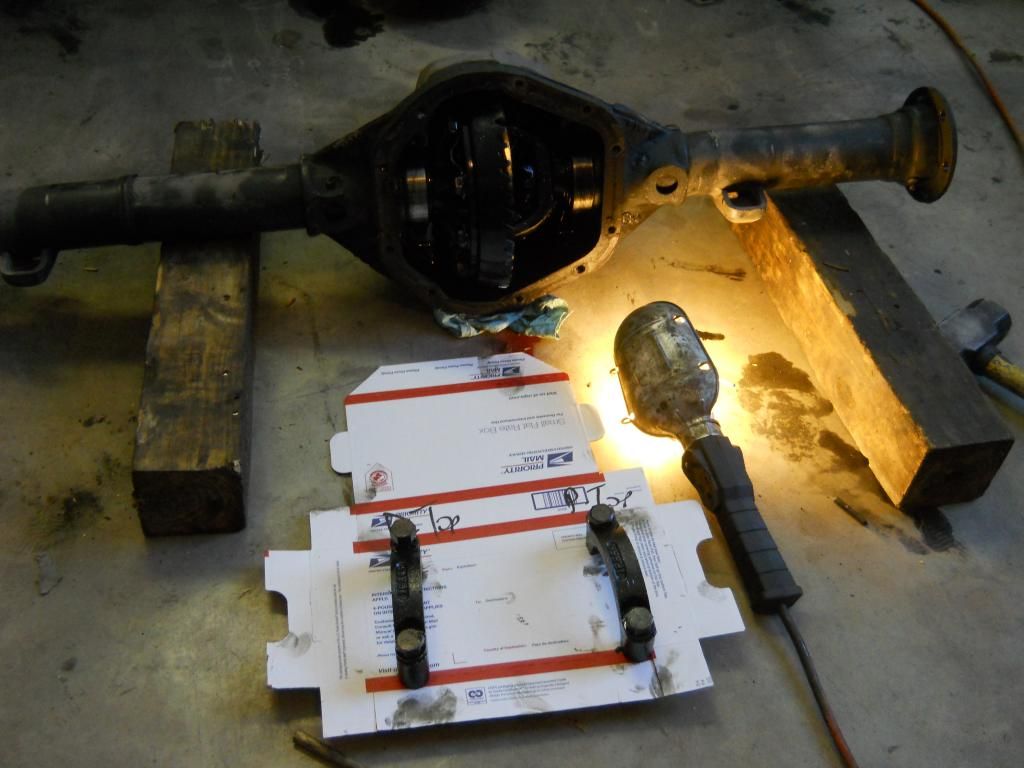 Axle housing on the operating table. The manual calls for a spreader but states a couple pry bars will do the trick when removing the carrier. I can vouch for that substitution. 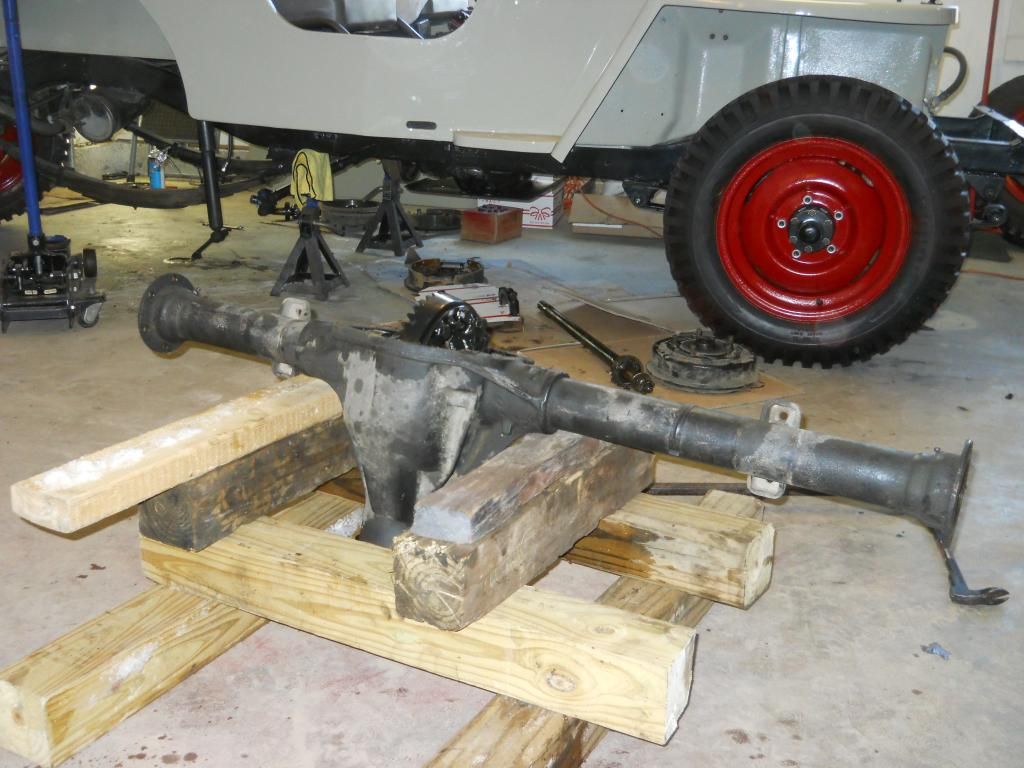 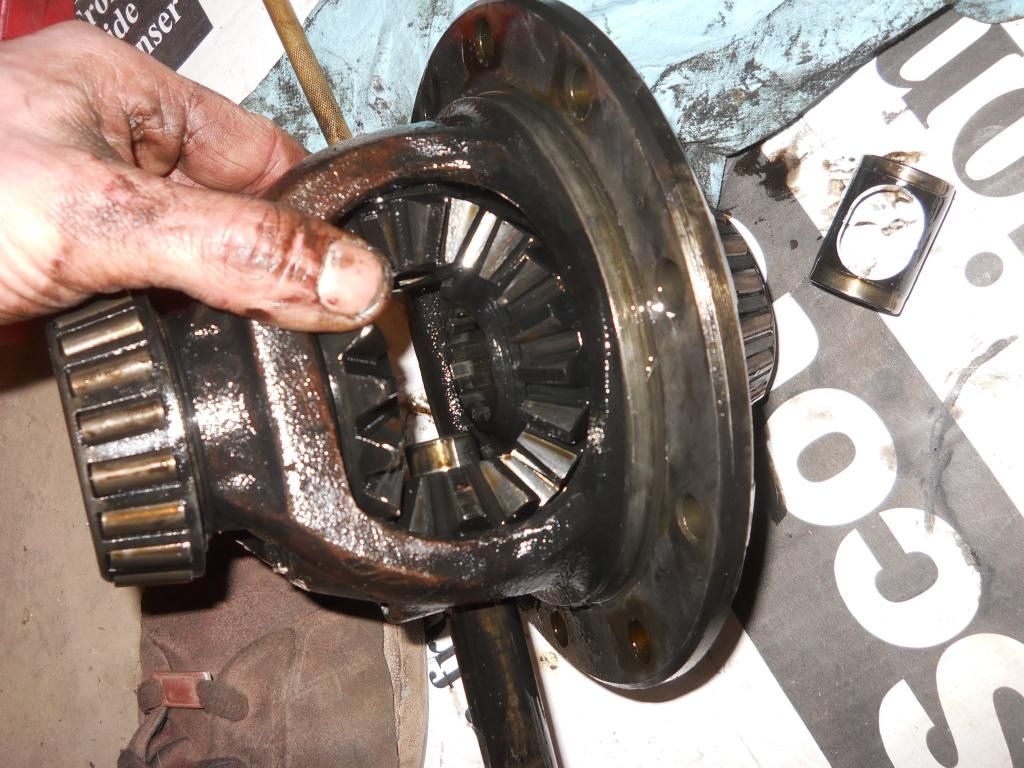 Here's the offening spider gears. No real obvious problems but I will likely replace them. 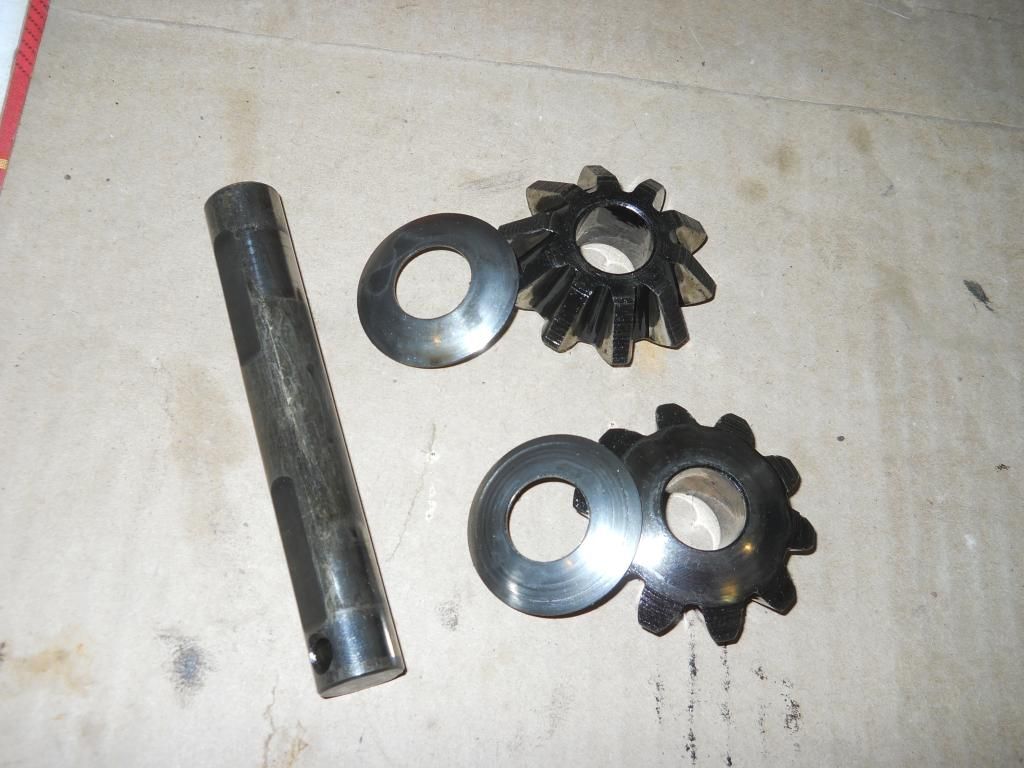 More poor man's tools. A large pipe wrench works well to hold the yoke while removing the nut. Be sure too leave those little u-bolts in place. They will protect the thin metal of the yoke from damage should the pipe wrench slip (ask me how I learned this). 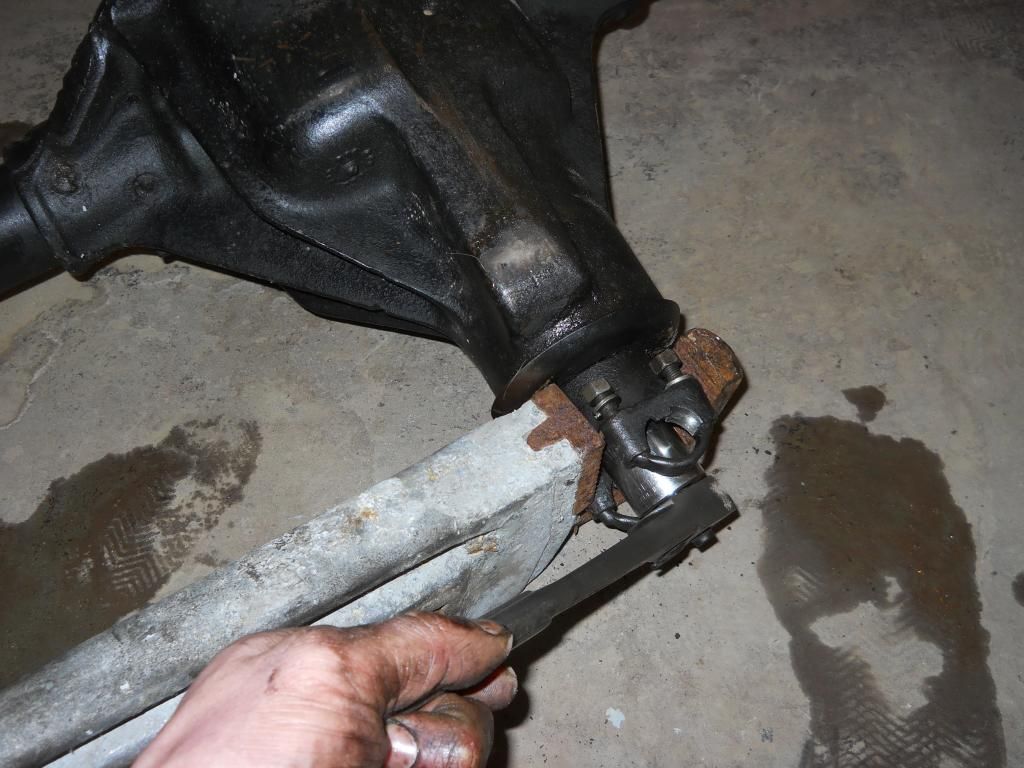 Next up is a 2-jaw puller to remove the yoke. This thing fought back pretty hard. I find it amusing that in the Moses Ludel book he has pictures of a 12-yr old kid zipping this yoke off like nothing. I suggest in the next printing that the kid should be covered in blood, sweat, and grease for a more realistic representation. 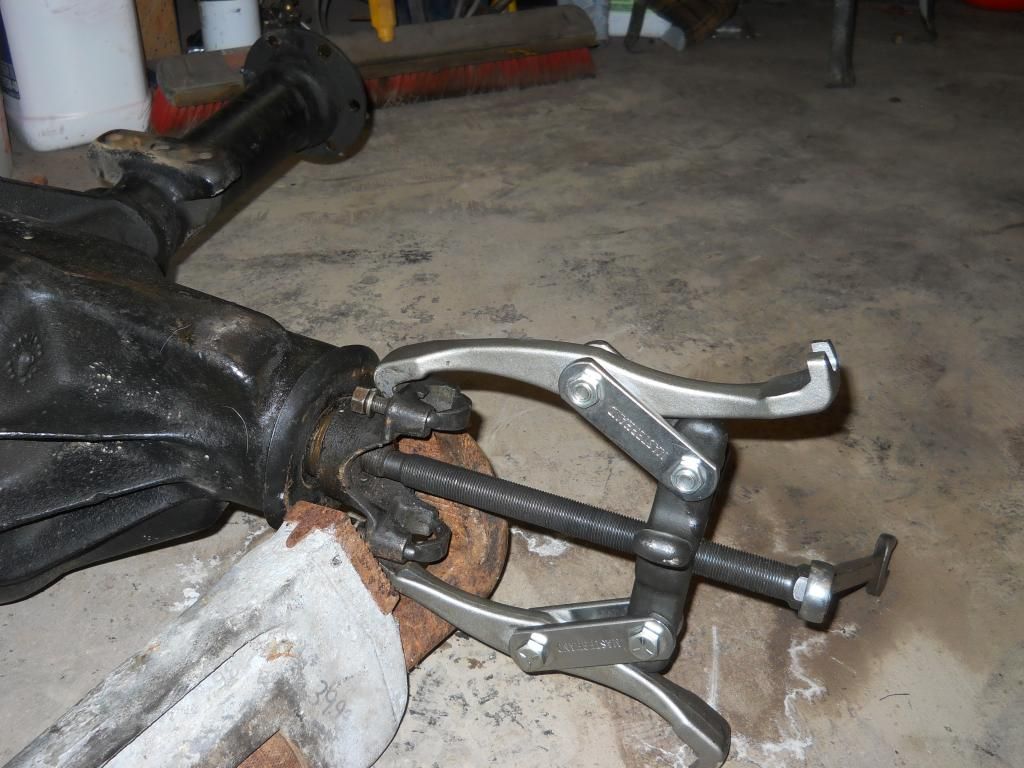 I gently tapped, and then smashed the pinion out of the housing with a BFH and a brass drift. Alternating various length "punches", I removed all the bearing races and the axle seals. Here's the longest reach - going all the way through the axle to get one of the outer grease seals. A couple taps and it popped right out. 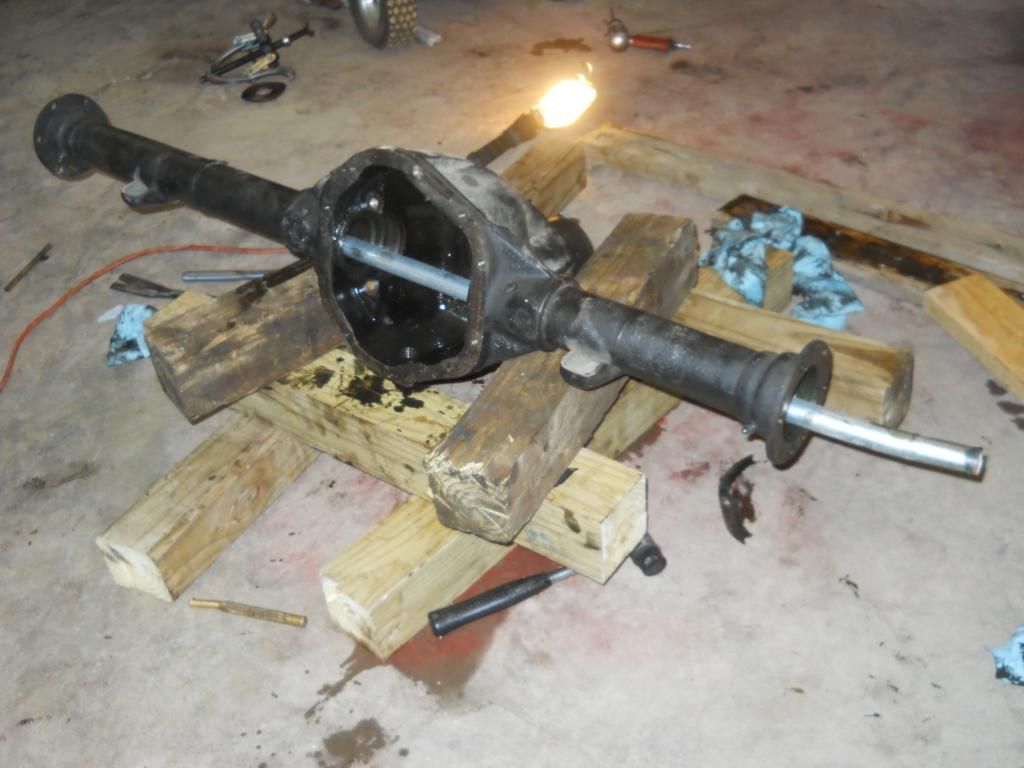 Here's one of the races from the differential. Does this count as wear? Yikes. 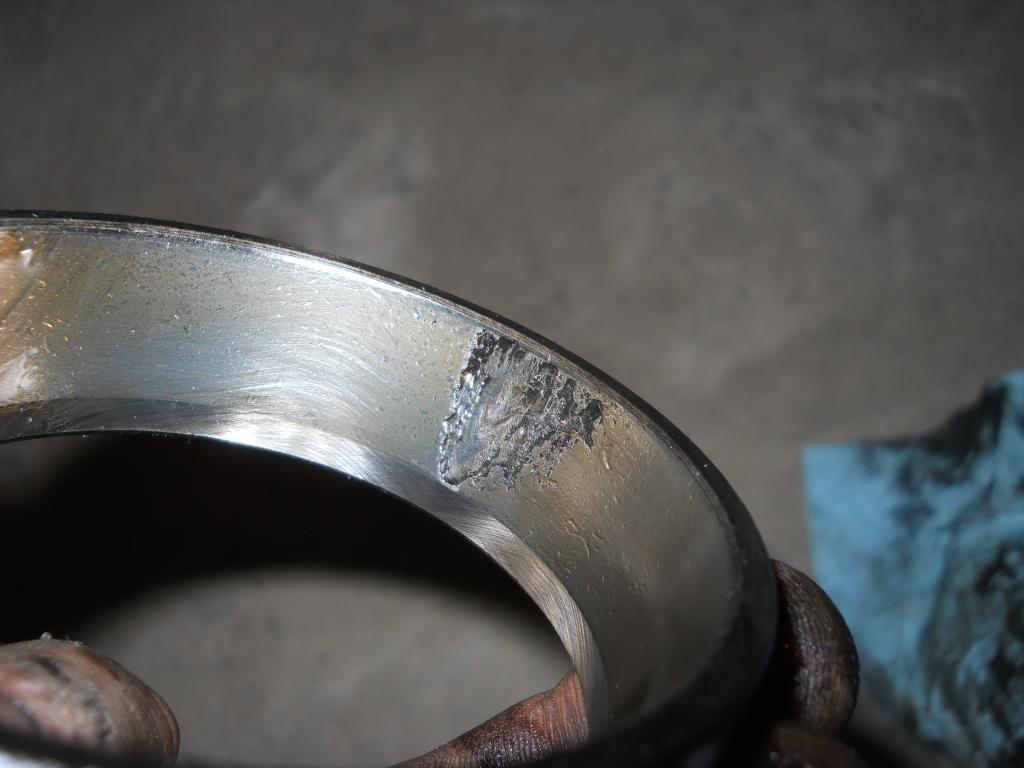 So here's everything laid out. 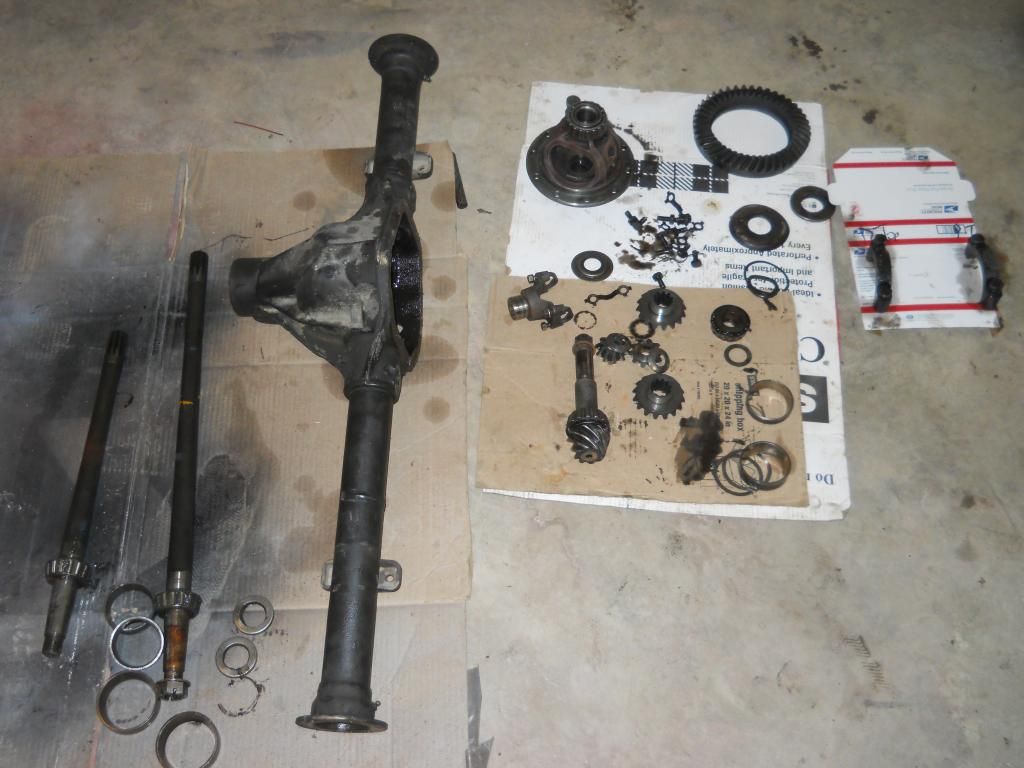 I don't own a bearing puller of any type so I need to get one to complete the disassembly. I'll clean and inspect and then place an order for any new parts required. I'm still apprehensive about putting this thing back together. When I see words like "endplay" and "shims" and "bearing preload" I get nervous. Has anyone found a definitive "how-to" guide on a Dana 44 rebuild? There's plenty of resources for bits and pieces but no one-stop-shopping for how to really get it done. Demon conquered or not, I'd rather not be back here anytime soon - not on the same axle at least. |
|
|
|
Post by Ryan_M on Feb 15, 2014 23:08:18 GMT -5
If anyone is looking for a complete money pit of a project, I highly suggest totally disassembling your rear Dana 44 and spreading the pieces out across the garage floor. What an abomination. I would rather rebuild three T-90's than repeat what I've done to this stupid rear axle so far and I've barely accomplished anything. In hind sight, I should have replaced the spider gears, the one damaged carrier bearing race, and left everything else the hell alone. Given this is such a nightmare, I've decided to attempt setting it up from scratch. Simply slapping the existing shims back in place and bolting it all back up is apt to yield acceptable results but if it doesn't this monstrosity isn't something you can just pop back apart and adjust. Bearings, shims and who knows what else are likely to be damaged with every attempt to disassemble and make adjustments. I'm forging ahead with a plan of making set-up bearings, races, and going through the motions of and measuring each step of the way. Best case scenario, I'm likely to still have to assemble and disassemble the entire thing on multiple trial runs with the set-up bearings before hammering home the real ones. It's a bona fide project. I am not confident enough to even begin a "how-to" guide here but I have a few examples of what not to do. The carrier bearings were a real nightmare. When trying to remove them, unless you want to drive back to Harbor Freight with a completely mutilated bearing splitter set you just purchased the day before, don't do this: 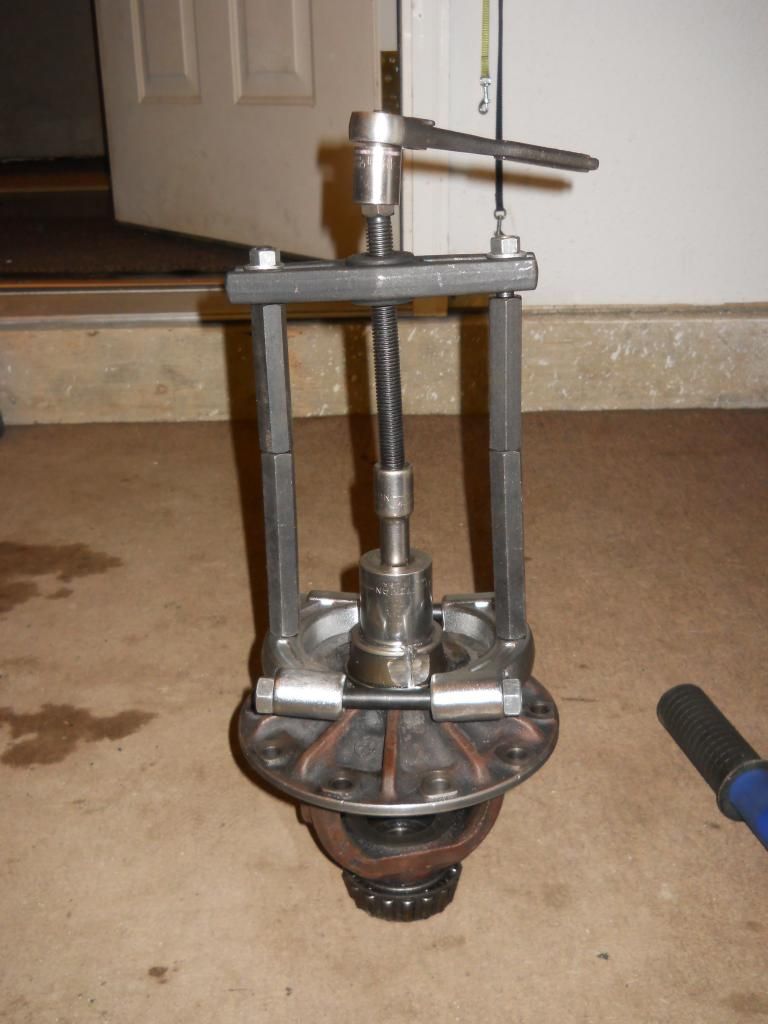 Or this:  And for the love of all things decent don't do this 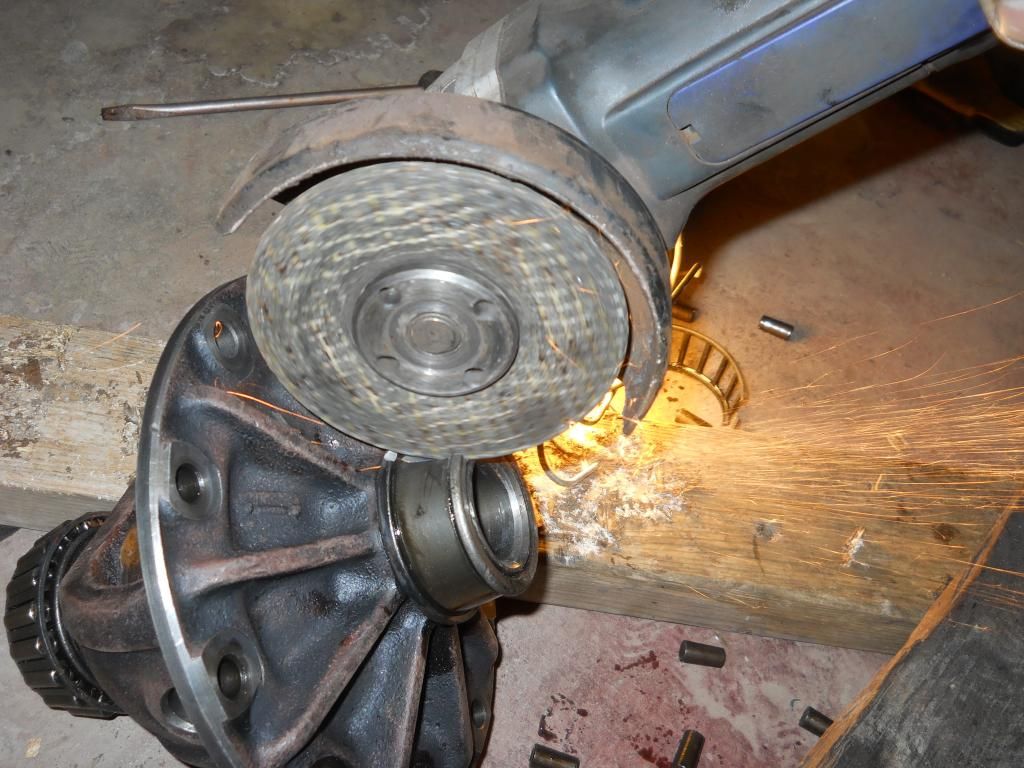 Smuggling this through the living room past your napping wife isn't a good idea either but that's a different story: 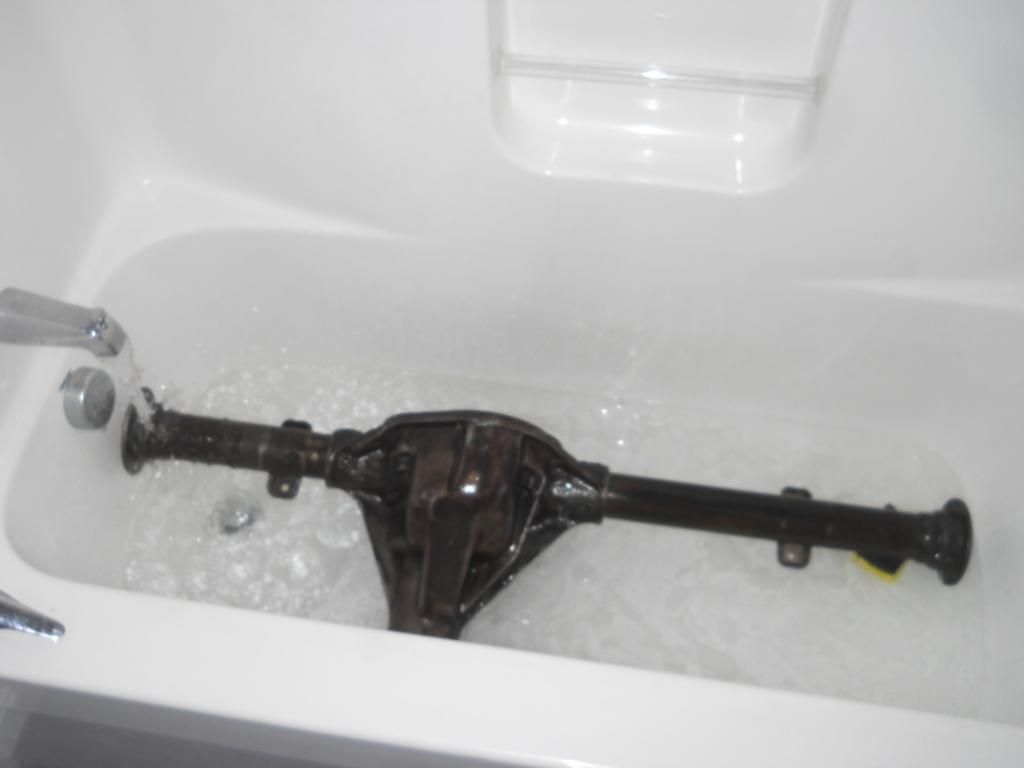 This is the magic formula that finally removed the carrier bearings. A Harbor Freight large bearing splitter with a 2-jaw puller. 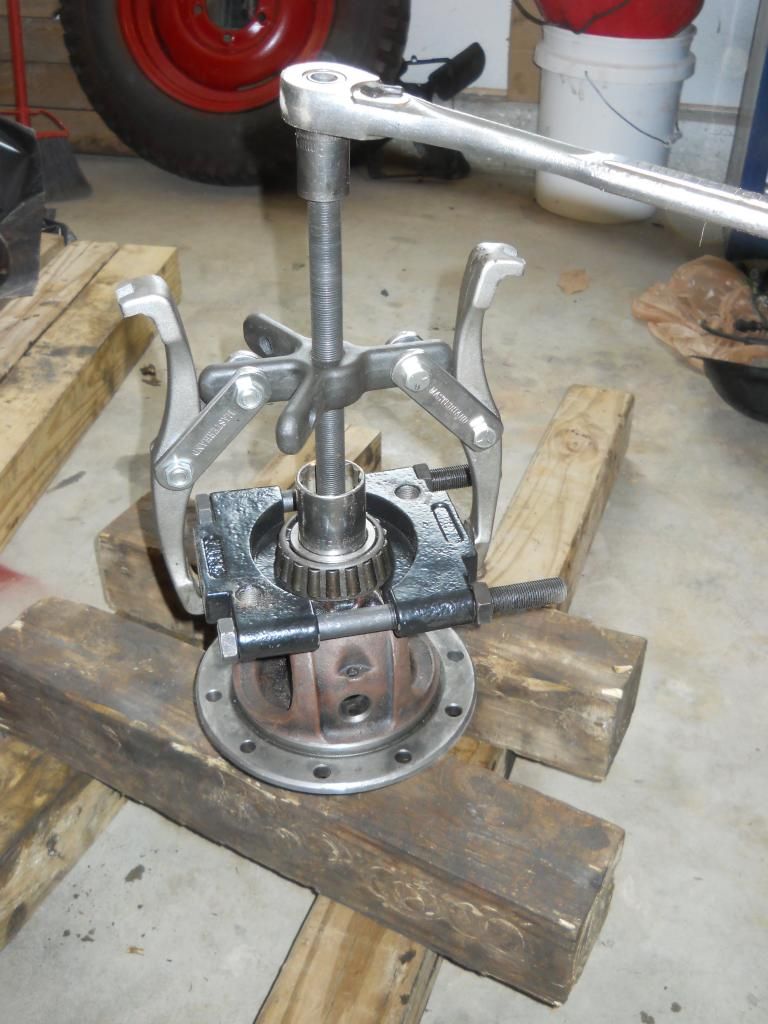 Shims bagged and marked. I will reuse the ones I can and will replace the damaged ones with new shim packs of the same thickness. It'll be a good starting point anyways. 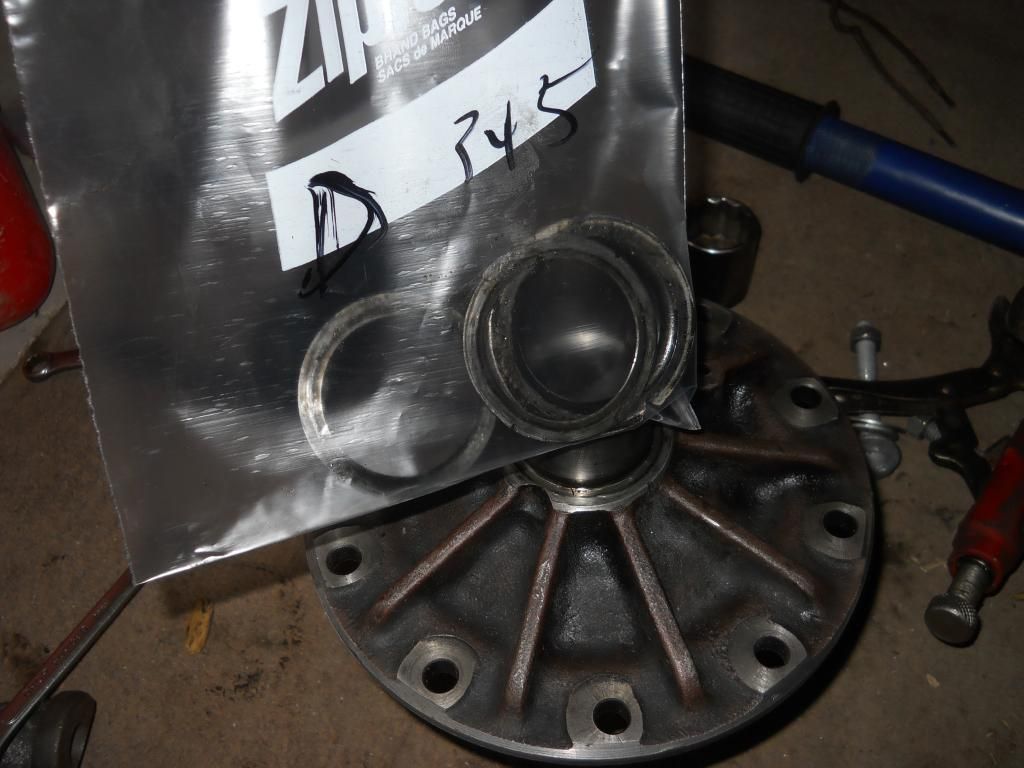 With the carrier properly gutted the disassembly is complete. I got to the first step of installing the pinion gear. Using what few bearings I didn't destroy during removal, I'm making set up bearings that can be slid on and off by hand.  It is encouraging that all the bearings and races received from Walck's are Timkens, just like the original ones I took out. 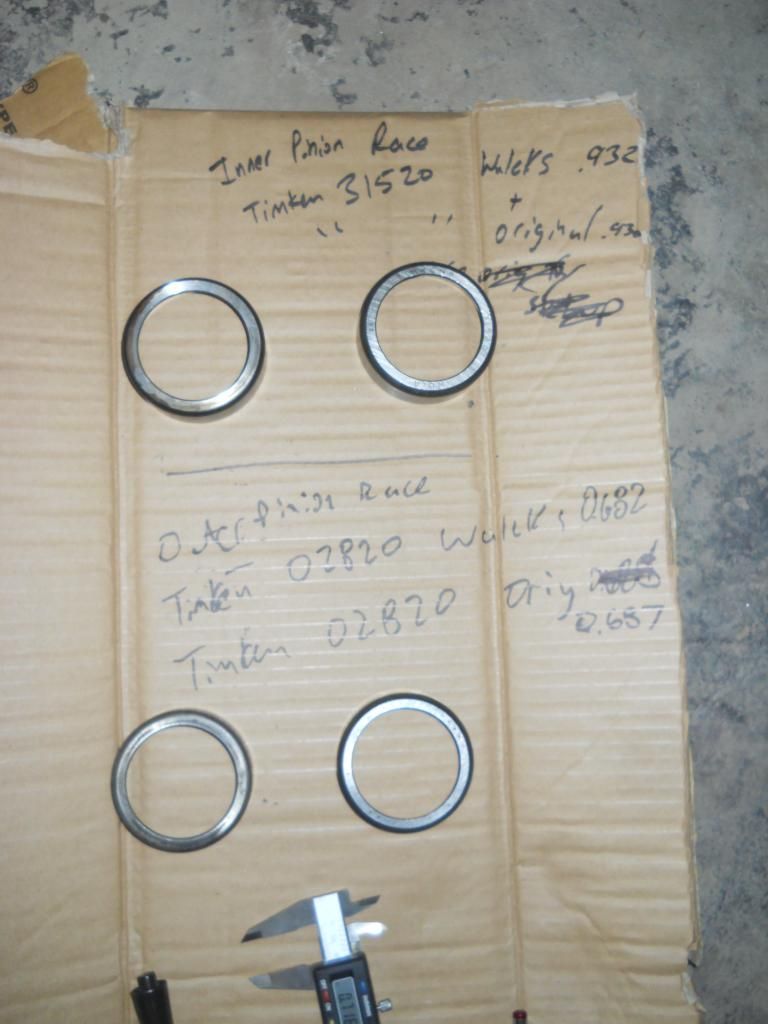 Pinion gear with new inner pinion bearing and old "set-up" outer bearing. 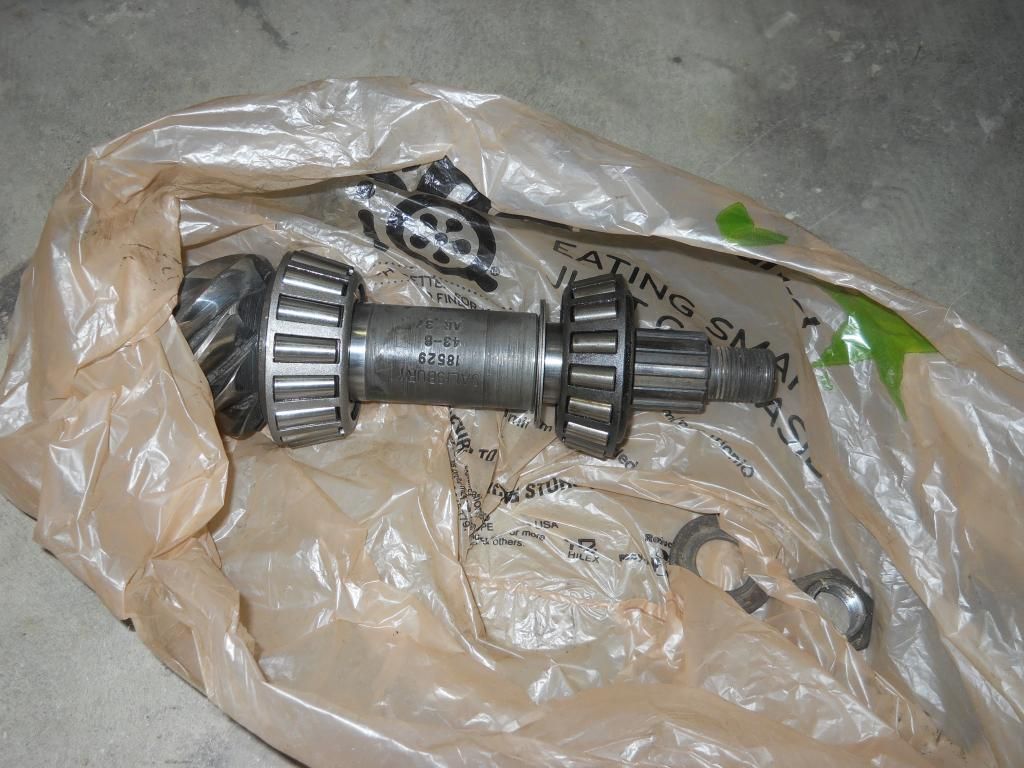 For the bearings I destroyed I'll have to make the set-up bearings out of brand new ones which is kind of a shame but that's the way it goes. I picked up a set of bearing race drivers at Harbor Freight today too. In a tight application like this it's a lot easier than fumbling around with a socket or the old race. As you're hammering on them they make a different tone once the race bottoms out so you know for sure when it's seated properly. 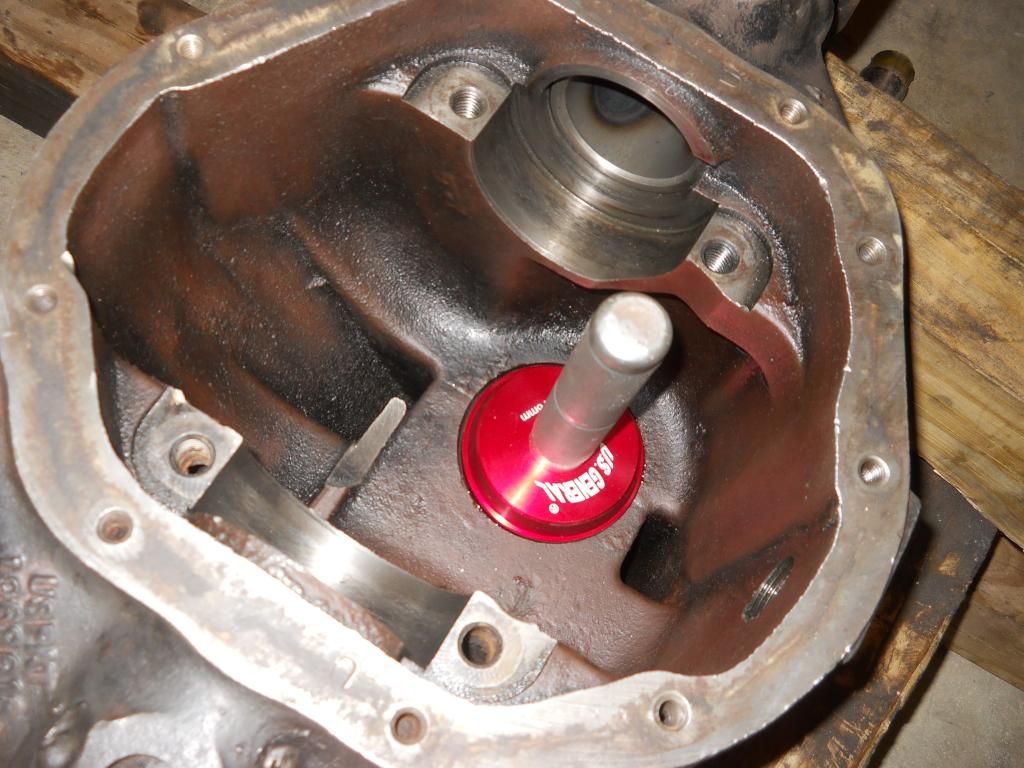 I also bit the bullet and used a coupon for a 12-ton press. I know that I'll have to press all these bearings on for final assembly. In asking around at a couple shops it was quickly apparent that hiring out press work is not economical. I used this press three times today already which means it has now paid for itself. I wish I bought one of these years ago. Axle bearing posing as first test subject. Works flawlessly.  Freshly pressed pinion gear bearing. Much cleaner than my typical BFH and ill-fitting length of pipe method. 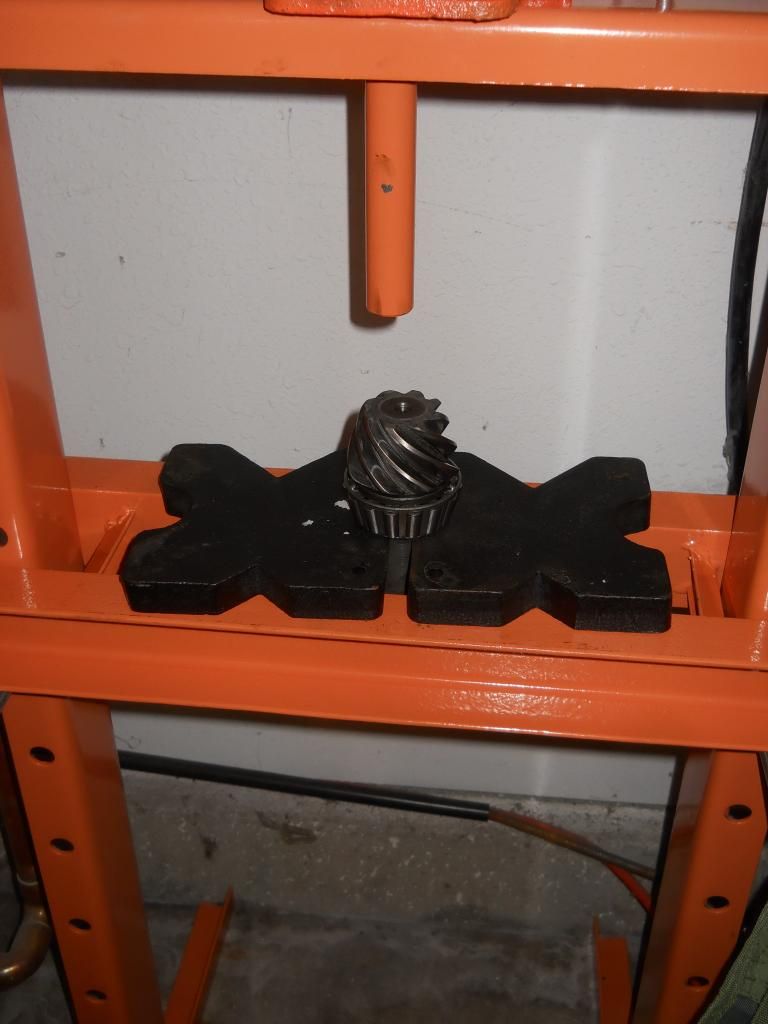 So I now have the pinion gear test assembly installed. Pretty meager progress for a week's time.  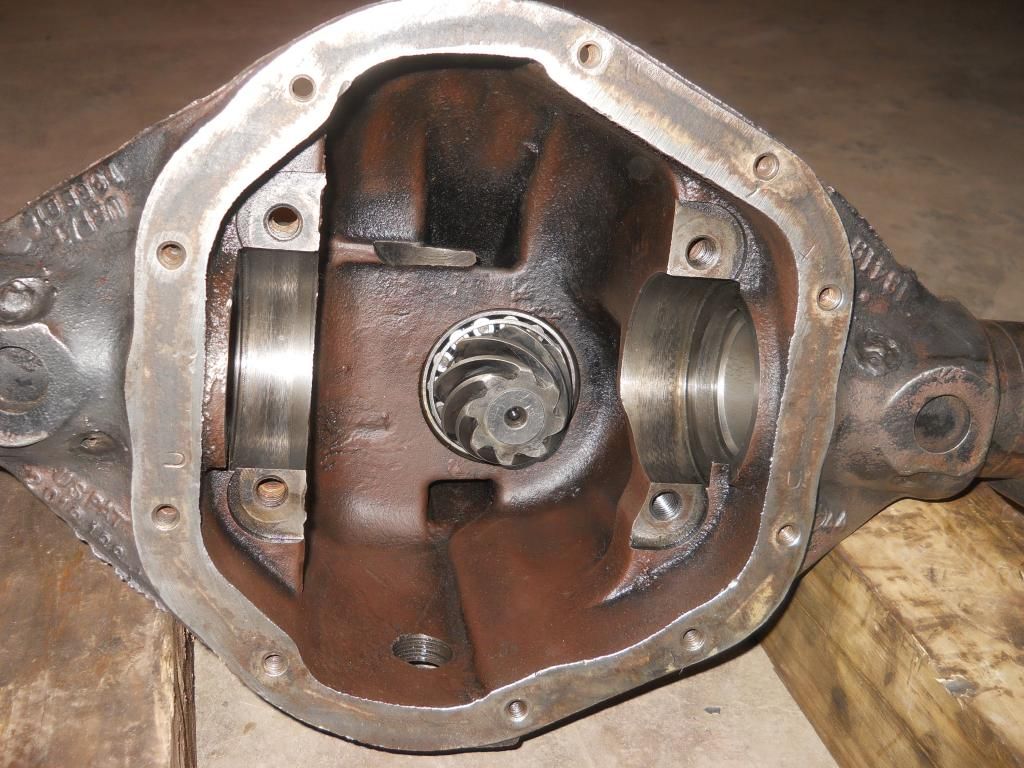 I'm really not sure how this will play out. If I get it back together and it actually works it'll be a miracle. If not, I may be trying to devise a way I can pull a hollow rear-end around with 4WD engaged and just a functional front axle.  |
|
|
|
Post by Ryan_M on Feb 23, 2014 21:10:59 GMT -5
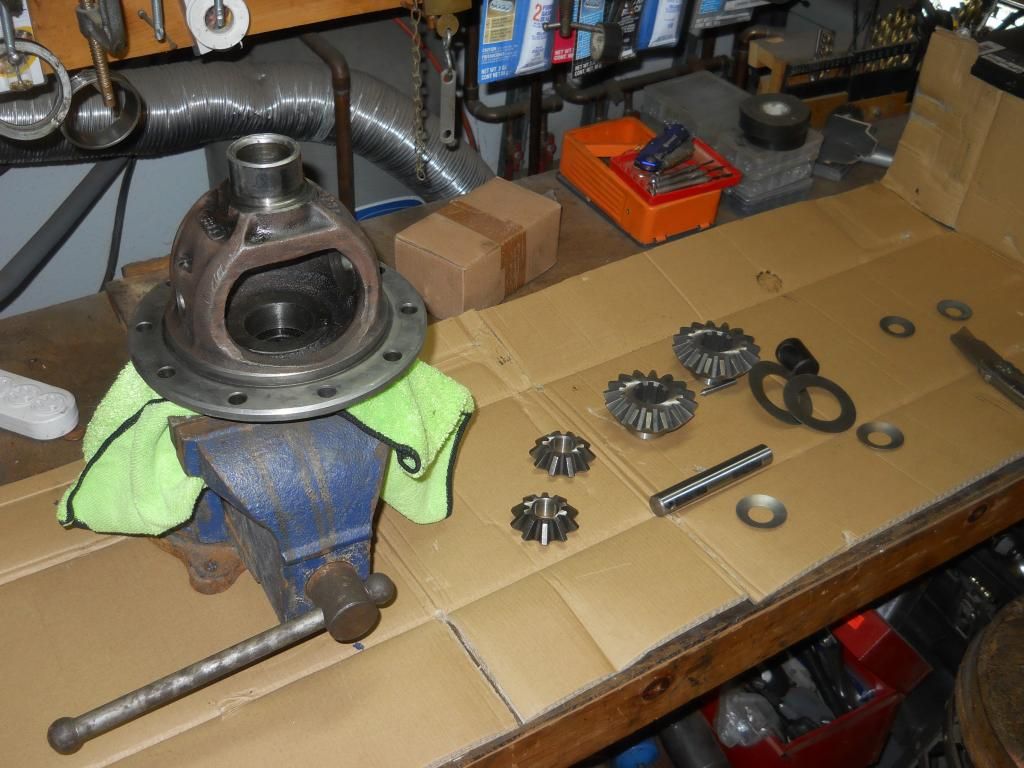 The misery of Dana 44 rebuild continues. All work came to a halt last Sunday once I realized that I had received a defective part in my Walck's spider gear set. The annoying thing about finding this out on a Sunday morning is that all progress ceases and it means another week of downtime trying to sort out a solution. A Monday phone call to Walck's confirmed that I did have a bad block (the small shaft that goes between the side gears and has the hole that the pinion shaft runs through). Walck's, as always, was good about it and got another one in the mail right away. Here's the original, the first Walck's one, and then the second Walck's one. You can see the problem with the middle one being considerably wider in diameter than the other two (which are down in the gear holes). It would not fit through the side gear hole and therefore could not be installed once the gears were in the carrier. 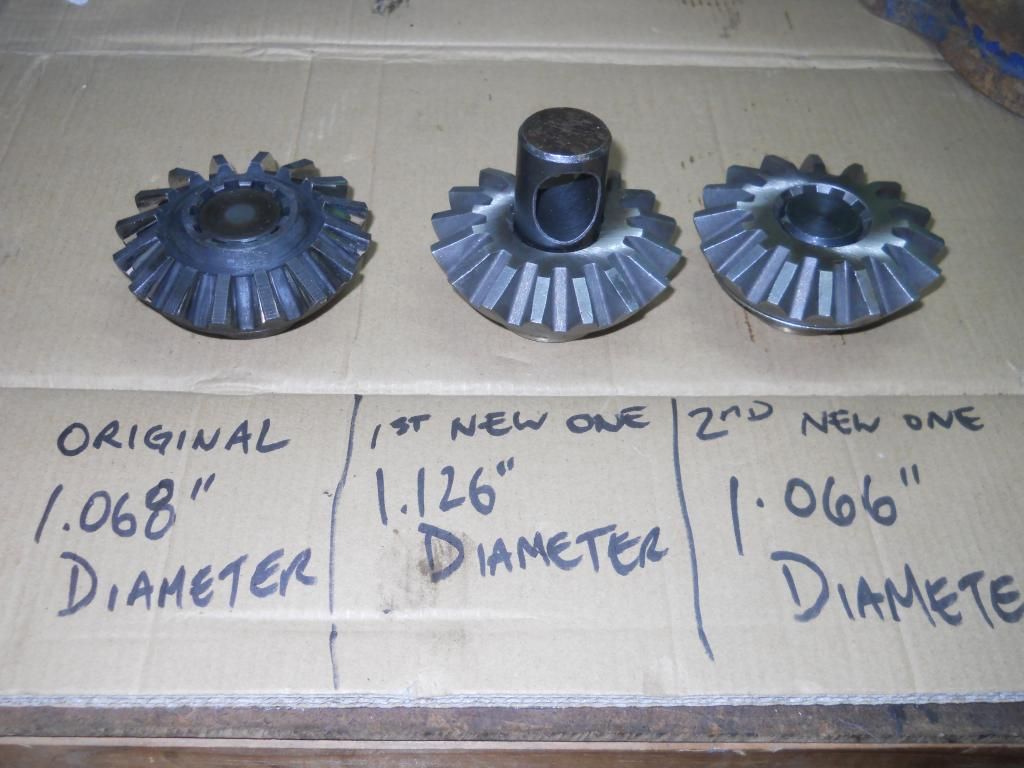 Fast forward to this weekend. Spider gear assembly installed followed by the ring gear. All looks good here but ended up getting torn apart again. 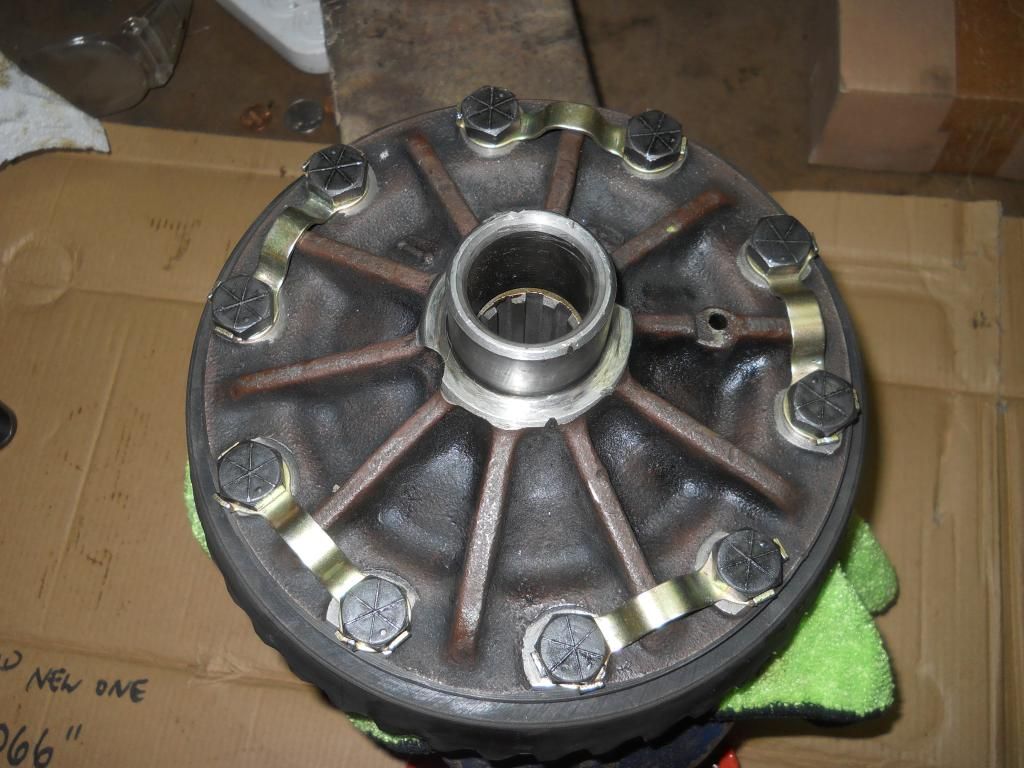 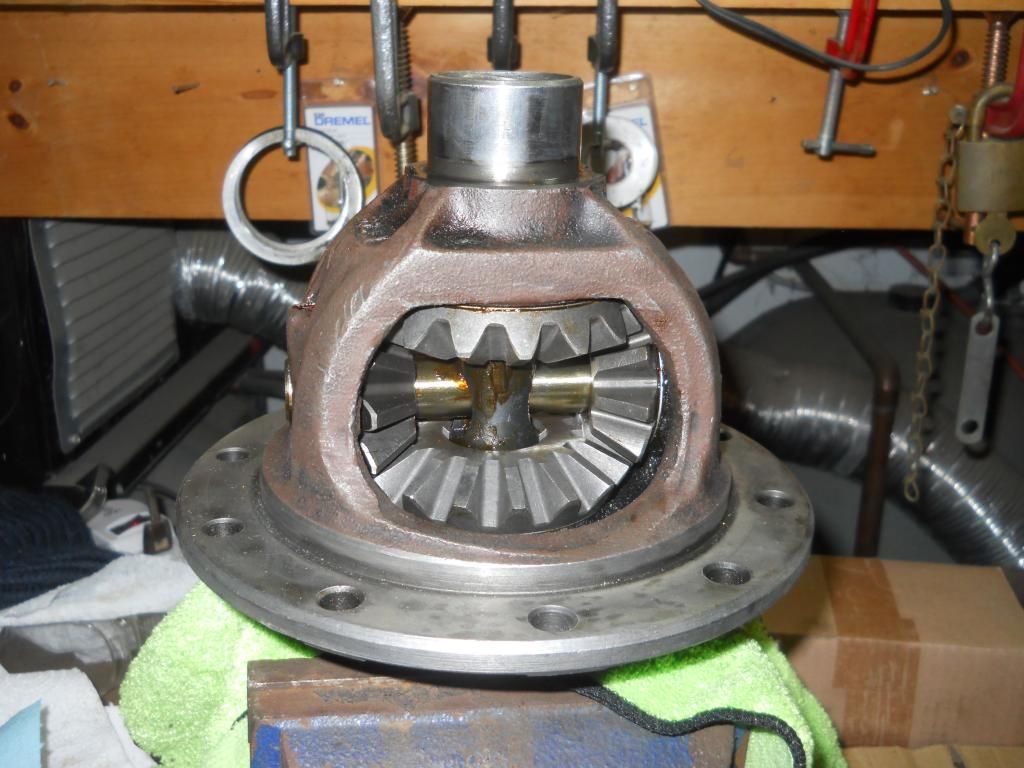 The FSM states a maximum of 0.006" clearance between the side gears and the carrier. I have 0.030" clearance. That's quite a difference. The FSM mentions adding shims here to remedy the problem but I can't find anyone who supplies the shims and barely any reference to them anywhere else online. The standard thrust washer on each side, yes. Additional shims, no. Wobbly side gears and spider gears are the reason I tore this ridiculous thing apart in the first place so I better make sure it's right. That means another weekend of zero progress and another call to Walck's in the morning in hopes that they can help. "Zero progress" may be a bit of a bitter overstatement. I have become quite proficient at installing and removing the yoke and pinion shaft (torqued to 210lbs each time) in order to add and remove pinion bearing preload shims. I did it about 6 times adding and removing various shims until I ended up with what I originally started with the first time. Go figure. I don't have an inch/lb beam torque wrench (for measuring pinion gear rotational torque) but I do have a fish scale (an acquisition from the kingpin bearing project days), a ruler, and a calculator. Amazing what you can learn on the internet ;D 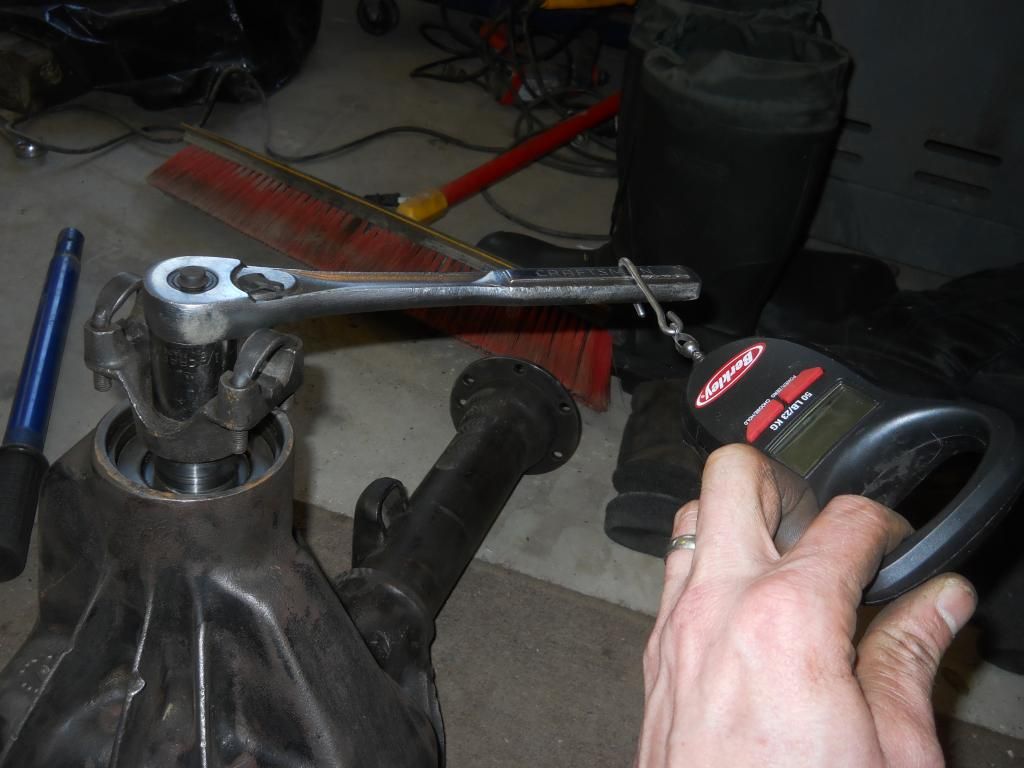 So hopefully tomorrow I can find some relief to this side bearing gap dilemma. Anyone else here know anything about shimming side gears? It's an elusive topic out there on the web. |
|
|
|
Post by rudycon on Feb 24, 2014 0:01:43 GMT -5
Ryan. Yeah diffs are fun. Especially with non pro tools.
I too asked about the excessive side gear clearance with new gears. I chose to double up on the stock side gear shims to get the spider gears to mesh better. Sure I only have about 5 miles on them, but so far so good.
In the Toyota world, we crank way over spec carrier bearing preload with similar sized bearings on the 8" 3rd members. Don't be afraid to go high on carrier preload. I've never seen a carrier bearing burn up from high preload. They are big tough bearings with plenty of oil. We crank in lots of preload to combat ring gear deflection. Getting the carrier in and out without a case spreader will be tougher for sure, so you won't want to do it too many times. If your backlash is good, but your carrier bearings are too tight, I'd run it!
On the Dana 60s, we use the engine hoist to lift the carrier in and out! You simply have to use a spreader on the 60s.
I've seen 44s done without case spreaders.
|
|
|
|
Post by rudycon on Feb 24, 2014 0:04:59 GMT -5
Oh yeah, before you go too far, check the length of the new walcks cross pin. mine was way too long. Couldn't get the ring gear back on!
|
|
|
|
Post by Ryan_M on Feb 24, 2014 6:44:21 GMT -5
Hi Rudy - thanks for the tips. I actually did try doubling up on the side gear thrust washers using the new ones and the old ones. That resulted in the side and spider gears being so tight they wouldn't turn at all. I even inserted one of the axles and tried turning with a pipe wrench and they wouldn't budge. I tried other combinations including a total of just three washer and then back to four with one ground down a little to make it thinner, which didn't work either as I don't have the right tool to grind it evenly. I'm hoping there's a specific shim pack available somewhere with a variety of thicknesses. I'll see what Walck's has to say later today.
|
|
|
|
Post by Ryan_M on Feb 24, 2014 19:45:48 GMT -5
I'm well aware this thread may be lugging down a bit. The complete slaughter of a Dana 44 by an idiot with a tool box is pretty dry material to follow. In the face of adversity one must persevere. I'm continuing to post these mundane ramblings for one reason: If some future hobbyist is naive enough to tear a rear differential apart he may stumble upon this rubbish and find some value. Probably not, but I'm telling myself that anyways. I know if I had found this a month ago it would have drastically changed the course of events. I likely would have taken a quick peek behind the diff cover, bolted it back in place, and sold the Jeep. So today, during discussions with the senior advisors at Walck's I was told that there is nobody producing and selling the side gear shims referenced in the Willys FSM. Great. They suggested I find some "shim stock" and make my own. Not exactly the answer I was looking for but since it's the only option at this point I better get to it. It took me four stores but I found some shim stock. I ended up only using about 10" of the stuff once I actually got to work on it. Good thing I had to buy a minimum of 17'. If anyone needs some shim stock, look me up. I don't have any metal stamping tools but I do have some scissors and a Dremel. Using the thrust washer as a pattern I traced out a few examples. I was going to etch "Bubba Was Heer" on the finished shims but I figured the end result spoke volumes so no need for further personalization. 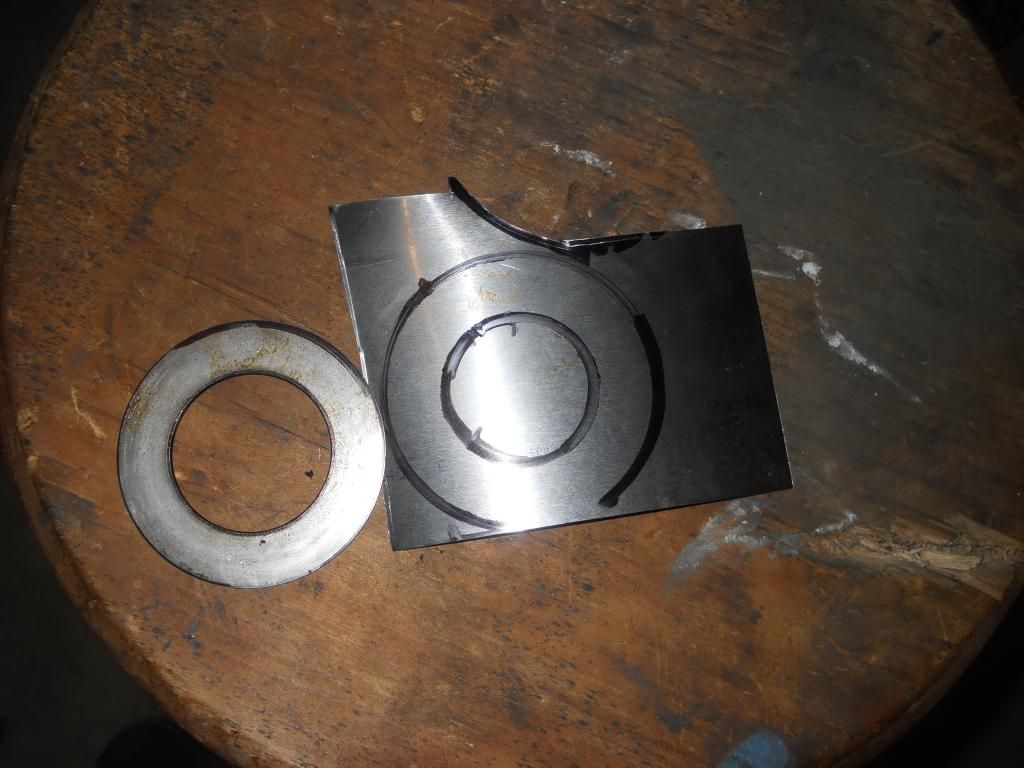 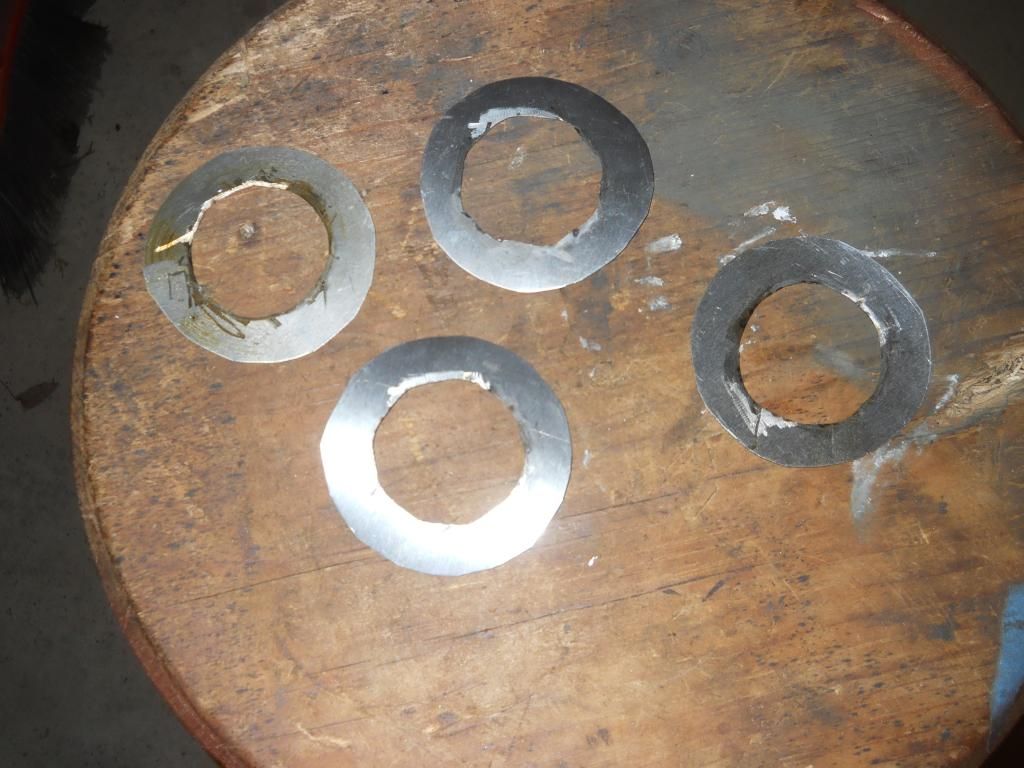 After some fiddling (there's always fiddling, isn't there?), I ended up with the stock thrust washers and a 0.020" shim pack under one side gear and 0.025" under the other. I don't like that the distribution isn't exactly even but that's as close as I could get with this fancy SHIM STOCK I had. The gap between the side gears and carrier housing is now just shy of .003", which is well below the allowable .006". 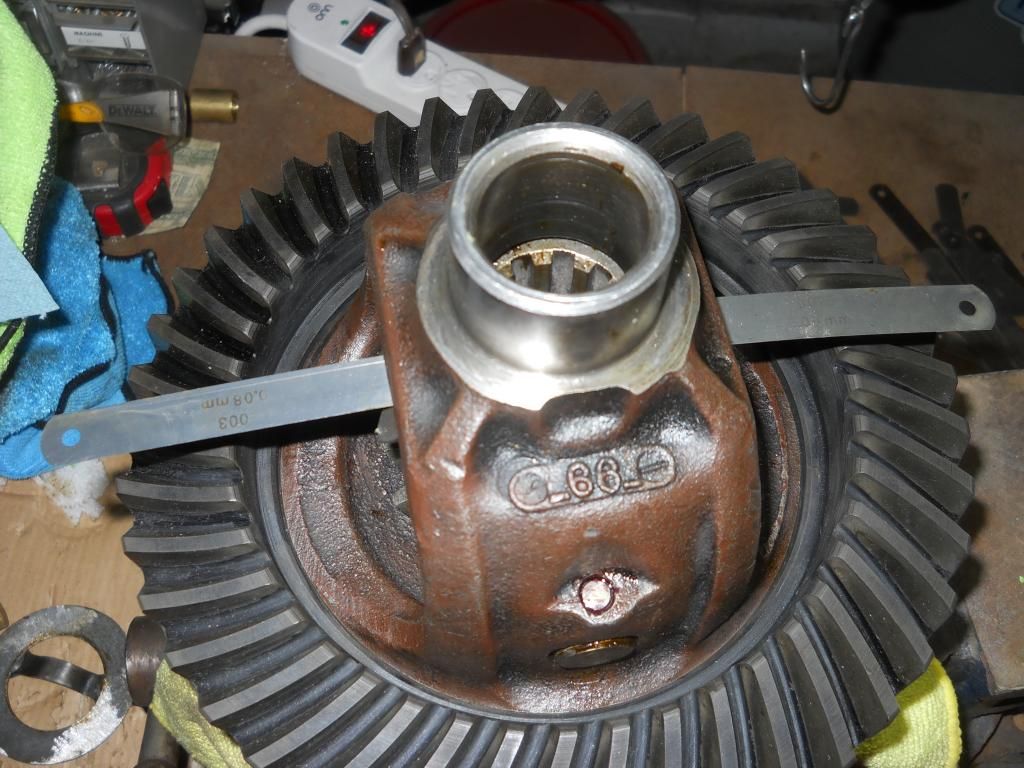 I can't spin the spider gears by hand anymore which is a little unsettling but vague references in the original Dana manual allude to the fact that this may be OK. By the time I can determine this for certain the axle will be back on the vehicle. If it doesn't work at that point I may find a new hobby anyways. Or start drinking heavily again. Maybe both. |
|
|
|
Post by Ryan_M on Mar 13, 2014 14:21:34 GMT -5
So at long last the D44 is back together and, sort of, back in the Jeep. I have not yet road tested my handi-work so this project still could end up as a photo of an overturned Jeep in a ditch surrounded by the smoldering shrapnel of blown out differential gears. If that is the end result, it certainly isn't for lack of trying. Once I realized how tedious this project could be I figured I should try to go as "by-the-book" as possible during reassembly. Instead of just taking for granted that the old shims would be correct (they pretty much were) I set to it as if I was installing a new ring and pinion gear and building from scratch. If nothing else, I learned a lot. Specifically - don't ever try this again. On the bright side, if ever I'm convicted of a crime and can't plea bargain for the firing squad, maybe they can put me to work in the prison vehicle axle repair shop. I made dedicated efforts to take all the right measurements in all the right places and execute adjustments accordingly. I'm still very concerned that I missed a step or miusunderstood the grainy shop manuals and cryptic, often conflicting, directions I pieced together from the web. Reading a gear pattern in Prussian Blue is much like trying to find animal shapes in billowy summer clouds - if you stare long enough you'll see exactly what you want (or don't want) to see. Is that a horse? No it's a dog...no wait, it's a horse-dog with a camel's head. It's maddening. For as much measuring and frigging around as there was, the carrier bearing and pinion shims all ended up back at their original thicknesses. The side gears themselves were replaced and shimmed to drastically different thicknesses from how I found them but it was the excessive slopiness of those gears that started this whole project in the first place. If I've screwed something up, it's likely somewhere in that assembly...or the pinion depth....or the pinion bearing preload...or...well, we'll just have to see how it goes. Here we are measuring and replacing carrier bearing shims. Most of the originals were damaged when I removed the old bearings (before I broke down and bought the shop press). Carrier shown here wearing set-up bearings. 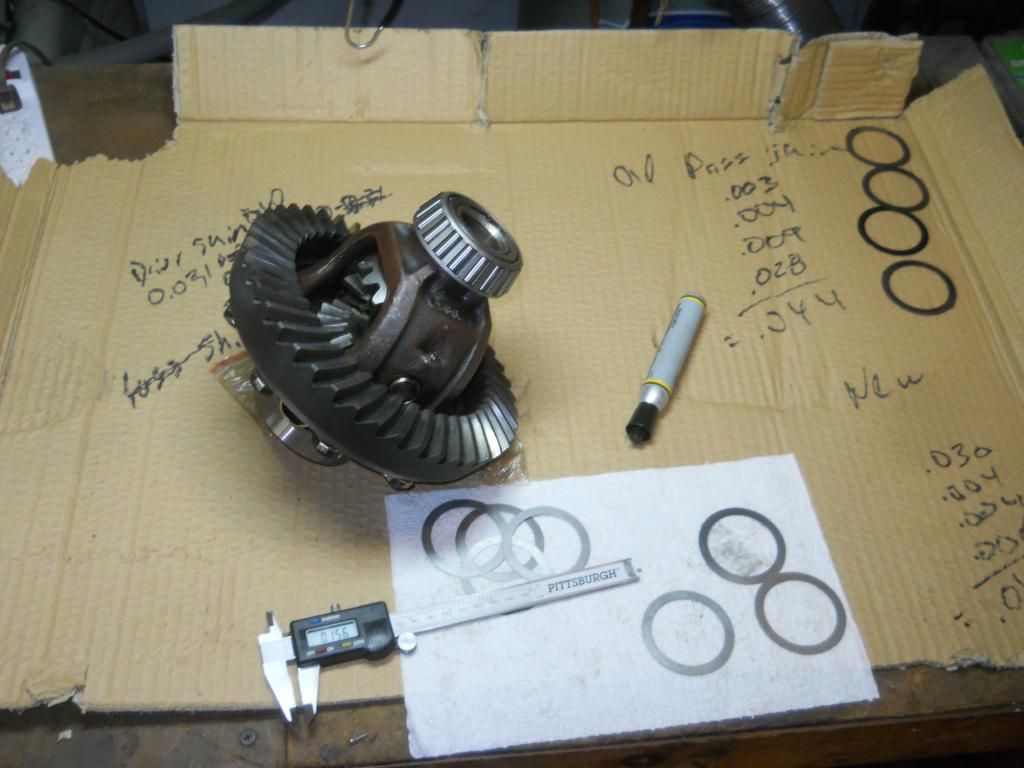 Part of the procedure for verifying carrier bearing shim thickness and bearing preload  After a couple test fits in the housing to ensure all measurements are correct, the setup bearings are removed and the new bearings pressed on  Everything assembled for hopefully the last time. I was careful to keep the bearing caps and bolts in the same locations they were when I removed them.  Now checking the final backlash. All good! 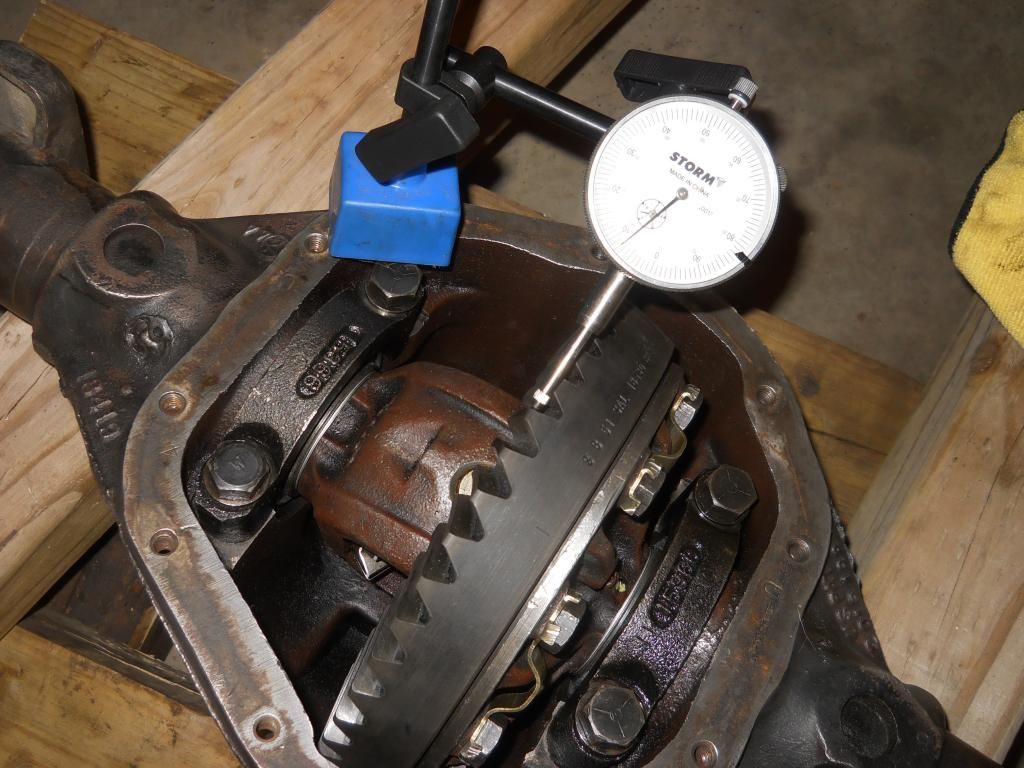 I used Prussian Blue to see the gear pattern. It was really tough to see and I'm wondering if the yellow gear marking compund would be better. Since none of the local stores carry it and I'm not sure I can accurately read the pattern anyways, I stuck with the blue stuff. I did try a bunch of other "home brew" gear compounds with no better success - vaseline, spray paint, mixtures of the two, etc. Kind of winging it here but at least it's reasonably close. I think? I used a pry bar on the carrier to create load while turning the pinion nut with a socket. 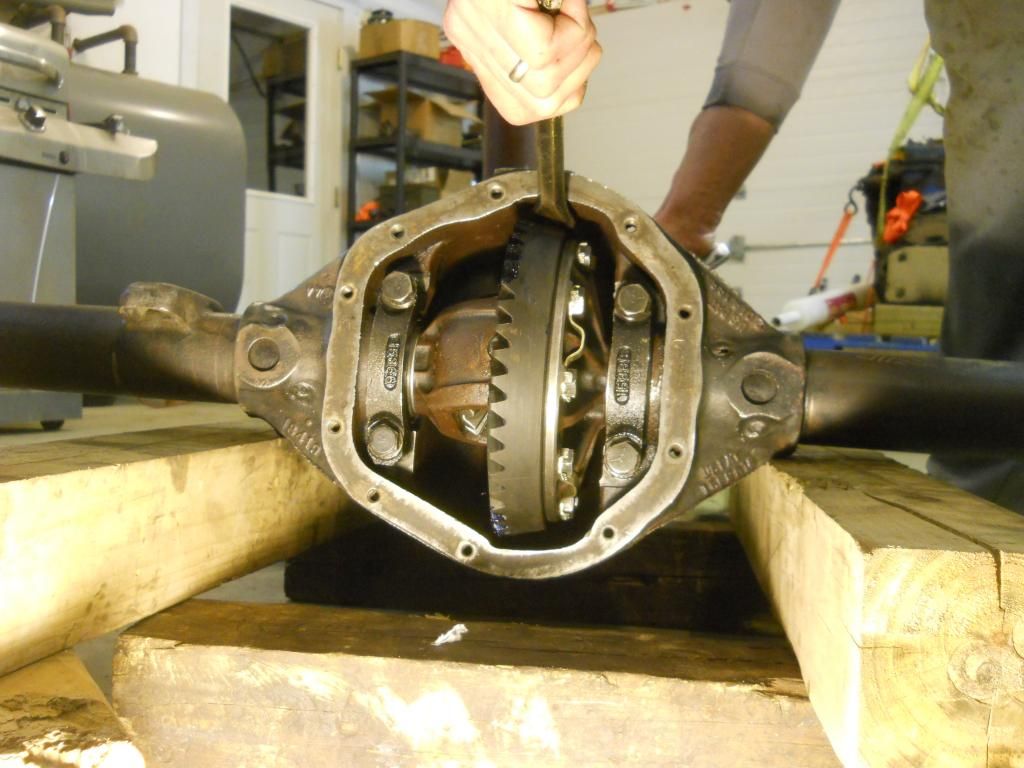 And I can show you a dozen pics where the gear pattern looks different in all of them but here's a couple  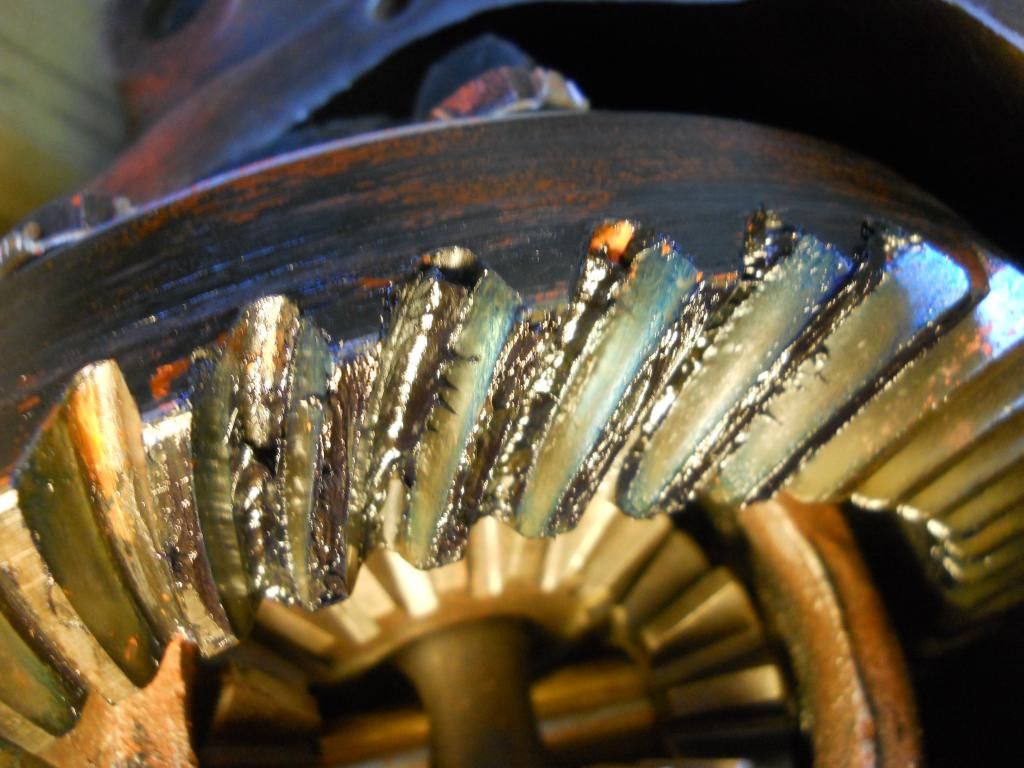 I don't care how bad anyone says it is, I'm not taking it apart again. I'll buy a new axle first Buttoned up and coated with Chassis Saver quickly followed by some Rustoleum Primer then Gloss Black Rustoleum and then Clear Enamel. 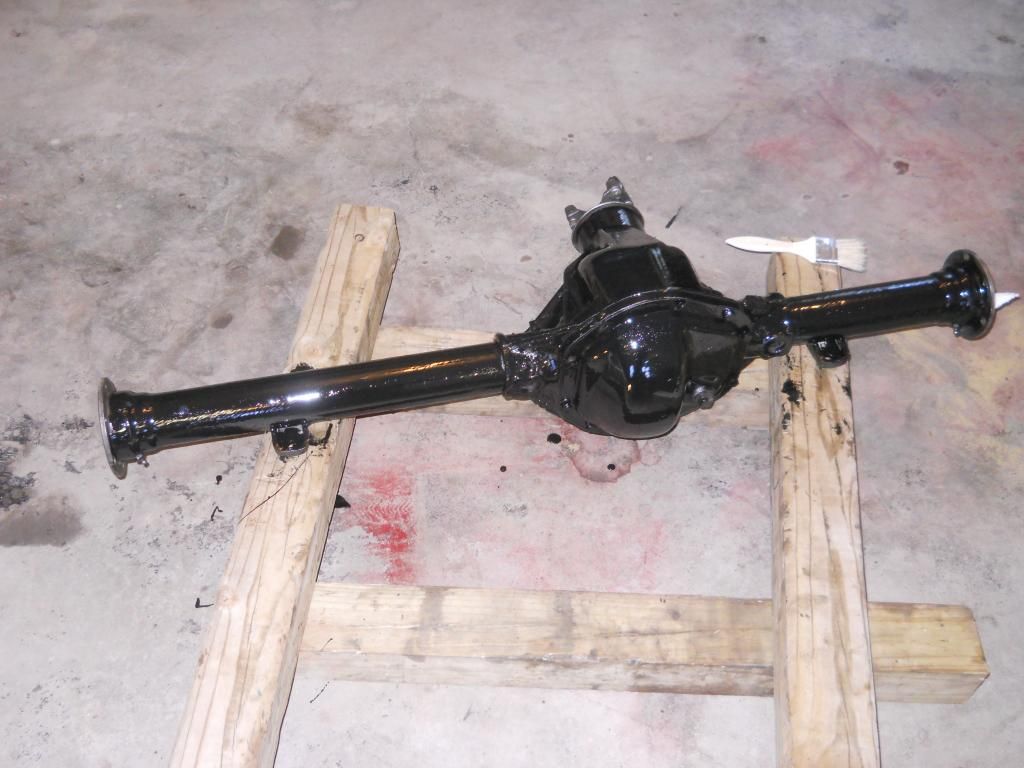 Axles in and new races ready to be tapped home. 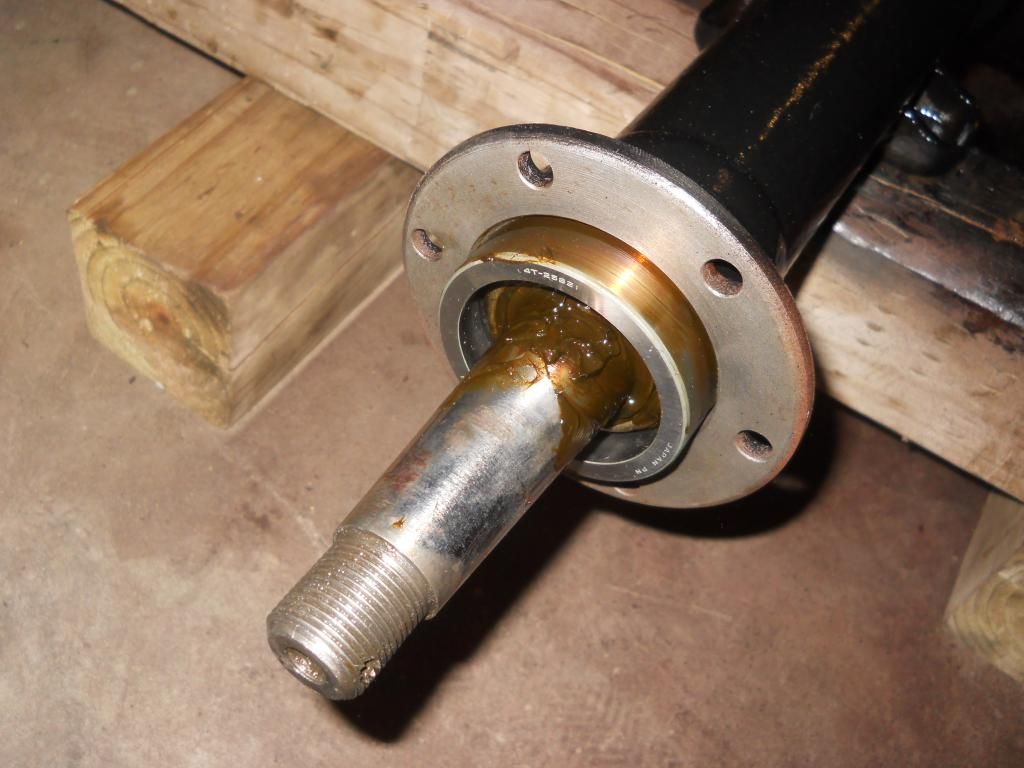 It's now back on the Jeep awaiting final outer bearing shim adjustment and brake installation. Onward we go.... |
|
|
|
Post by Ryan_M on Mar 23, 2014 18:03:50 GMT -5
"KA-THUNKA-THUNKA-THUNKA-THUNKA-THUNKA-THUNKA-THUNKA-THUNKA-THUNKA-THUNKA-THUNKA-THUNKA...." $%#&#*#**&#$$ !!!!!! That was the sound of my freshly rebuilt rear differential installed on a my 3A up on jack stands as I spun the wheels by hand and swore profusely. It was obvious the side gears in the differential carrier were binding. I could feel it happening through the vibrations in the wheels. Free spin the wheels and they'd clunk and quickly come to a stop instead of winding down slowly and smoothly like they're supposed to. Frustrating, as I had spent a lot of time hand crafting those Bubba shims and setting the side gear clearance to spec per the Willys FSM. I was not comfortable with the end result as it made those gears extremely difficult to turn but spec is spec and I went with it. Against sound judgement I quickly bolted the radiator back on and ran the running Jeep up and down through the gears while still on jack stands hoping for a self-correcting problem. No luck. In fact, while running it up on jack stands I was craned around backwards watching the rear wheel so intently I never noticed the temp gauge creep up to well over the 200+ degree range. A sputtering motor triggered me to look forward just in time to see the engine stall and boiling coolant puke out of the radiator and all over the floor. With no hood installed I had a front row seat to Green Geyser Spectacular. Not good. I could not get the thing restarted and spent all the next day thinking I had blown the motor. If you are ever feeling bad about a malfunctioning differential just convince yourself you blew your engine and the it'll make the differential problem seem like a minor maintenance item that may eventually require some casual attention. Luckily, no need to write the final chapter of "How to Annihilate Your Motor by Rebuilding a Dana 44" just yet. Note to self - an elevated rear end will cause fuel starvation even if you can see a little fuel sloshing around in the bottom of the tank. In case there are a few who are still not convinced, I can confirm that a motor won't run if it's out of gas. Brilliant. I'm pretty sure the lack of fuel is what caused it to stall just before it puked coolant, likely saving it from further catastrophic damage. Anyways, although I said I was throwing in the towel with this differential project if it didn't work I got an early start this morning and pulled it back out, stripped it down, and removed most - but not all - of my Bubba side gear shims. The side clearance is well in excess of the .005" called for in the FSM but it's back in the Jeep now and not clunking nearly as bad. In fact, it's barely noticeable. I'm sure if I removed the last of the shims it would disappear completely but that would leave a ton of slop in the side and spider gears - which is what prompted this ridiculous overhaul in the first place. It may come to removing those shims. Slop is better than binding...I think. I will fill the diff with fluid and give it a more thorough test later this week. I pulled the wheels, brakes, axle housing, axles, removed and stripped the carrier, and put it all back together in about 5 hours. Not bad. Since there's a chance I'll be doing it again soon to get those last couple shims I'm hoping I can even whittle that time down some. Here's what the battlefield looks like on the home stretch 5 hours differential-ectomy. Cover your eyes Haines.....  |
|
|
|
Post by rudycon on Mar 24, 2014 11:10:22 GMT -5
Oh man, Ryan. I feel for ya! Let's see...Well, my rear 41 has an extra shim on one side of the housing, and probably more gear lash than the manual calls for, but they don't bind either. I too though the lash was excessive with the stock shims behind the side gears, but we'll see how they hold up. Maybe the gear hob behind the new side and spider gears has cut a different pattern than the original gears which causes the binding with the proper side gear clearance. 200+F iron block, iron head...you'll be fine. I ran the Austin Healey (cast iron block and head) home as a teanager with 2 girls in the car and NO WATERPUMP one night. The water temp was 100 PSI!(combo water temp, oil pressure gauge spun the temp needle right off the end of the water temp scale (230F) and onto the oil pressure 1/2 of the gauge! That engine still runs fine today some 20 years later) Attachments:
|
|
|
|
Post by Ryan_M on Mar 25, 2014 5:59:35 GMT -5
Rudy - So just how much lash did you have in your side gears? Here a video of the old gears before I replaced them. The new ones aren't quite as bad with no additional shims but they are way beyond the allowable .005" as stated in the FSM. And bringing two girls back home or a possibly ruining a motor.....that's be a tough choice.....glad the motor turned out ok. I hope the girls rewarded your efforts  |
|
|
|
Post by rudycon on Mar 25, 2014 9:58:05 GMT -5
Hmm. I think it was about .010 on the side gears. The spider gears didn't move like in your video. maybe .020 up and down? I didn't measure it. I chalked it up to "itsa Jeep thing." I might have less spider and sidegear wear in my differential carrier since the diff had welded spider gears for who knows how long.
Big healey, no water pump, high engine temps:
Yeah. it was a tough choice that night. We cut the fan belt because the worn out water pump had let the fan slide forward enough to smack the radiator at about 6,000 rpm (6,000 is the typical teenagers shift point dontcha know), which bent the water pump shaft enough that it stopped turning.
Risk hurting the motor or get the girls home...I ran with the hood unlatched, (2 side catches left to hold it down somewhat.) I would run the engine hard to get up to speed quickly, then coast at idle....waiting for it to lock up. It didn't. The radiator was percolating enthusiastically when I coasted into the garage.
This isn't really the end of the story....
So I was at (a different) girl's house, started up the healey on her Dad's driveway, throttles were stuck wide open, rpms went through the roof, there was a BAM noise and the hood dented up. The engine was shaking hard by the time I got my hand on the ignition to turn it off.
I thought, "Oh wow I just threw a piston right through the head and a rocker arm hit the hood!"
Nope.
The super high RPM was too much for a cracked fan blade and it flew off, cut the fan shroud like butter, then hit the hood and dented that up. The vibration was simply running with a 5 bladed, 6 blade fan. Removed the fan belt and drove home (only a couple of miles this time) with no water pump again.
Good times, good times...The healey still runs that hood(bonnet) with the double dent bulged up in the metal.
|
|
Deleted
Deleted Member
Posts: 0
|
Post by Deleted on Mar 26, 2014 7:36:16 GMT -5
I was reading all with interest. I've done 5 diffs. The picture of you installing the rear axle bearing in the press, am I blind or did you put it on the wrong side of the ring of the axle? Haines did this too! Wondered why it didn't assemble correctly. John
|
|


 ).
).


