|
|
Post by Haines Garage on Mar 26, 2014 9:24:45 GMT -5
From what I see Sir Ryan has it right.
I placed the bearings inside the shoulder on the axle shaft.
Bearing seats on the outside.
Thanks for the Reminder.....
|
|
|
|
Post by Ryan_M on Mar 27, 2014 10:07:30 GMT -5
Bearings are seated on the outside of the ring of the axle with the narrow end of the bearing facing outwards so that the race goes on after the axle is installed. That's right, right?? I did look back over many posts and pics (including the HG fiasco) to make sure everything was in the proper order. I had to make sure it was correct as I don't own a karate gi  |
|
|
|
Post by Haines Garage on Mar 27, 2014 18:14:04 GMT -5
|
|
|
|
Post by Ryan_M on Mar 27, 2014 19:50:47 GMT -5
I had a very trusted source who knows more about mechanics than I will learn even if I live to 100 stop by and check out my rear differential tonight. After carefully inspecting the exposed side gears, spider gears, gently turning the wheels while listening and periodically prodding at things, his final assessment was....... "Run it!". And so I shall. Besides, what's the worst that can happen?  |
|
|
|
Post by Ryan_M on Apr 5, 2014 19:27:16 GMT -5
Still too cold, rainy, muddy and gross to take the 3A out to determine whether or not the rear end is going to grenade. So today I replaced the exhaust on the M38 and hit the streets for a 30 mile cruise. It was the first real road drive of the year which felt great. When I got home, I took a crack at pinstriping the 3A wheels. Using a drill bit as a measuring tool, I marked the wheel where the pinstripe needed to be. 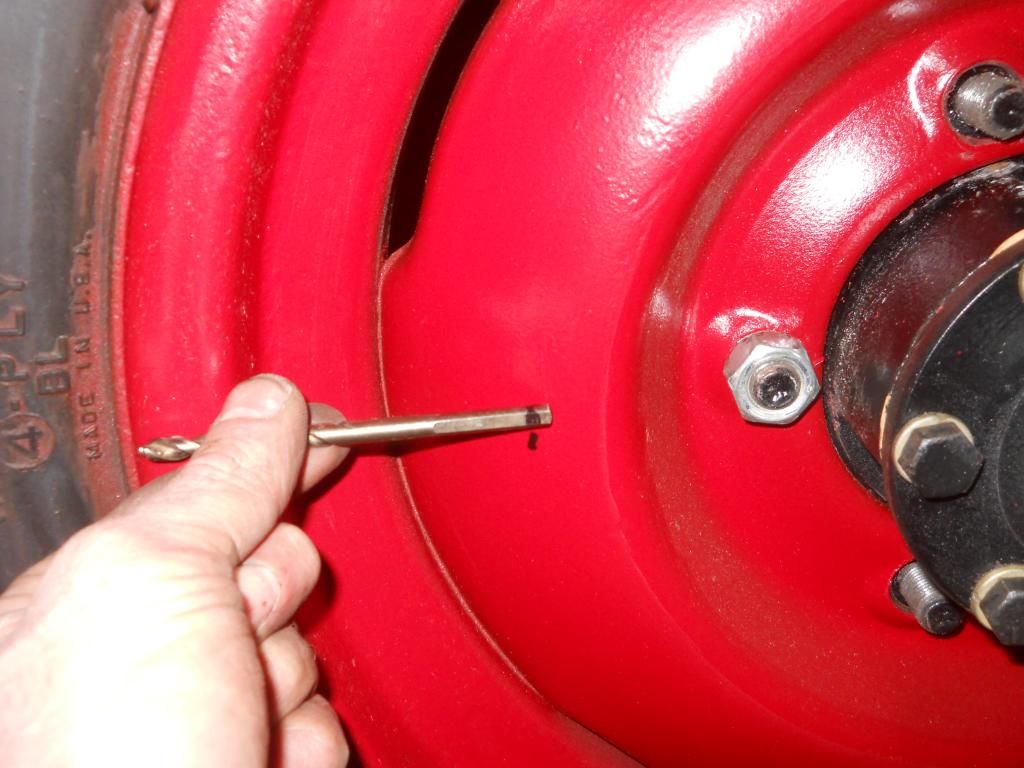 With the wheel jacked up, I aligned my super hi-tech pinstriping unit. It's a paint marker taped to a magnetic dial indicator stand and stuck to a heavy vice. 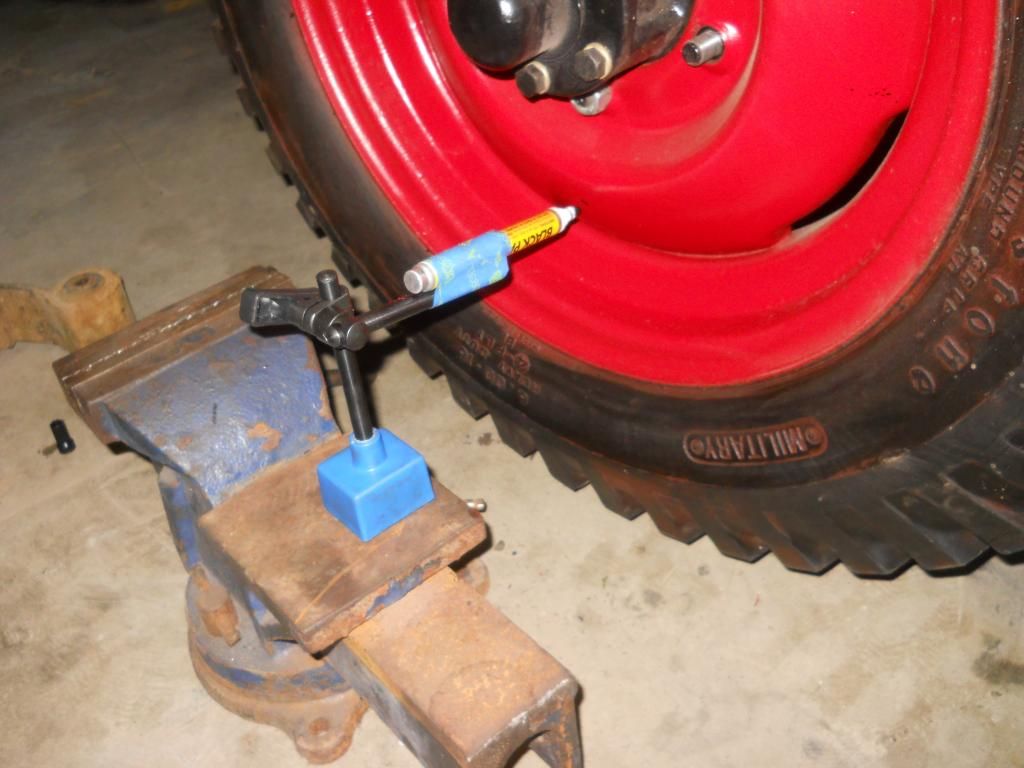 A couple spins of the wheel and, voila, a reasonably decent pinstripe 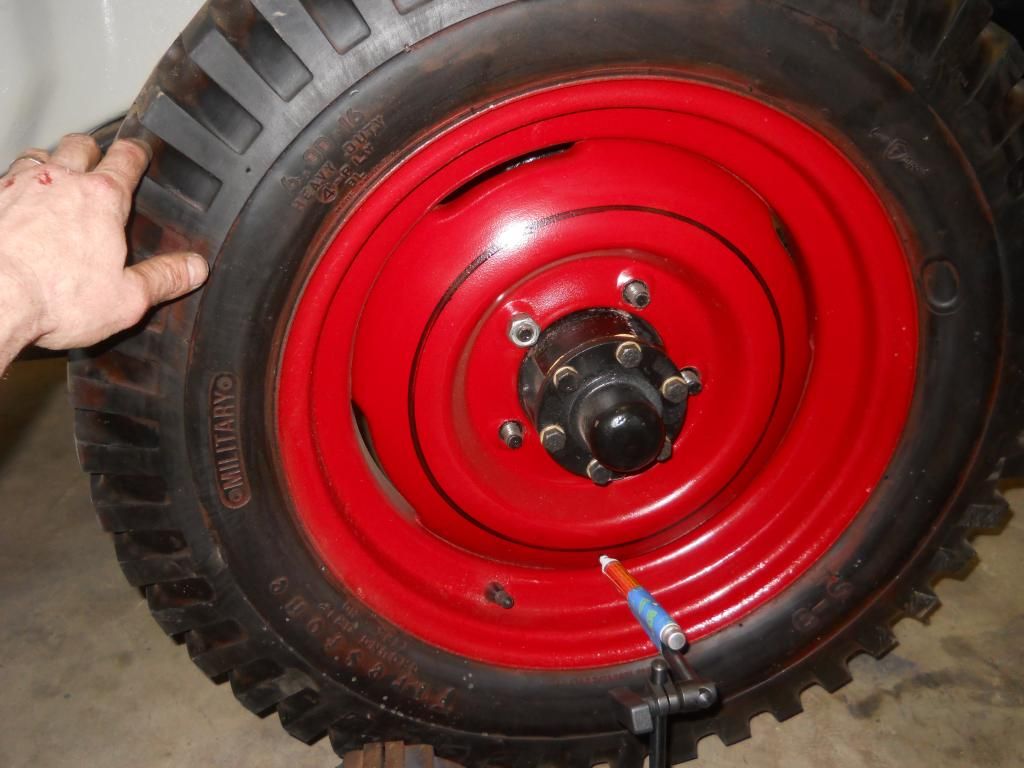 Once the pinstripe was in place it was pretty easy to fill in any thin spots by hand. I found it more consistent to use the front passenger hub as the "work station" and rotated all the wheels through that one. I screwed up a couple pretty badly but easily wiped the stripe off with acetone. Once I got them looking good I hit the wheels with quick blast of clear coat. This is far from a professional end result but from 10' away it'll look perfect, which fits the theme of the rest of the vehicle. Yes, I know, I still haven't cleaned the old red over spray off the tires. I just haven't been quite that bored yet. 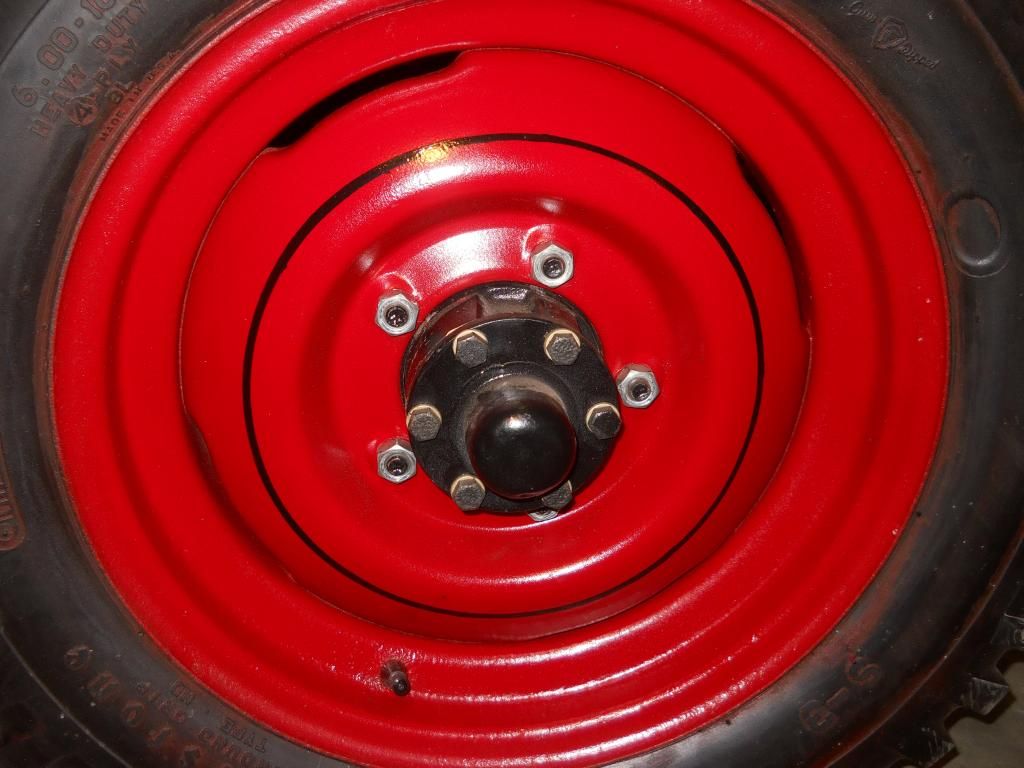 |
|
|
|
Post by zooke581 on Apr 5, 2014 20:04:19 GMT -5
Nice! Looks like someone also busted some knuckles today.
|
|
|
|
Post by Ryan_M on Apr 5, 2014 20:27:03 GMT -5
Nice! Looks like someone also busted some knuckles today. That would not be unusual but in this case it's only red paint  |
|
|
|
Post by Ryan_M on Apr 6, 2014 17:53:17 GMT -5
So for the first time in, I don't know, at least 5 months we had a day that was actually bearable and borderline enjoyable to work outside. I clocked another 40 miles on the M38 then came home and got to work on the new-to-my-3A-but-originally-from-a-2A hood. For those of you that don't remember, my current and original-to-the-Jeep hood was poorly repaired last time around. Between two full time sociopaths moonlighting as body-men, 18lbs of bondo, and enough metal bracing to reinforce the Bay Bridge the thing does not fit right and drives me crazy. I found this 2A hood on ebay over the winter. I had a friend make some minor weld repairs in a couple spots and fill in the offset hood block holes. I'll drill new ones so it'll look right on a 3A. I've never painted a vehicle, let alone tried to color match an existing one. This could be a challenge. Today's project was to clean it up a bit. I burned through two wire wheels which were the only two I had. I'll need a third one to finish which I'll get later this week. The weld repairs need some minor touch up in a couple spots and then it's off to the paint store with a mountain of stupid questions for whoever is unlucky enough to be working the counter that day. Actually, it'll only be one question - "How do I paint this hood?". I think I'll bring the tailgate with me too so I'll have an example of what I need it to end up like. I have the paint code and know the store it came from so I'm hoping we can get this figured out. First time using a flapper wheel on the angle grinder. As promised, it made very quick work of the welding slag. 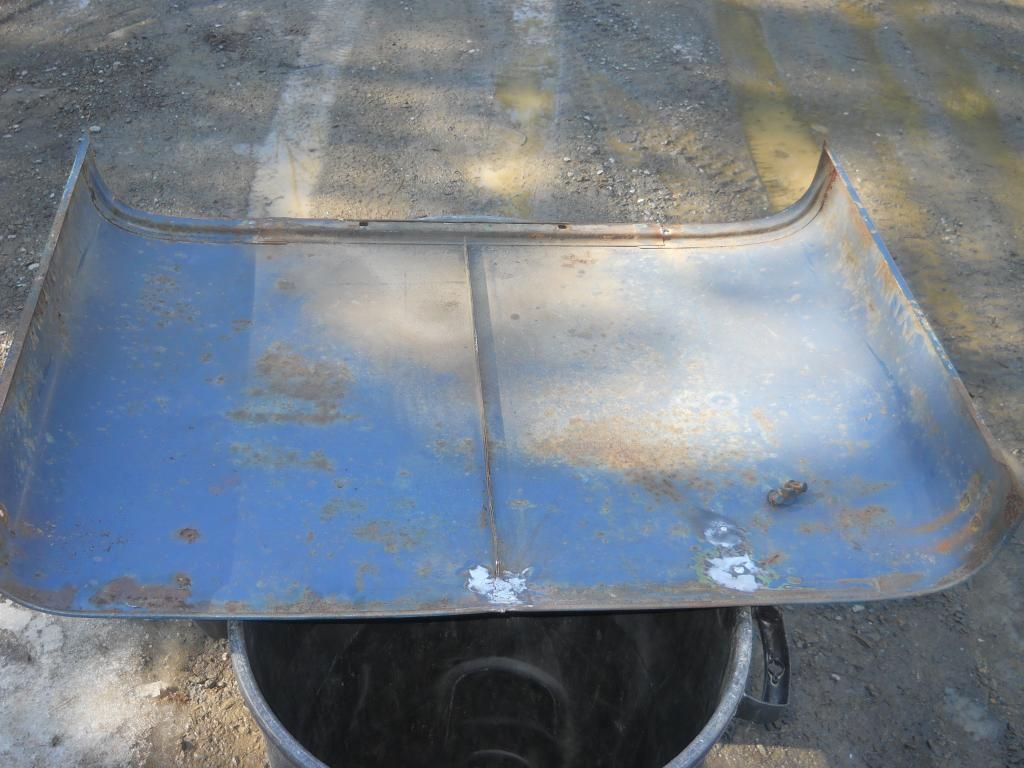 Does this green appear to be an original 2A color? 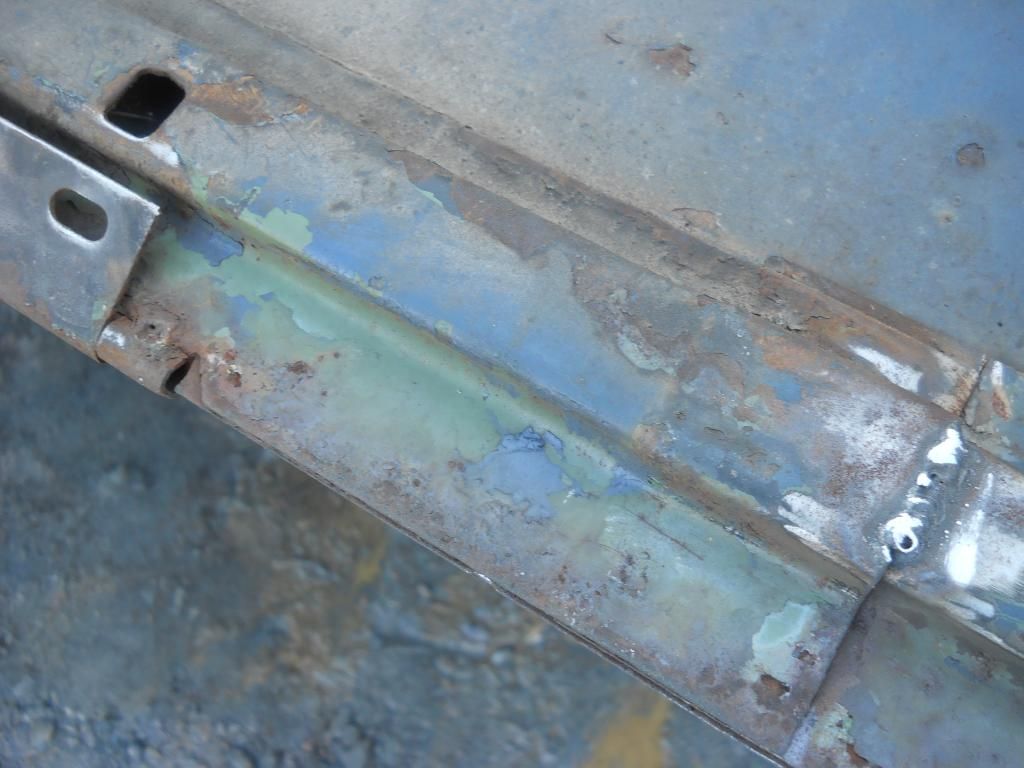 Much more time consuming than I expected 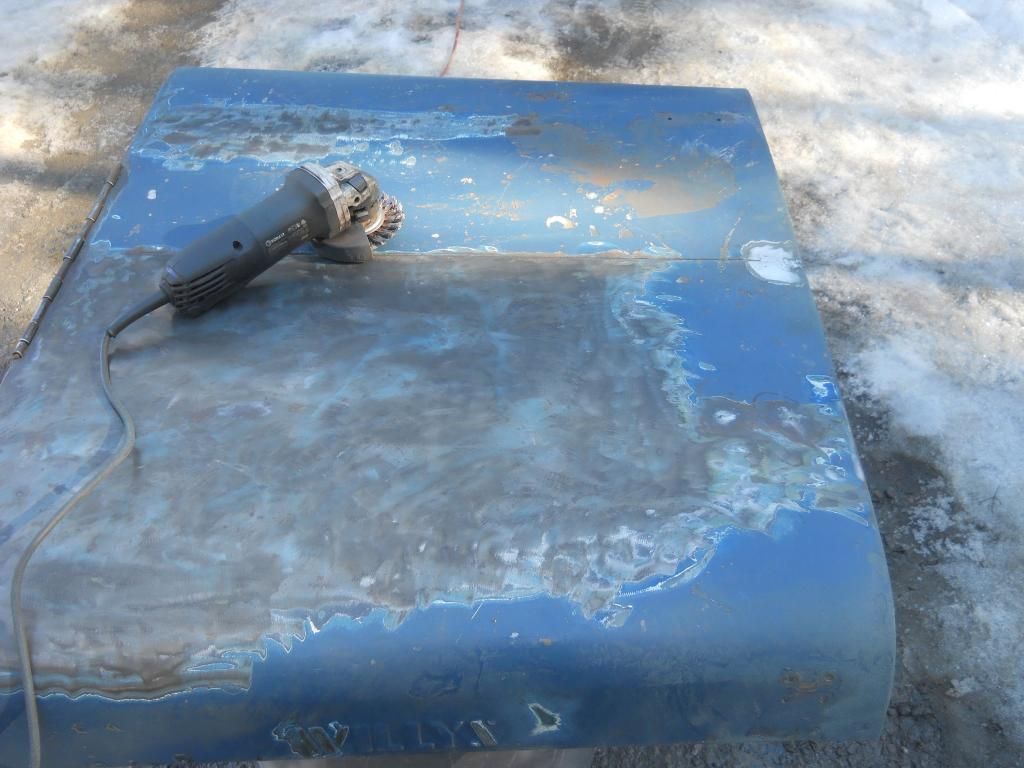 Out of wire wheels. Time to call it a day. 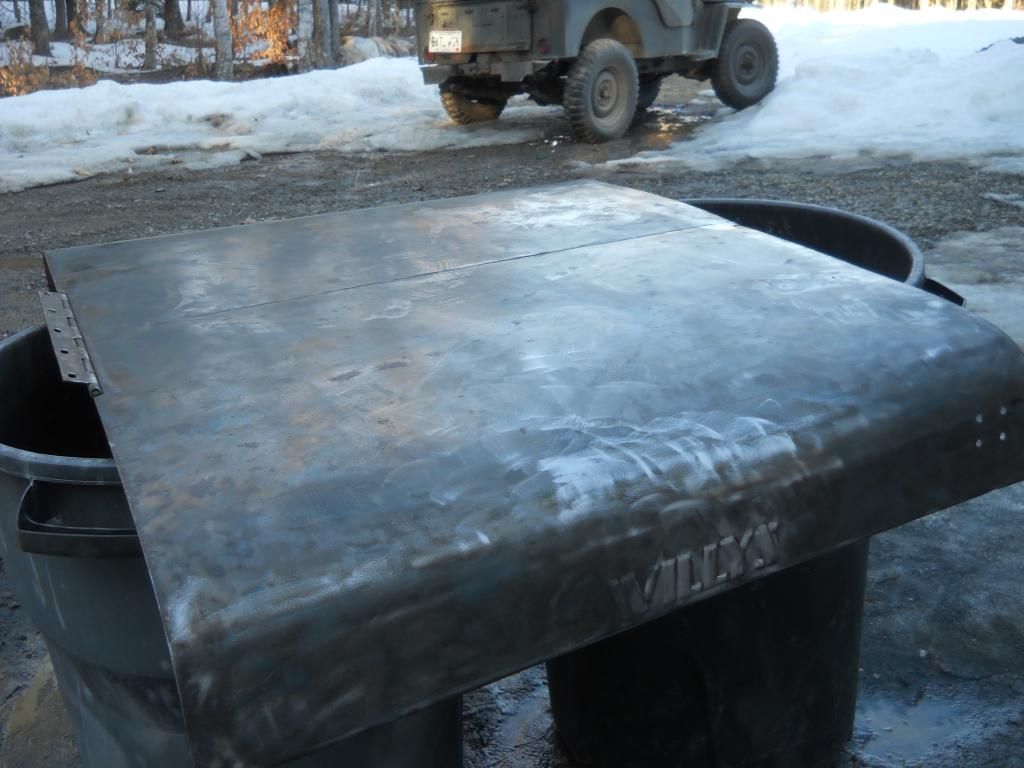  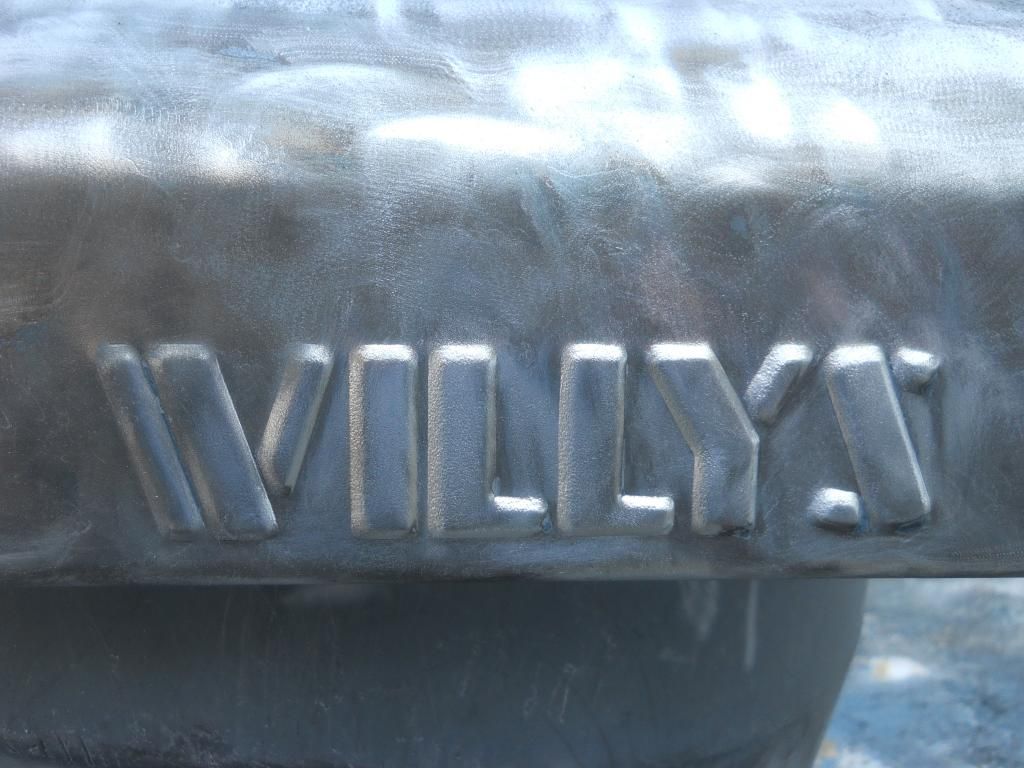 |
|
|
|
Post by Ryan_M on Apr 20, 2014 16:17:24 GMT -5
Etching primer, urethane primer, urethane sealer, and finally - paint....boy, I didn't realize how involved painting really is. I rigged up a makeshift paint booth and managed to spray the hood to a relative likeness of the rest of the Jeep. I will not be professional painter anytime soon but I'm satisfied with the result.  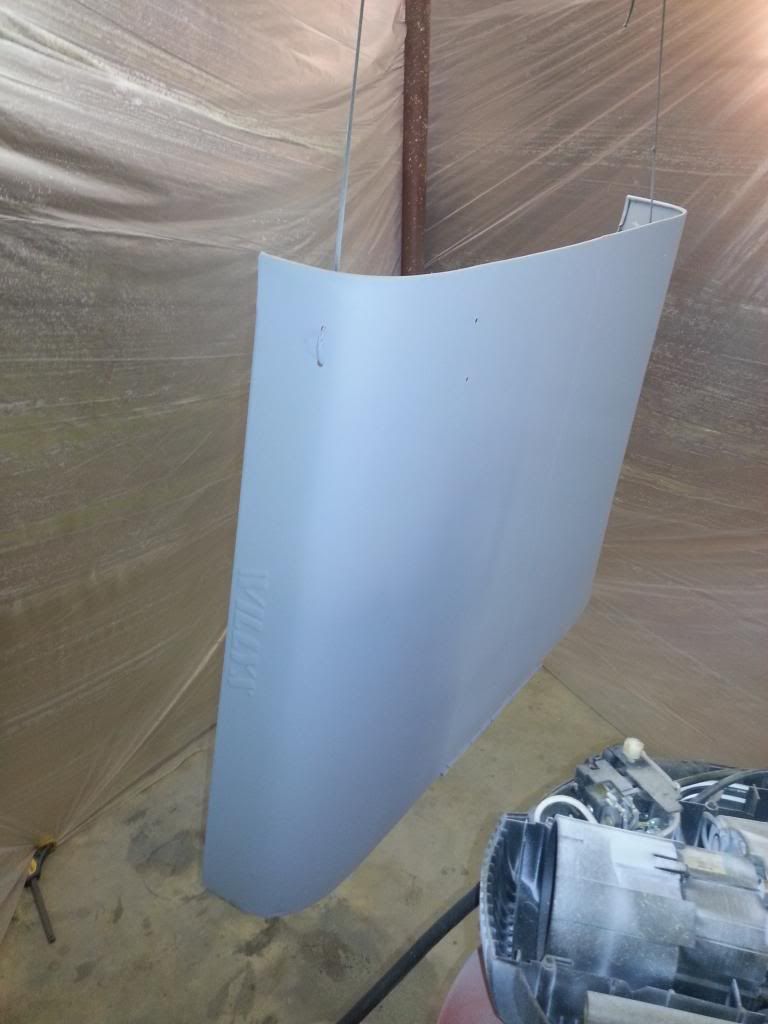 The new hood feels and sounds like metal now instead of the low "thunk" of the bondo-cake that predeeded it. It's awesome. I opted to hand paint the "WILLYS" logos this time around and mercifully managed not to screw them up too badly. I'm waiting on a new adhesive "4 Wheel Drive" stencil so I can complete the tailgate. I tried a test spray (on the old hood) with a non-adhesive stencil and all it did was make a mess. I don't know how you could possibly make it work. 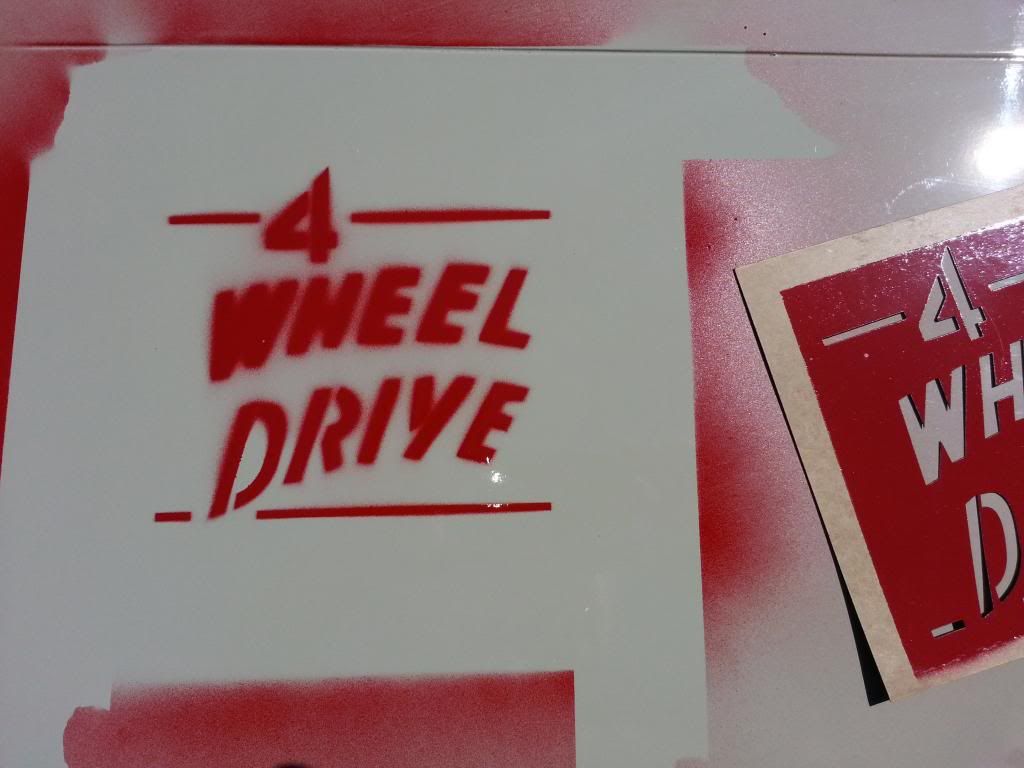 So here are a few glamour shots from this afternoon. I found some original rims for my T3-C that came with some very vintage tires. They're bigger than they should be but it rides level with the Jeep so I'll probably keep them on there. I still need to scrub some over spray off the tires but it was too nice out today for that project. I went for about a 40 mile ride instead for the first trip of the year. The rear axle did not explode, which is good.  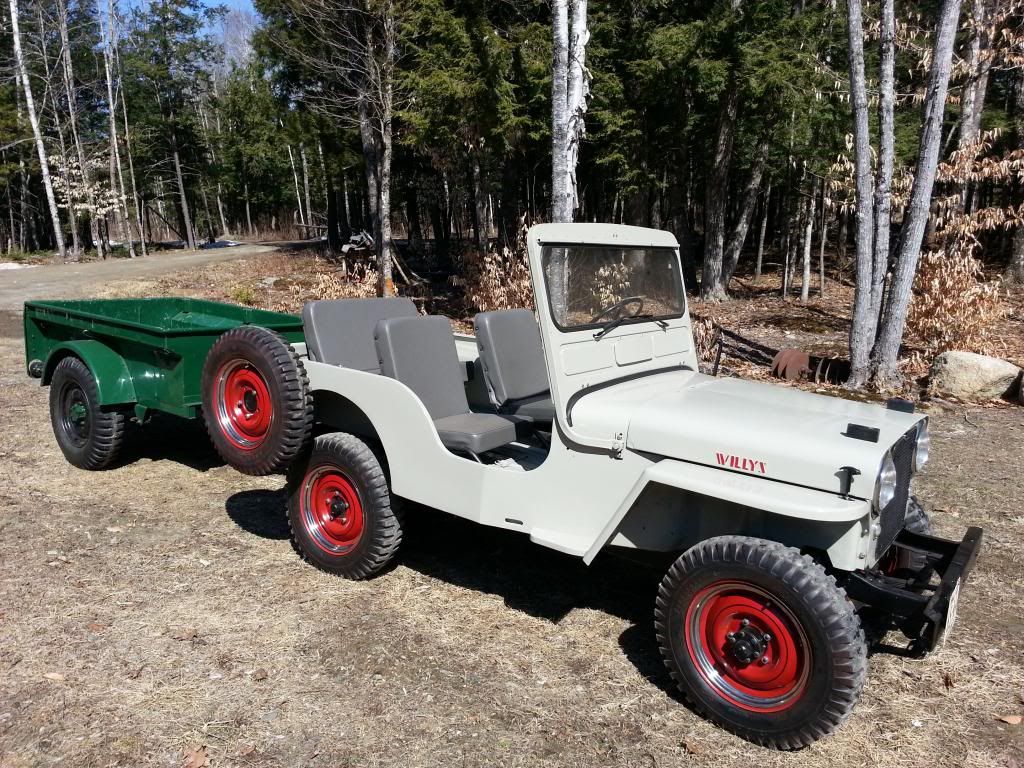 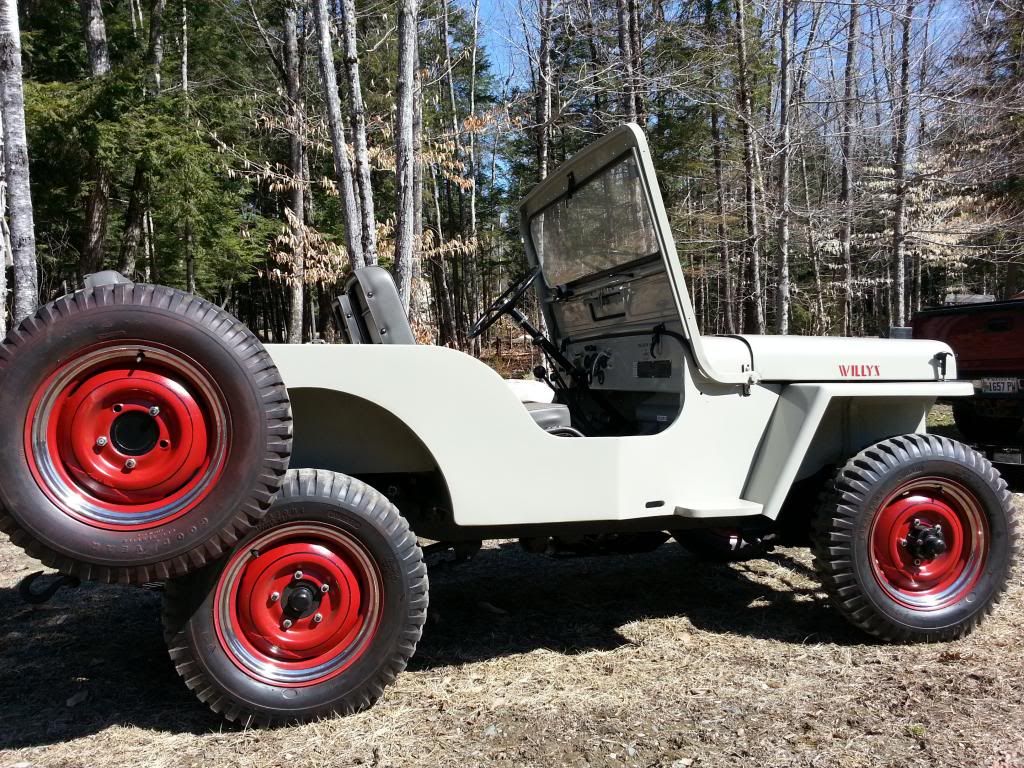 |
|
|
|
Post by Haines Garage on Apr 20, 2014 17:01:24 GMT -5
I love the spray booth, and the Jeep looks Fantastic!
But that look on your face with the spray gun is concerning me...
Just a little....
|
|
|
|
Post by zooke581 on Apr 20, 2014 19:10:14 GMT -5
Looks very good from here.  Nice job. I like the red wheels and pin stripes. |
|
|
|
Post by Ryan_M on Feb 7, 2016 18:36:57 GMT -5
When you need to shorten a driveshaft by 7 inches why just cut 7 inches off? Why not cut 10 inches off and the figure out how to add 3 back on? Because you're an idiot that's why. Lots going on with the gray 3A as of late. I finally wrestled the OD out and shipped it back to Herm. It's been grinding with almost every shift since Day 1 and no amount of shims or cursing has made it any better. Dr. Herm gave it a complete overhaul and said that this was the problem. 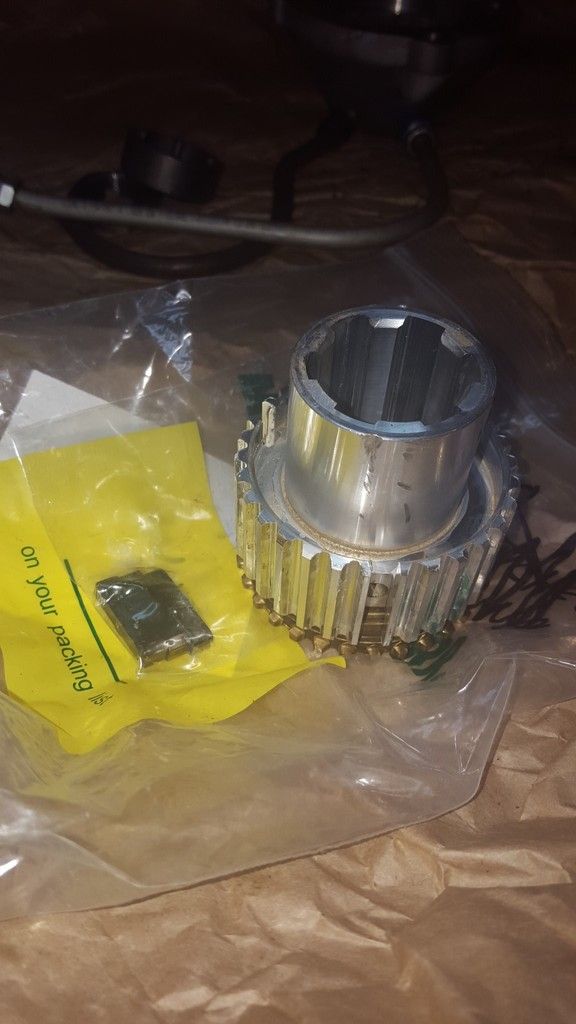 I don't know what it is and Herm doesn't know why it was binding but it's now on my workbench and the OD is back in the 3A with a new one of these things. Road salt limited my ability to test drive but flying laps in 1st and 2nd gear around the yard failed to induce a grind during any shift. I am cautiously yet optimistically pleased. Since I was on the phone with Herm last week anyways it seemed only reasonable to order one of those PTO/OD adapters from him. I had tried to snipe a couple on eBay recently and was completely blown out of the water both times. Herm chalked up another sale. 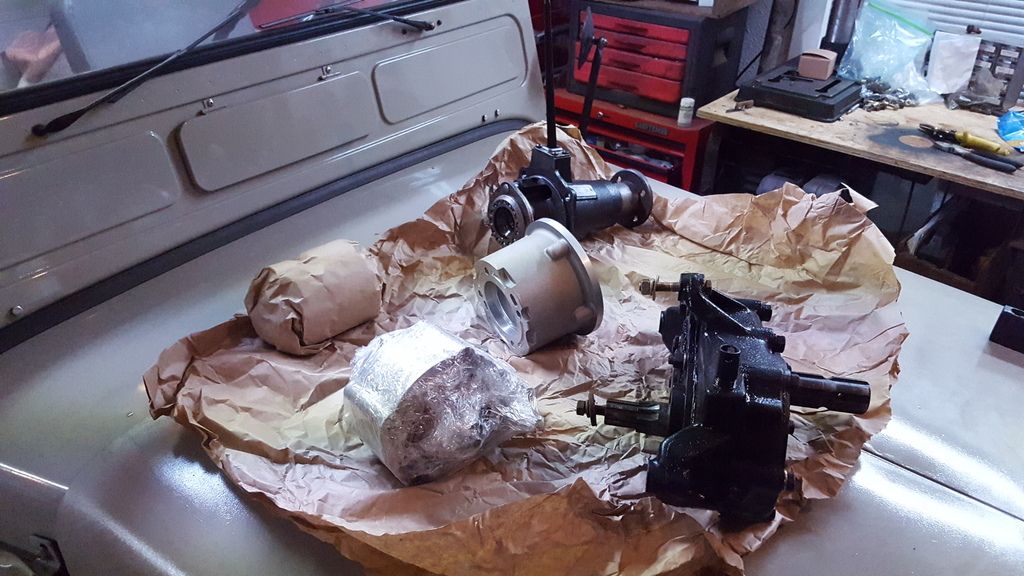 I bought that PTO set-up from a forum member a few months ago and went through everything. Complete disassembly, new bearings, seals, and paint. I'll spare you all the pics but they came out nice. Actually, I'd bombard you with pics I just can't find them. Here's what I have: Before: 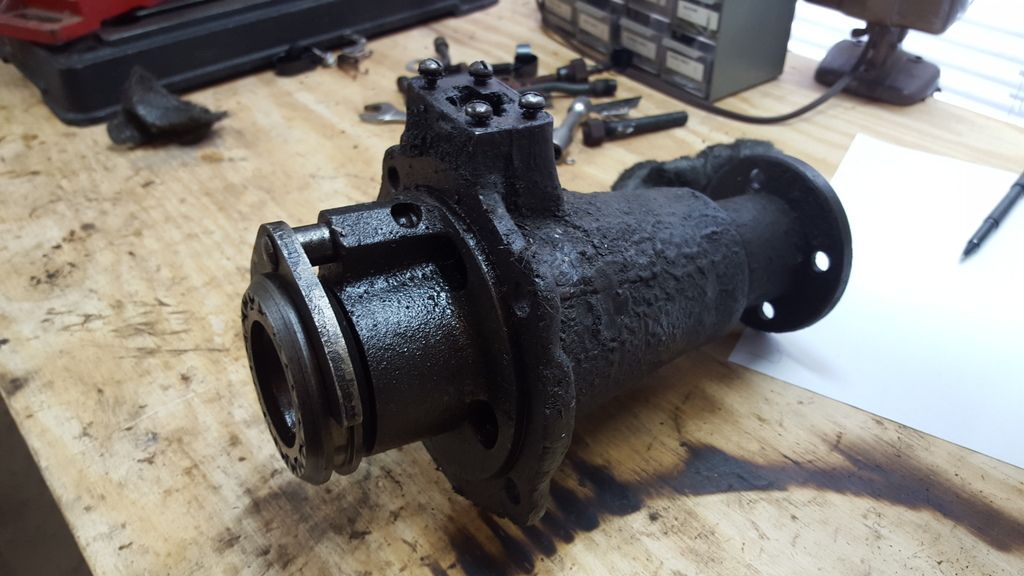 During: 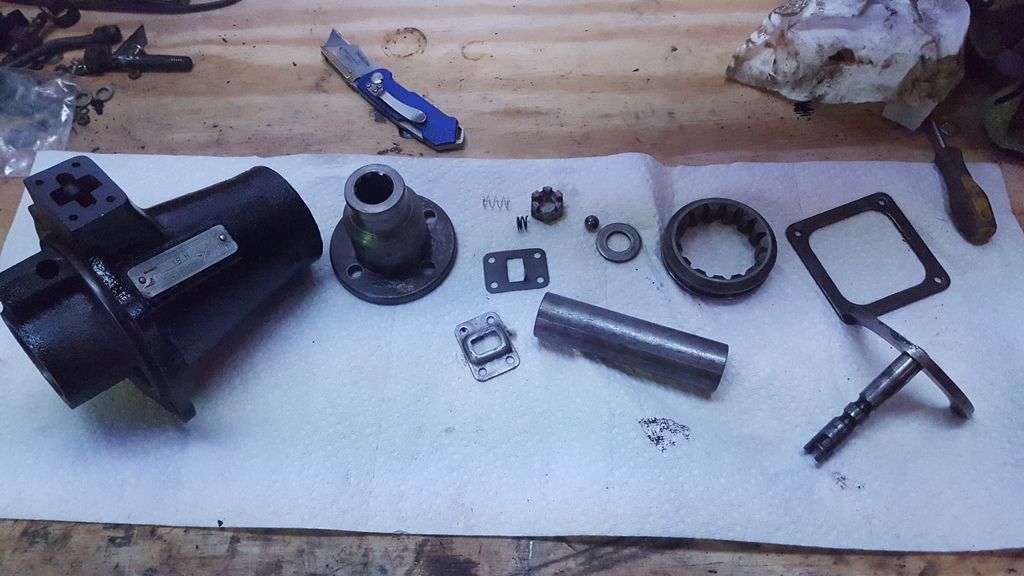 After: I told you I was missing pics. This is one of them. In preparation for rear gearbox installation I added the support brace to the rear crossmember. Go check your 3A and see if it already has one of these tucked up in there. Neither of my 3A's had one. Walck's chalked up another sale. 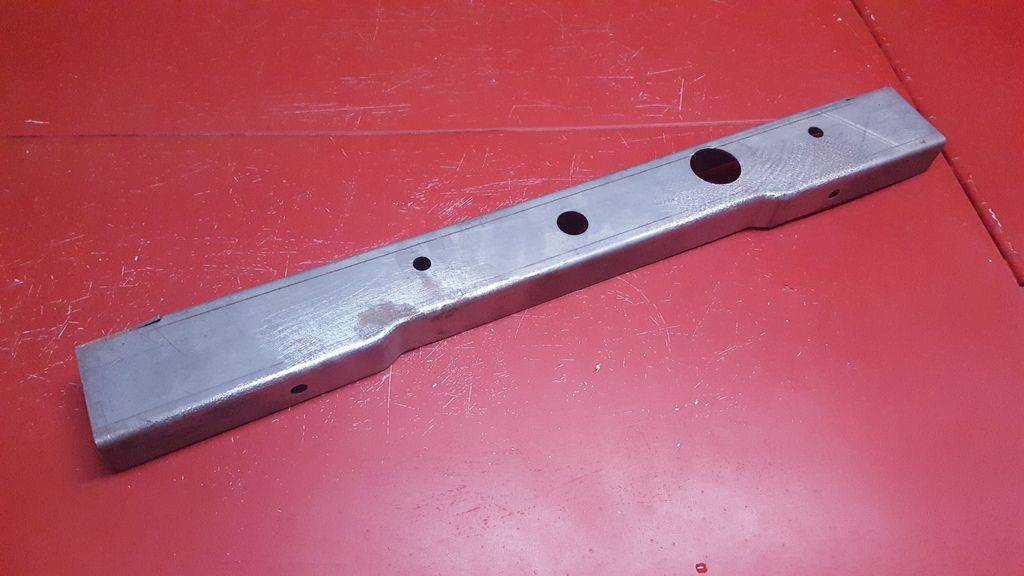 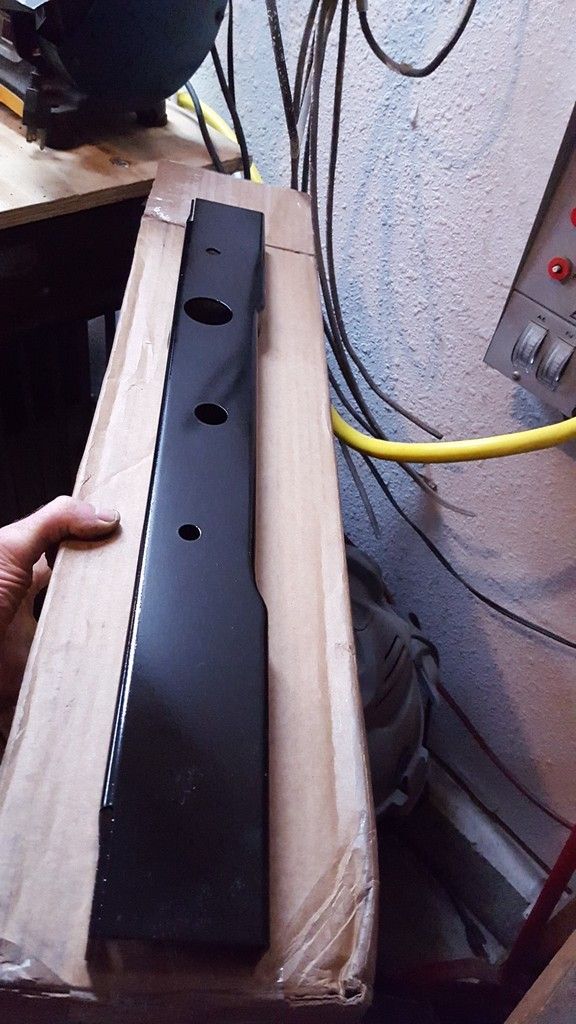 Next up I decided to take my shoes off and cut a giant square hole in the tub. I always do my best Sawzalling while barefoot. Luckily, I was able to use this hole for the PTO shift lever which coincidentally needed a new hole here anyways.  Back under the Jeep to bolt everything up. Oscar stopped by to visit. He likes to hang out just beneath the skid plate in order to baste in the cocktail of oils that flow from it. He was soon bored and moved upstairs to nap on my side of the bed.  So now I have the PTO and OD roughly installed. I still need to button everything up once I'm sure I won't have to take it apart for the 5th time. 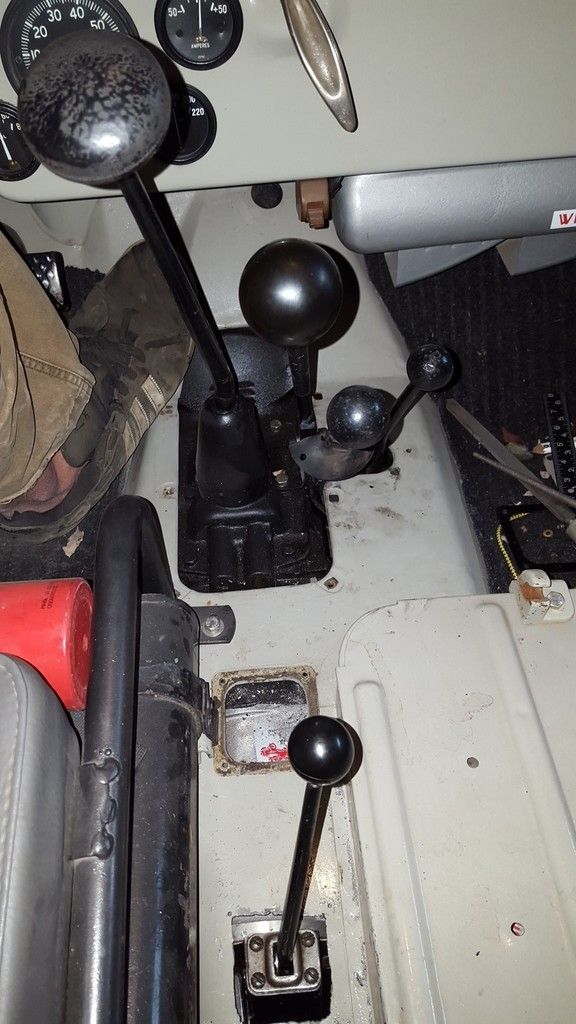 While sitting in the driver's seat staring at this mess I actually had to Google "CJ2A - How to use a PTO" (Yes, I know I'm in a 3A but 2A Google searches always result in way more hits....). Since I had my phone out I updated all 12 of my Facbook pages and then engaged the PTO for the first time. Nothing exploded. Good. And it appears to work. Even better.  So back to this driveshaft fiasco. I have an original PTO shaft that obviously won't fit now with the OD installed. I had contemplated building a compeletely new driveshaft in order to not molest the original one but a quick tally of cost and effort in doing so sent Historical Preservation out the window. I spooled up the angle grinder. I cut the shaft and cleaned up the end, shortened and fit everything to my measurements and even drilled a few extra holes in the tube so I could really weld it back together.  Looks great, doesn't it? Well it's over 2" too short. I'm still trying to figure out how I screwed this up so badly. I must have measured a dozen different times using a variety of approaches so I could cross-check my findings for accuracy. I would have been closer just eyeballing it. Since the first test fit proved an utter failure I spent the next three hours adding that 2"+ back in. Luckily there are no tall bridges on the way to Tractor Supply and I was able to go there and come home with a bag full of pieces to make this happen. I managed not to hurt myself or anyone else during the trip. It was a struggle. So as gruesome as this now is, I believe it's solid. There's a short length of pipe inside the tube bridging the seam and about three spools of welding wire holding it together. Nothing like putting in twice the time and effort for a result half as good. 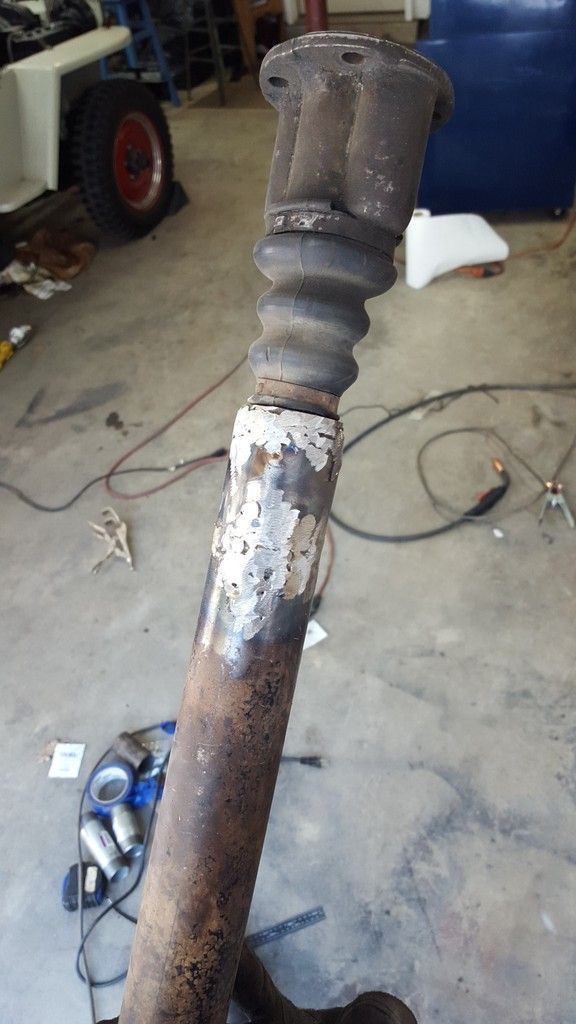 Inhaling Rustoleum fumes makes everything better.  I'm guessing this shaft now has some serious balance issues. If I were prepping a Ferrari for a Watkins Glen Track Day event I'd be nervous. I'm not doing that here though. My primary audience will likely be a group of laid-off union mill workers at a greasy diner cruise night some Wednesday this summer. They will be too distracted arguing over whether the liberals or the Chinese are more to blame for their $38-an-hour minimally skilled positions evaporating to notice a wobbly PTO shaft. Actually, they probably will notice. I'll just tell them the shaft is a Chinese repop. That will simultaneously please and infuriate them. So enough for one night. The gray 3A is happy as it is getting some much needed attention. Stay tuned for the next episode of "Measure Twice, Cut Once,....and Then Measure and Cut 40 more times and Spend a Bunch of Money and then Measure and Weld and Cut Some More". |
|
Deleted
Deleted Member
Posts: 0
|
Post by Deleted on Feb 7, 2016 18:48:34 GMT -5
Very funny!......... So where is the engine govoner ?
|
|
|
|
Post by Ryan_M on Feb 7, 2016 19:15:47 GMT -5
Very funny!......... So where is the engine govoner ? Feel free to throw one in the box with that plow pump valve  |
|
Deleted
Deleted Member
Posts: 0
|
Post by Deleted on Feb 7, 2016 20:38:54 GMT -5
Very funny!......... So where is the engine govoner ? Feel free to throw one in the box with that plow pump valve   I have one!, it is for sale as well!............ The hitch is its part of a complete Empire tractor, buy the tractor and the govoner comes with it!....  |
|
|
|
Post by Ryan_M on Feb 7, 2016 22:14:24 GMT -5
Now it really hurts. I'd love to have an Empire.
|
|
Deleted
Deleted Member
Posts: 0
|
Post by Deleted on Feb 7, 2016 23:05:32 GMT -5
I thought you did!!!
|
|
|
|
Post by Ryan_M on Feb 14, 2016 20:49:27 GMT -5
Feeling good about my first ever successful carb rebuild on the red 3A, I tore open the gray 3A's carb and cleaned and adjusted that one while I was at it. I've owned this accelerator pump gauge for over a year and it wasn't until a few hours ago Scout actually taught me which end was up and how to use the thing. Neat gadget but a machinist rule will do the job just as well. 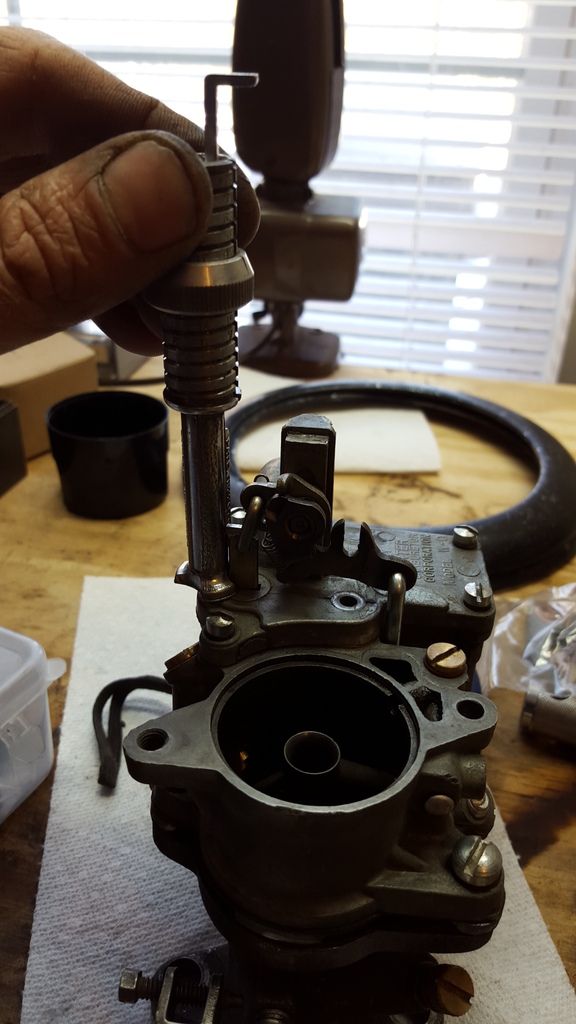 |
|
Deleted
Deleted Member
Posts: 0
|
Post by Deleted on Feb 16, 2016 8:56:11 GMT -5
Way to go Ryan! You don't back away from anything your Jeep needs. Excellent. Oilly
|
|
|
|
Post by Ryan_M on Feb 21, 2016 14:45:19 GMT -5
I had planned to pull the starter out this winter for a "preventative maintenace" rebuild but it began acting up last week so I went ahead and yanked it out of there. Off to Reggie, my go-to old-school starter whiz, for an overhaul. He completely disassembled it, re soldered everything, replaced what needed to be replaced, and dressed the banged up gear teeth. For those who don't already, make sure you have an adequate spring installed to pull the starter lever back and everything out of the way of the ring gear. I wish I had taken a "before" pic - the teeth were pretty chewed up. I have had a return spring installed since I overhauled the Jeep a few years back but there was nothing on there when I originally brought it home. It all looks good now and it is repainted and back in the Jeep. It also sounds noticeably stronger now when starting. Reggie magic.  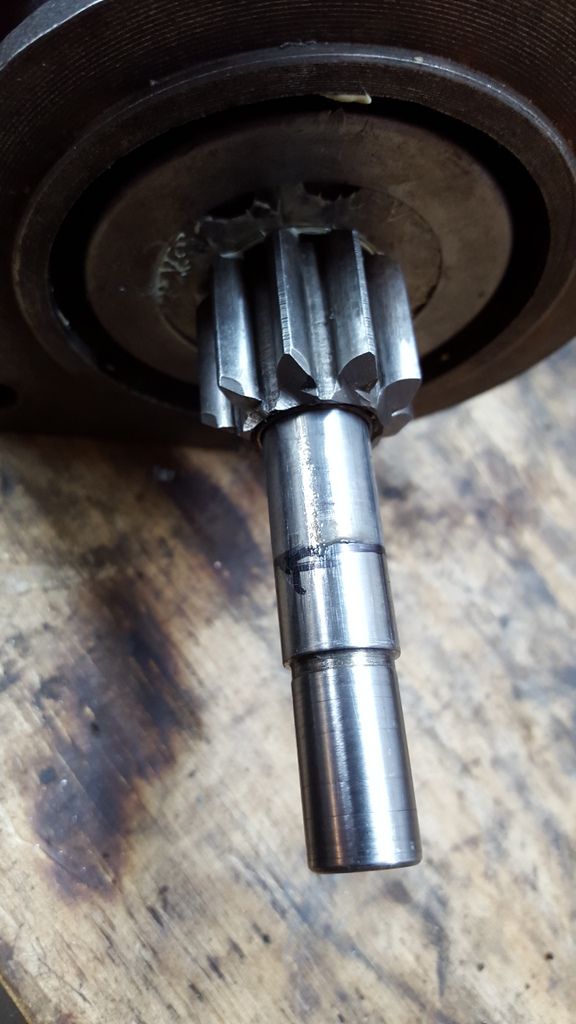 |
|