Deleted
Deleted Member
Posts: 0
|
Post by Deleted on Mar 6, 2016 17:17:45 GMT -5
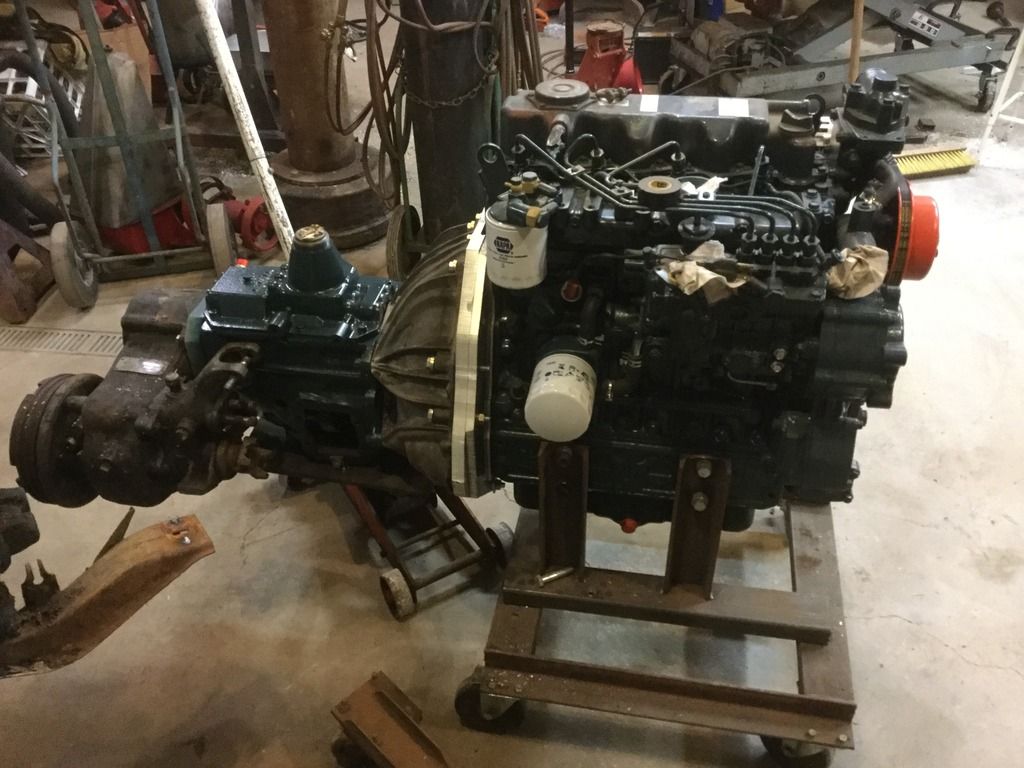
Well, you can all rest easy tonite!, the T-18 transmission is now together, minus torquing the Novak adapter bolts and the t/o bearing support on the front........ Damn torque wrench is at work....... Turns out my gearbox is the early style, they do not make a repop input shaft for the early model, so you use the late style with a late blocking ring and front bearing and snap ring...... This week I will get a 3B chassis in the garage and prepare to set the engine/trans/TC to see what the next obstacle I face.  .  |
|
Deleted
Deleted Member
Posts: 0
|
Post by Deleted on Mar 6, 2016 17:37:12 GMT -5
At this speed, you'll have that puppy ready for the HBR. EH!! (2017 MAYBE)
|
|
Deleted
Deleted Member
Posts: 0
|
Post by Deleted on Mar 6, 2016 17:58:38 GMT -5
At this speed, you'll have that puppy ready for the HBR. EH!! (2017 MAYBE) 2018 maybe, 2020 if Haines whines......... |
|
|
|
Post by Haines Garage on Mar 6, 2016 19:45:08 GMT -5
YAWN....
I see no pictures.
No pics, didn't happen .
|
|
|
|
Post by Haines Garage on Mar 6, 2016 19:58:01 GMT -5
At this speed, you'll have that puppy ready for the HBR. EH!! (2017 MAYBE) 2018 maybe, 2020 if Haines whines......... Whines..... Haines Does Not Whine...    |
|
Deleted
Deleted Member
Posts: 0
|
Post by Deleted on Mar 6, 2016 20:21:05 GMT -5
2018 maybe, 2020 if Haines whines......... Whines..... Haines Does Not Whine...    He may not Whine but he sure "got cheese". |
|
|
|
Post by Haines Garage on Mar 6, 2016 20:26:02 GMT -5
Cheese ? WTF does that mean?
Hahahahaha !
Bastage!
|
|
Deleted
Deleted Member
Posts: 0
|
Post by Deleted on Mar 12, 2016 22:17:40 GMT -5
A little garage cleaning today to make room for the derail ect 3B chassis for the test fit, a couple shots of the power pack!  Well I guess photobucket will only let you see one.   |
|
Deleted
Deleted Member
Posts: 0
|
Post by Deleted on Mar 12, 2016 22:40:53 GMT -5
Keep it up and you'll be using that Willis to pull the Willis haulin' rig around!
|
|
|
|
Post by Haines Garage on Mar 12, 2016 23:48:21 GMT -5
And there we have it!! That is very Bad Ass my friend!  |
|
Deleted
Deleted Member
Posts: 0
|
Post by Deleted on Mar 13, 2016 9:12:28 GMT -5
Looking good.  |
|
Deleted
Deleted Member
Posts: 0
|
Post by Deleted on Mar 13, 2016 10:37:06 GMT -5
Jelloness!!
|
|
Deleted
Deleted Member
Posts: 0
|
Post by Deleted on Mar 13, 2016 16:41:27 GMT -5
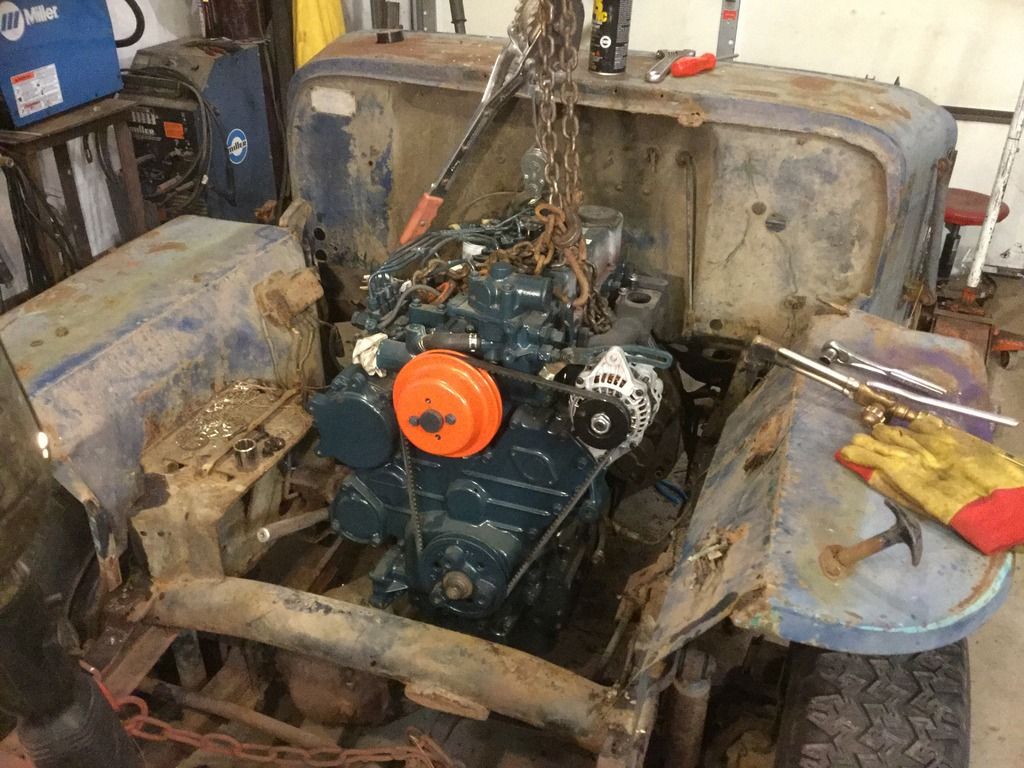
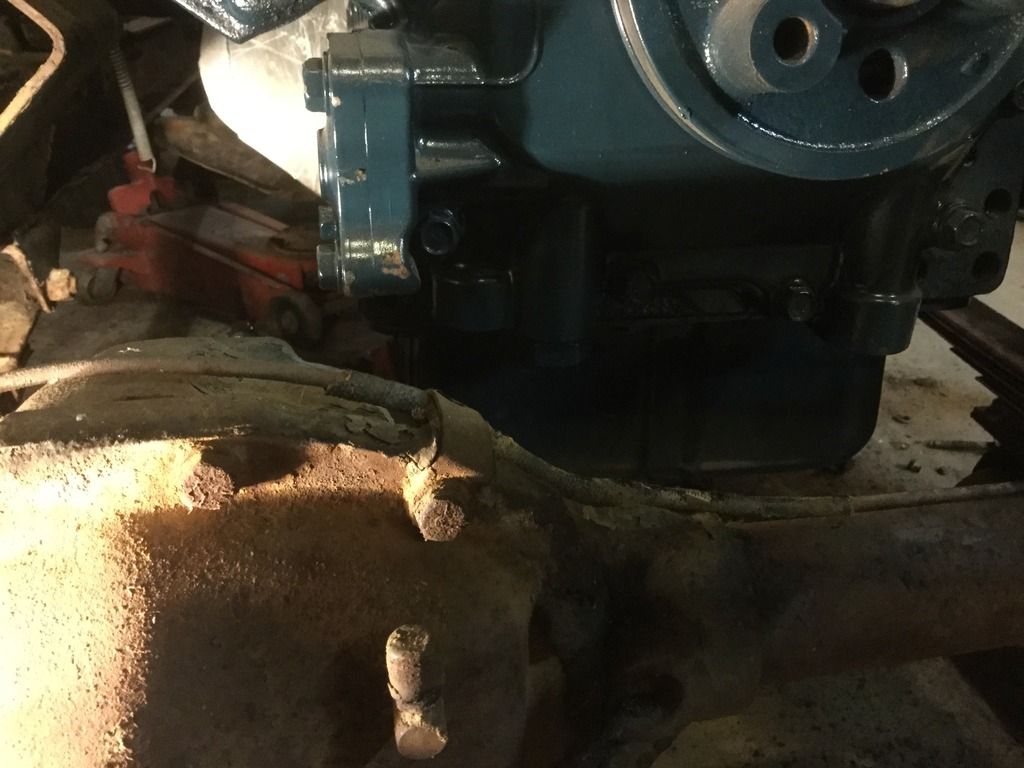
Well my afternoon was spent in the garage on "Mock-Up".............. I left all the goodies on the chassis so I would know what worked and what would not as I slid the power pack into place, let's call this a Red Green approach!  . So after some creative rigging to hang this beast and removing the grill, I rolled it back and lowered the t/c end down till I could catch it with a floor jack, first interference was the Ross box, I am not planning on using one anyway so off it came!, plenty of room now ( this is where Mr. Murphy showed up!), knowing well before starting this project, a stock T98 in a Jeep required dropping the rear crossmember 1" with spacers and raising the trans hump a bit (a T18 is a newer version of the T98) I expected clearance issues, plus I am dealing with a rusty derilect cowl that has settled over time..... Next in line for removal was the master cyl, hits on my engine adapter, this did not please me, I may need to go hanging pedals and did not want to do that but at this point may have to....... Now firewall trimming time, yup had to whack that a little, got over it in short order. So at this point I can make everything work, except on the front cover of the engine there is a casting sticking out where you can relocate the oil filter, not in a good spot,  . "F", right in way of the front diff, I was planning on a little lift anyway and I will work around this as there are always options........... I guess the bottom line is, this will require extensive modifications to work, no slip in like the V2203, and I knew that going into it. Once in relative place the Ross box could go back in. I am very surprised how much room there is along the sides for engine mount fabrication, that's a plus... Many points to ponder yet, photos later!..  |
|
Deleted
Deleted Member
Posts: 0
|
Post by Deleted on Mar 13, 2016 19:24:26 GMT -5
I read where the V2203 also has differential clearance problems with Overland Diesel's RF motor mount. I'll be addressing this myself. The '49 pickup clears a F Head 134 in the firewall dept., but we'll have to see that also when I get there. Yankee ingenuity will prevail. I'm all ears and eyes, show us the way Sir Captain! Oilly
|
|
Deleted
Deleted Member
Posts: 0
|
Post by Deleted on Mar 13, 2016 20:43:37 GMT -5
Nice visit with Oilleaker on the Willys Hotline tonite,  Sometimes you just have to walk away for awhile and think!, I am sure I can come ahead of a clearance issue on the front diff, a little more trimming on the firewall and setting the package back another inch will make a noticeable difference, I will overcome!. Here is a shot of the engine in it's place, or thereabouts!  Here is a shot of my dilemma with the front diff/ timing cover!   |
|
Deleted
Deleted Member
Posts: 0
|
Post by Deleted on Mar 13, 2016 22:03:35 GMT -5
Nice progress! Sir Lee!
|
|
Deleted
Deleted Member
Posts: 0
|
Post by Deleted on Mar 14, 2016 6:50:21 GMT -5
One of those chrome straight axles with disc front brakes will solve it!  You already did. Front spring forward offset, and rearward engine movement until it all clears. No problem. All it takes is money. Oilly |
|
Deleted
Deleted Member
Posts: 0
|
Post by Deleted on Mar 19, 2016 14:15:37 GMT -5
 So I picked up a Ford revers rotation steering gear at the local wrecking yard this morning, very nice shape for $35, I need this for the mock up, if it works that's a bonus but I can use it for a core if not.... Then I head to Ace hardware for 8 Jap thread bolts......... $22. WTF!, that steering gear would make 100 of the damn Jap thread bolts, just ant right.
|
|
Deleted
Deleted Member
Posts: 0
|
Post by Deleted on Mar 19, 2016 15:07:15 GMT -5
Metric lessons. Me too. Had to buy all 24 oil pan bolts. None of the transicold bolts will work unless you want to cut them all down and then you still have 8 more to get. Fastenall would have to order a bag of them for me. I just bought original Kubota ones from parts barn.
|
|
Deleted
Deleted Member
Posts: 0
|
Post by Deleted on Mar 19, 2016 15:58:14 GMT -5
Metric lessons. Me too. Had to buy all 24 oil pan bolts. None of the transicold bolts will work unless you want to cut them all down and then you still have 8 more to get. Fastenall would have to order a bag of them for me. I just bought original Kubota ones from parts barn. Yup I ordered all the bolts I replaced on the engine from Kubota as well. Much cheaper and they have the extra cool washer built in option.  Oilleaker, wander out to the shop with a tape measure, on your 3A measure between the bump stop and the front axel tube on the drivers side, my springs are so flat I have 1 1/4" on my 2A, I'm looking for a stock base line. My Chi-Com Crown, screw the working man springs have got to go!.......Back to the B... The Kubota is set on the frame with temp motor mounts just so I could get the damn engine hoist out of the way, I was very surprised when I set the engine down, as I have 3" between the axel tube and the frame, a bump stop measures 1 1/2" so it's right about where my 2A sits on the flat Chi-Crowns ( that's my new name for shit springs). I am lifting it 2" over stock with new springs, so I cut two 2x4's 5"long and put between the tube and the frame to simulate where my engine will be above the axel, the bump stops are long rotted off on this frame so they fit good. As it sits my clearance issue is minimal without moving the axel ahead, but I will most likely do that anyway, and I believe my measurements are conservative anyway and it will actually sit a little higher on actual new springs. Pictures later...... I am also pleased with the room available between the engine and the frame to build engine mounts, the engine sits back enough so the stock frame mounts would need to be modified to use them, I will build new to suit my situation and most likely remove the stock drivers side and modify the passenger side as the battery tray is built into it....... Things are looking up, many things to consider, cause and effect get overwhelming at times and you just need to go do something else and not overthink, after all it's a Jeep not a space shuttle!  |
|
Deleted
Deleted Member
Posts: 0
|
Post by Deleted on Mar 19, 2016 22:31:38 GMT -5
Will do AM tomorrow, I'm in my skivy's right now. Also a note: my 3a springs are all Walcks made in the USA springs.
|
|
Deleted
Deleted Member
Posts: 0
|
Post by Deleted on Mar 20, 2016 7:20:37 GMT -5
Will do AM tomorrow, I'm in my skivy's right now. Also a note: my 3a springs are all Walcks made in the USA springs. Wow, skivies, I've got that cousin Eddy picture in my mind now dumping the shitter!, thanks, I started a front spring poll, check that as well. |
|
Deleted
Deleted Member
Posts: 0
|
Post by Deleted on Mar 20, 2016 7:46:30 GMT -5
Will do AM tomorrow, I'm in my skivy's right now. Also a note: my 3a springs are all Walcks made in the USA springs. Wow, skivies, I've got that cousin Eddy picture in my mind now dumping the shitter! That was only when his septic tank was backed up!!  |
|
Deleted
Deleted Member
Posts: 0
|
Post by Deleted on Mar 20, 2016 9:35:35 GMT -5
Now that's just shitty of you Gary!!!! Ok, My report is: 3A with Walck's springs = 2 1/2 inches. CJ2 A with Rancho two leafs and winch spacers between bump and frame = 2 1/2. Without spacers = 4 inches. Willys MB = 2 1/2. Oilly
|
|
Deleted
Deleted Member
Posts: 0
|
Post by Deleted on Apr 9, 2016 23:27:56 GMT -5
I hit it hard today, front motor mounts are done as well as the 2nd generation crossmember, the power pack is now sitting on the frame where it will be, well where it will be on the other frame, LOL.... Pictures tomorrow.
|
|