|
|
Post by Haines Garage on Mar 4, 2014 19:37:20 GMT -5
I am currently working on the Brake and Clutch Pedal Assembly. Once again, I am no expert, this is what I am doing. If you see mistakes, or would like to add information, please feel free to do so. Start with the Manual Schematic 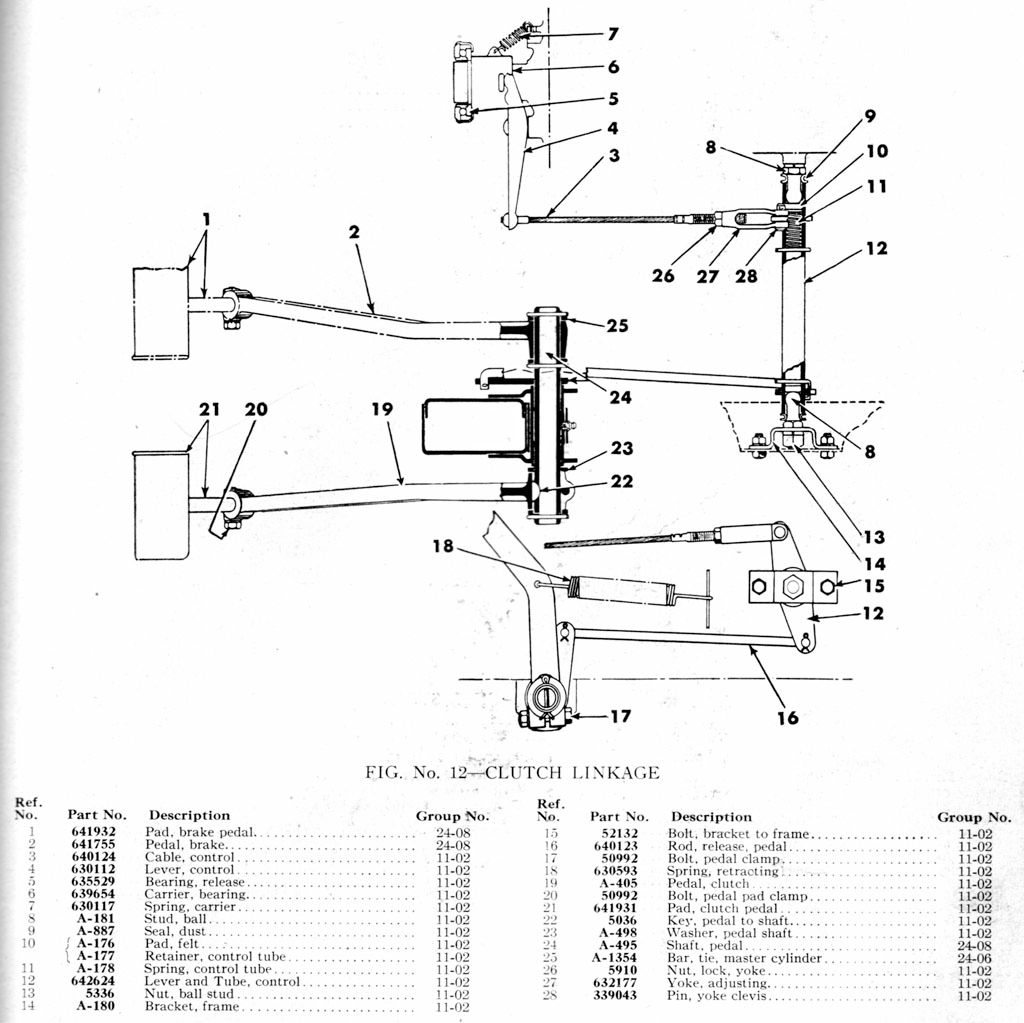 I had the original Control Lever and Tube, Pedal Release Rod, and Pedals and Arms. There are quite a few wear items in this assembly that will effect its performance. This is a very basic system, with a lot of metal to metal wear areas. There are a lot of small inexpensive parts that count, and are readily available. Lets start with the ball studs 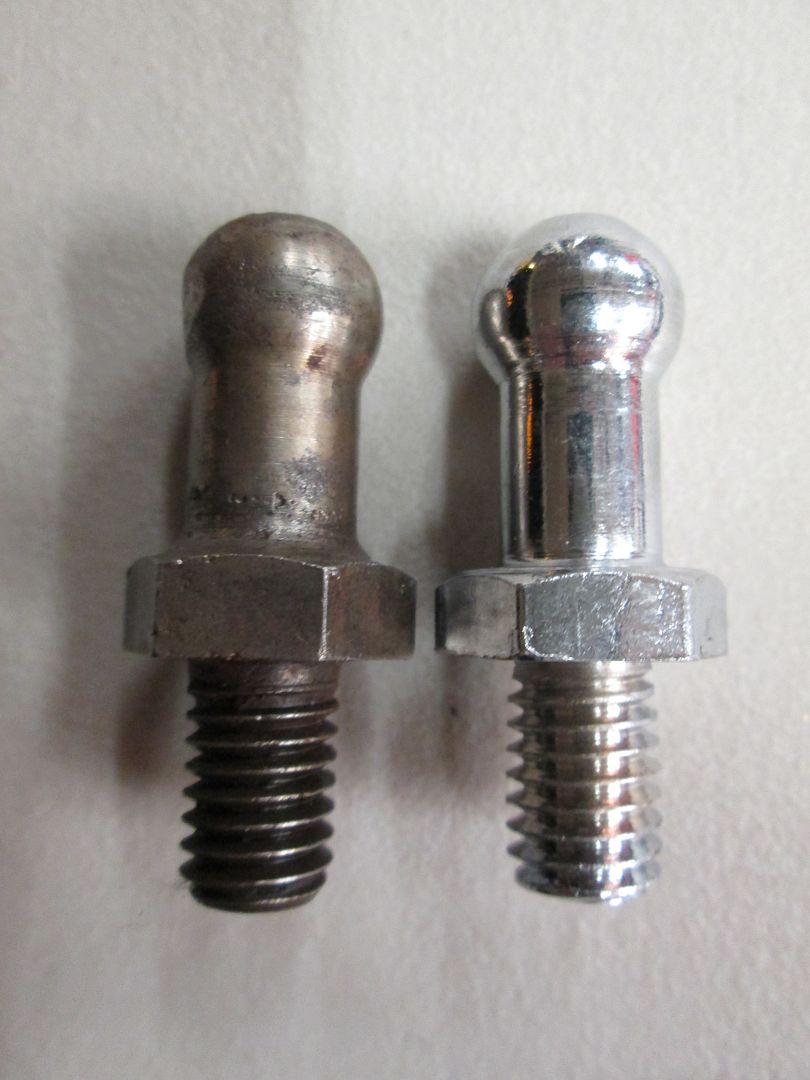 There are two required. One is threaded into the Transfer Case Hosing, One to a Bracket on the Frame. Notice the wear on the original, compared to its new replacement. Also notice the thickness of the original hex nut side to the replacement. |
|
|
|
Post by Haines Garage on Mar 4, 2014 20:04:39 GMT -5
Here is a lay out of the Control Lever And Tube Assembly. Notice that there is a Long, and Short what I will call "Ears" Make sure the holes drilled in these ears are not oblong. There is a long ear and a short ear. The long ear goes to the Transfer Case Side. Inside the Control Lever and Tube Assembly are the follow parts. A spring, two felt pads, two control tube retainers (concave discs), and two rubber dust seals. 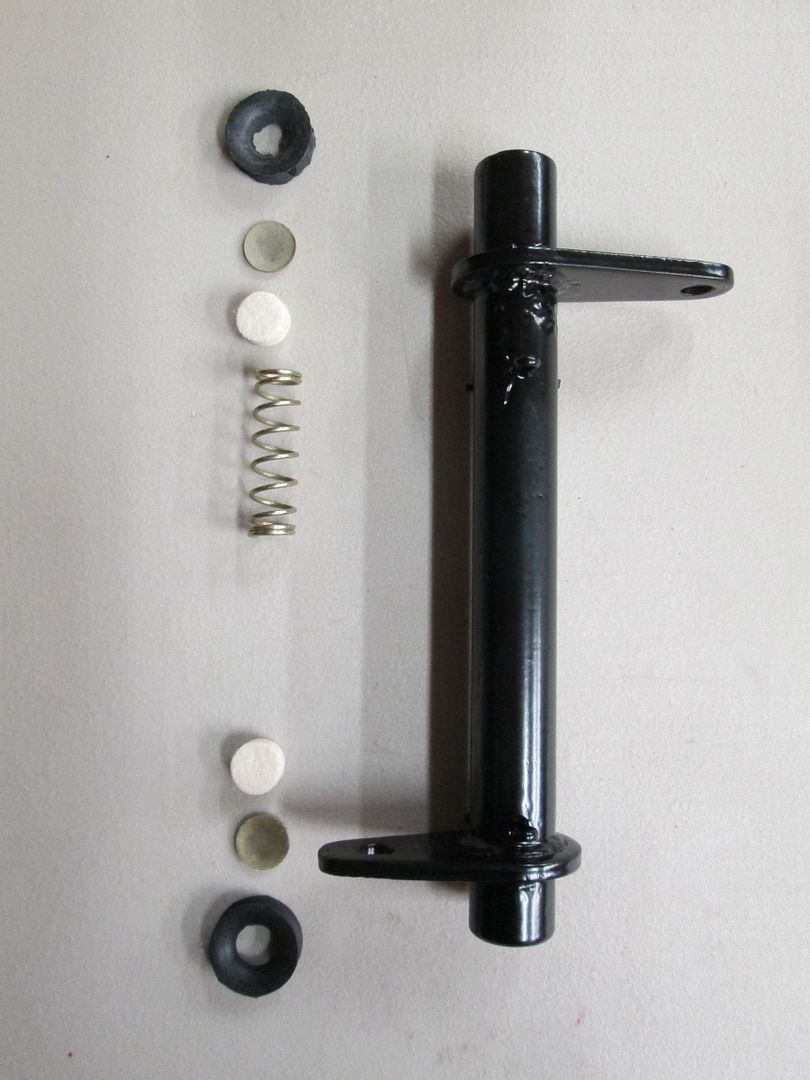 |
|
Deleted
Deleted Member
Posts: 0
|
Post by Deleted on Mar 5, 2014 7:49:13 GMT -5
I always make/replace # 16 with a 5/16 rod that I thread and install two clevice ends with jam nuts. That stupid design is always worn out and a problem. Make sure you put #12 in right. The two arms on it are different length and will cause adjustment/ clutch release problems if it is backwards. You got a long ways to go with your Jeep to be able to drive it to the Black Hills in June. Get with it! Quit your job and hit it 24/7.  John |
|
Deleted
Deleted Member
Posts: 0
|
Post by Deleted on Mar 5, 2014 17:24:56 GMT -5
I will wholeheartedly disagree with Oilleaker on the position of #12, I purposely install them backwards on every Jeep I have worked on, as it makes the clutch not as stiff, our older members of the MV club very much like this for parade duty, and not as hard on the clutch leg. I have never had a release problem of any kind!. I will also agree with Oilleaker on the rod #16, clevises on the end is a huge upgrade, heim joints even more so. MHO, Lee  |
|
|
|
Post by Haines Garage on Mar 5, 2014 19:19:49 GMT -5
That's what I am talking about! INPUT! Now, both of you mentioned the bar upgrade. Grandpa had something similar to what you are describing . I will find it and post a pic. Where does one find the hardware to make the upgrade. I found the 5/16 threaded no problem. The ends.......! Pins or bolts. I will put one together as part of this thread. Let me know.
|
|
Deleted
Deleted Member
Posts: 0
|
Post by Deleted on Mar 5, 2014 19:26:27 GMT -5
Pins my friend!...........Bubba would use bolts  Lee  |
|
Deleted
Deleted Member
Posts: 0
|
Post by Deleted on Mar 5, 2014 19:40:29 GMT -5
Lee , I'm mortally wounded and hurt. You are supposed to always be on my side Bud! Actually, What you said is interesting. I've read where the clutch would not totally release due to the shorter throw. Whats your "take" on that big guy? PS-----I still will buy you a cold one when you get here to drive your Jeep up in the woods. That's what it's all about right? Haines, get your Ass up here too! The snow is beginning to melt and I've got Jeep fever real bad. The runoff today flowed over both of my driveways and ticked me off, but the feel of spring helped alleviate that. We need to Jeep together for sure! John (Oh, the rest of you knights are always welcome.)
|
|
Deleted
Deleted Member
Posts: 0
|
Post by Deleted on Mar 5, 2014 19:43:01 GMT -5
Haines, 5/16 clevises are available at napa, and also buy the 5/16 pins and cotters. I buy cheap 5/16 rod and thread it myself with tap and die. All thread is tacky. Not professional. I'll be watching! John
|
|
|
|
Post by Ryan_M on Mar 5, 2014 20:26:50 GMT -5
I've wanted to make that rod for both my Jeeps but haven't done it yet. Until then I carry a spare #16 in each one. I've already had two break on me in my relatively short Willys career.
|
|
|
|
Post by Haines Garage on Mar 5, 2014 21:17:14 GMT -5
This is what I LOVE! New project relating to this thread. I will visit NAPA tomorrow...Lets make one   |
|
Deleted
Deleted Member
Posts: 0
|
Post by Deleted on Mar 5, 2014 21:47:34 GMT -5
Haines, 5/16 clevises are available at napa, and also buy the 5/16 pins and cotters. I buy cheap 5/16 rod and thread it myself with tap and die. All thread is tacky. Not professional. I'll be watching! John AAAAAAAAAAAAAAAaaaaaahhhhh, a Man with my own heart!   , All-Thread is for hacks!!!, I would thread it in a Lathe  ,,,,, On the #12 Oilleaker, I have never had/heard of a problem with this, I was turned on to this trick by a vetran off roader and Will-is/Willease expert, try it, youl like it! , no Beer needed or expected but a bit of CC/7 is good for the ticker  Lee  |
|
|
|
Post by Haines Garage on Mar 6, 2014 8:51:55 GMT -5
Can you give me an length of the rod, and length of threaded area.
Right or left hand threads?
Pitch of threads.
|
|
Deleted
Deleted Member
Posts: 0
|
Post by Deleted on Mar 6, 2014 17:42:28 GMT -5
Haines I do not have a rod handy to measure, If you had the a couple #27 clevises laying around you could make one that way, and it would be Will-is parts, LOL. I would find the clevises first, the ultimate would be 5/16 NF, that gives you more thread per inch, not that it's a hi torque deal, but by God that's how Oilleaker and I would do it!   . 5/16 NC would be fine as well!, and no need for LHT as you can just drop a pin if you need to adjust it. MHO, Lee  |
|
Deleted
Deleted Member
Posts: 0
|
Post by Deleted on Mar 6, 2014 18:53:55 GMT -5
Buy some plain 5/16 inch rod and buy or order the clevices. I used fine thread. Don't forget the locknuts against each clevice. Lay the old one on the floor and then lay the two clevices next to it and measure. Cool part is it's fully adjustable. Thread each end with the 5/16 inch die, fine thread. You will never need to go back. Tell all the Jeep guys you thought of it.  John |
|
|
|
Post by Haines Garage on Mar 7, 2014 12:50:02 GMT -5
I have built the rod already.
I will post pics later.
We have some things to talk about.
|
|
|
|
Post by Haines Garage on Mar 7, 2014 16:24:00 GMT -5
Haines, 5/16 clevises are available at napa, and also buy the 5/16 pins and cotters. I buy cheap 5/16 rod and thread it myself with tap and die. All thread is tacky. Not professional. I'll be watching! John AAAAAAAAAAAAAAAaaaaaahhhhh, a Man with my own heart!   , All-Thread is for hacks!!!, I would thread it in a Lathe  ,,,,, Lee  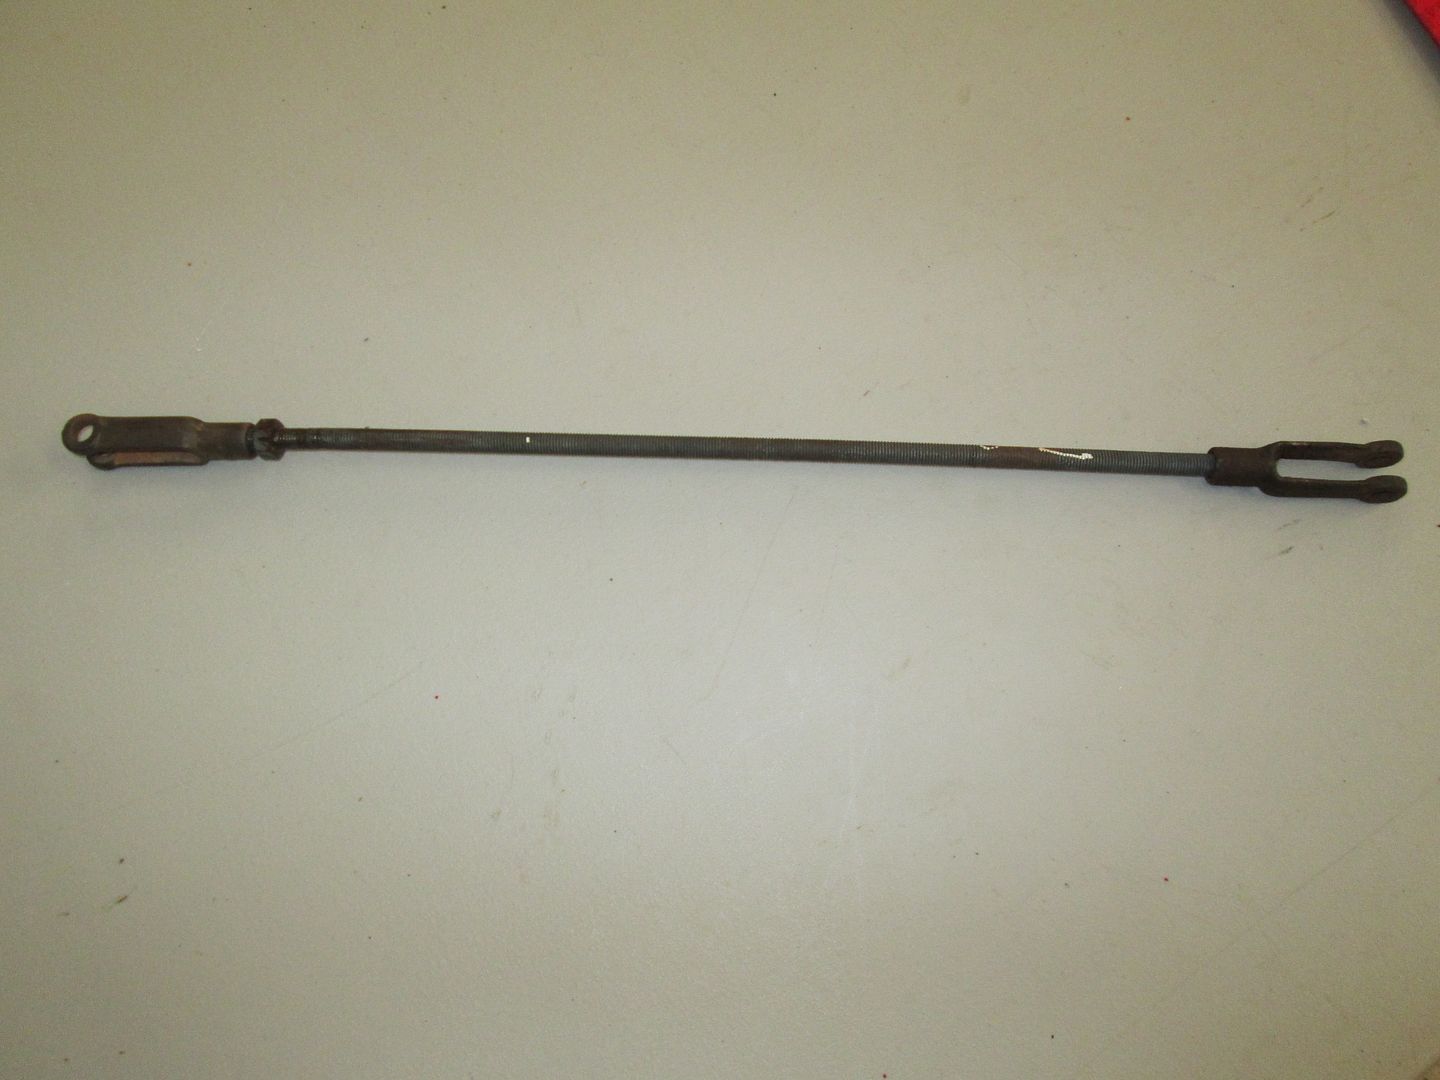 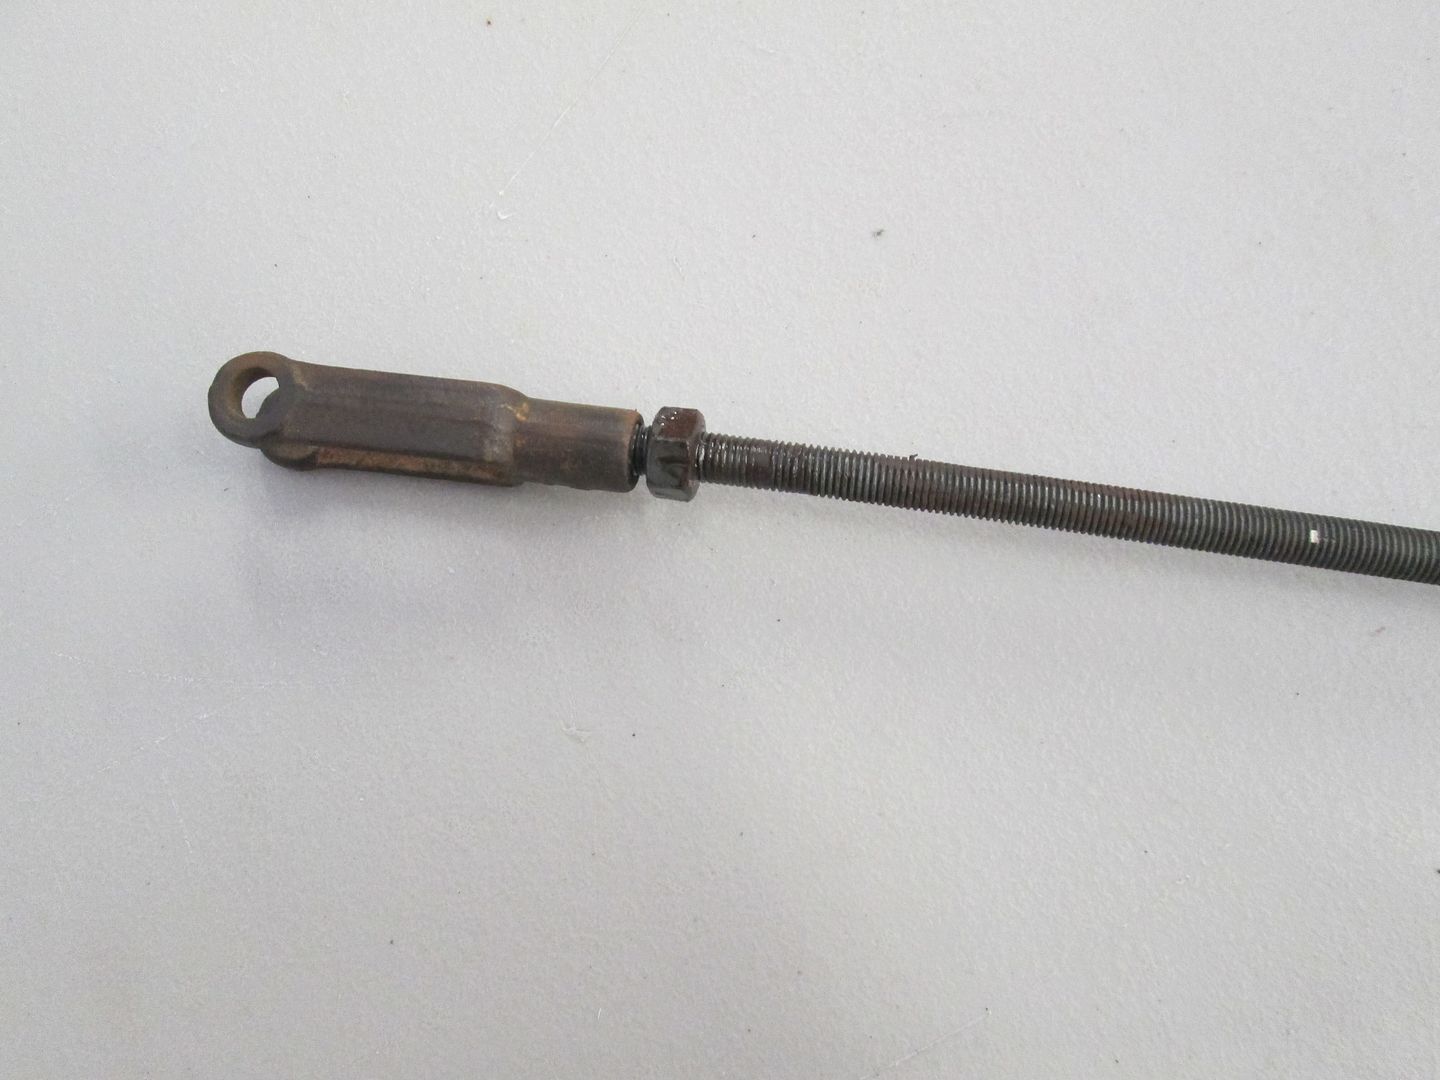 This is what I found in a box that was Grandpas.....So What are you guys saying.....   |
|
|
|
Post by Haines Garage on Mar 7, 2014 16:31:25 GMT -5
Pins my friend!...........Bubba would use bolts  Lee  And it also had bolts through the holes with washers, and nuts. |
|
Deleted
Deleted Member
Posts: 0
|
Post by Deleted on Mar 7, 2014 17:48:14 GMT -5
Wait until that all thread gets full of grease and you want to clean it. Also the threaded bolts wear bad on the threads when used as pins. Clevices are fine. Lee and I need you to do it our way. We'll hold back for a while until you comply. No fines yet. Signed Lee.
|
|
Deleted
Deleted Member
Posts: 0
|
Post by Deleted on Mar 7, 2014 17:57:17 GMT -5
|
|
|
|
Post by Haines Garage on Mar 7, 2014 19:26:58 GMT -5
Sounds like some back pedaling to me.....     Now that you two turkeys have your feet in your mouth....  Here is what I did Immediately!! I think its a cool project.. The clevis ends are from two unused clutch cables. Both have right handed threads, I aquired a 36" section of hot steel 5/16 bar from the Farm and Tractor Store. (Stanley was the brand) two stop nuts from Ace Hardware. Here is what I had as far as original rods. 1) 10" overall...this was the one from Grandpas 46. 1) 10 5/8 overall..From a VEC 46 column shift. The one far right is the "Project" 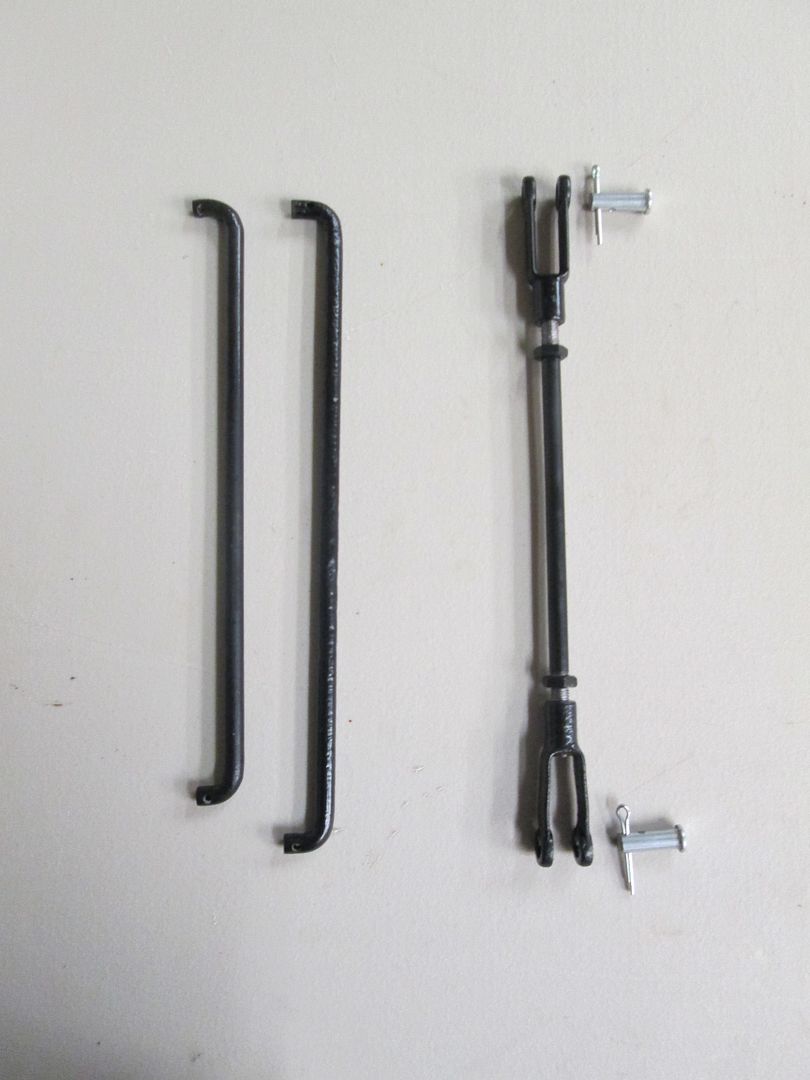 I determined that I would like to have a full inch of adjustment. I cut the 5/16 rod at 7 3/4 inches. Using a die, I cut 5/16 x 24 NF threads , as the clevis was. I am no machinist, but this worked for me.... 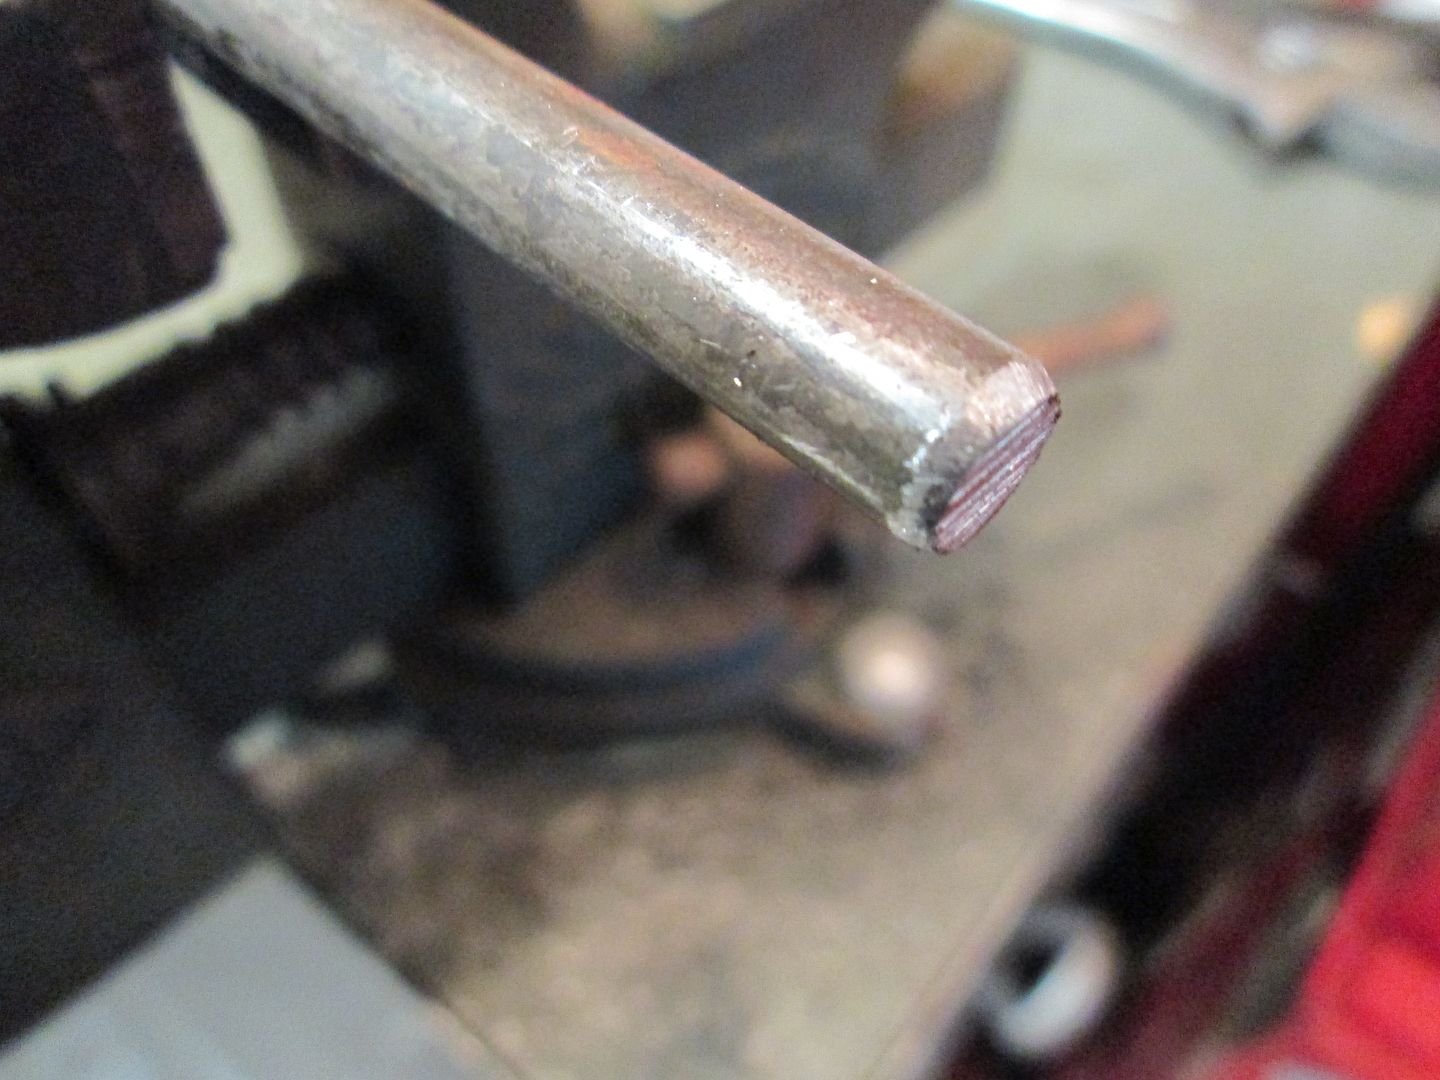 Using a 9 mill bastards  I put a slight taper on the rod to ease the start of the die. 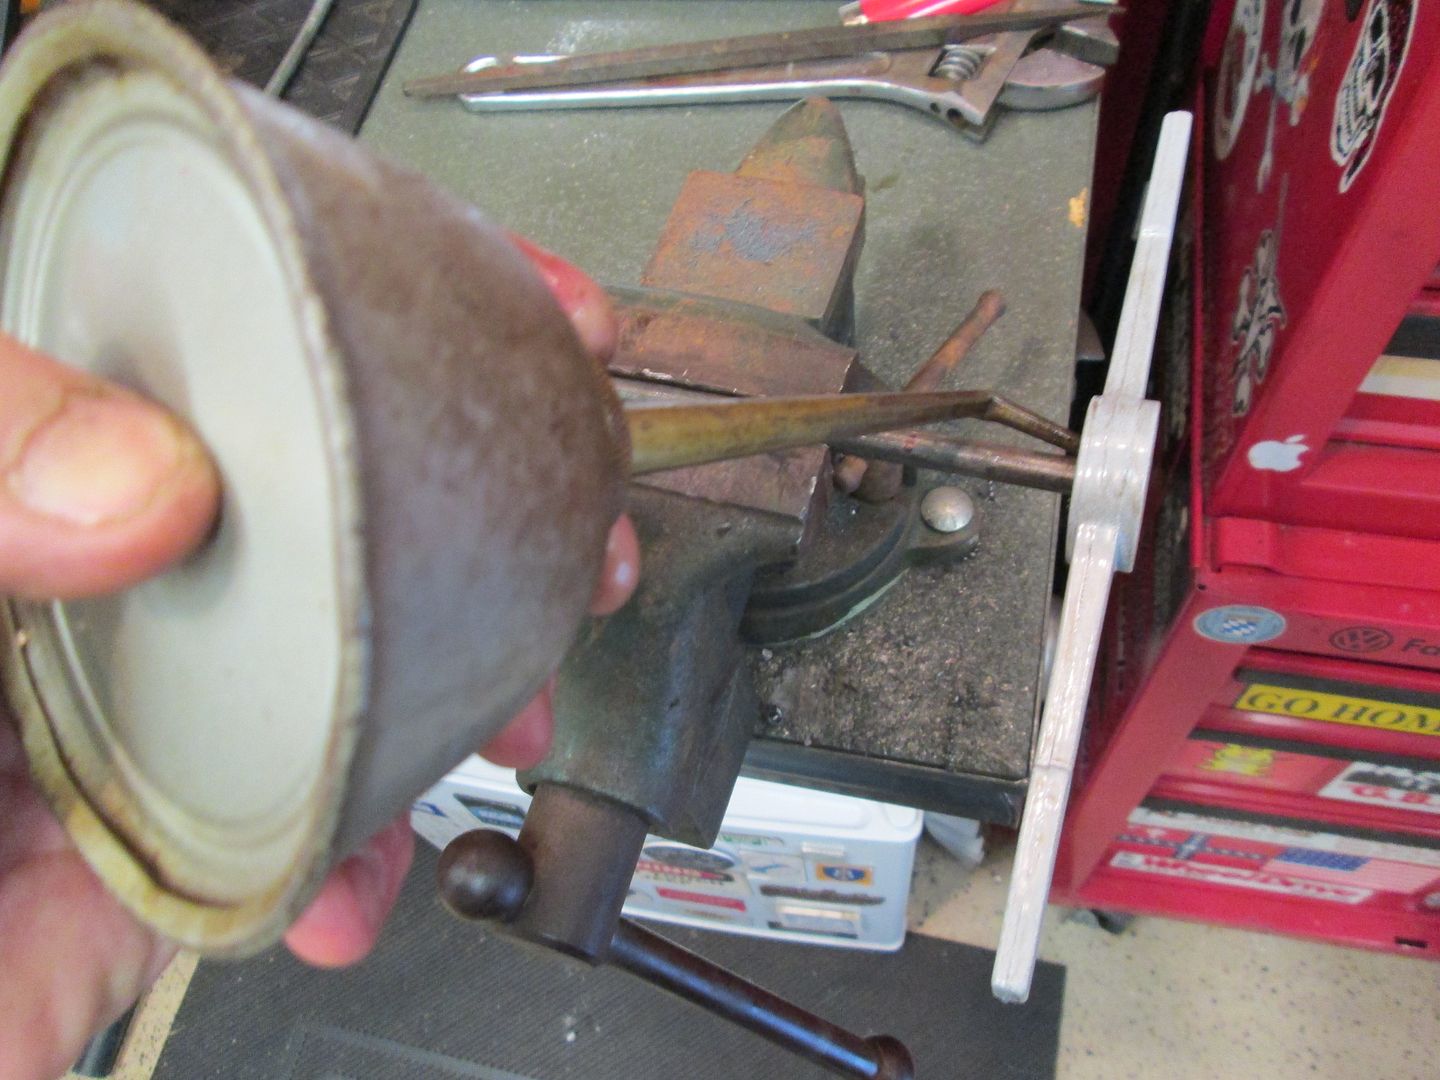 Add a few drops of oil with my trusty Eagle Can. I love the sound it makes! 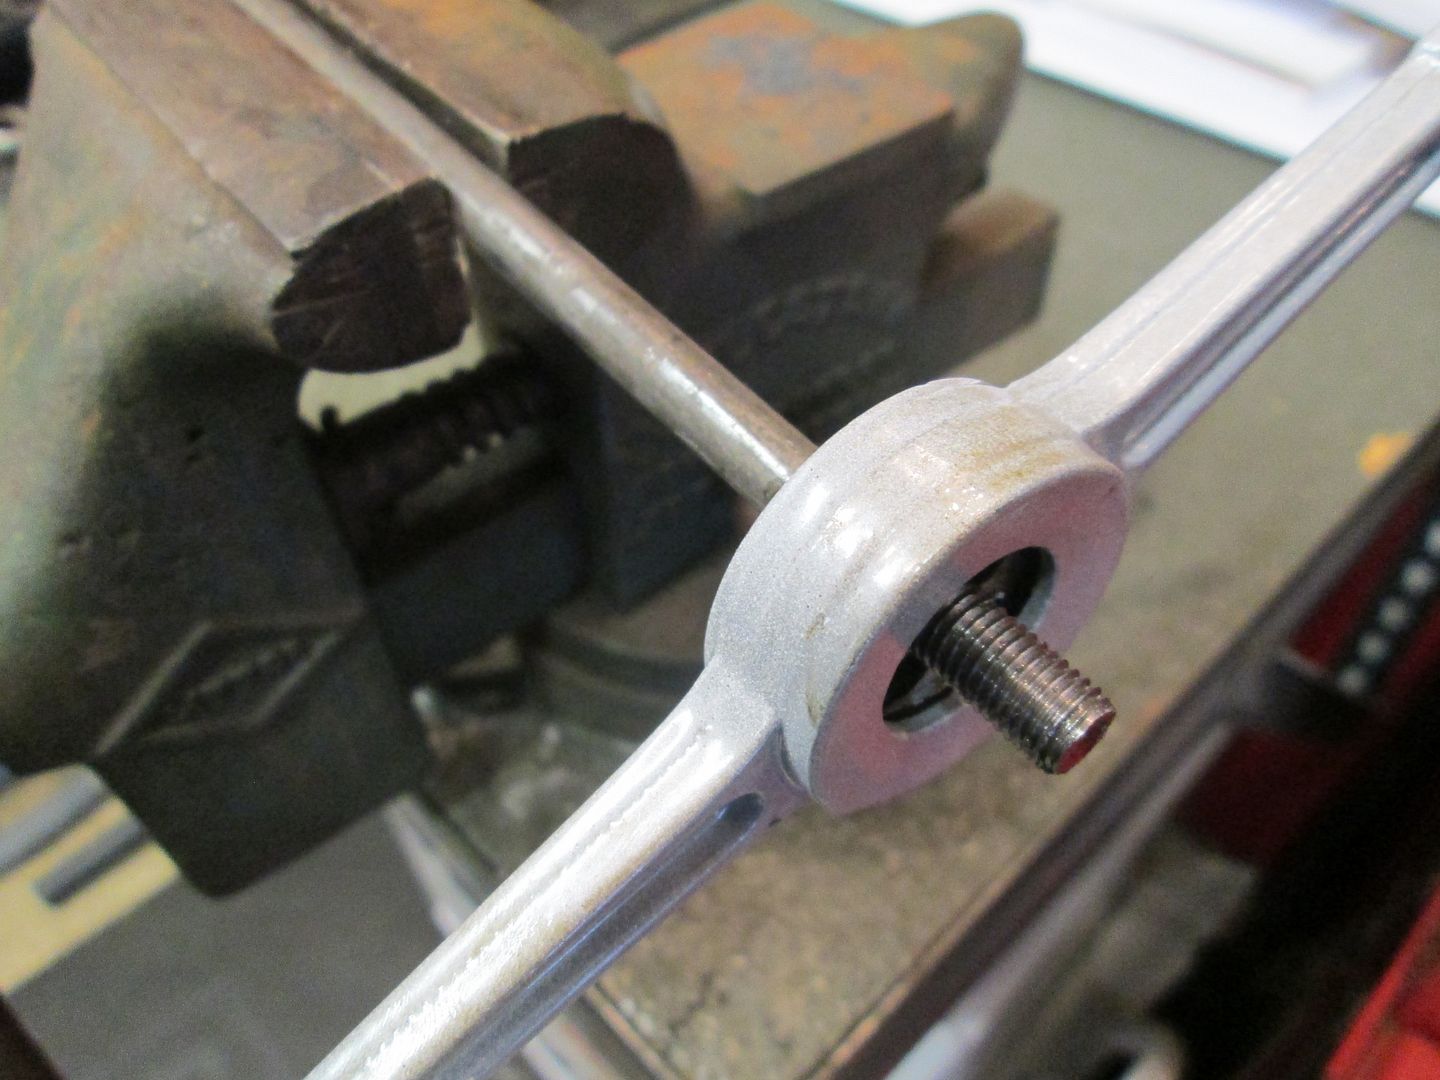 I threaded 1 3/4 inches on each side. Space for lock nut and clevis. I bought 2 5/16 clevis pins. Cleaned, Primed and Painted, you see it compared to the two OEM rods in the first photo. |
|
|
|
Post by Haines Garage on Mar 7, 2014 21:02:03 GMT -5
So I built "the Rod" ...Here is where we will talk further. If you look at the posted drawing, you will see that the original bar is attached at what I will call a slight angle, from the front arm to the back. The simple rod makes this angle easily. Should there be a bend in the replacement?
|
|
Deleted
Deleted Member
Posts: 0
|
Post by Deleted on Mar 7, 2014 21:10:05 GMT -5
If this wasn't such a serious thread, I would be asking the so called moderator to post this in the joke section. Yes, I read your childish attempt at poetry.
Haha...just kidding, Haines. Your work shows no signs of Bubba-fication. Your great grand kids will be very confused not being able to find this part in the manual when they do the restoration again in 80 years.
|
|
Deleted
Deleted Member
Posts: 0
|
Post by Deleted on Mar 7, 2014 21:10:53 GMT -5
I'll try and cluck for you while my foot in in my mouth, NO you don't need a bend in the rod. It works mighty fine. About as fine as frogs hair. That's about as good as you can get. You have just over 3 months to finish your jeep, so let's shift into a higher gear and roll. The Turkeys are waiting!  |
|
|
|
Post by Haines Garage on Mar 7, 2014 22:46:28 GMT -5
|
|
Deleted
Deleted Member
Posts: 0
|
Post by Deleted on Mar 7, 2014 23:02:16 GMT -5
Well the walcks shaft looks top shelf, very nice. I would have used cold rolled 5/16 rod, but that's me, and I have 10' on the shelf  . why stainless steel Bolts?    ?. And by the way, a very nice job  Lee  Gbble gobble  |
|