|
|
Post by Haines Garage on Jan 24, 2014 21:04:50 GMT -5
Before I begin this thread, I want to tell all my cyberland friends, that all of my posts here are how I am trudging through the restoration of my Grandfathers Jeep. Once More...I am NO EXPERT! I rely on the help of my Flat Fender Friends... We learn from doing, and SHARING... That is why we have this forum.. OK I shall share... Here is the Hardware 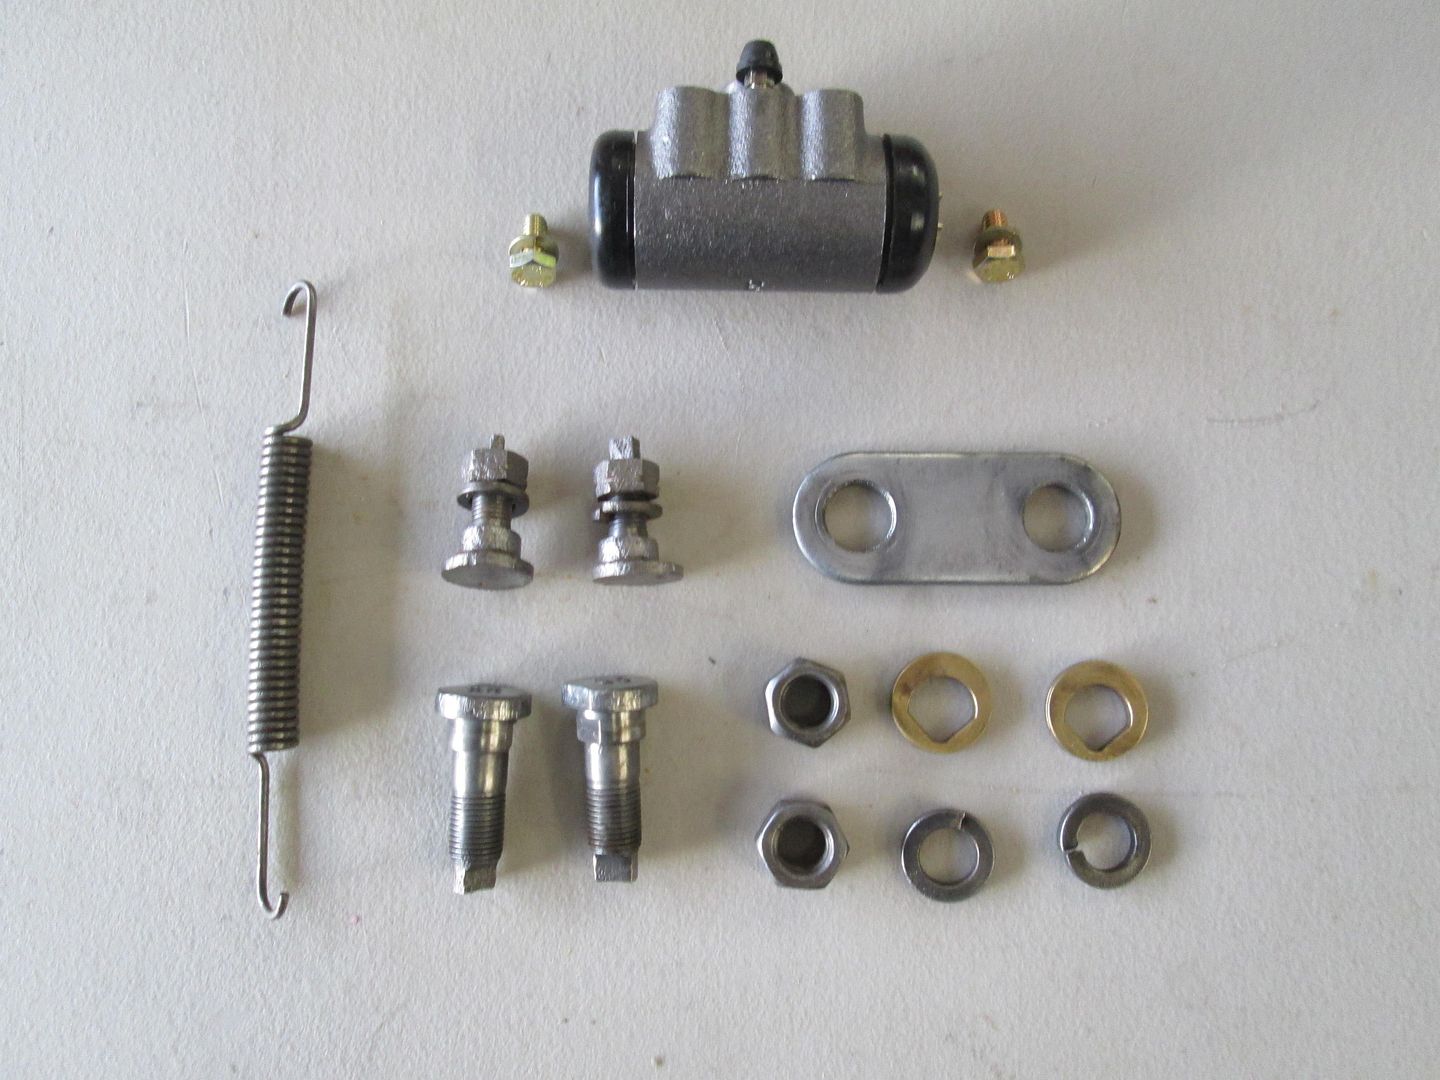 New Brake cylinder and bolts, Shoe Return Spring Anchor Pin Plate Eccentric Anchor pin Cam (Brass) Lock washers, and nuts |
|
|
|
Post by Haines Garage on Jan 25, 2014 20:53:46 GMT -5
I install the front brake cylinders (1 inch in the front), Even though I have the original fasteners, I opt for new from the auto parts store. They mount up PERFECT. 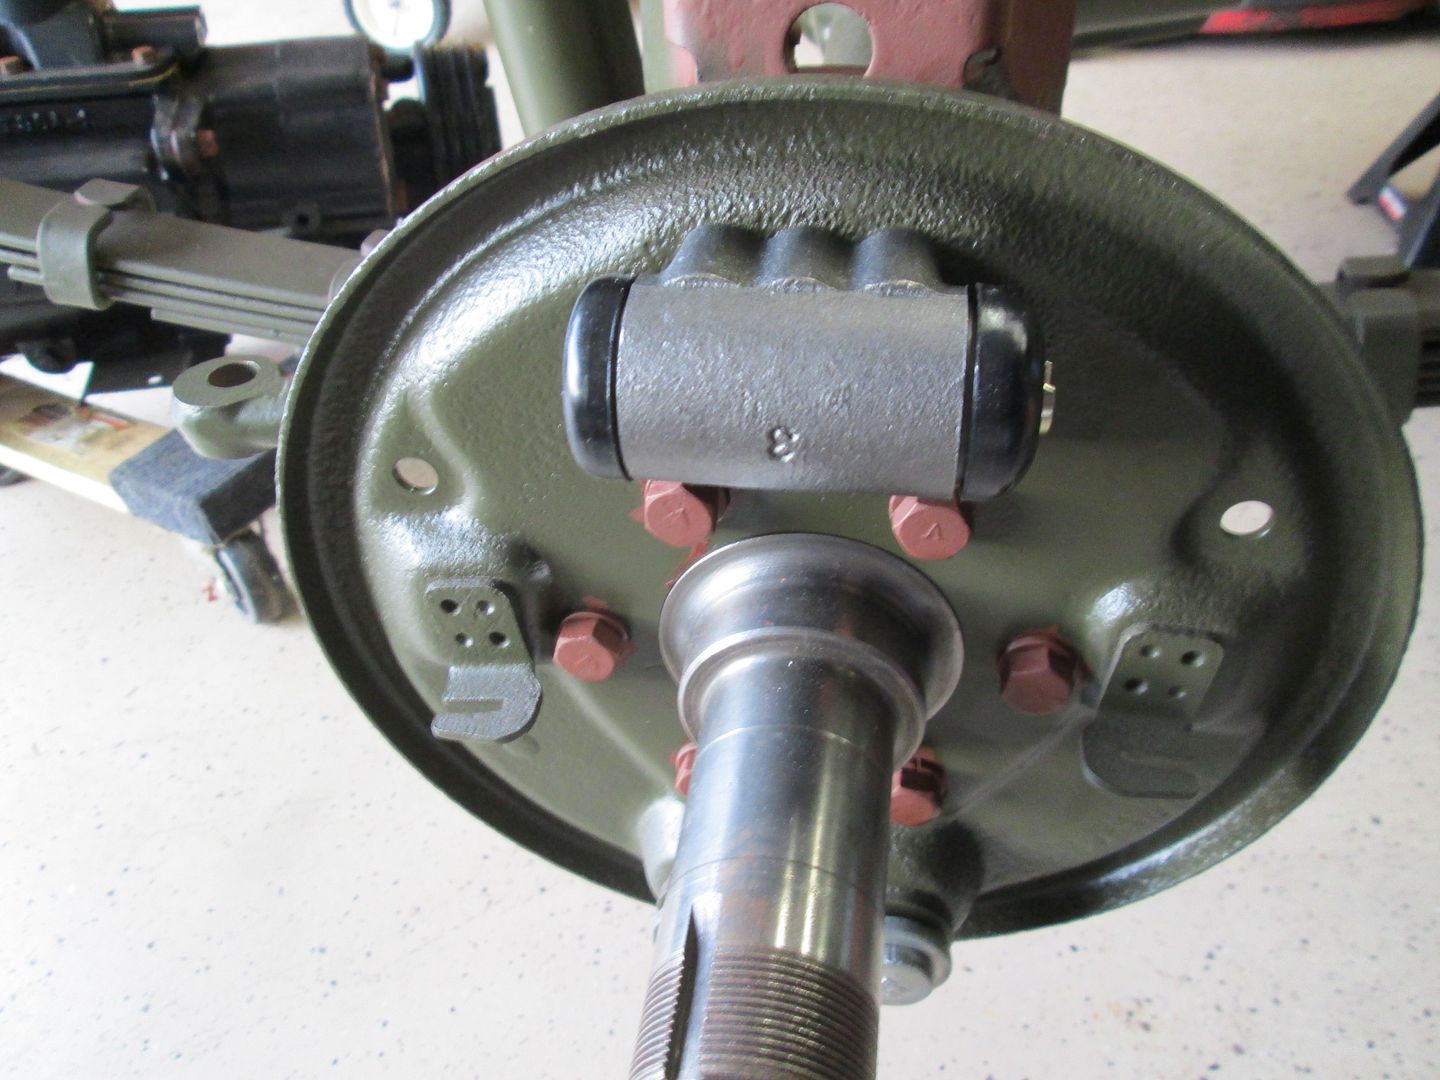 \ 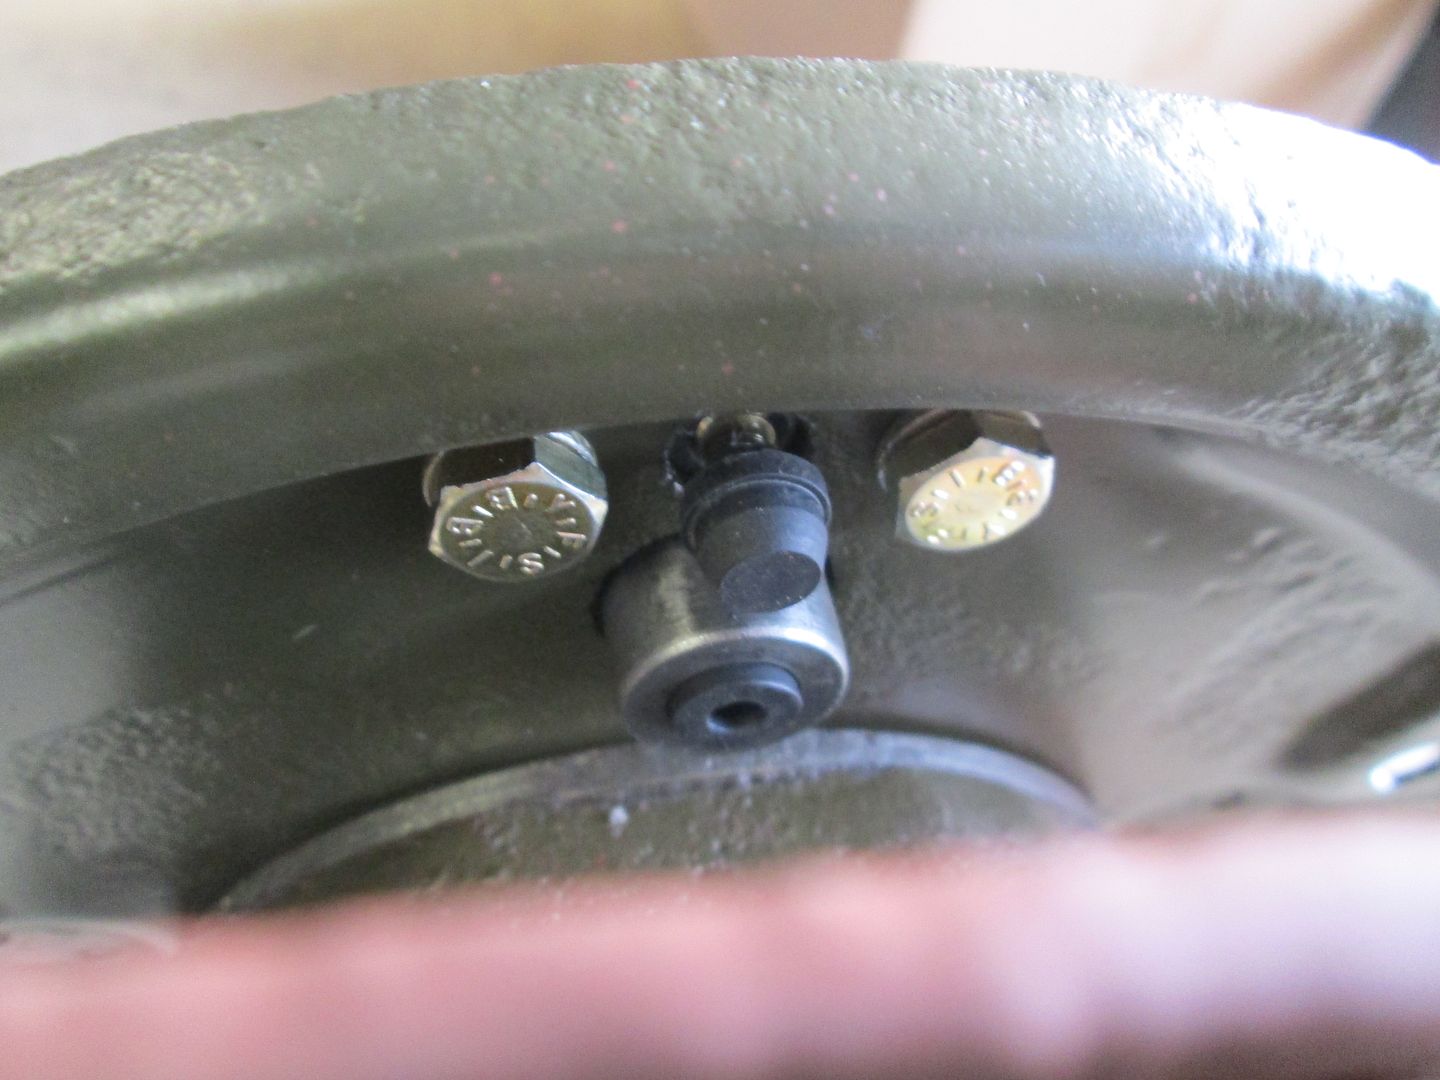 |
|
|
|
Post by Haines Garage on Jan 27, 2014 20:11:13 GMT -5
This picture is to show how the bras cams, lock into the anchor pins, 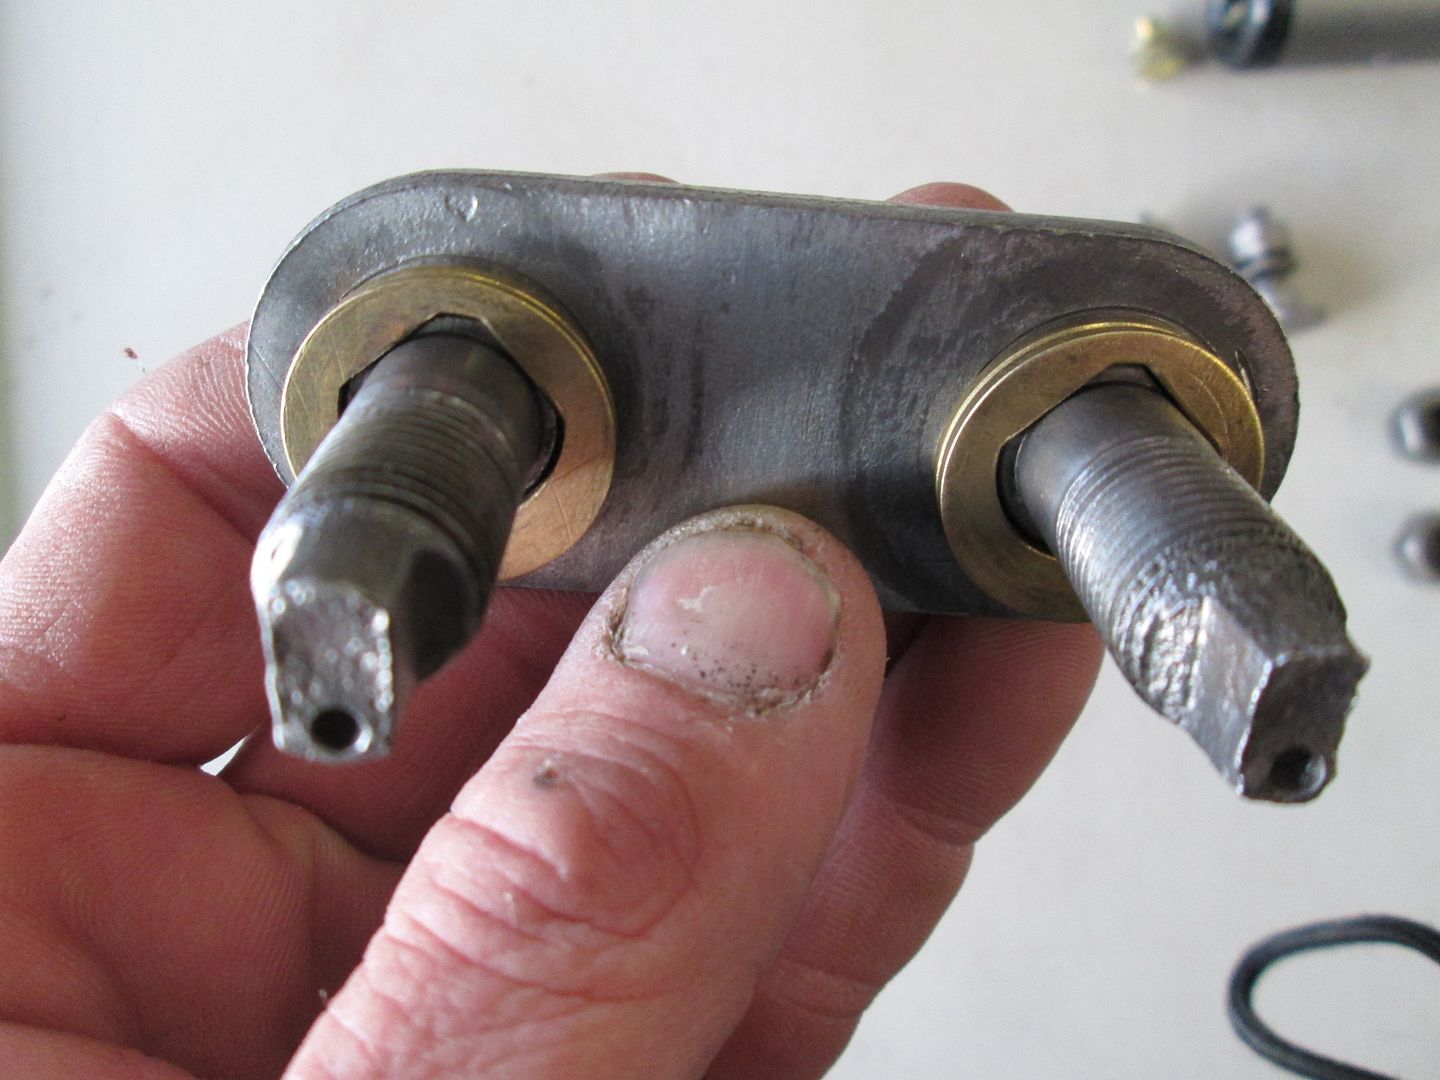 Notice the "Dimples" In the pins.. When Rudy does his Brake Adjustment thread  This might pertain. New Shoes....Brakes that is.. I knock down the edges with sandpaper... 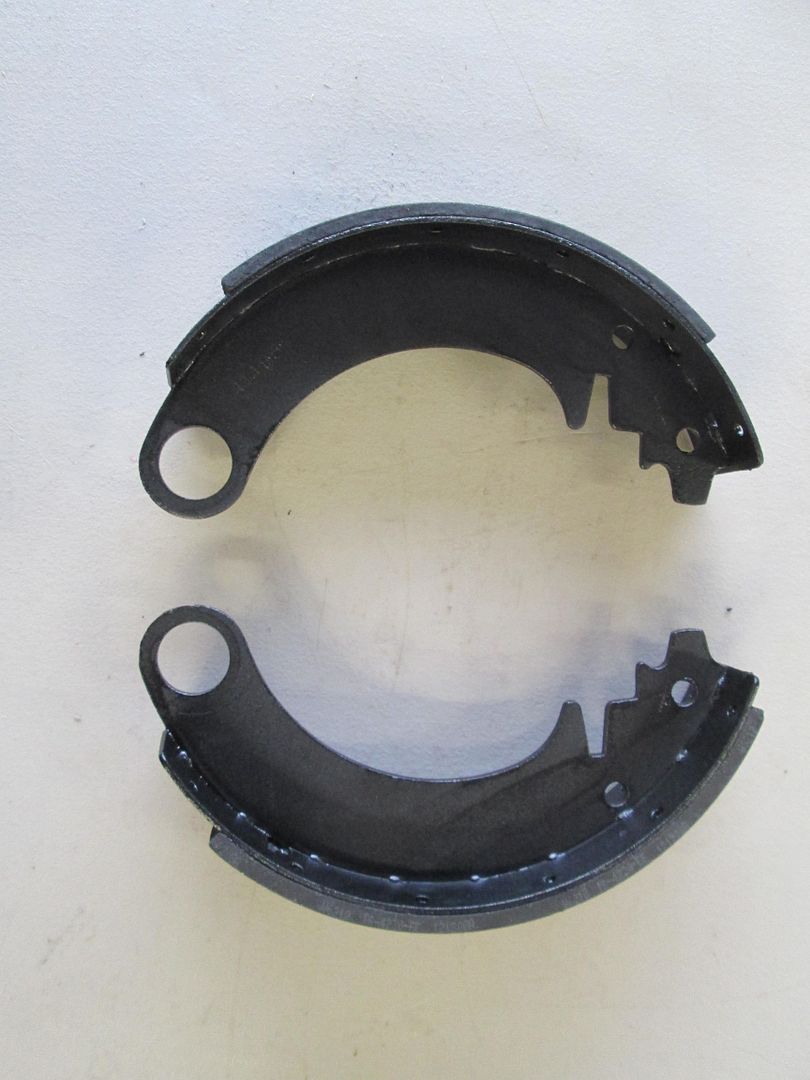 Brass Cams inserted into the brake shoes.. 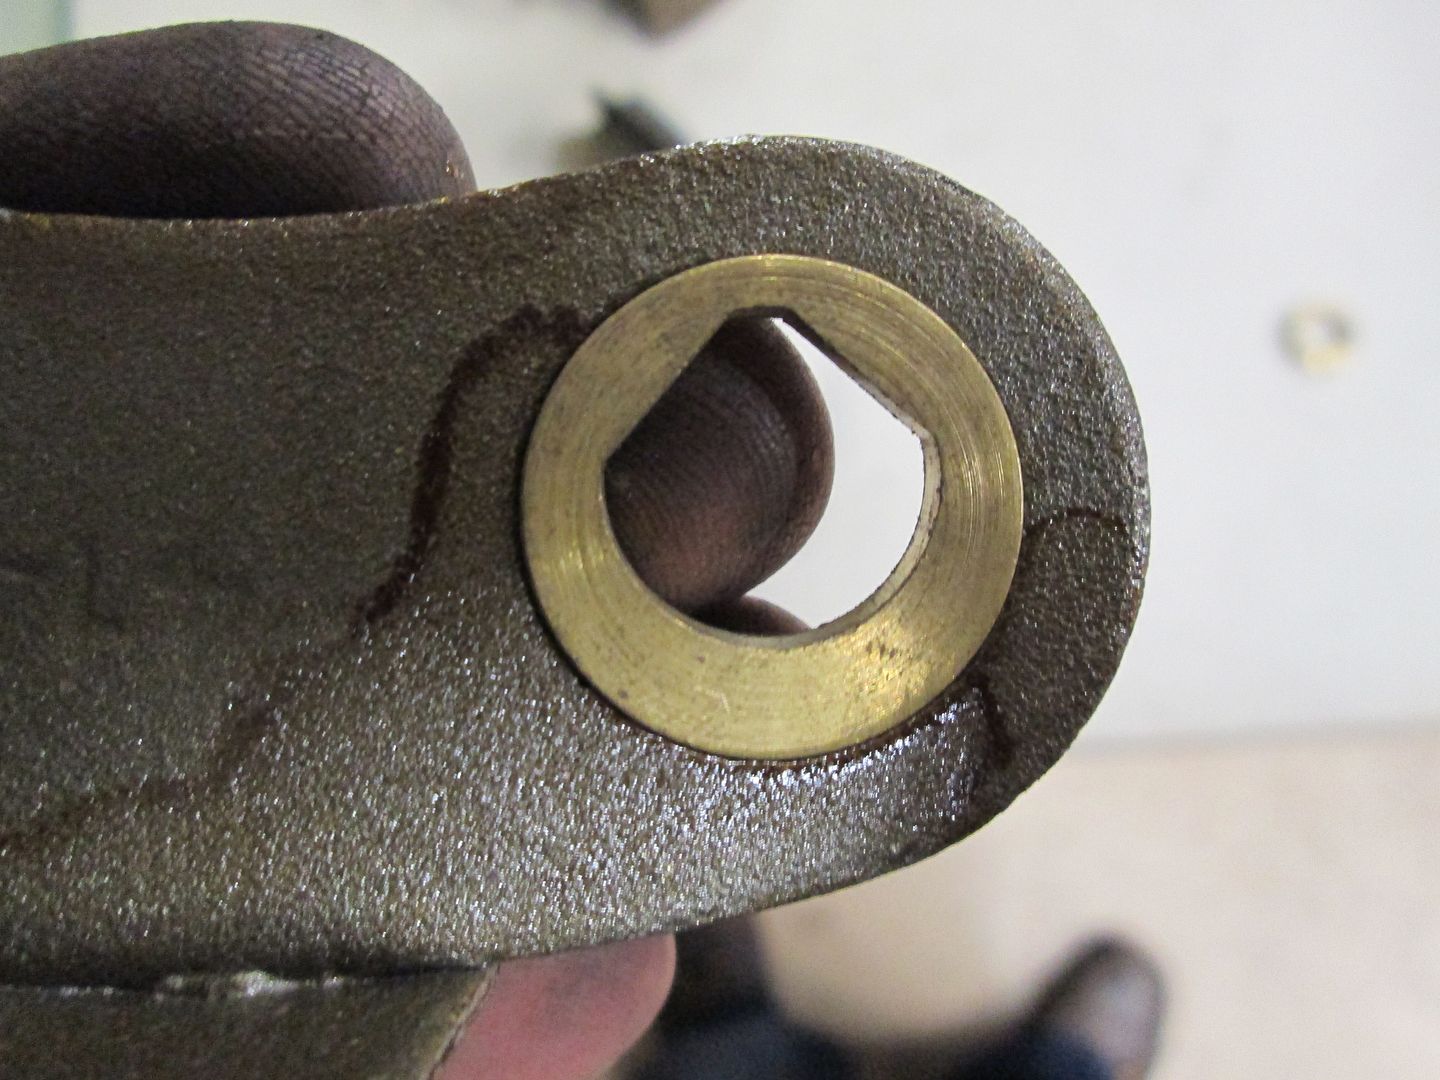 |
|
|
|
Post by Haines Garage on Jan 28, 2014 22:42:10 GMT -5
Front Shoes, and all hardware installed.. 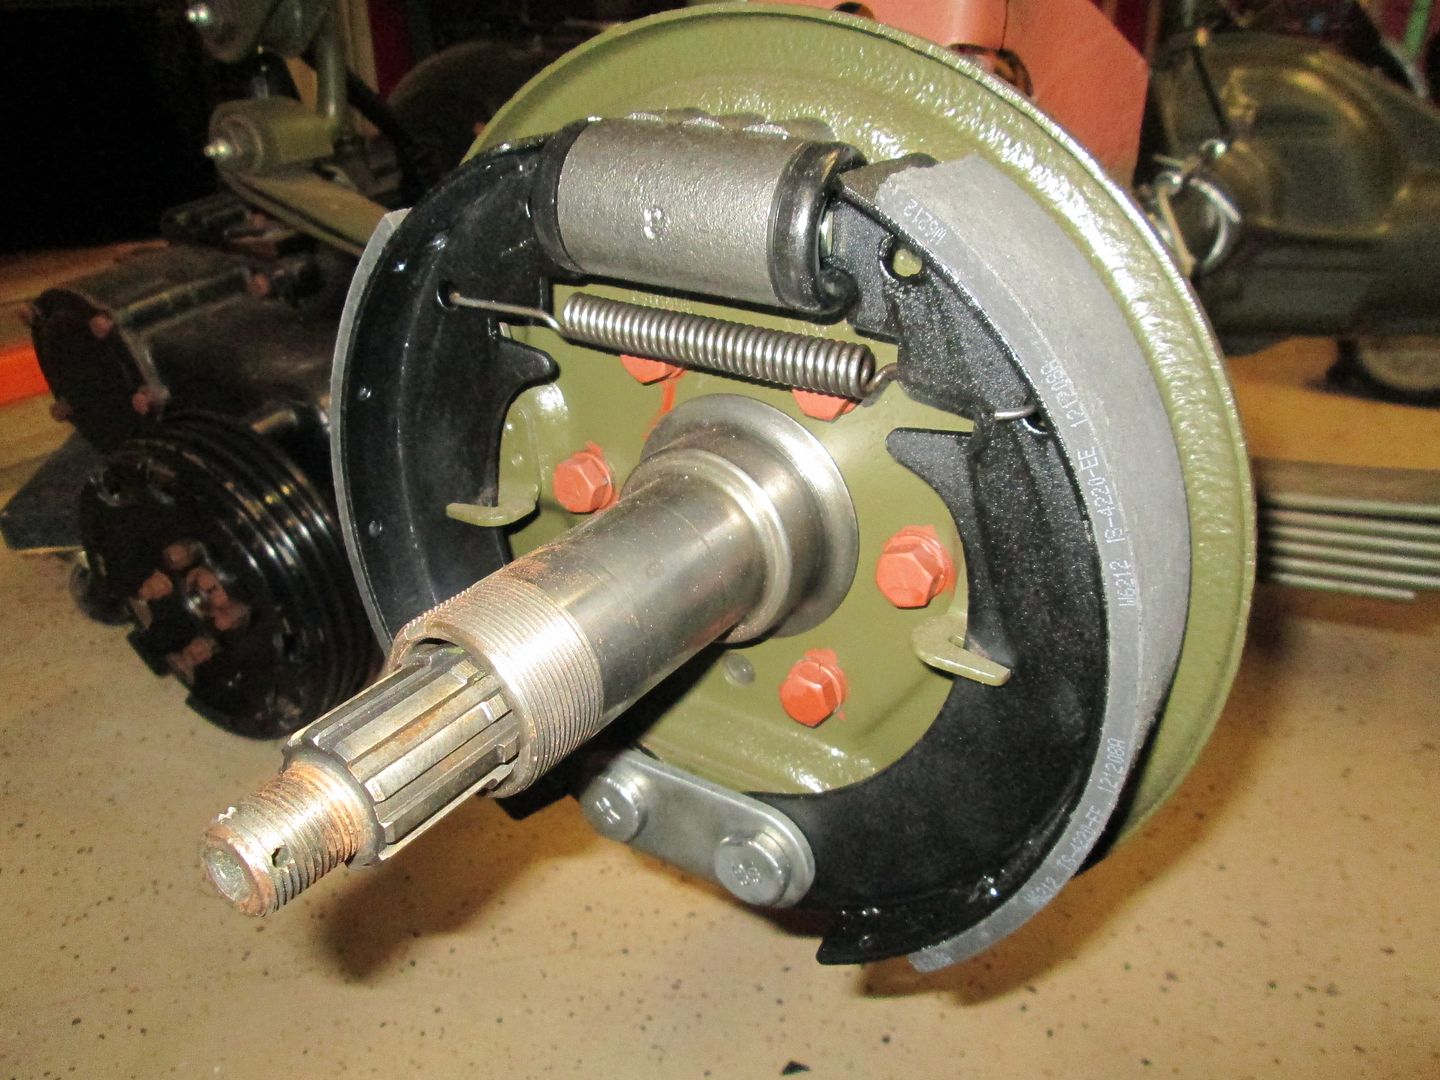 Rear Brake Shoes and hardware installed.. 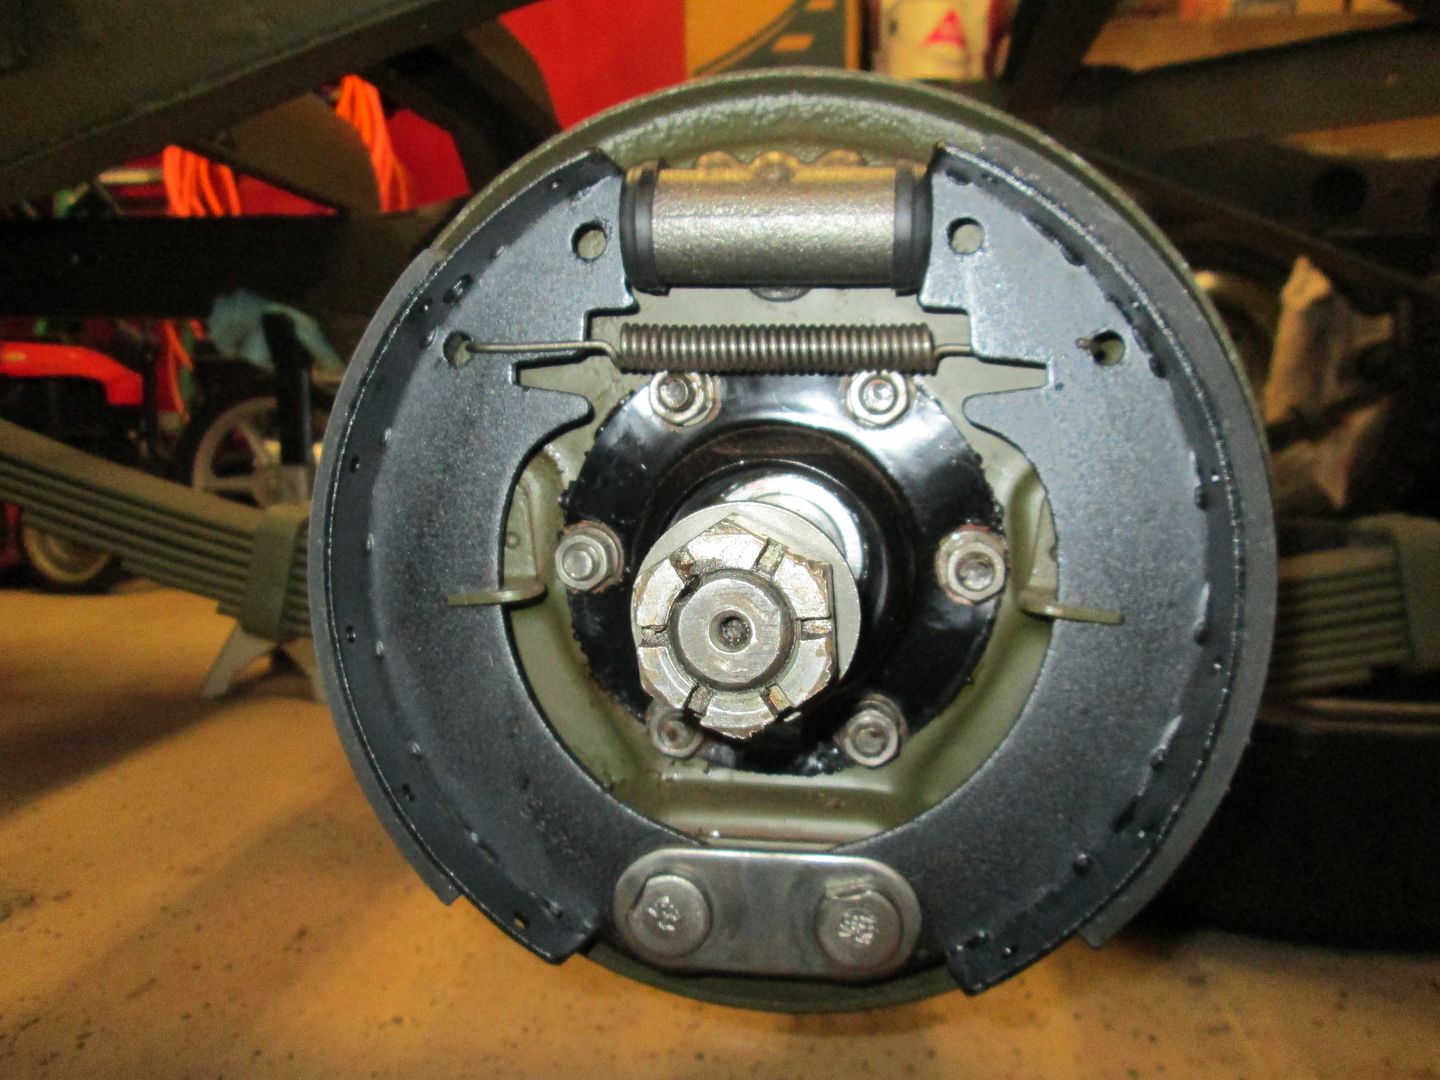 |
|
|
|
Post by athawk11 on Jan 29, 2014 17:20:04 GMT -5
Very nice detailed photos. I'm guessing you're priming the bolts for a coat of OD, right?
|
|
|
|
Post by Haines Garage on Jan 29, 2014 18:27:42 GMT -5
ABSOLUTELY!!! Its a little over the top.....but.  I will do details with an artist brush. |
|
|
|
Post by Haines Garage on Jan 29, 2014 18:56:29 GMT -5
Rear Brake Lines run. 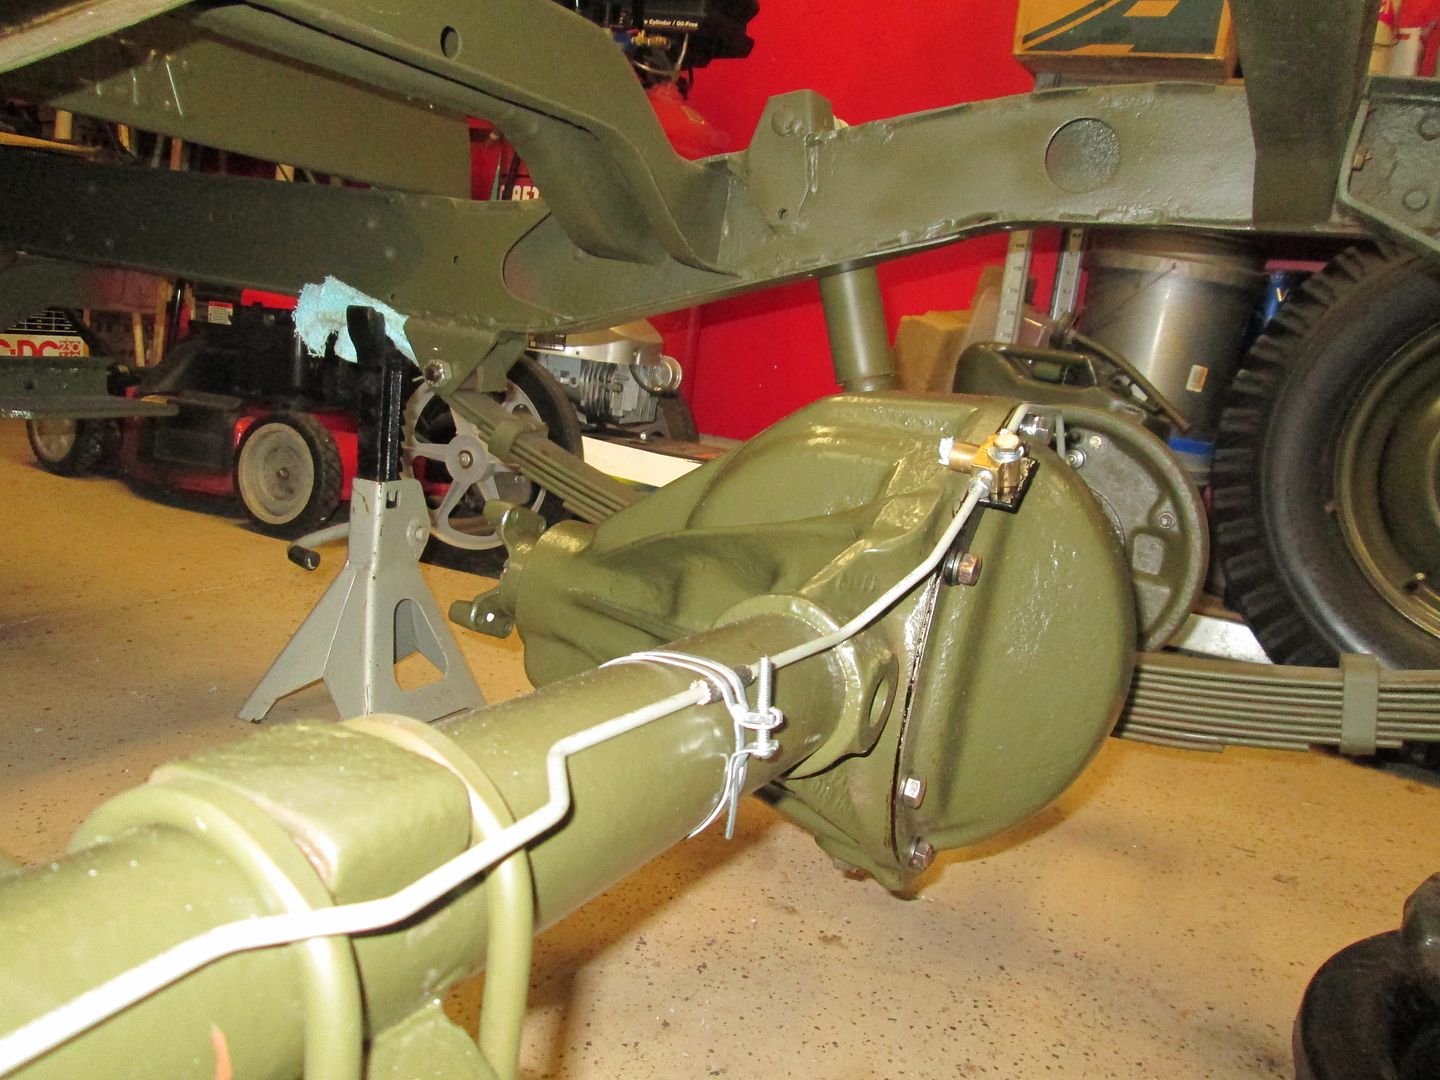 Rear Drums... There is a side story!! I took the drums off Grandpas Jeep. They were rusty, but looked smooth and in good shape. I Placed painters tape on the inside of the drums to protect them. I sandblasted them, Primed and Painted them. I took off the original Painters tape, (Didn't want paint to stick  ) and replaced the tape with new.. When they were dry (30 days) I wrapped them in paper, boxed and sealed them, and placed them on a shelf. When I opened them...IT WAS A NIGHTMARE.... The tape had bonded to the drum!! It took two hours to scrape it off, on my drums looked like TOAST! I took them to three local brake shops to see if the were ruined.. GUYS WOULDN'T TOUCH THEM...Oh we don't have specs,for a 46, we do have a fitting for those drums, What did those come off off...VERY FRUSTRATING!  Finally I showed them to an Old School Mechanic, From New Jersey...Joe SR. At A shop 2 miles from my house.. I asked him.."Are these Shot?" I took them to the three brake shops in town, and they said they couldn't or wouldn't.. His response..."They are FULL OF @$#%#$@% SHI&!! Told me to come back tomorrow, and he would turn them. I did with Scott II.. We sat and watched in the garage as this Old school dude set them up....And saved them!!! We talked as he worked, and explained to us what he was doing. I have to admit a few ...well a lot of F bombs got dropped !  When He was done, I was ECSTATIC!! I asked him what I owed him... He said "you don't owe me a thing... Its nice to meet nice people whom give a Sh%4! and whom actually care about what they are doing. I enjoyed talking with you.." I insisted three times to pay... He said.." Take your Shi$, and get out of my shop!!" Before I left, I cut a deal to return to the shop when I was done with Grandpas Jeep and do a Photo... He shook my hand, and said "DEAL"! When we got in the truck to go home, my son said.. " That was a really funny and Cool Guy" I told him "yeah, and they are fading away" With that told...It needed to be... Rear drums  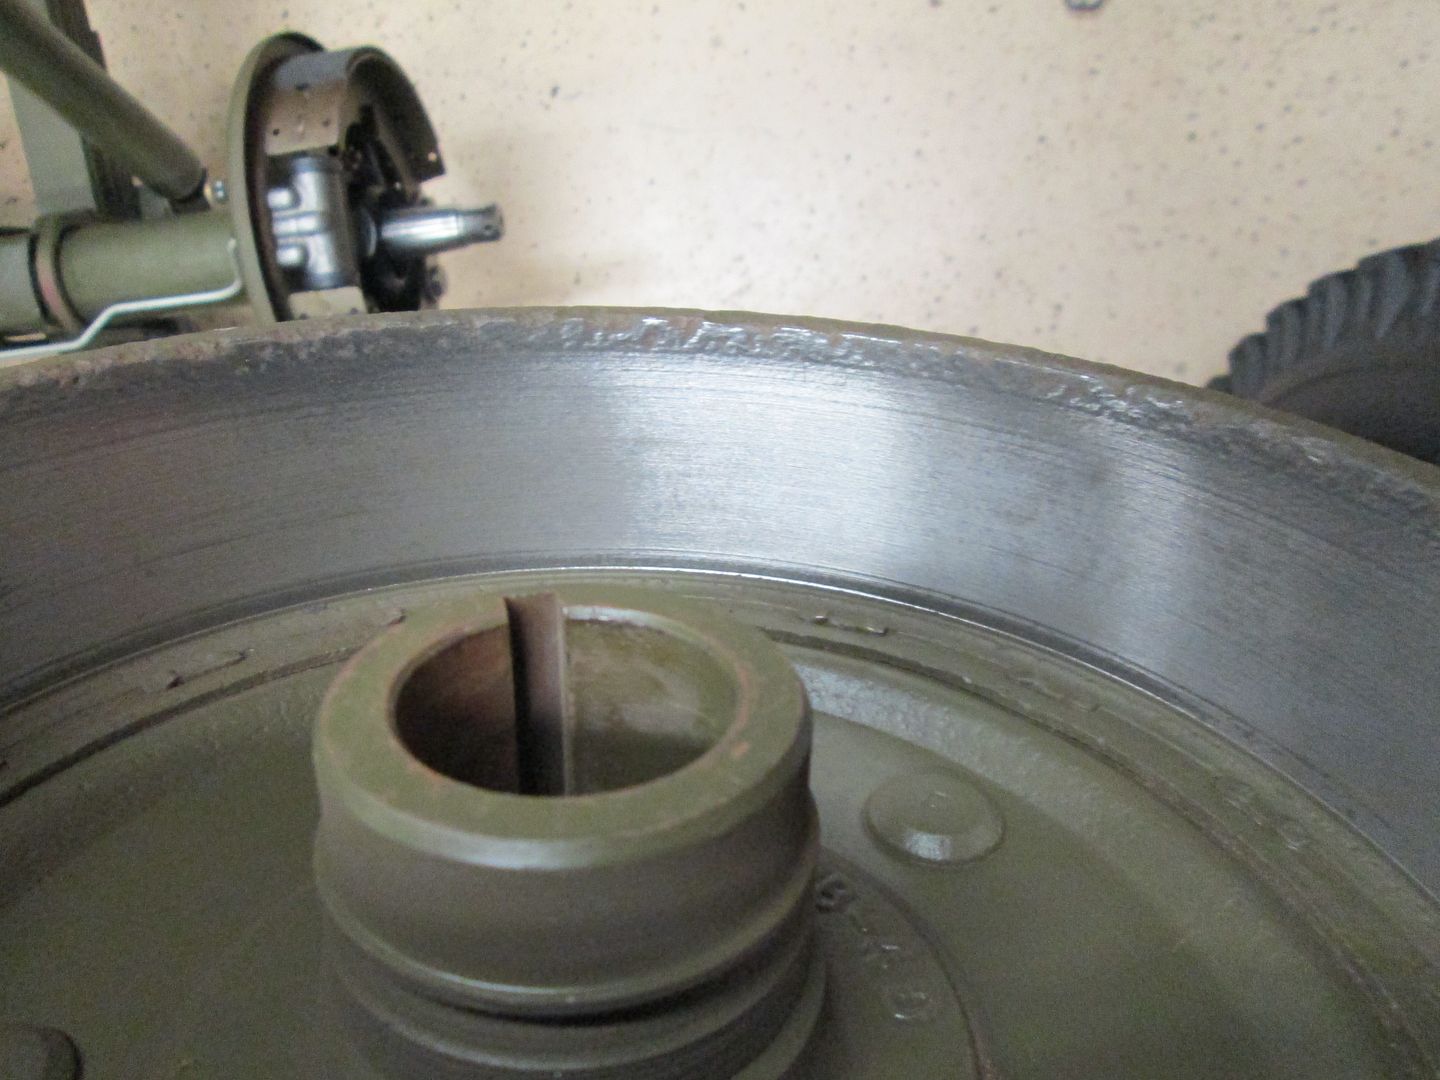 Install Drum first, line up key slot 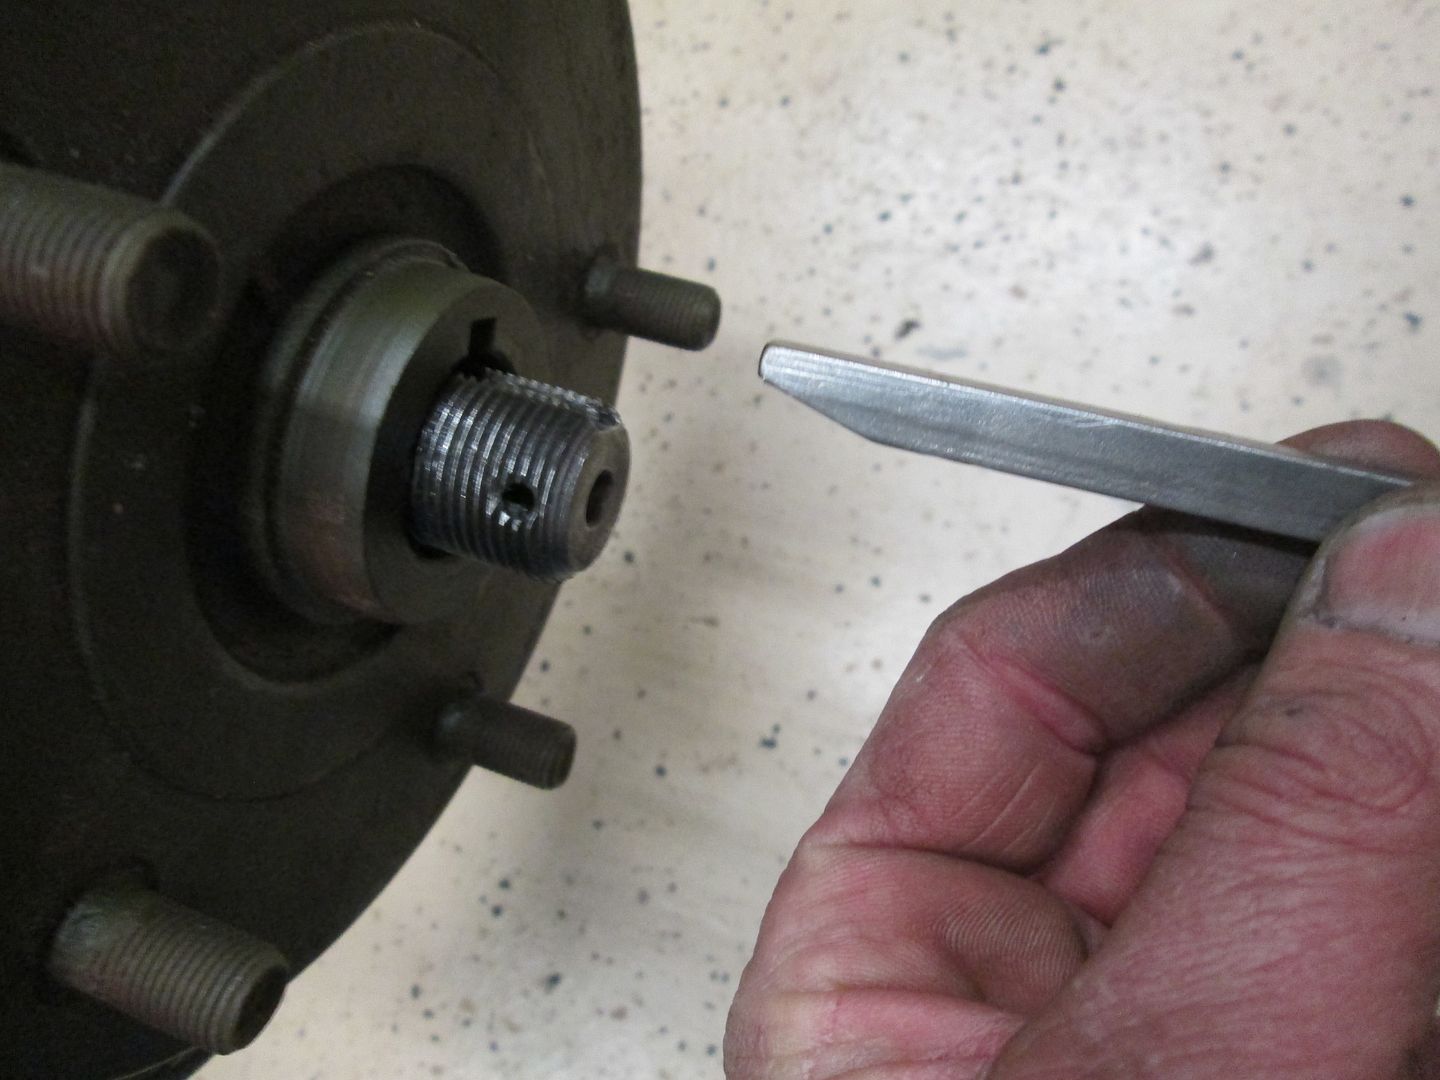 Notice closely how the KEY goes in! It went in by hand. Install washer 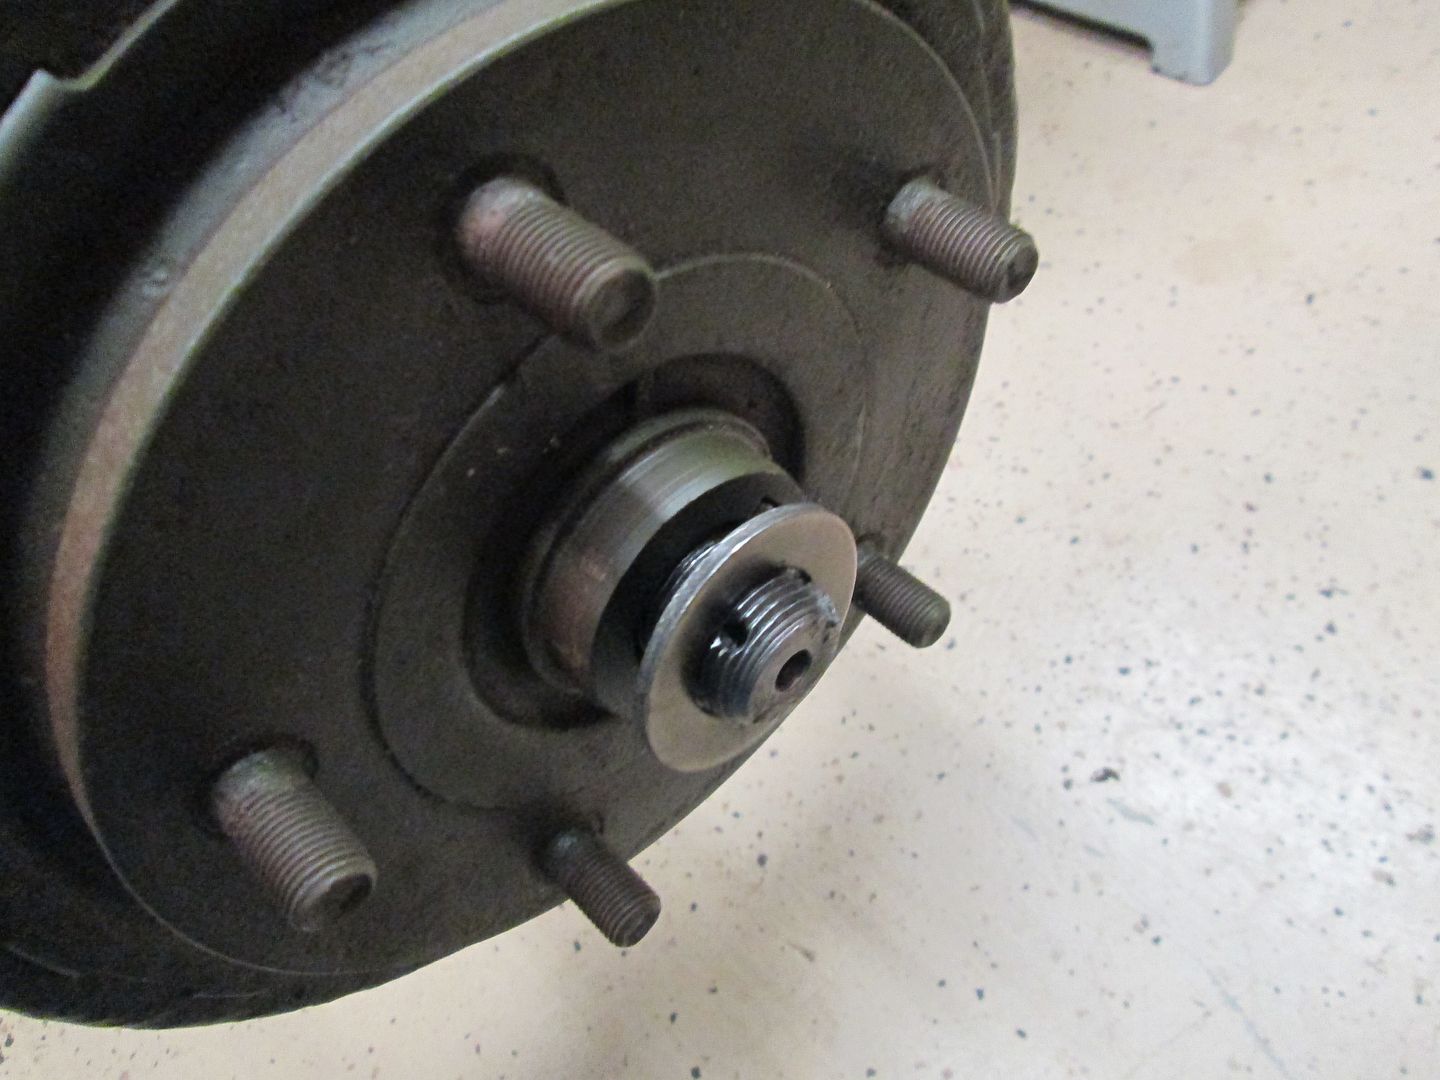 Install nut..lined up perfect when tight to the cotter pin hole! 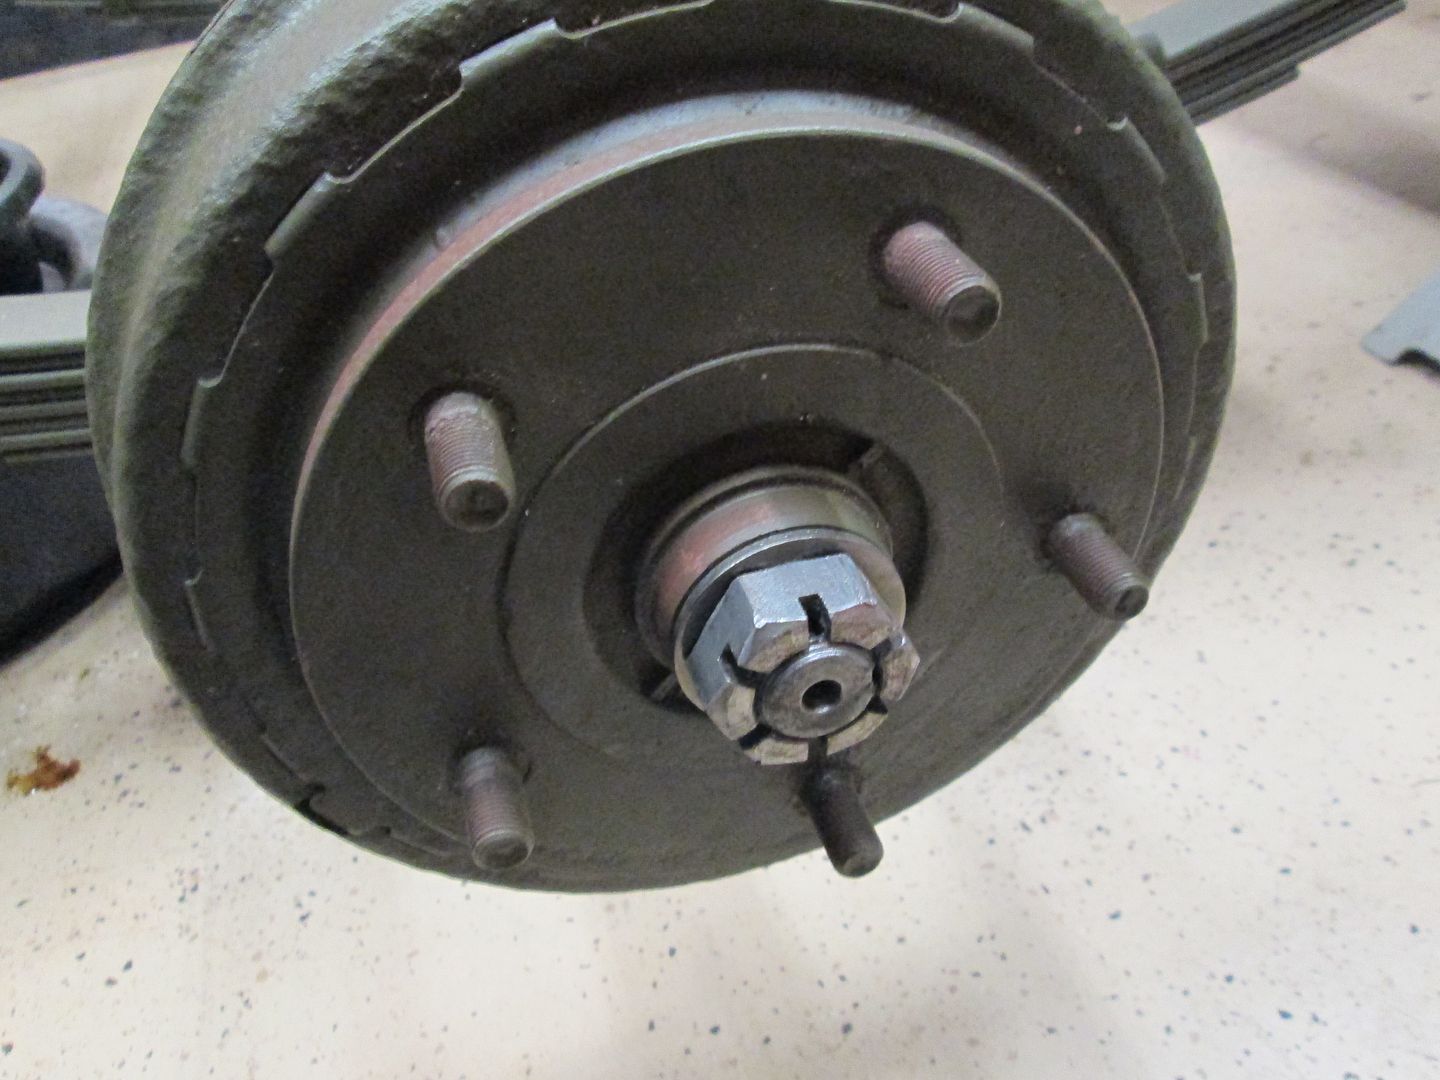 |
|
|
|
Post by Ryan_M on Jan 29, 2014 20:06:05 GMT -5
Nice work HG! I'm am really liking these detailed tutorials as they make for excellent reference material. Keep it up Sir!
|
|
Deleted
Deleted Member
Posts: 0
|
Post by Deleted on Jan 29, 2014 20:09:01 GMT -5
That is a great "end" to the story!!! I can't believe that "old guy" was a mere two miles from your house. Destiny.
And I can't believe he did it at no charge!!! Reminds me of the starter/generator guy down on Rivers Ave. I took my 1942 Autolite generator to him (that I used on the Rustbucket Resto). It had sat open to the elements in the tub of a rusticated/busticated jeep for YEARS. I opened the genny up and it was NASTY! Among other things, all of the tape around the coils was disintegrating. I took it to him and he laughed at me. Said it wasn't worth saving and to go away. "F@#% him" I though to myself. I can save this thing! I asked him to get the two massive screws loose that hold the coils in place. He did. And then sent me on my merry way.
AND HE DIDN'T CHARGE ME TO LOOSEN MY SCREWS! hahaha! Oh, by the way...I rebuilt that generator and it works.
That is a relief that you saved the drums, Haines.
Bo!
|
|
Deleted
Deleted Member
Posts: 0
|
Post by Deleted on Jan 30, 2014 0:14:21 GMT -5
DONT FORGET YOUR COTTER PIN 
|
|
|
|
Post by Haines Garage on Jan 30, 2014 17:41:40 GMT -5
You mean "Split Pin"   Glad you brought that point up... Here is some valuable information... Split Pins/Cotter Pins |
|
|
|
Post by Haines Garage on Jan 30, 2014 22:45:31 GMT -5
Front Drum and Hub Assembly...I install the Races(cups) into both sides of the hubs. Insides are clean as I could get them.. 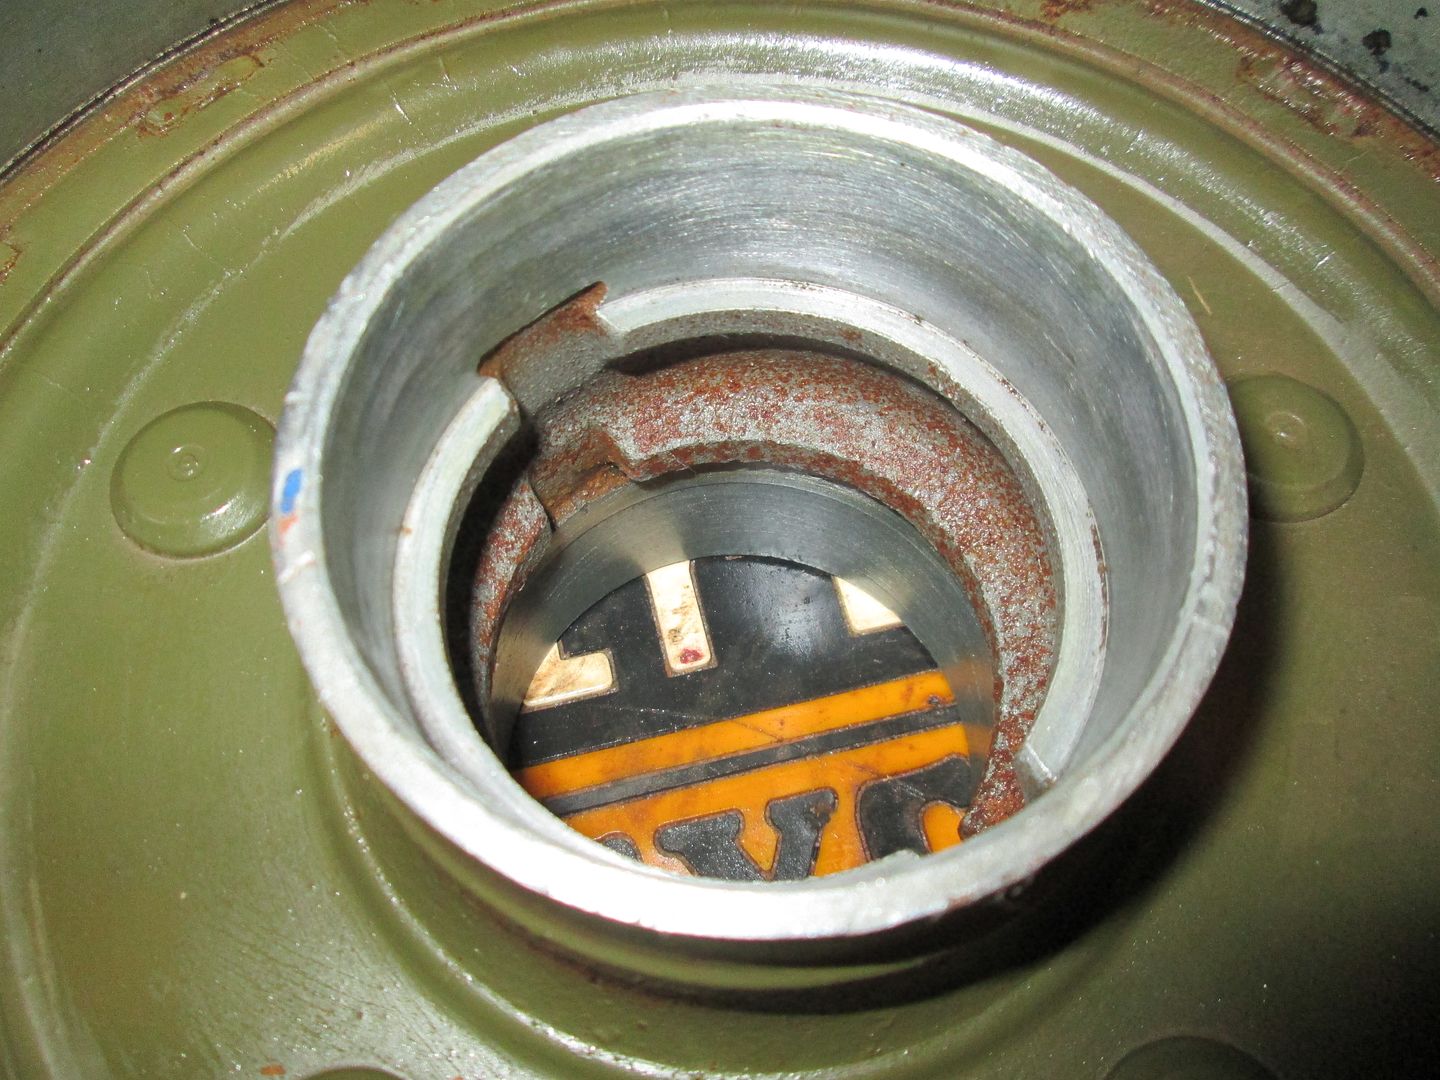 Install races (Cups) 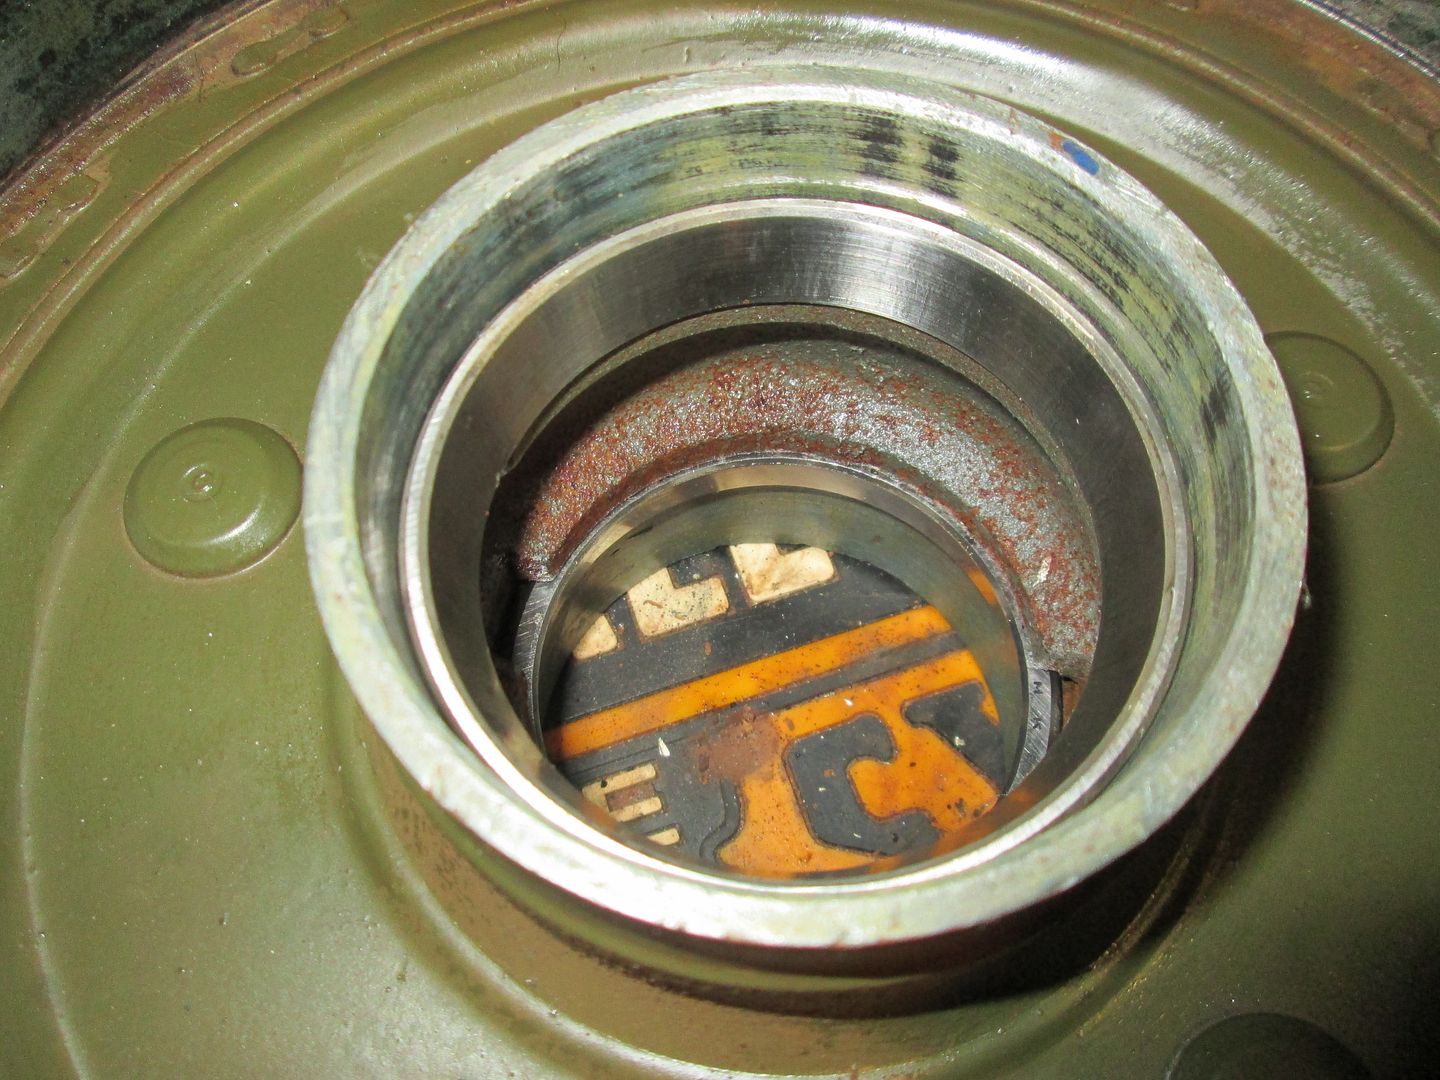 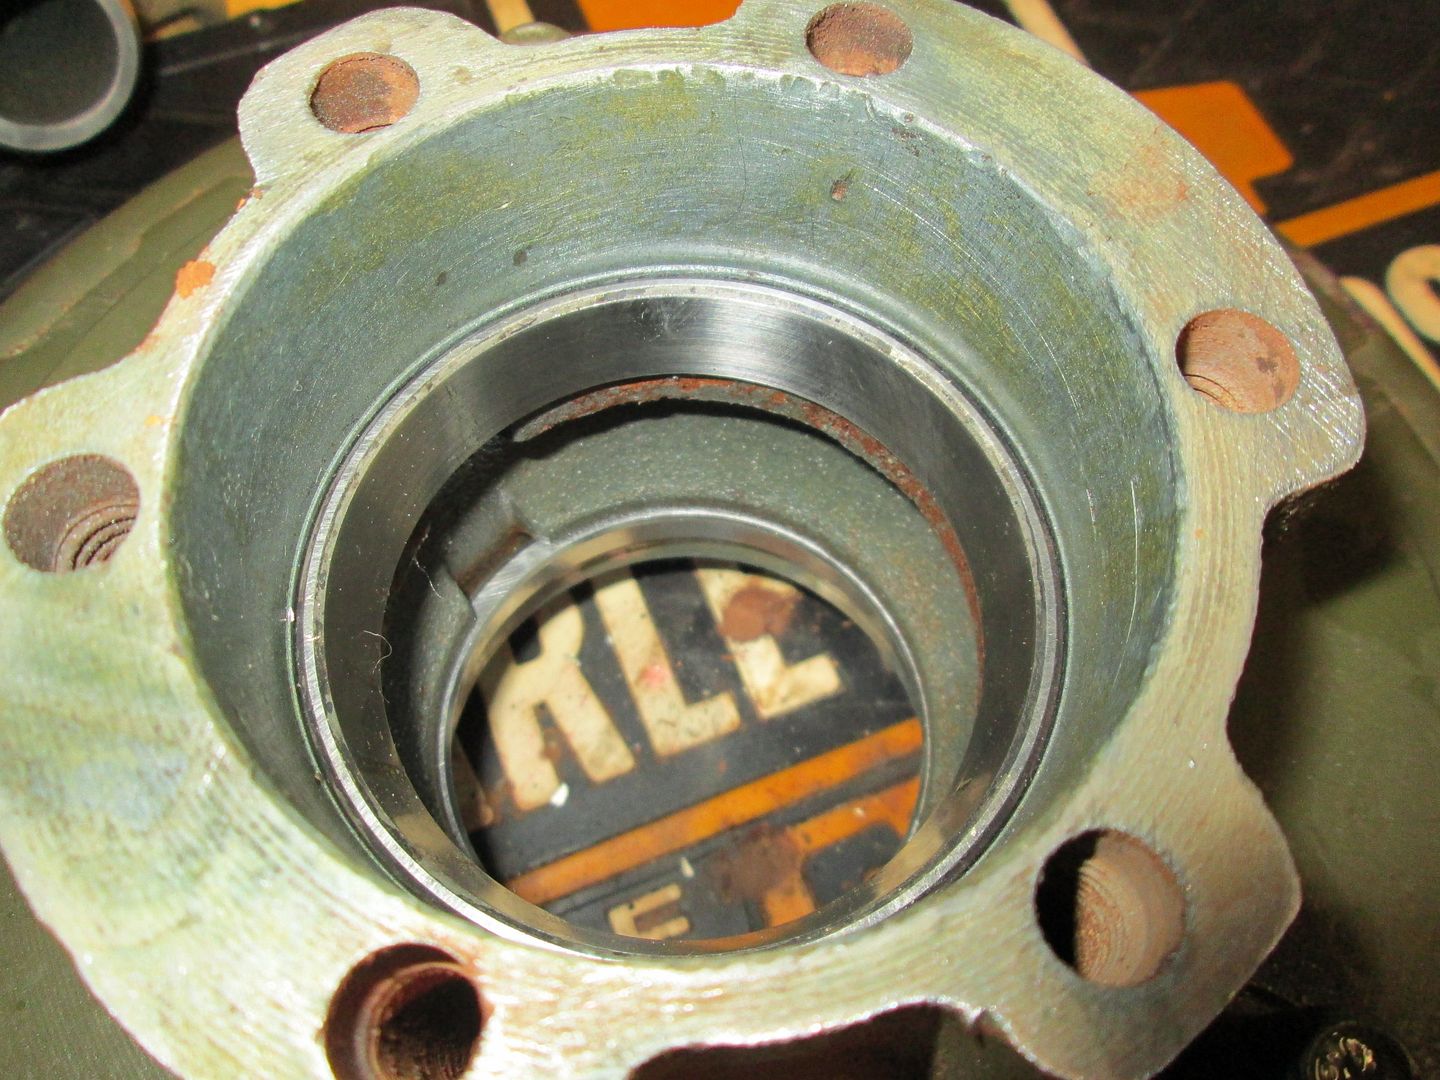 I pack the bearings (cones) with high temp grease...'Ole school style...Install on inside of hub first, then install new seal. I use permetex#2 on EVERYTHING! 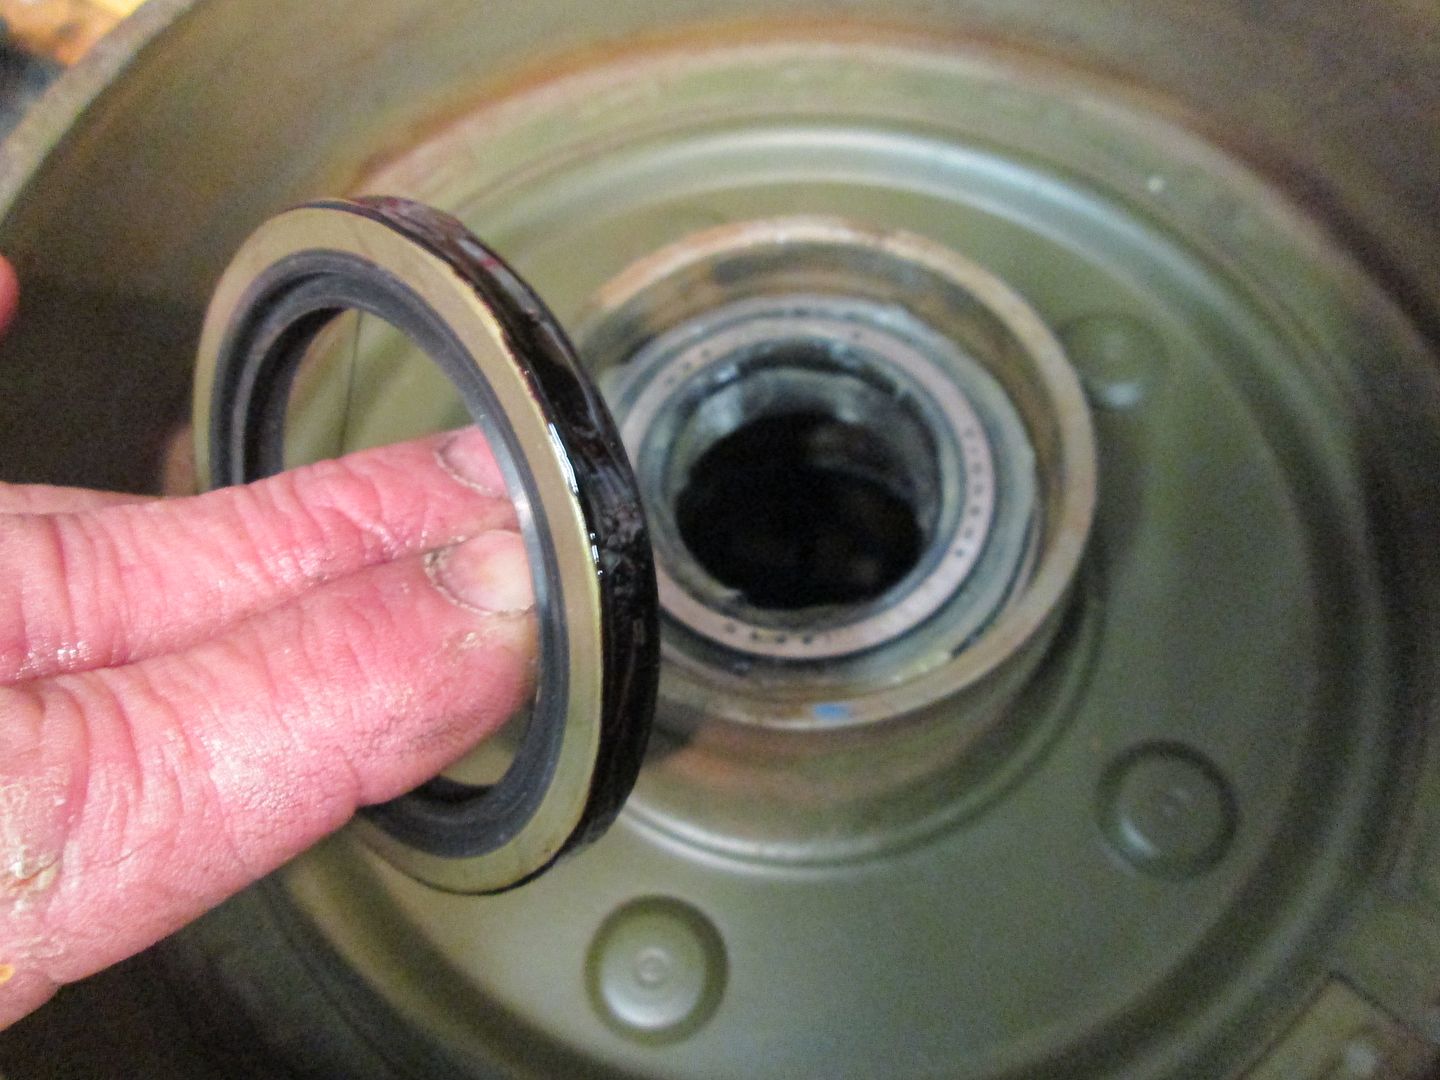 new seal installed, Timken Seal # 6626S 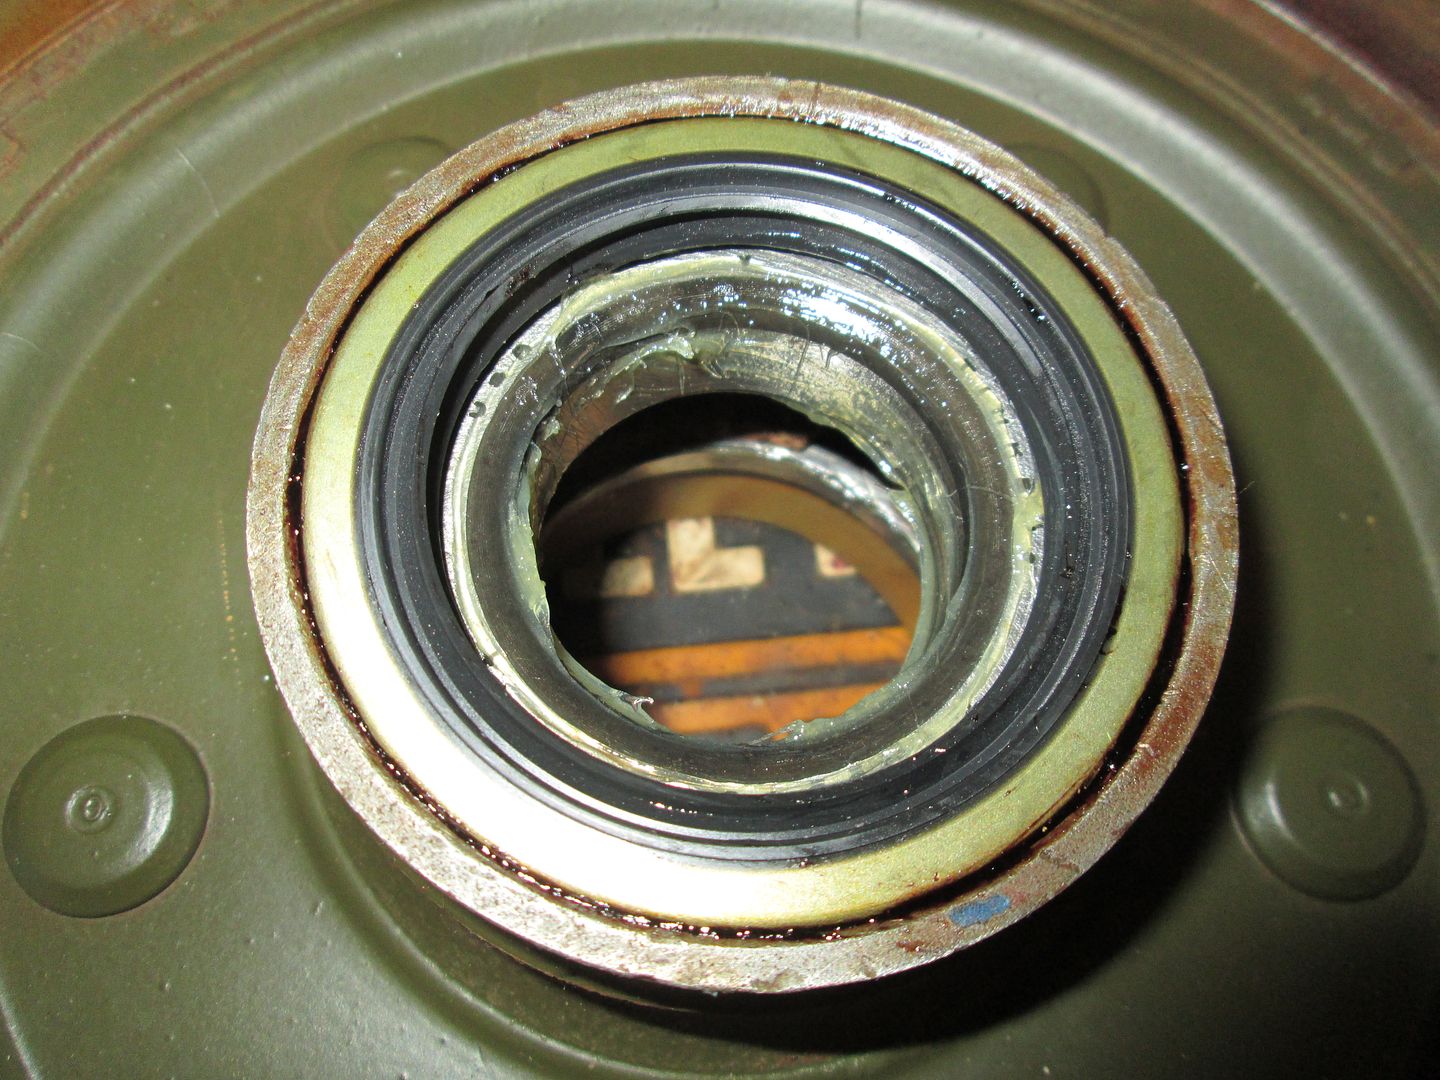 |
|
Deleted
Deleted Member
Posts: 0
|
Post by Deleted on Jan 30, 2014 22:56:04 GMT -5
Looking good, I will post a photo of my bearing packer!, not expensive and very handy. Lee  |
|
Deleted
Deleted Member
Posts: 0
|
Post by Deleted on Jan 31, 2014 0:40:43 GMT -5
scott if the tape hand bonded to the drums a fews times of braking and the pads would melt the tape off the drums and expose good steel again, as we all know tape is now where near as hard as steel. that being said good that you got them turned.
|
|
|
|
Post by Haines Garage on Mar 7, 2014 16:41:16 GMT -5
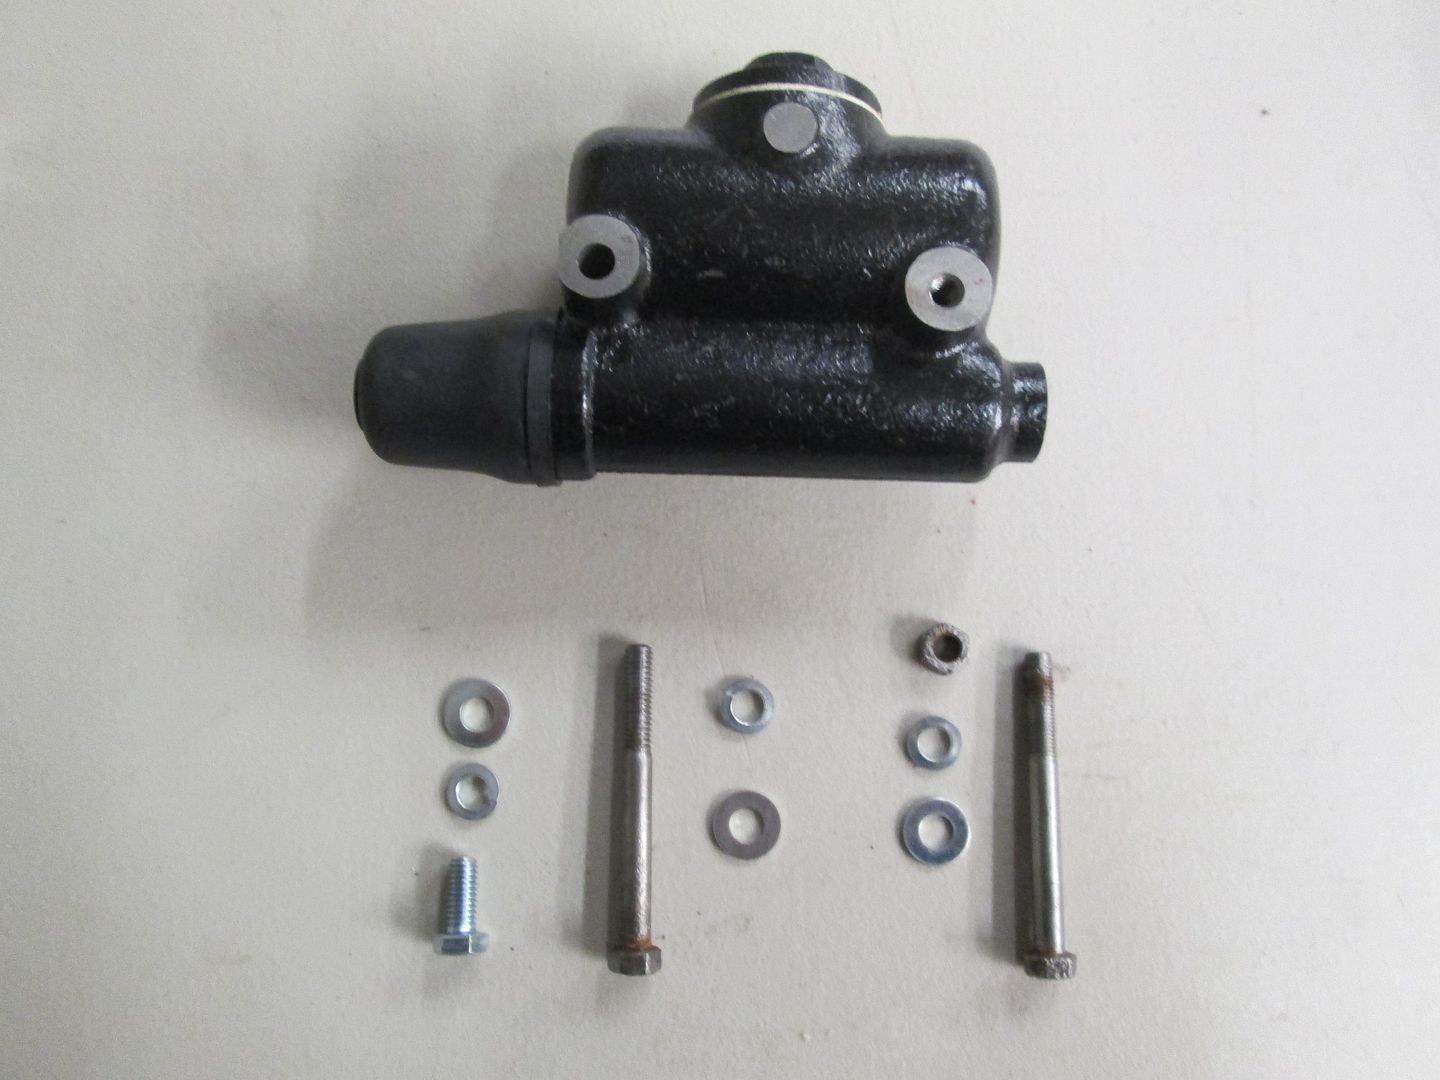 This is something I had a hard time finding on the web, and the manuals as well Pictured are the new Master 1 5/16-18x1 bolt with flat washer, and lock washer 1 5/16-24x3 bolt with flat washer, lock washer, and nut 1 5/16-18x3 bolt with flat washer and lock washer The two 3 inch bolts are original take offs. |
|
|
|
Post by Haines Garage on Mar 7, 2014 16:55:39 GMT -5
Master Cylinder to Brake Pedal Exploded 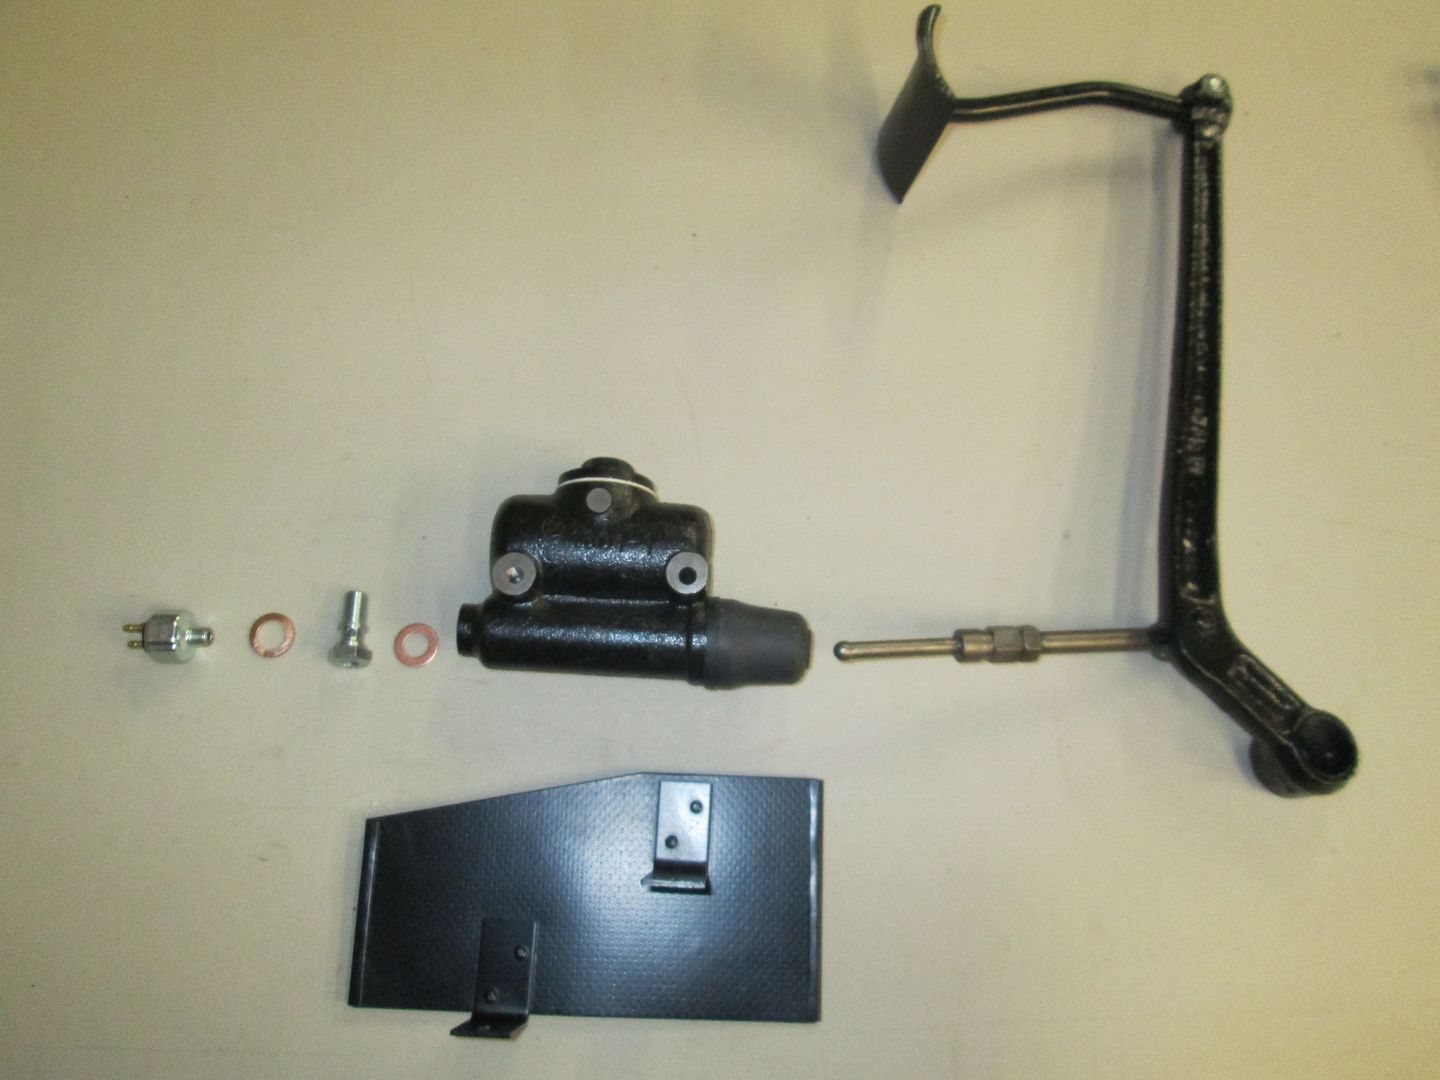 Right to Left, Stop Light Switch, Fitting Bolt, Copper Crush Washers( * see note), Y Fitting (outlet), Master Cylinder Assembly, Push Rod, and Brake Arm and Pedal. Also pictured is the Master Cylinder Heat Shield. 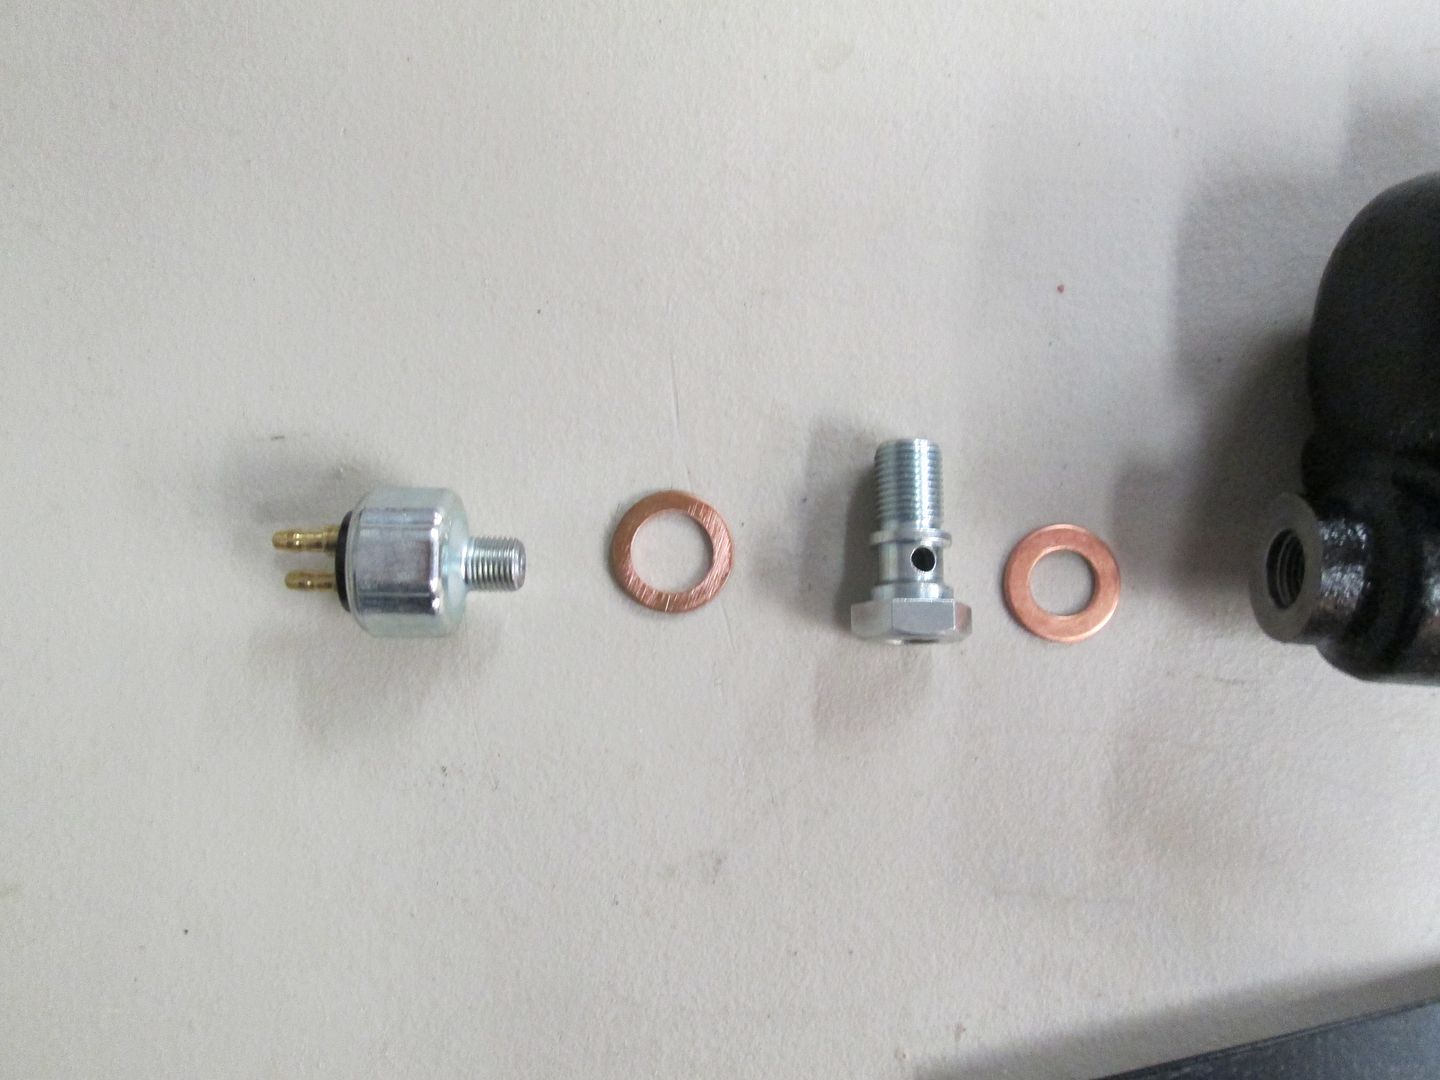 * Note. There are two different inside diameter copper crush washers. The larger is 5/8 and the smaller 7/16 approximate. When fitting the new washers, have your Fitting Bolt with you to check exact size. My new, and original had slightly different sizes. 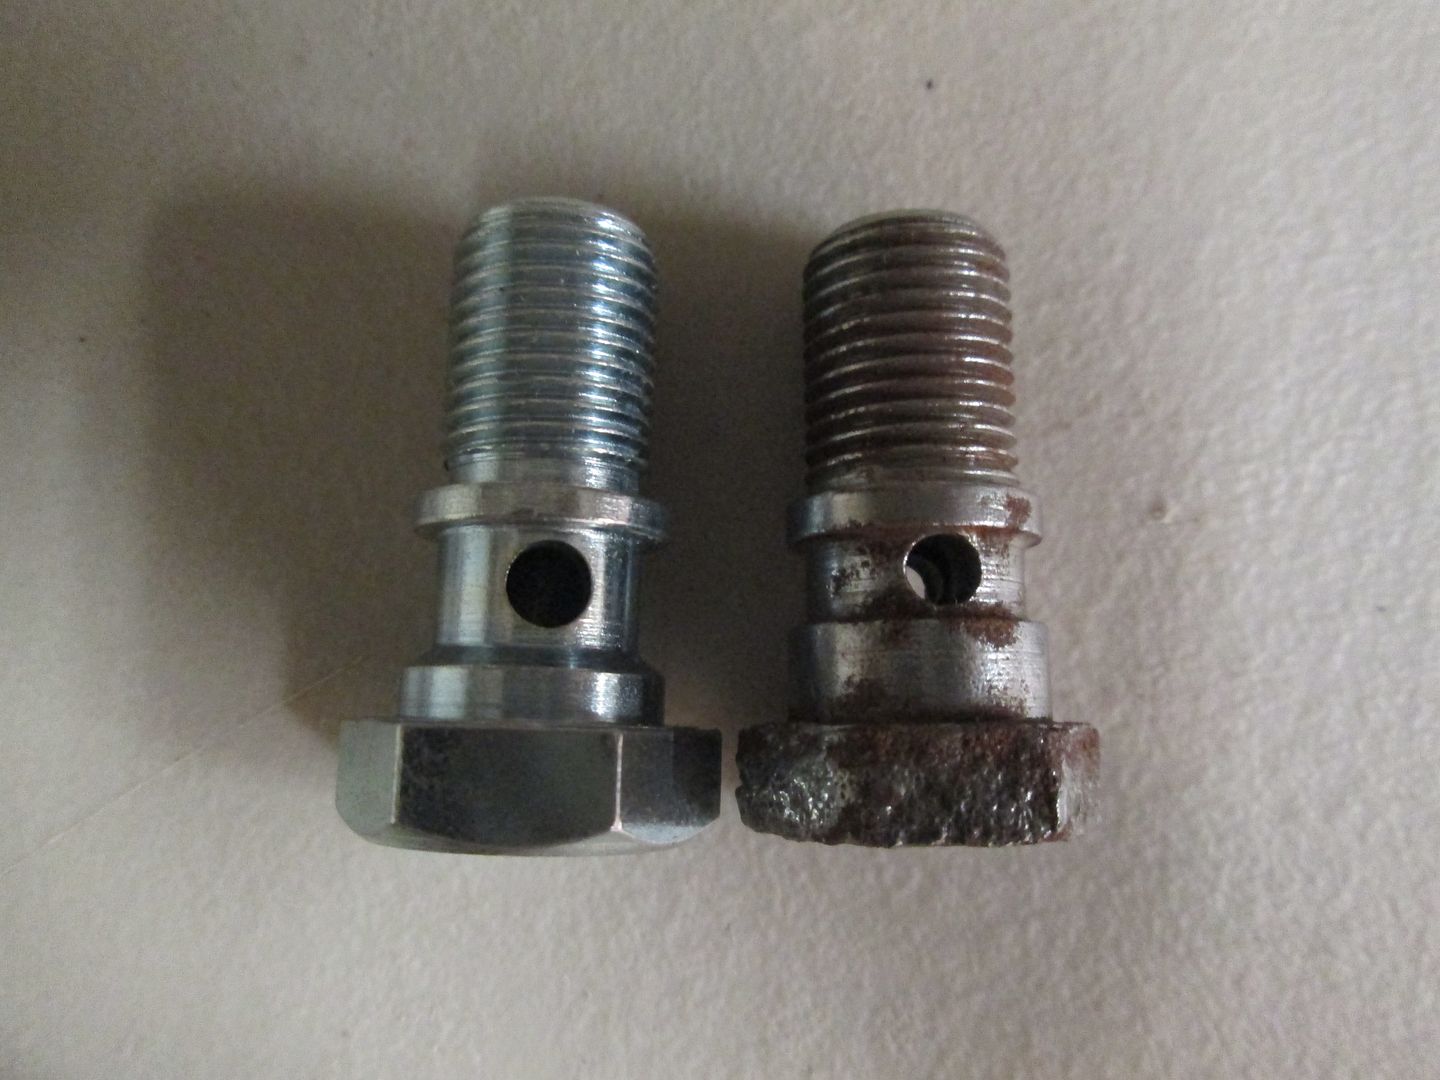 |
|
Deleted
Deleted Member
Posts: 0
|
Post by Deleted on Mar 7, 2014 17:05:11 GMT -5
that stupid bolt and y with the crush washers caused me a world of hurt. kept having to go down there and fiddle with it to get that to stop leaking. finally i just grabbed a vise grips and tightened it all a lot, went way past what i thought was a good nice and snug tight and so far it has worked. if it causes problems again I'm buying a new set of crush washers and maybe a new fitting, mine looked nice and clean.
|
|
|
|
Post by Haines Garage on Mar 8, 2014 14:48:23 GMT -5
that stupid bolt and y with the crush washers caused me a world of hurt. kept having to go down there and fiddle with it to get that to stop leaking. finally i just grabbed a vise grips and tightened it all a lot, went way past what i thought was a good nice and snug tight and so far it has worked. if it causes problems again I'm buying a new set of crush washers and maybe a new fitting, mine looked nice and clean. Glad you brought that up Sir Schimmster.... 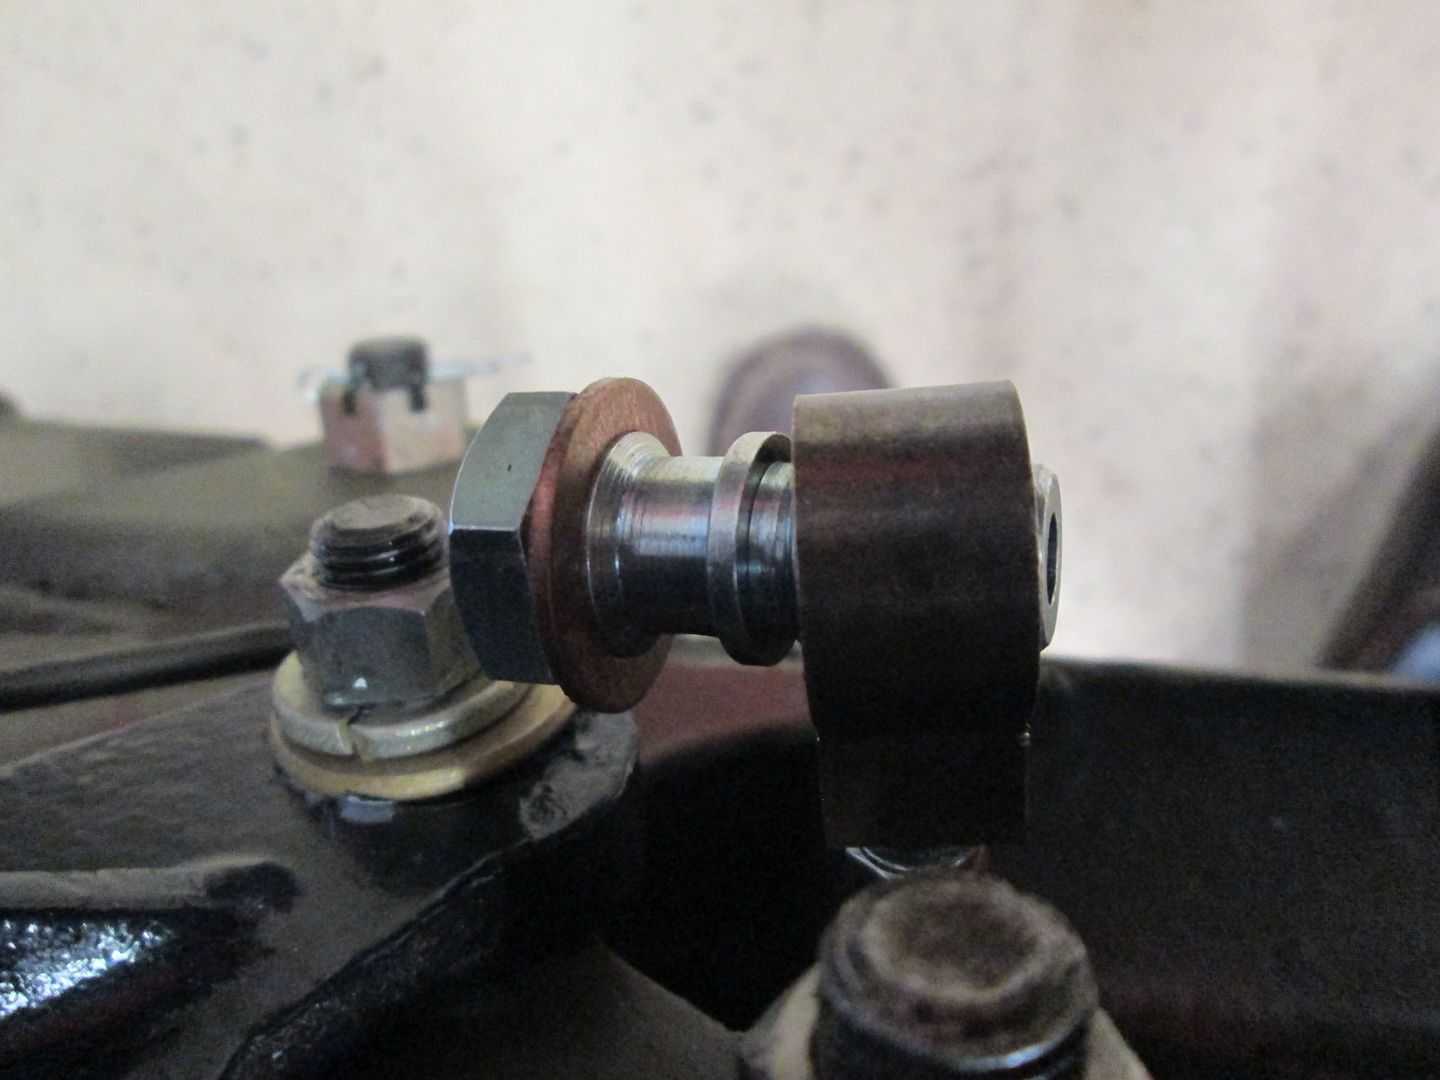 Y brass fitting in center, first (larger inside diameter ) on outside of connecting bolt. Smaller diameter on out side of y bras fitting. then thread into the font side of the master cylinder. 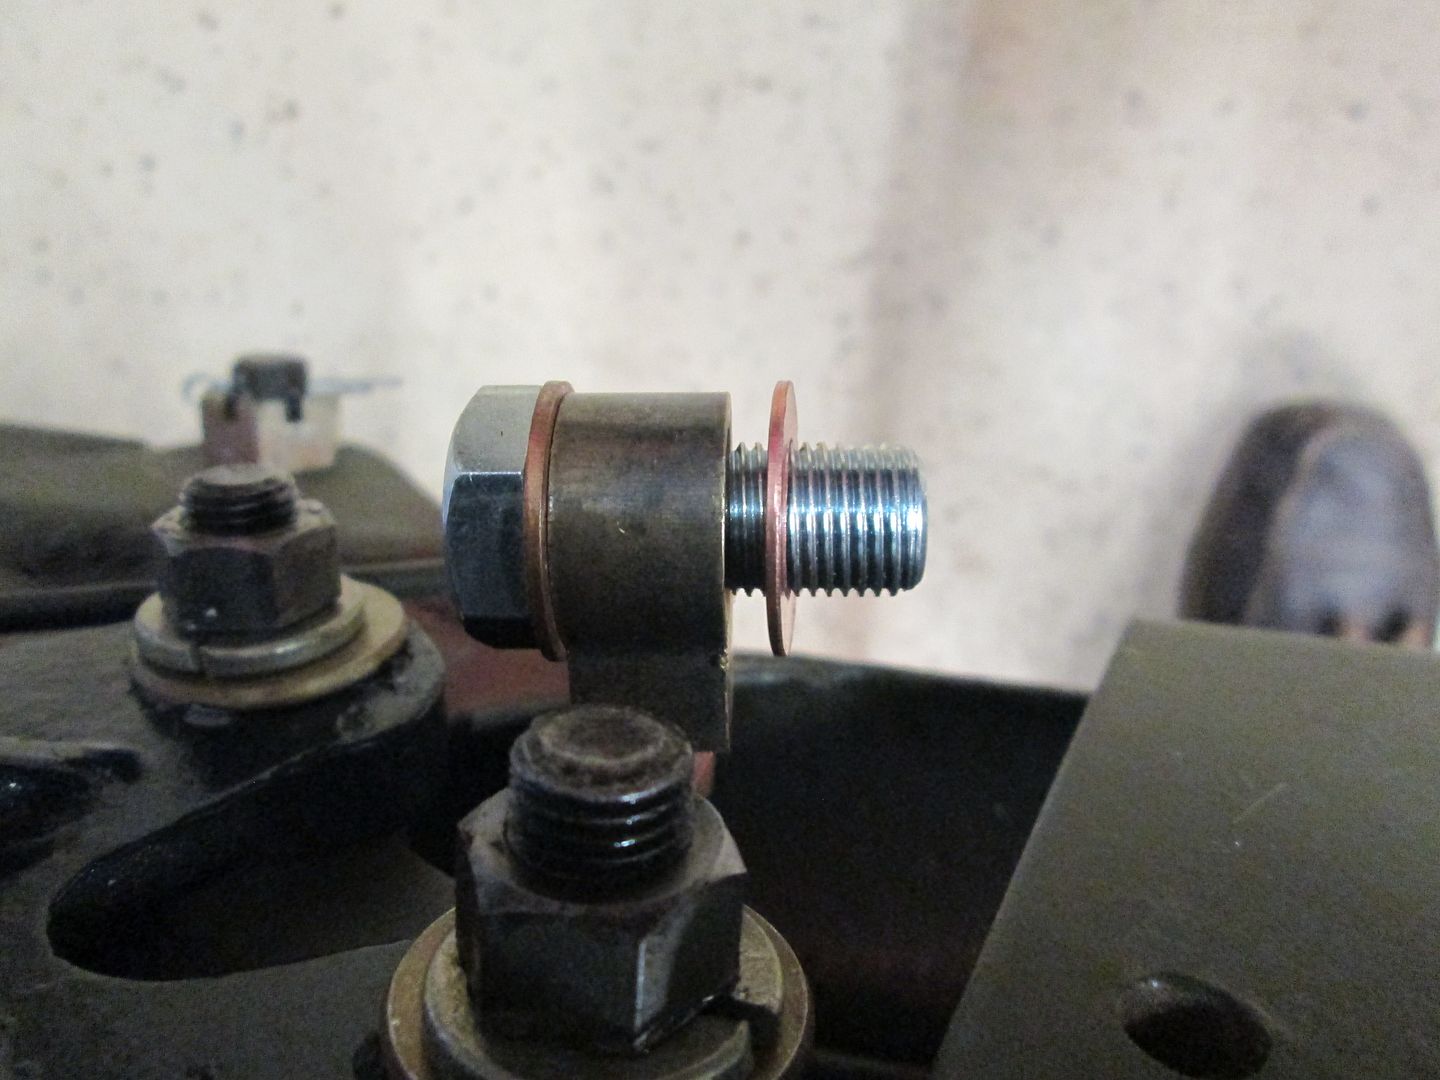 I held the master cylinder in my hand as to not create any stress on my new brake lines. I just tightened the connecting bolt finger tight. I had the 5/16-24x3 bolt, washer, lock washer, and nut at the ready. In order to get the bolt in, I had to slightly tip the Master Cylinder in or to push the bolt through the smooth bore mounting hole That bolt is inserted into the rear hole on the Master Cylinder mounting bracket. I install the washer, lock washer and nut, Again only hand tight, you want some play for the time being. |
|
|
|
Post by Haines Garage on Mar 8, 2014 14:54:05 GMT -5
The next bolt, 5/16-18x3 is inserted trough the outside of the frame, into the threaded , front mounting hole of the master cylinder. For now, again only hand tight. 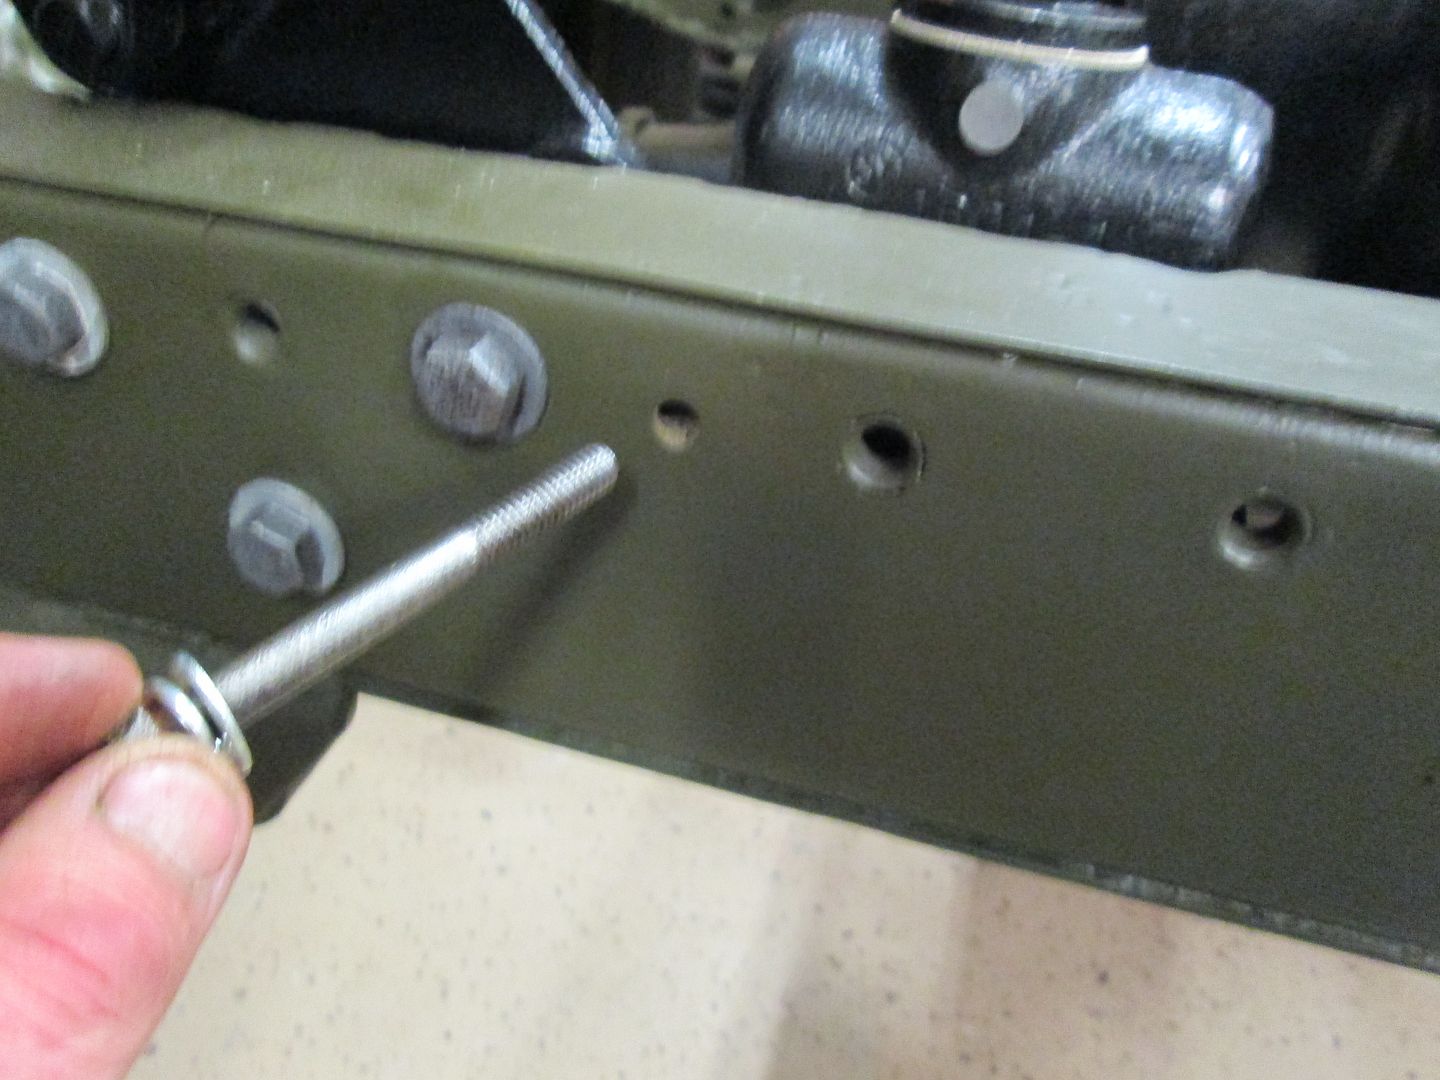 This is a test fit to show where the heat shield is placed. Tapered end forward, one leg to the lower steering box bolt, one to the threaded hole in the master cylinder. Bolt size is 5/16-18x1, and lock washer. 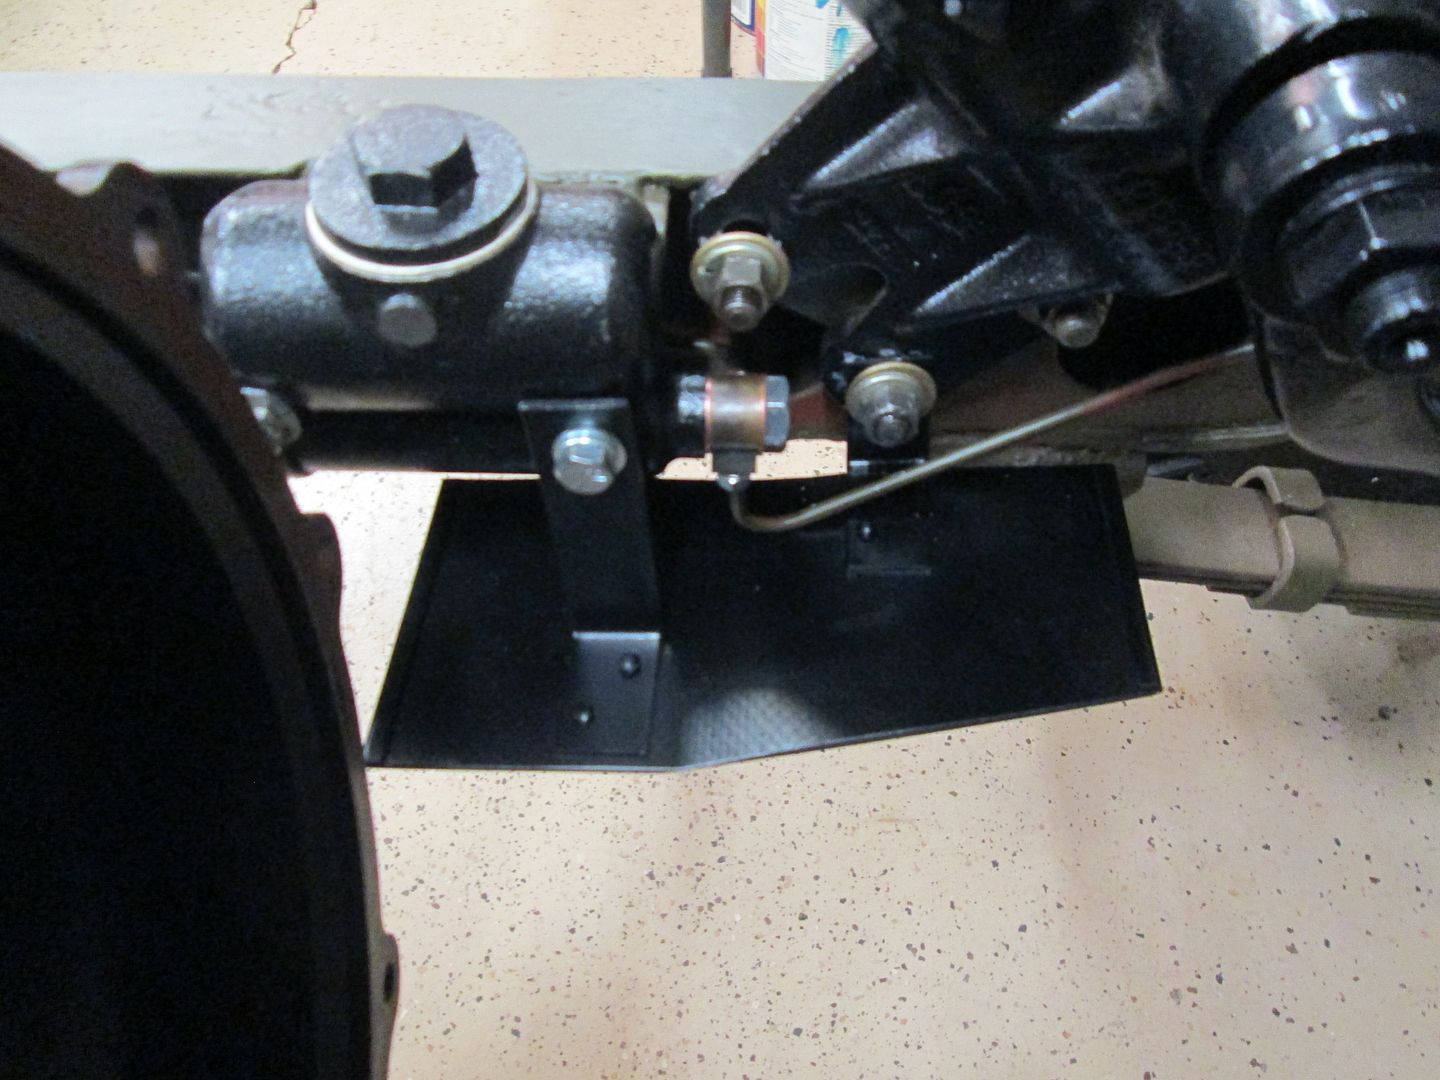 |
|
|
|
Post by Haines Garage on Mar 8, 2014 15:09:54 GMT -5
At this point, I return to the Brake and Clutch Pedal Assembly. I have fully tightened NOTHING AT THIS POINT. You will see why in the next post.
|
|
Deleted
Deleted Member
Posts: 0
|
Post by Deleted on Mar 8, 2014 16:42:15 GMT -5
that stupid bolt and y with the crush washers caused me a world of hurt. kept having to go down there and fiddle with it to get that to stop leaking. finally i just grabbed a vise grips and tightened it all a lot, went way past what i thought was a good nice and snug tight and so far it has worked. if it causes problems again I'm buying a new set of crush washers and maybe a new fitting, mine looked nice and clean. Those washers are soft copper, meant to crush, that's how they seal. But when they are crushed, they harden, and won't work as intended again, unless they are annealed (softened). It's best to use new washers any time they are removed. BW |
|
Deleted
Deleted Member
Posts: 0
|
Post by Deleted on Mar 8, 2014 19:39:42 GMT -5
bruce i did anneal them, i actually had 2 sets and even tried to buy just a copper washer off the shelf of the local hardware store. also it is easier to use a socket and or wrench on the mc fitting then do the brake light fitting on the end of the unit, if you put the brake light in first it will make tightening the whole thing harder.
|
|